Create real-time image effects on your web page with Flash Image Enhancer. Use rounded corners, borders, drop shadows, blur, grayscale and mouse over effects like an image description that slides in!
Flash Image Enhancer Manual
Create real-time image effects on your web page


Dynamically Enhance your imageswith Spry and Flash Image Enhancer
Introduction
You can use Spry to open images from any XML file. In this tutorial we're going to use an XML file from a Flash Album Generator Gallery to enhance the images automatically using Flash Image Enhancer and Spry.
Note: This tutorial is for Dreamweaver CS3 users only
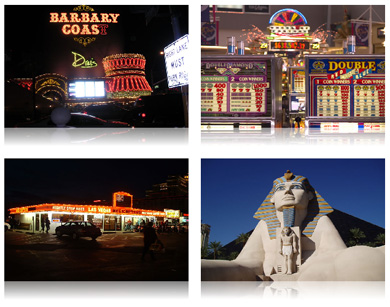
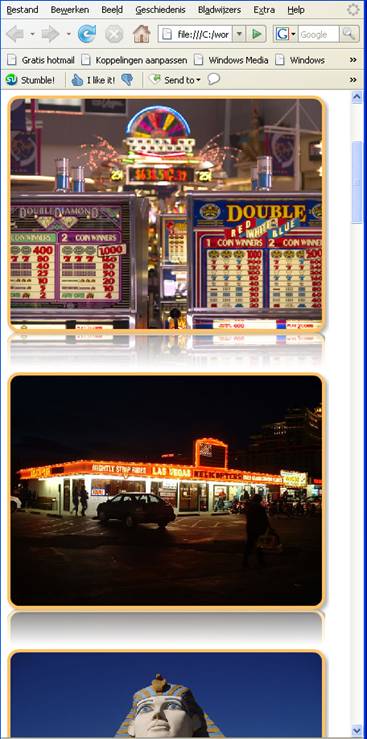
Automatically enhanced images from an XML File.
- Before
you begin
Make sure you've read the previous tutorials. - Creating a basic page
We create a basic page in Dreamweaver (make sure you've defined your site) and save it. - Creating a Spry XML Data Set
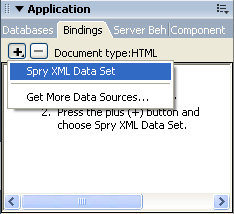
Go to the Application panel on the right side of your screen, select the Bindings tab and choose Spry XML Data Set.
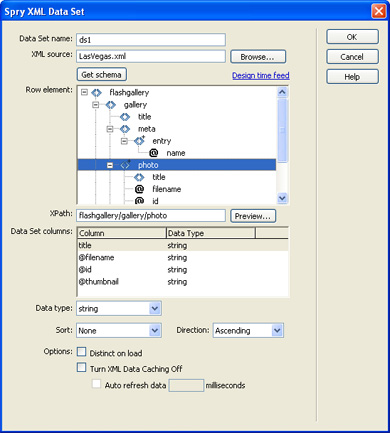
A new popup appears, select the Browse… button and select the XML file that Flash Album Generator 2 produces.
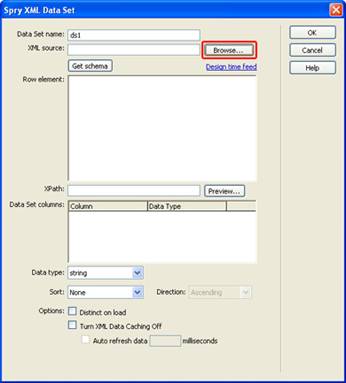
Press the Get schema button and select the correct row element (usually it is called photo) and press OK.
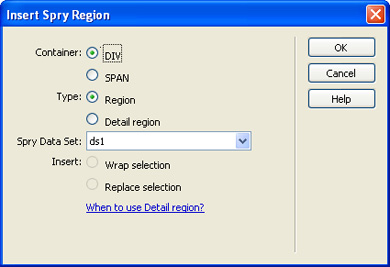
- Put a Spry Region on the page
Now put a Spry
Region on the page by clicking the ![]() on your Insert Bar.
on your Insert Bar.
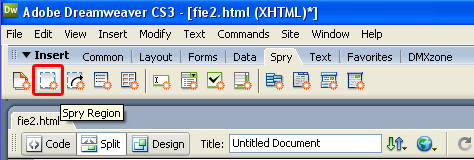
A popup appears, press OK as the default settings will do.
- Put a Spry Repeat on the page
Now put a Spry Repeat on the page by clicking the on your Insert Bar.

A popup appears, press OK as the default settings will do.
- Include your Images with Flash Image
Enhancer
Choose the icon from the DMXzone
object bar to apply the extension, the Flash Image Enhancer appears. You
can also use an existing image, select the image and then choose the icon.
icon from the DMXzone
object bar to apply the extension, the Flash Image Enhancer appears. You
can also use an existing image, select the image and then choose the icon.
- Setting
the Display Options
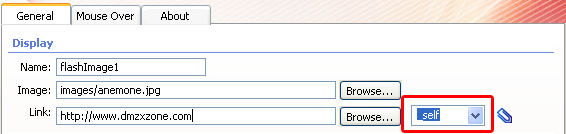
The name field is created by default to identify the image, we don't change the name as you don't need to.
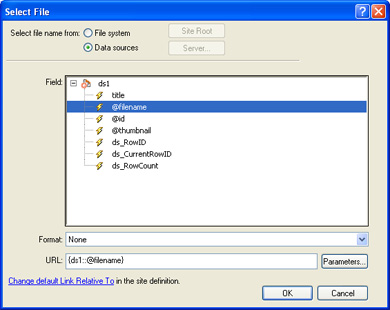
Now it is time
to select our image by pressing the Browse… button next to the image
field, this is where you select the Data Source. We choose the filename to
display all images that are listed in our XML file in the Spry Repeat Region on
the page, then we select OK.
The Link field is used to enter the file or URL that the image needs to
link to, we use one link for all images.
Note: links only work online as the Flash Player blocks acces from your local hard drive to external links.
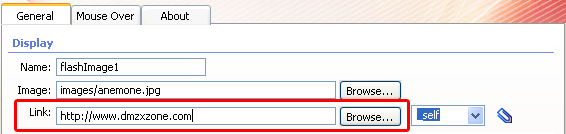
In the Target we can specify if the linked page or file should be
displayed in the same window and frame as the current image (_self), in
a new window (_blank), the immediate parent of a frame (_parent)
or the topmost frame (_top).
- Integration with Advanced Layer Popup
The left button allows you to add a popup window that contains your image, the right button allows you to remove the popup again. Checkout this movie for more details on how to open your enhanced images in a popup window.
Note: you need Advanced Layer Popup to open your enhanced images in a popup window.
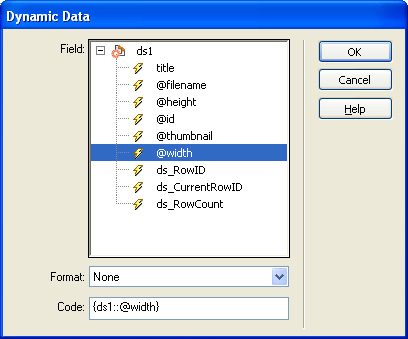
- Dimensions & Layout
The extension automatically gets the width and height from the image in pixels, it works the same as a normal image that you insert in Dreamweaver so you can blow it up or make it smaller as you like. The
![]() icon
is for getting the width and height from your images in your XML file. If the
XML file does not include the width and height you can use Flash Album
Generator to add the value's and generate a new XML file or you can manually
edit it by entering width ="number" and height="number" after the photo id="number_file".
icon
is for getting the width and height from your images in your XML file. If the
XML file does not include the width and height you can use Flash Album
Generator to add the value's and generate a new XML file or you can manually
edit it by entering width ="number" and height="number" after the photo id="number_file".
We select the ![]() icon
next to the Width field and choose @width.
icon
next to the Width field and choose @width.
We do the same with the height icon next to the Height field.

- Displaying Effects – Rounded Corners, Reflection and Drop Shadow
We enable the Rounded Corners, Reflection and Drop Shadow. Feel free to experiment with the settings.
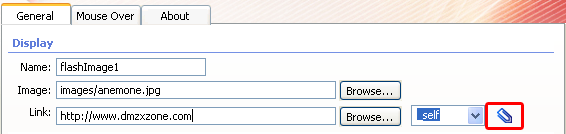
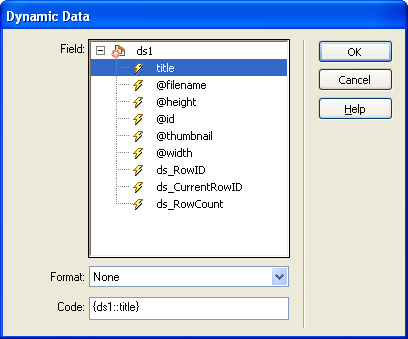
- Mouse over Effects – Dynamic Text
We select the ![]() icon next to the Text input
field to dynamically load our photo descriptions.
icon next to the Text input
field to dynamically load our photo descriptions.
Final Steps
Press Ok, save your files, upload them to
your server (including the script library) and the result should be similar to
the image below (only with different images).
If you like you
can edit the CSS a bit to reformat your page, we added a float and a padding:
<div spry:repeat="ds1" style="padding:10px; float:left">
So it looks like this:
George Petrov
 George Petrov is a renowned software writer and developer whose extensive skills brought numerous extensions, articles and knowledge to the DMXzone- the online community for professional Adobe Dreamweaver users. The most popular for its over high-quality Dreamweaver extensions and templates.
George is also the founder of Wappler.io - the most Advanced Web & App Builder
Comments
Be the first to write a comment
You must me logged in to write a comment.