Messenger Smilies Tutorial
|
If you have used the Internet, e-mail or text messaging on mobile phones then there's no doubt you would have come across 'smileys' (sometimes called emoticons) at some point. Many can be seen on forums such as Snitz, and now with this extension you can integrate them into any dynamic content on any web page you create with UltraDev.
For those that don't know? Smiley's are emotional icons that help purvey your feelings in text based communication systems. By adding these small icons we can give the recipient a better understanding of how we feel, and what we are trying to say when we speak to them across nonverbal mediums. Take the conversation below....................
|
Now, although you can assume that John feels good you have really no way of knowing if he actually is, as he could be being sarcastic! See how how the use of smiley's really tell the reader how the sender is actually feeling..................
|
If you tip your head to the left you can see that after the word great there is an unhappy face. Maybe John didn't have such a top time!
Although smileys are useful there are no real guidelines to them and many have slight variations on how they are displayed and what they mean. This can, and does cause confusion.
|
|
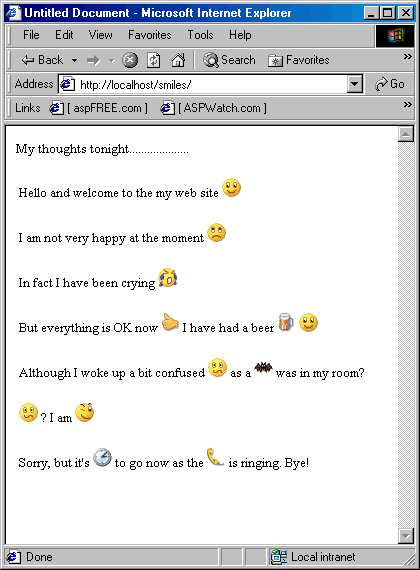
It takes the use of smileys one stage further by replacing them with small graphical images that also represent the emotions the user is trying to portray. Each emotion ( out of a total of 55 which can be seen here ) has a smiley and a graphic that will represent it on the page.
|
The first thing to understand is that the extension does not contain every available smiley. It has a list of 55 at the moment which you should display to your users so that they understand which are available.
First, create a recordset that will contain the content. Next, place your recordset field onto your page and apply any repeat region behaviors or additional formatting you want.
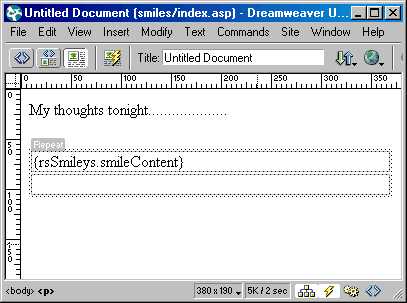
Select the recordset field on the page first by clicking on the place holder.
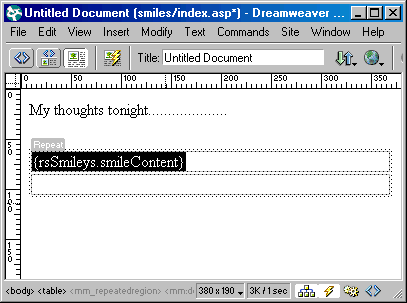
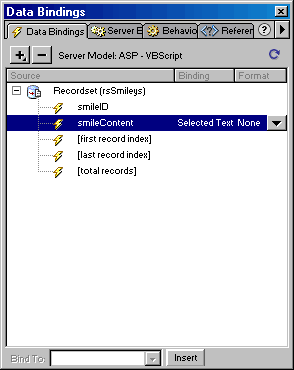
Now, you must open your Data Bindings window in UltraDev where you will see the relevant field selected.
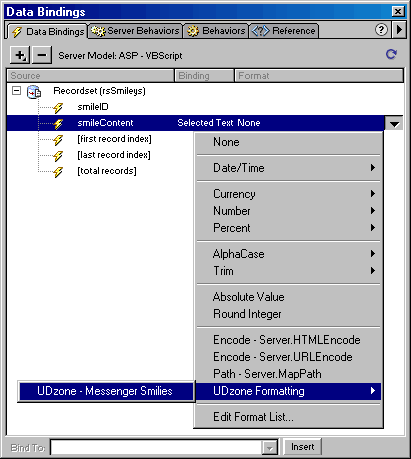
To apply the Messenger Smilies Extension you need to tell UltraDev how we want the data to be formatted on the page. Select the arrow in the Format column of the Data bindings window and choose UDzone - Messenger Smilies and we are done :)
In my example I have an Access database table filled with the following content.
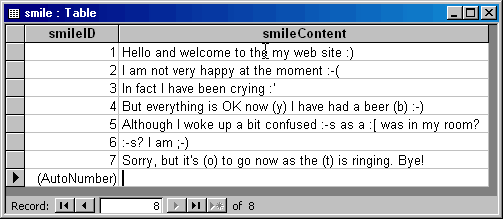
When displayed live it looks like this.
|
One thing you have to remember and maybe point out to users is that all the smileys must have either a leading OR trailing space for them to be recognized and processed. If a smiley is the first entry in a database field then it must have a trailing space after it.
If you want to try out the example above then you can download a zip file containing the page and database from here ( DSN=smileys ).
Comments
Server Model
RE: Server Model
RE: RE: Server Model
Great Job
I greatly thank for this extension, i know its your job and it wasnt easy, but it could be a good idea to add a little more info in your tutorial, for example on how to add more smiles to the list.
Thank you for giving this extension to the world :)
You must me logged in to write a comment.