This article is everything you need in order to learn how to work with HTML5 File Upload extension. It features basic as well as advanced tutorials. We covered everything from uploading single and multiple files, showing a loader while uploading, how to store the uploaded file names into a database and more. The tutorials are also available in video format.
If you experience any troubles with the HTML5 File Upload, please contact our Live Support or post in the support forums.
Prev Index Next
Advanced: Upload Images and Store their Names into aDatabase
In this tutorial we will show you how to how to upload
images and store their names into a database, using HTML5 File Upload. In order to do that you'll also need HTML5 Data Bindings, DMXzone
Database Updater PHP/ASP and DMXzone
Database Connector PHP/ASP extensions.
*You can also check out the video.
How to do it
1.We've added a form, containing a file field and a text field. We'd
like to store the uploaded file name and the text from the text field, into our
database. We've also created a server action that uploads our files to a
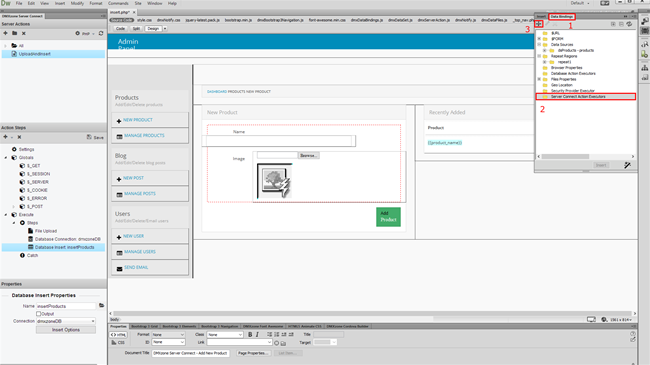
folder on the server. Check our previous tutorial, called "Upload Files to Your
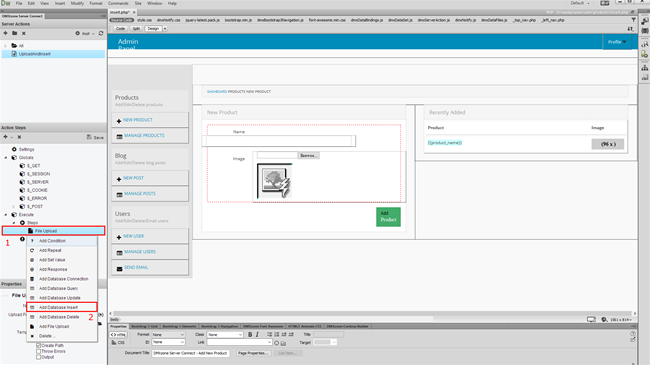
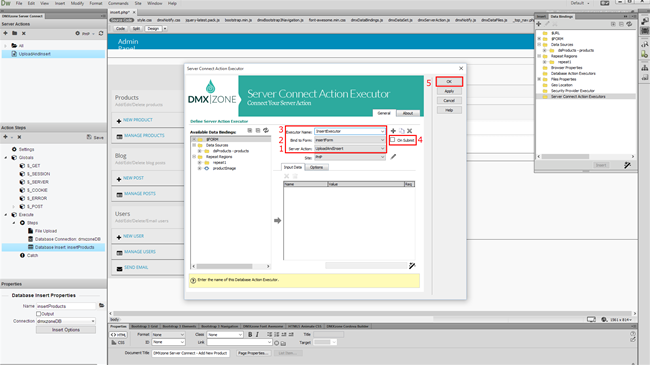
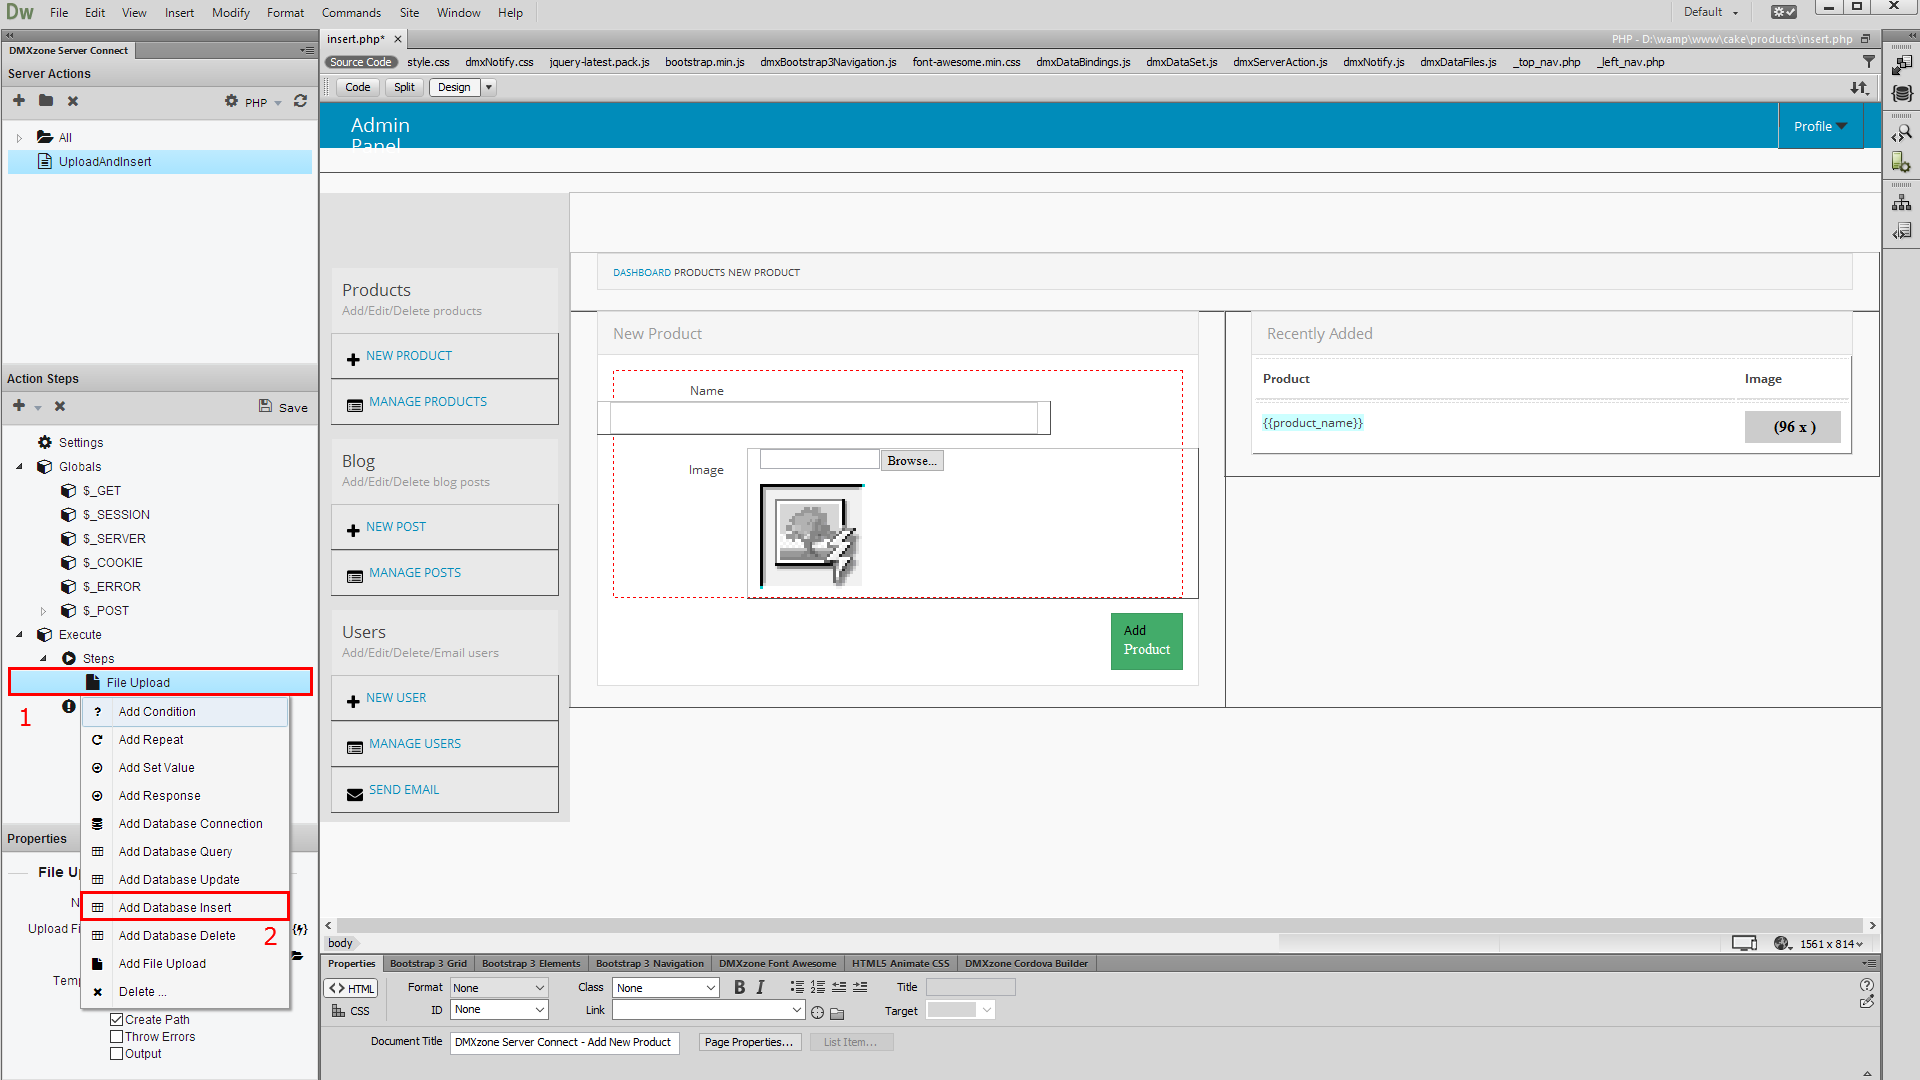
Server" in order to learn how to do this. So, now we need to add an insert
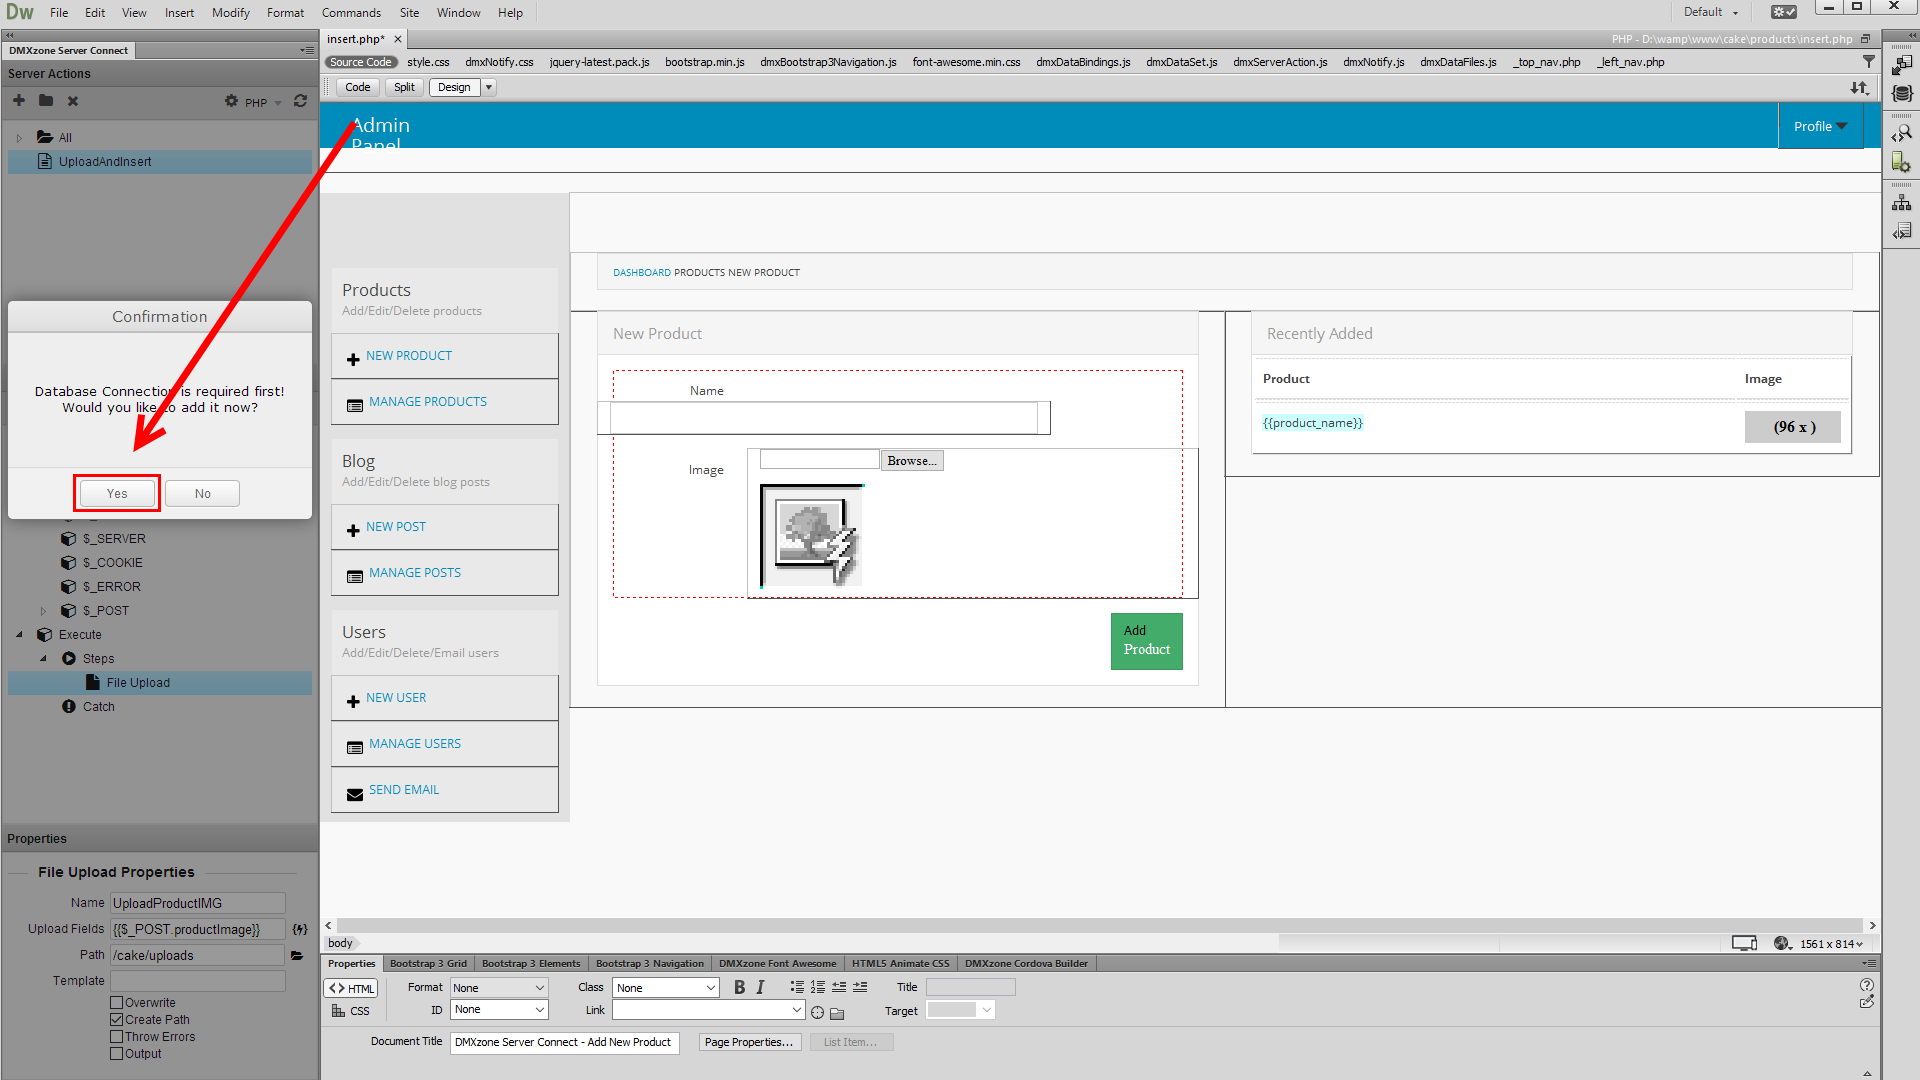
record step, after the file upload. Right click the file upload step (1) in the action steps tree and select – add database insert (2).
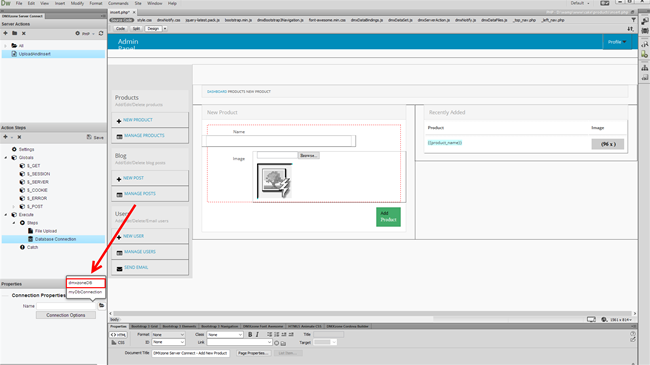
2.We first need to setup a database connection, so click yes.

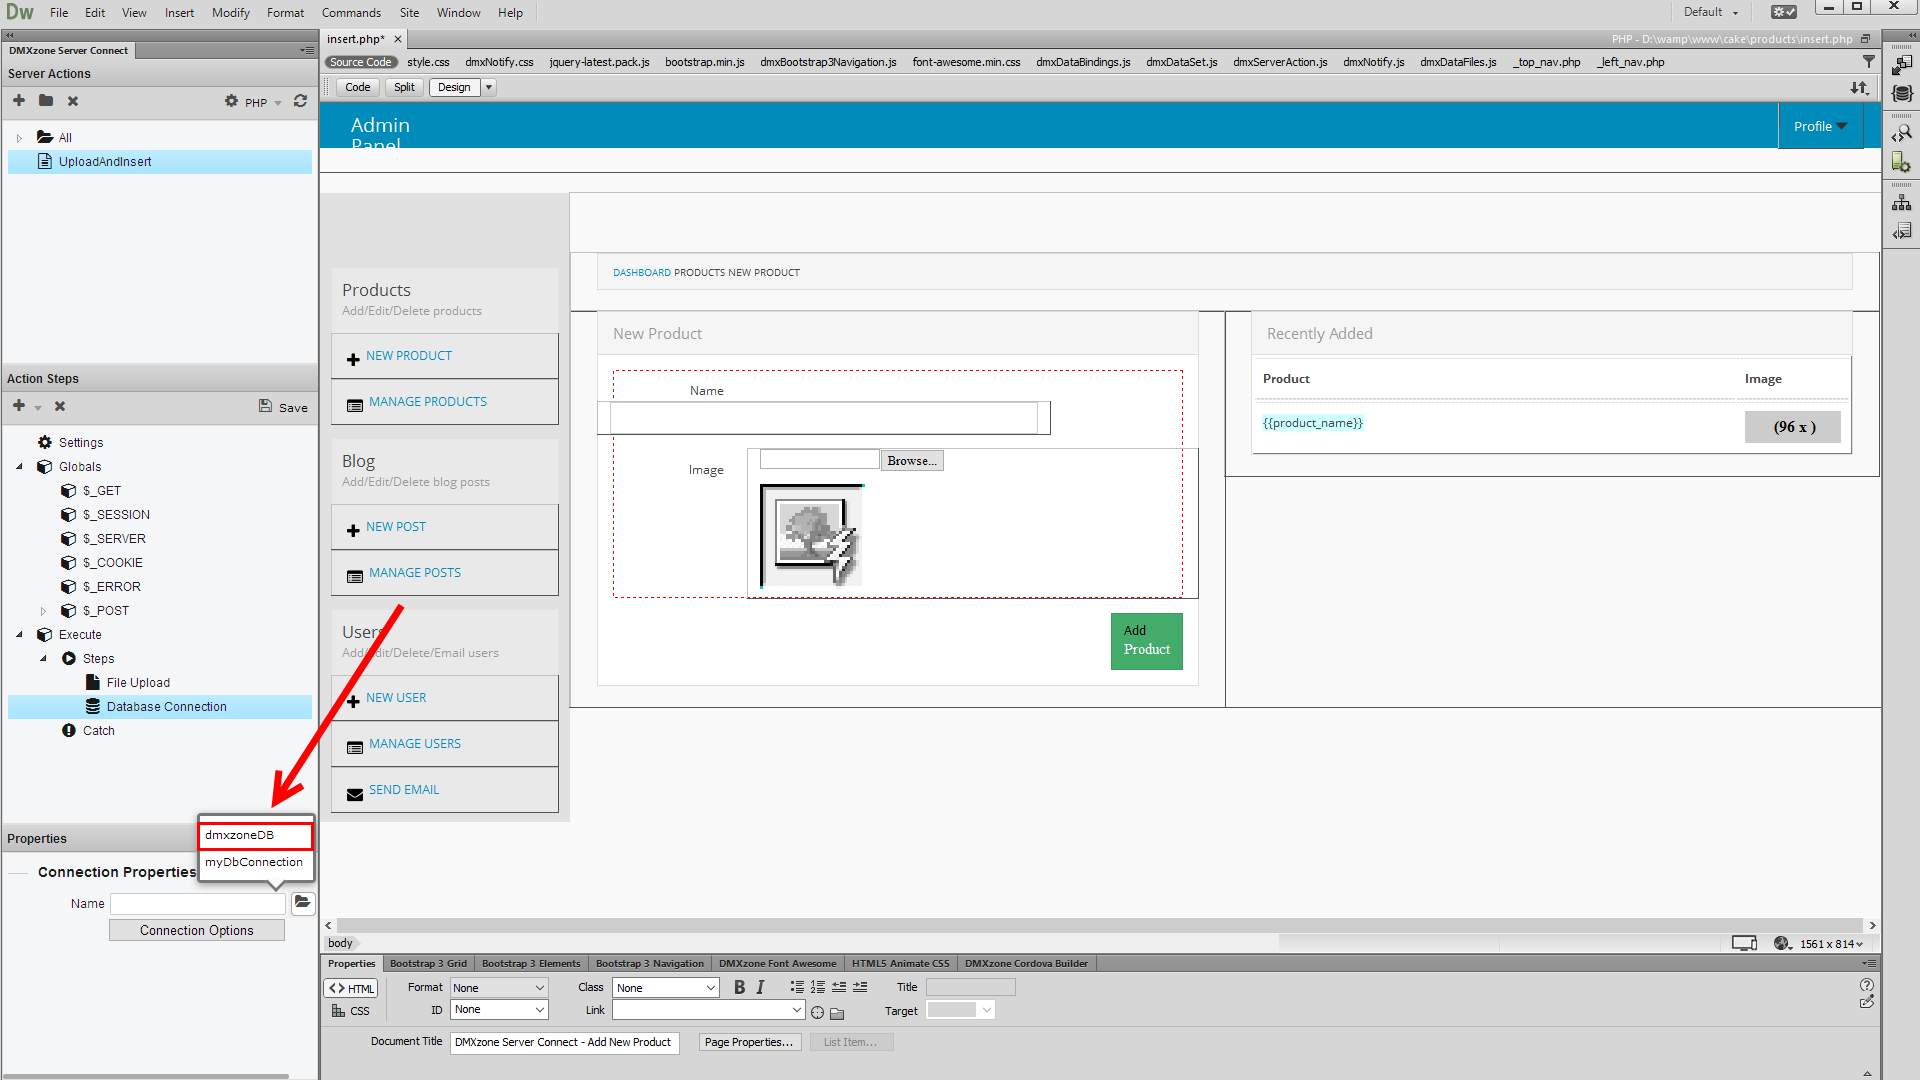
3.Create
your database connection, or select it from the dropdown if you
have already created it.
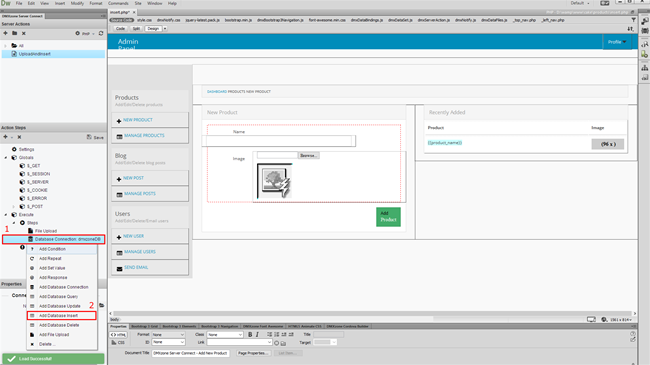
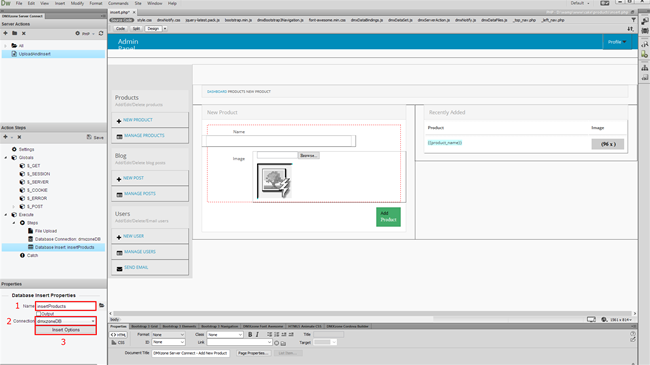
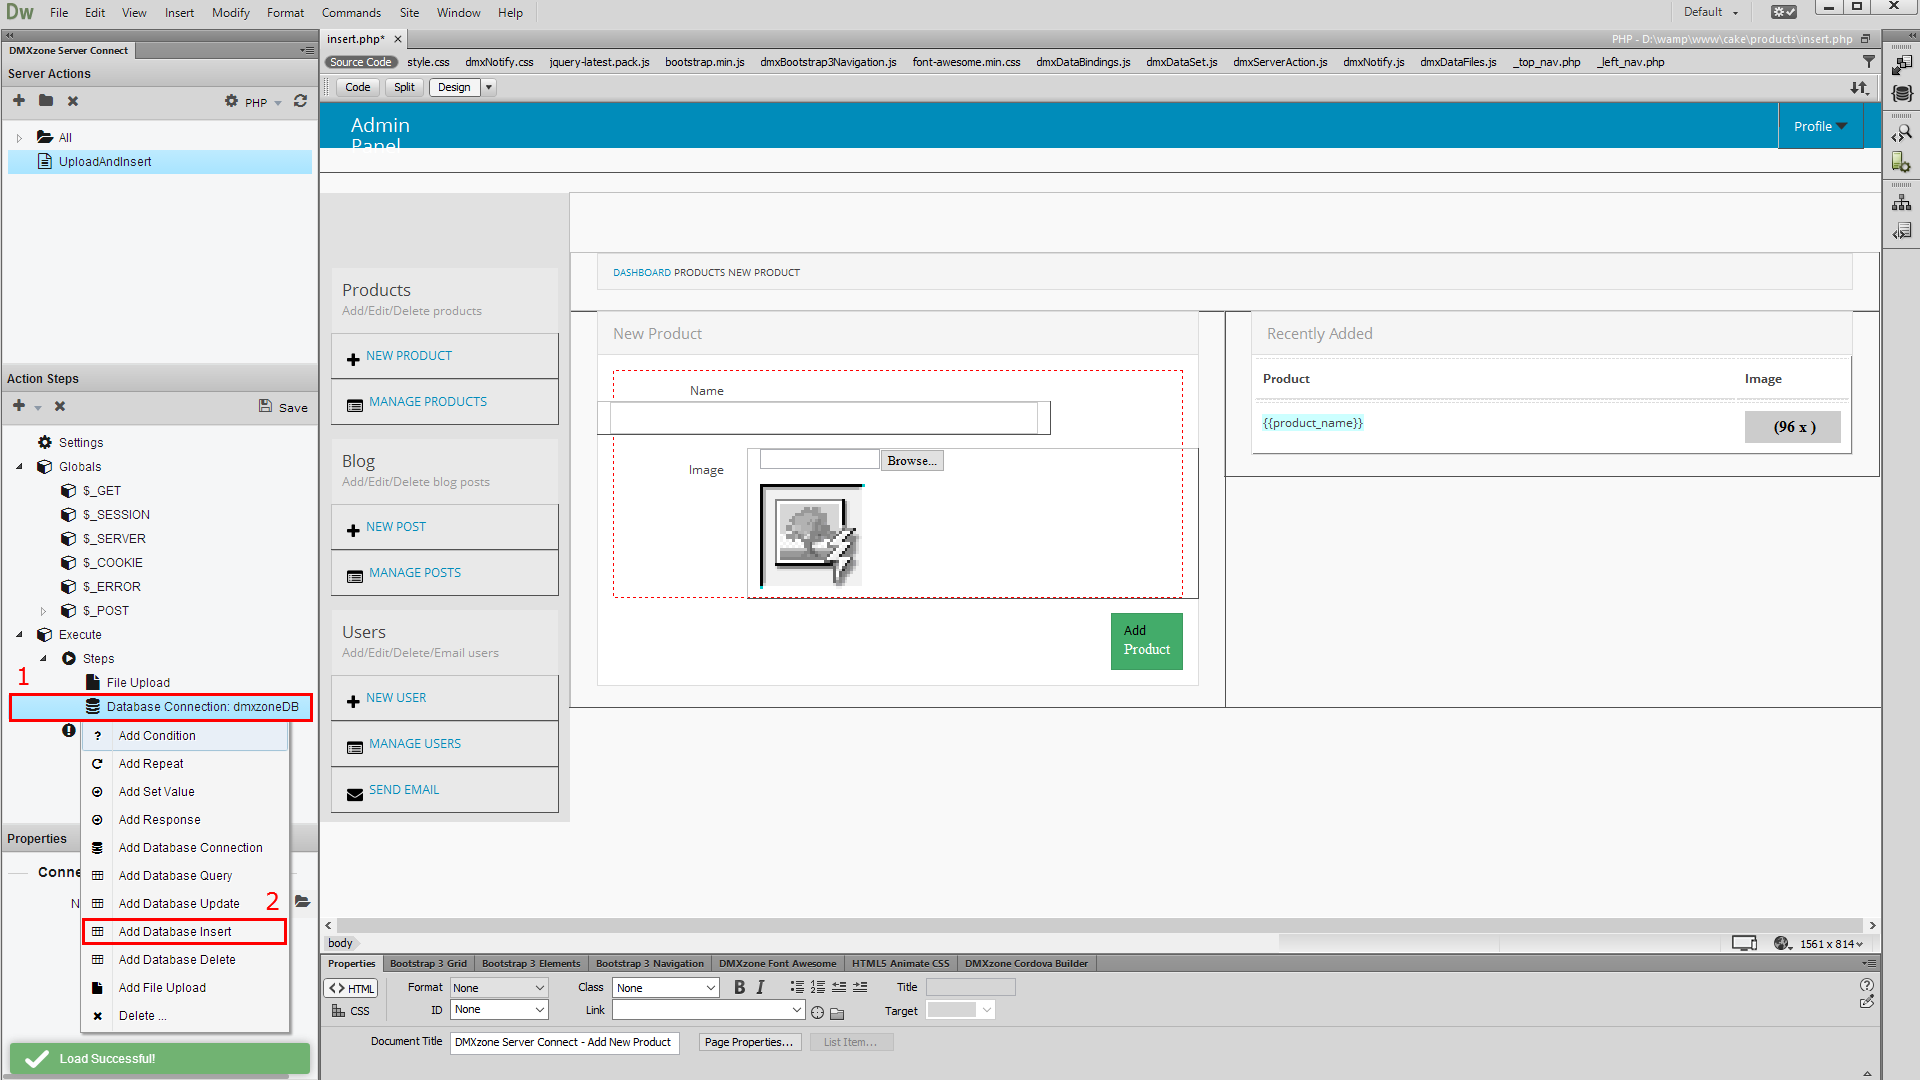
4.Then right click the database connection step (1) and select add database insert (2).
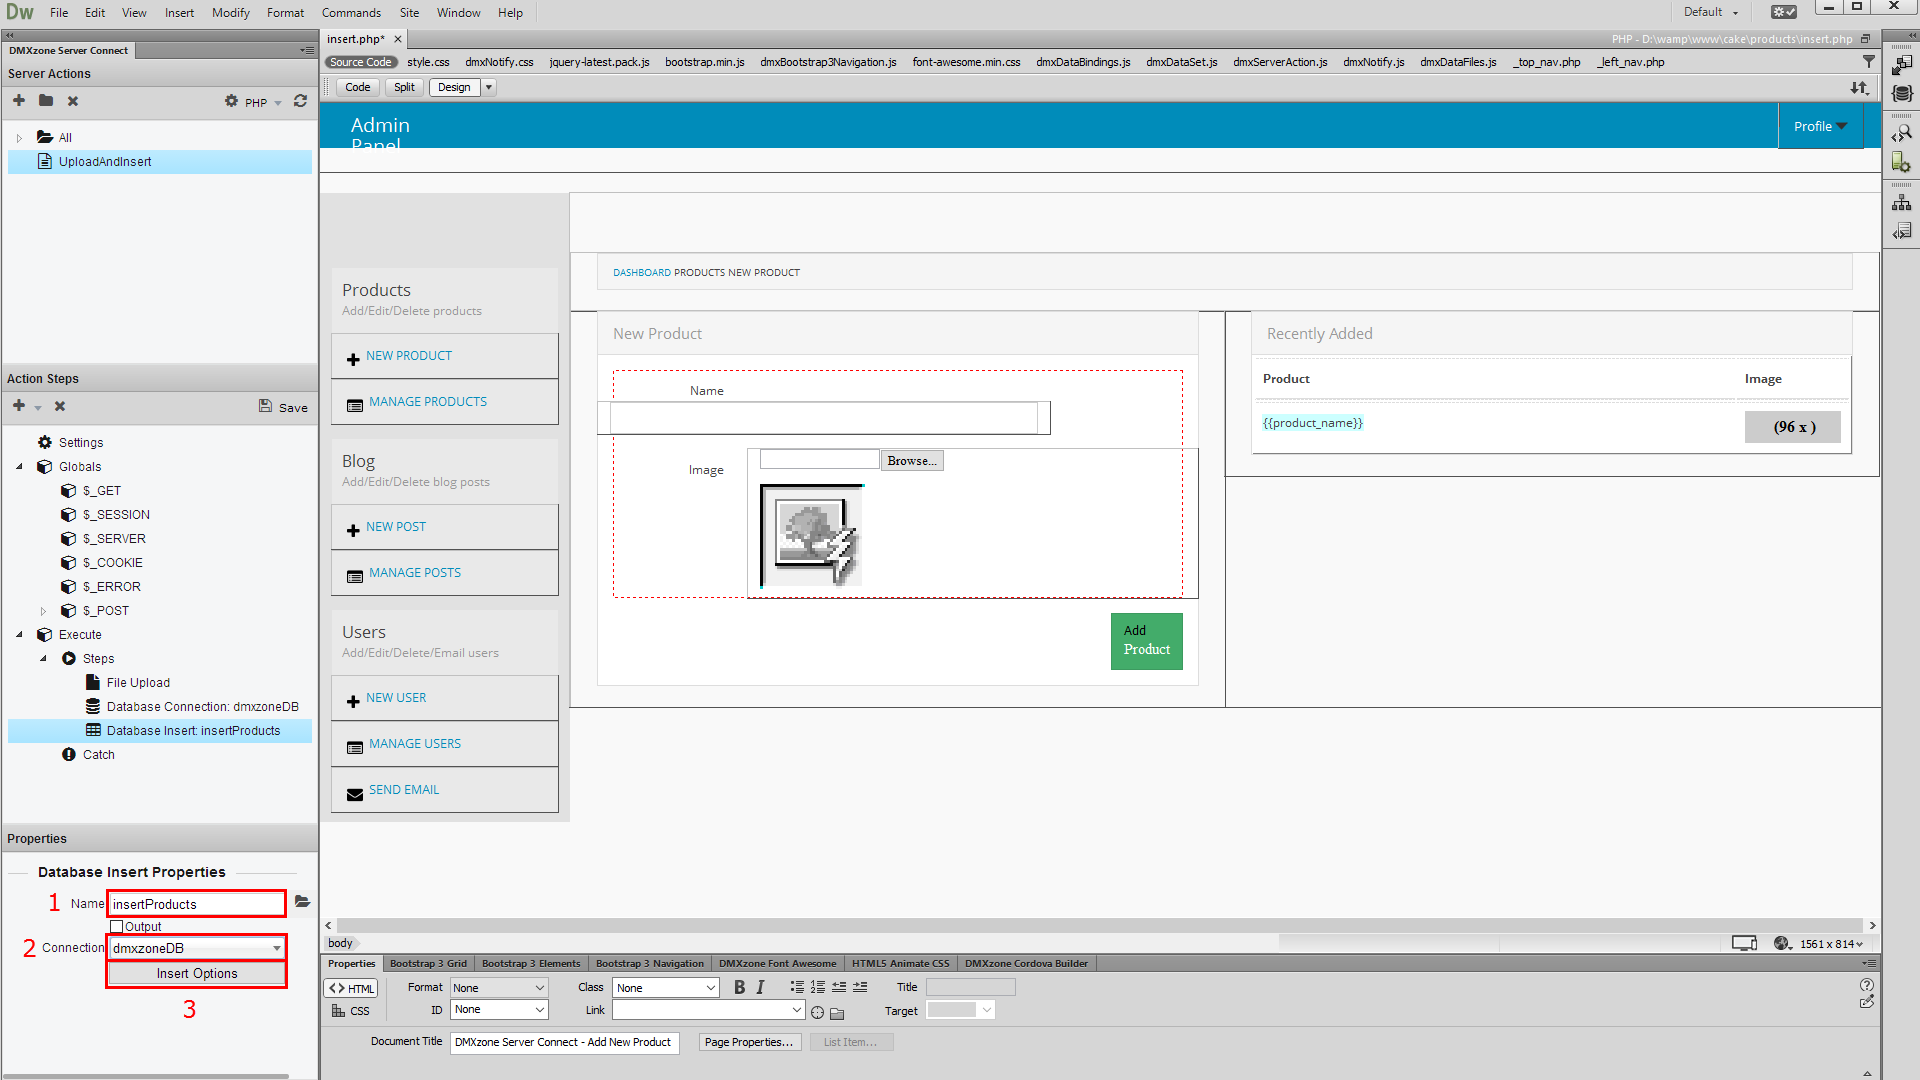
5.Add a name (1) for
the database insert step, select your connection (2) from
the dropdown and click the insert options button (3).
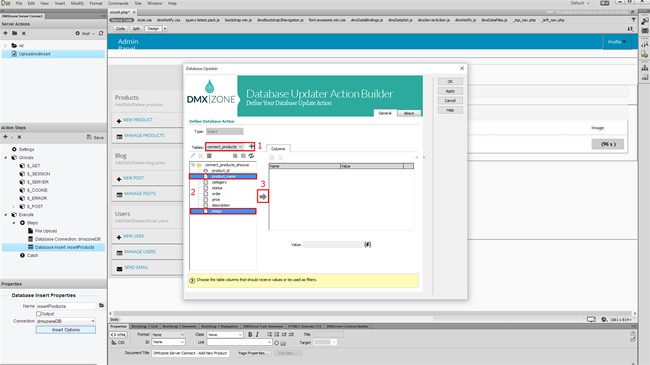
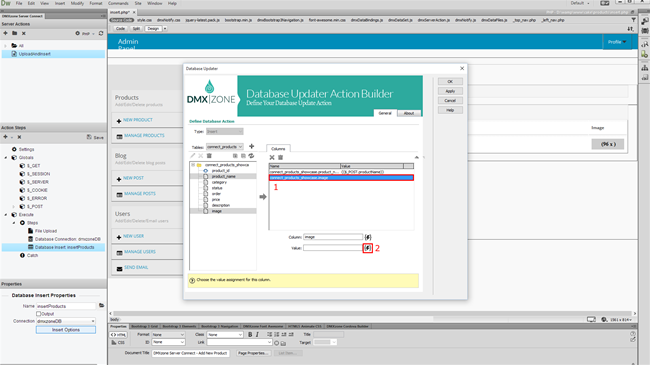
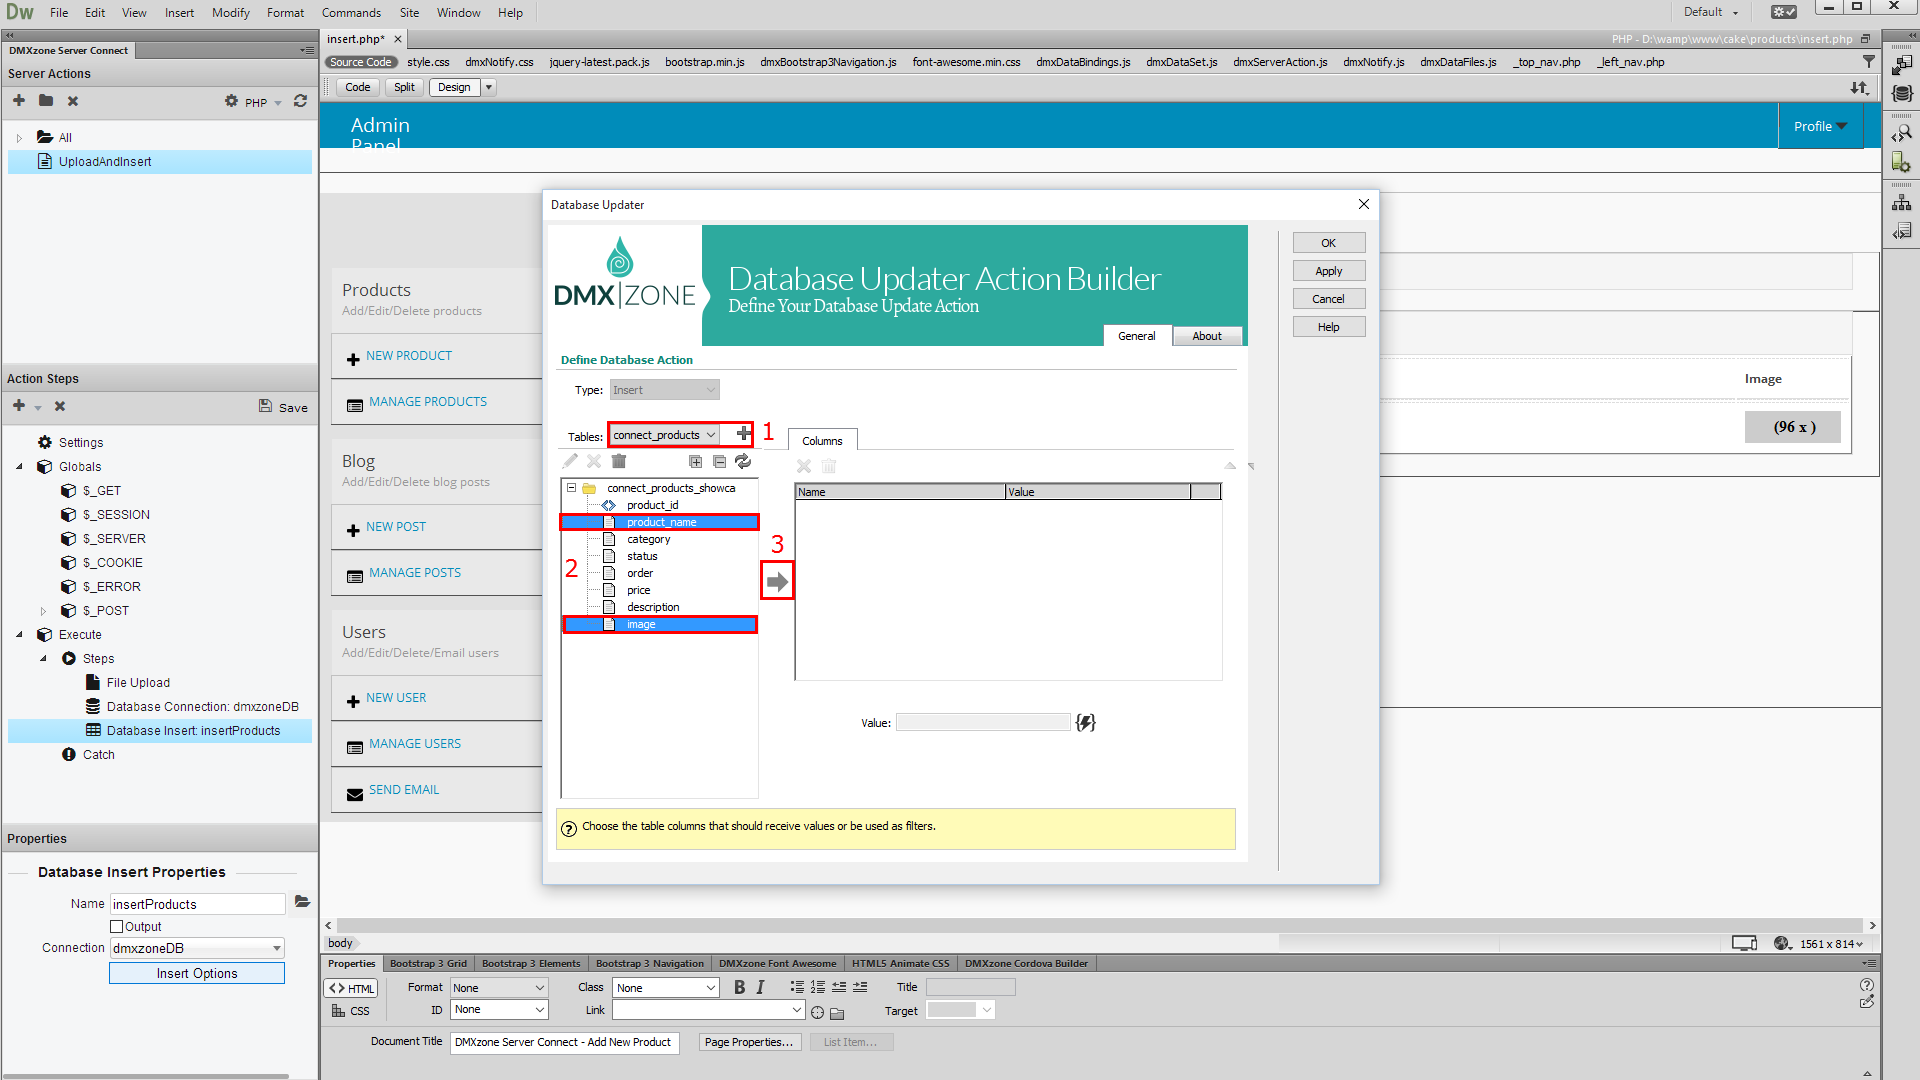
6.Select your database table (1), choose the table
columns, where you want to insert the textfield text and file name into (2) and add them to the columns list (3).
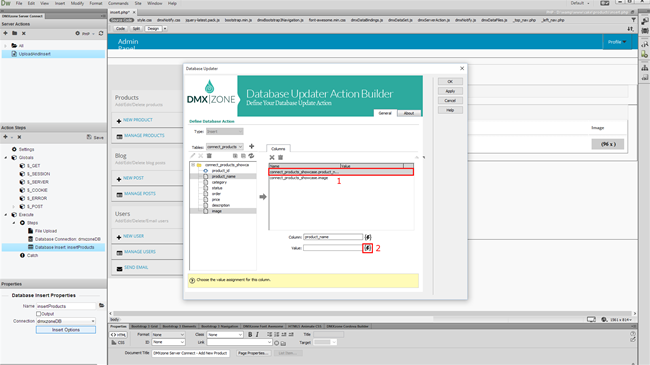
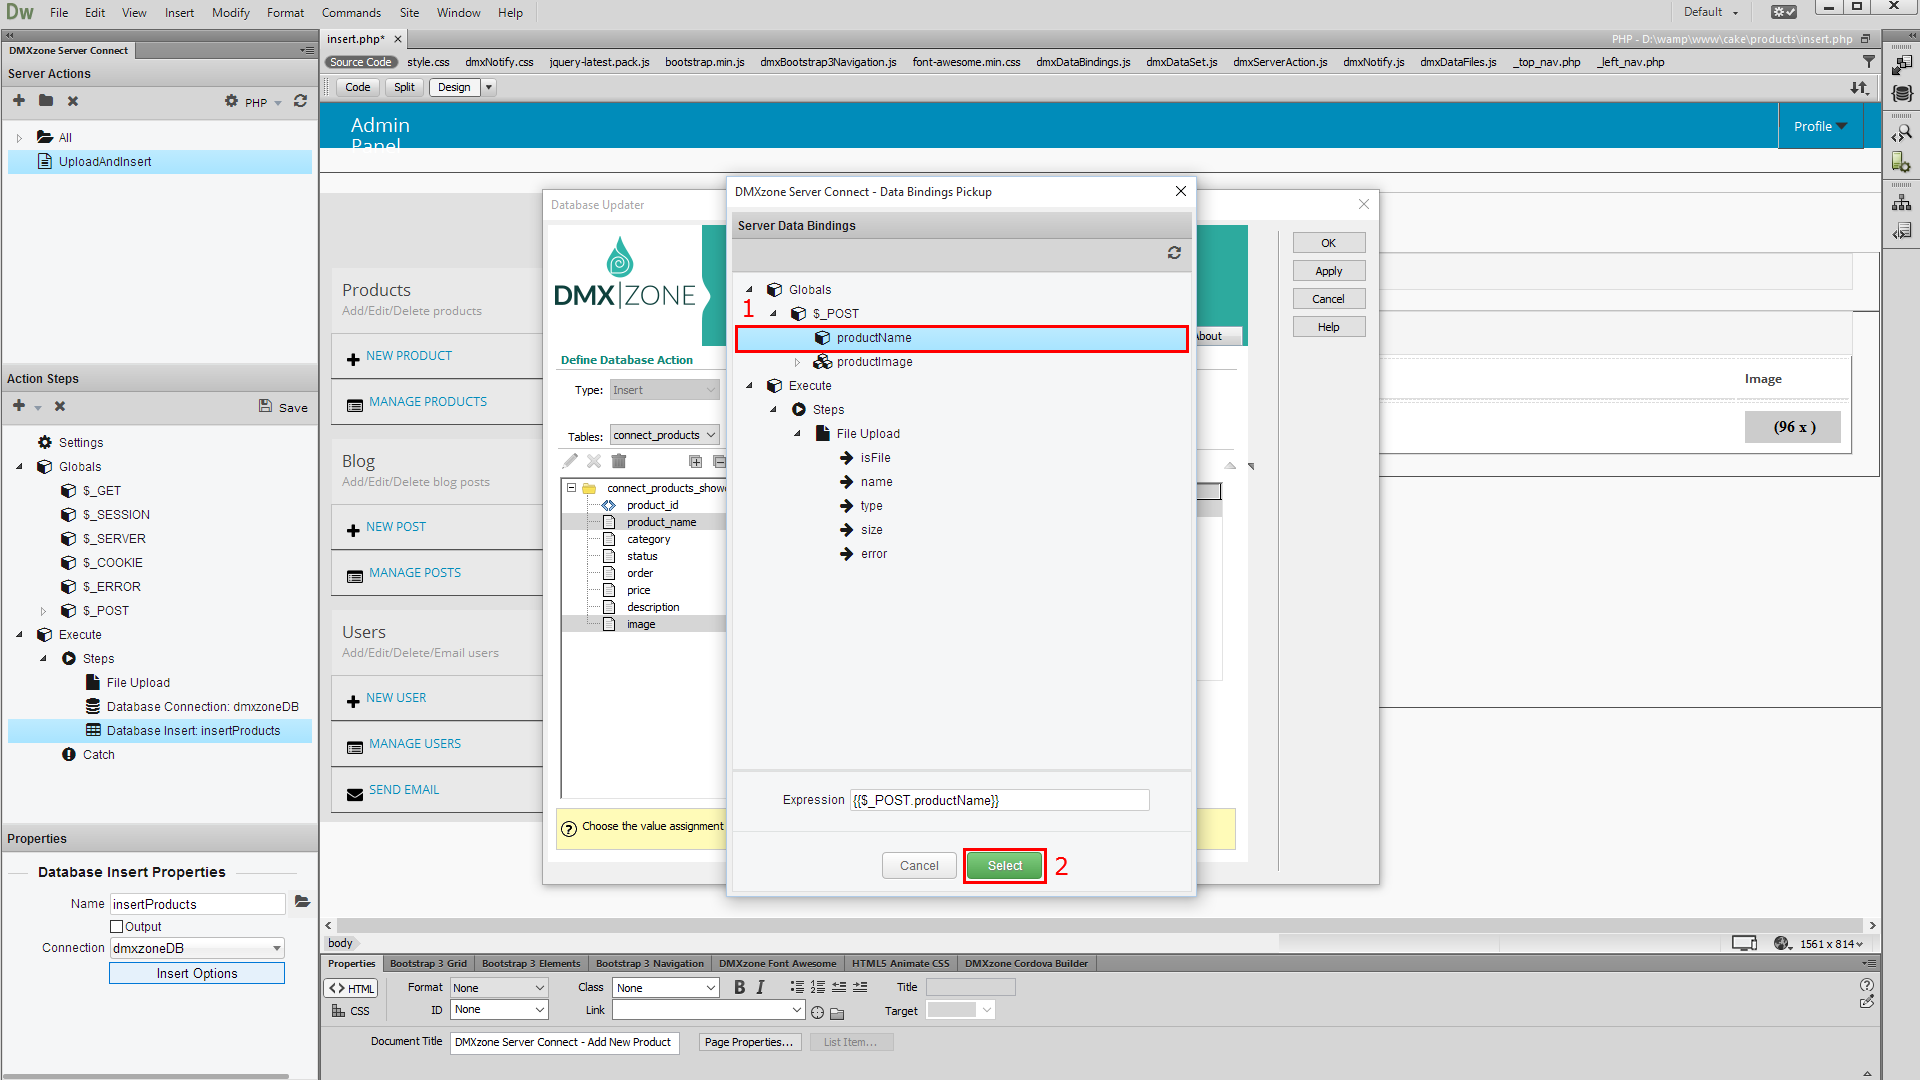
7.First, select the database column (1) where you want to store the input text and click the server
data bindings picker (2) for its value.
8.Under globals and post choose your textfield (1) and click – select button (2).
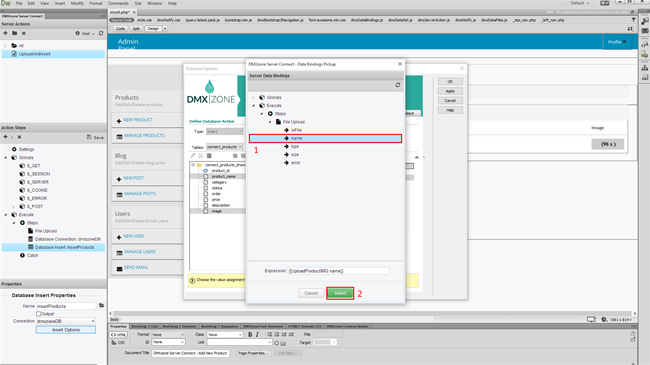
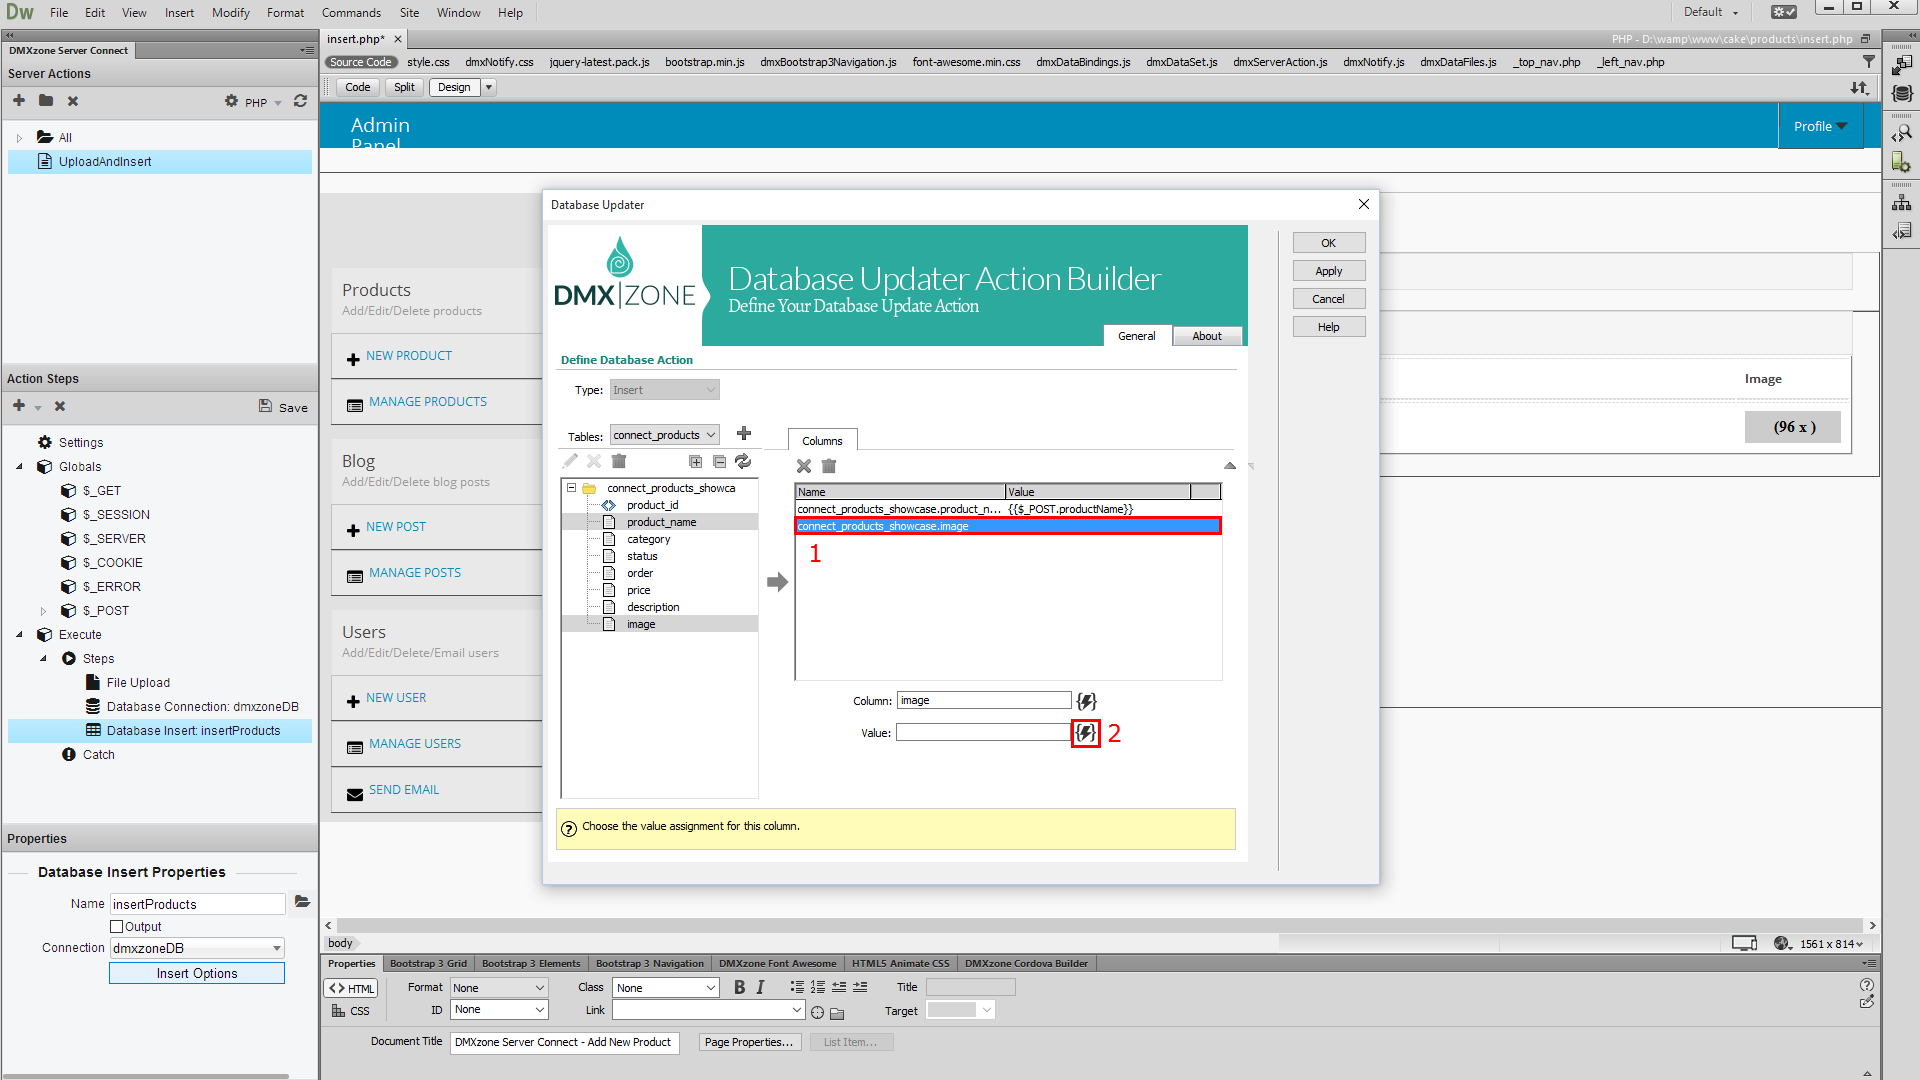
9.Then, select the database column where you want to store
the image name (1) and select the server data bindings picker (2) for
its value.
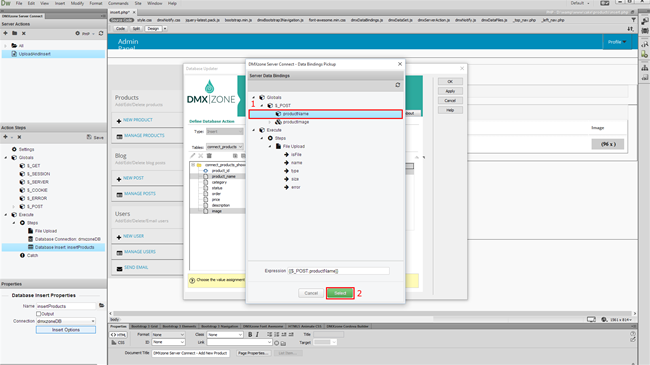
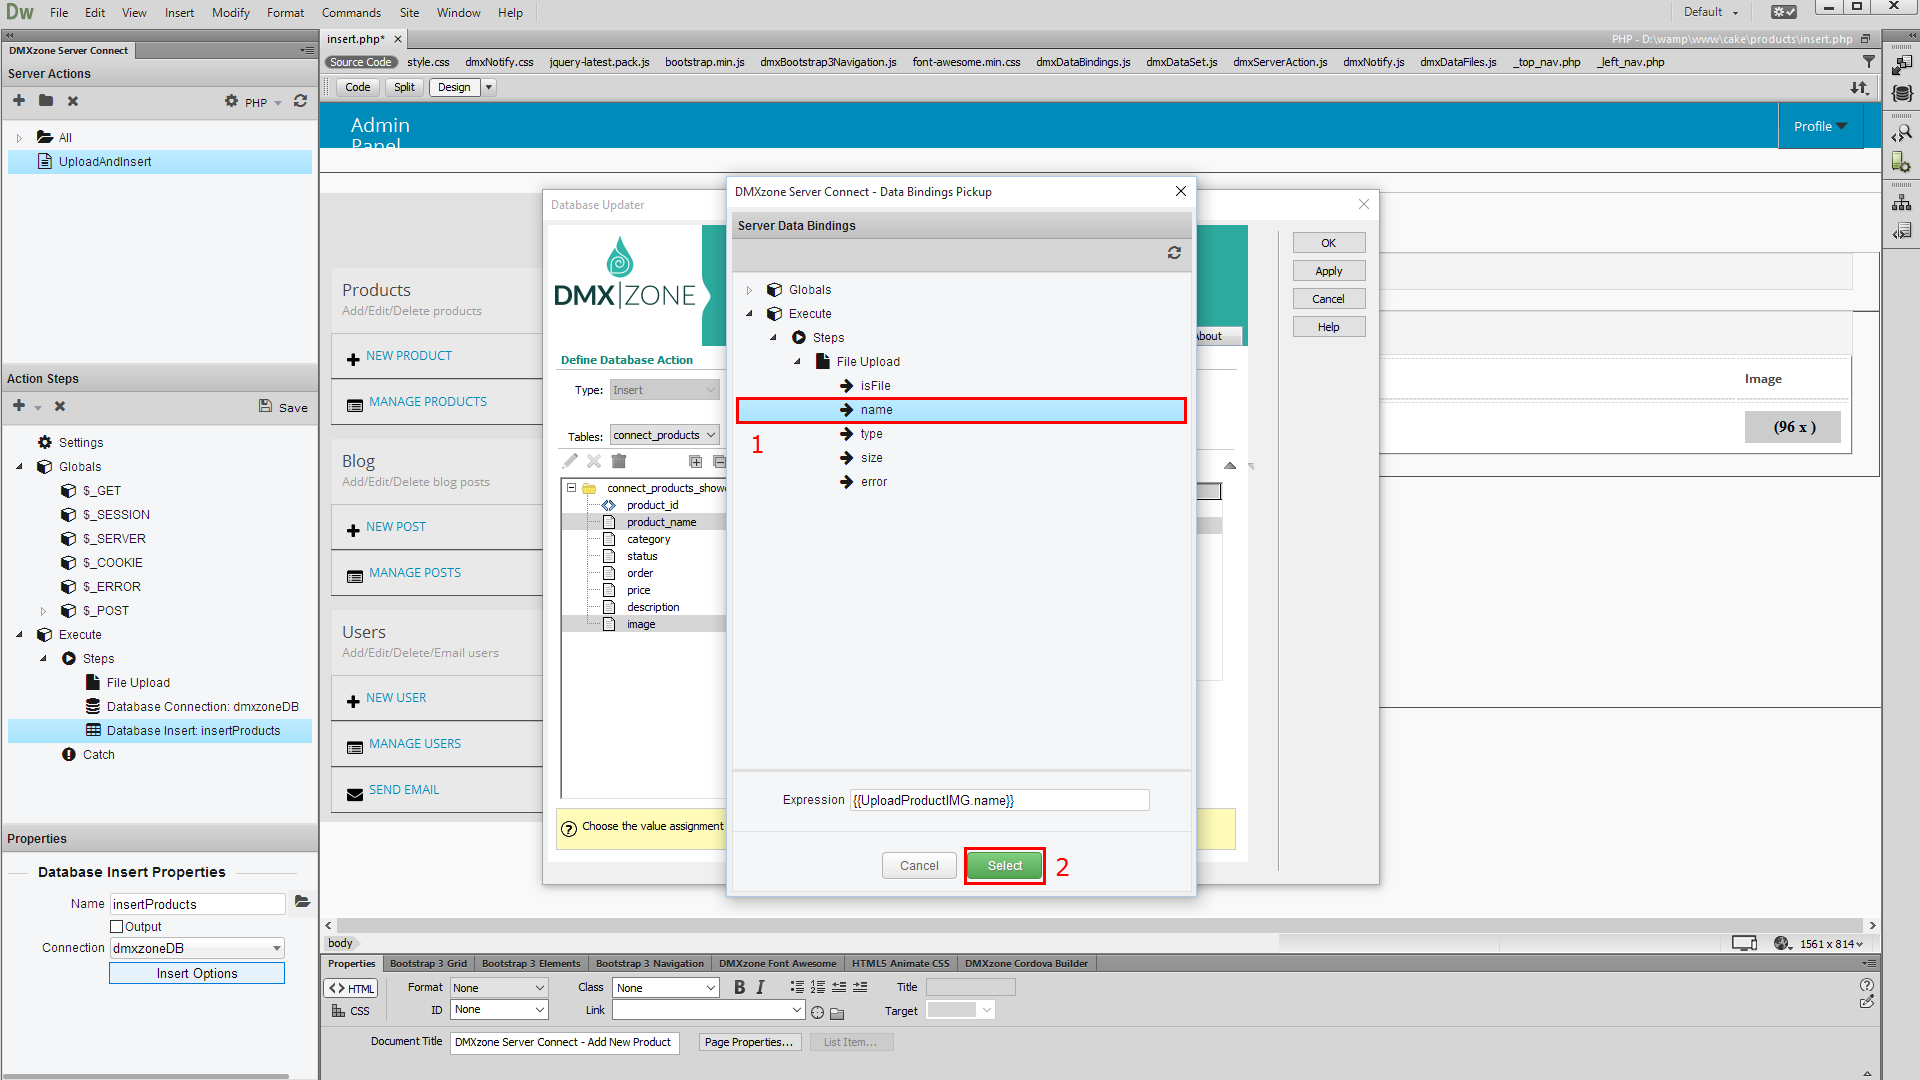
10.In the steps tree you see your file upload step. Select the name
binding (1), located under it. This returns the
name of the uploaded file. Then click the select button (2).
11.Click Ok, in order to apply these step properties.
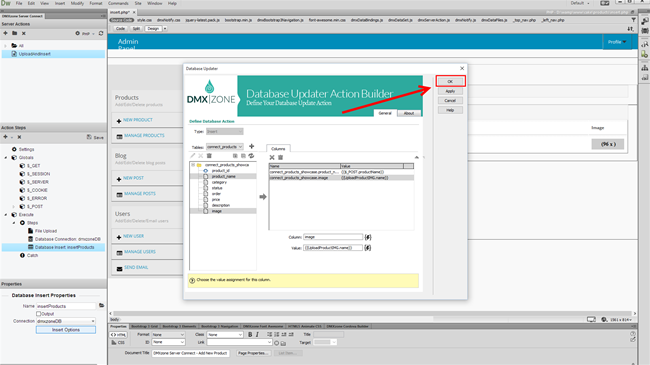
12.And do not forget to save your server action steps.
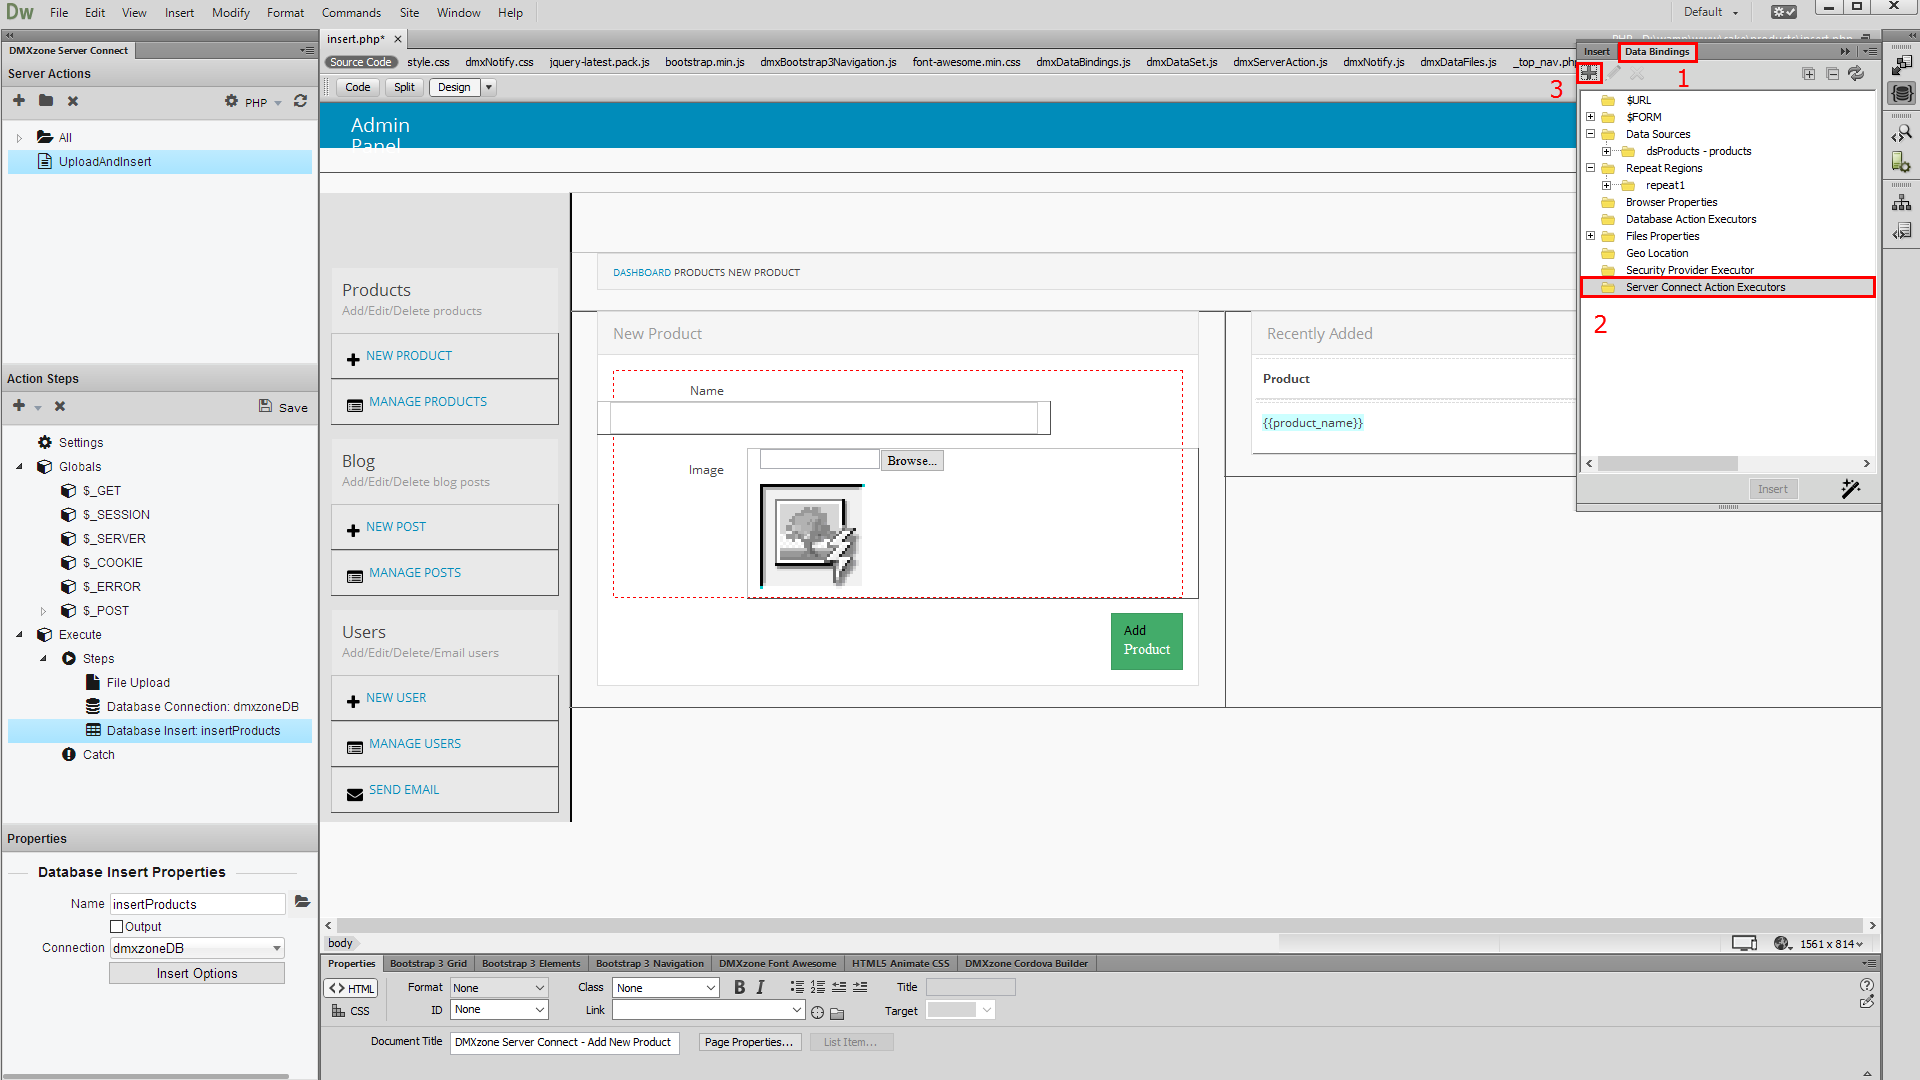
13.Then, open the HTML5 Data Bindings panel (1), select server
connect action executors (2) and click add new button (3).
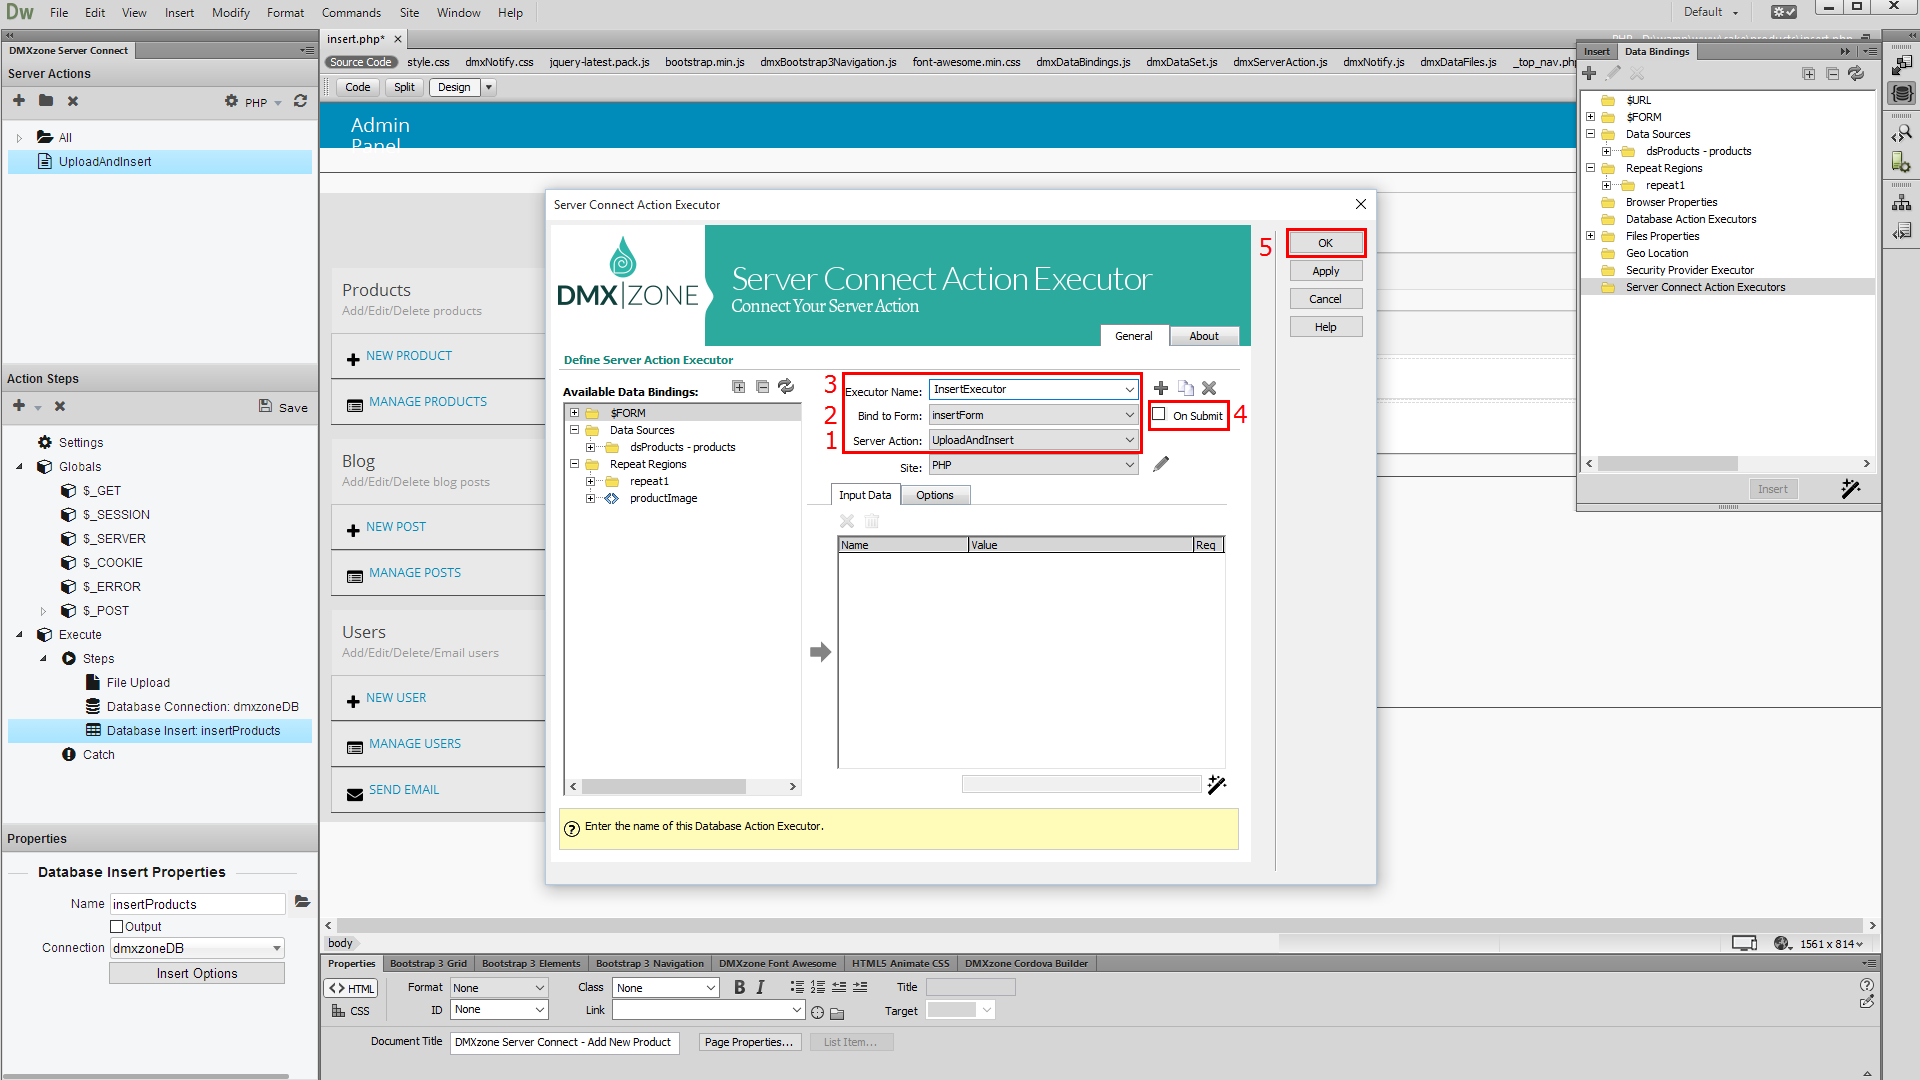
14.Select your server action (1), bind your form (2) and
add a name for this executor (3). Then, check the on submit option (4)
and click OK (5).
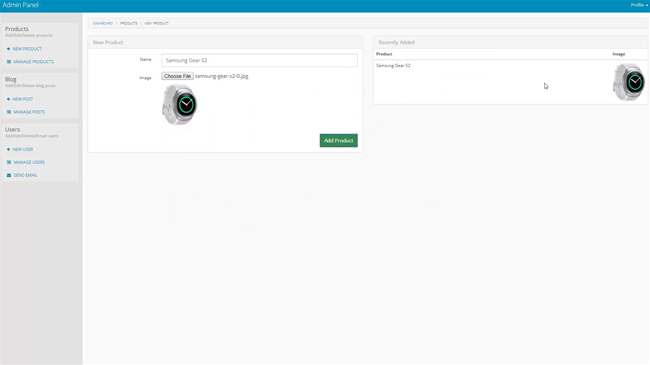
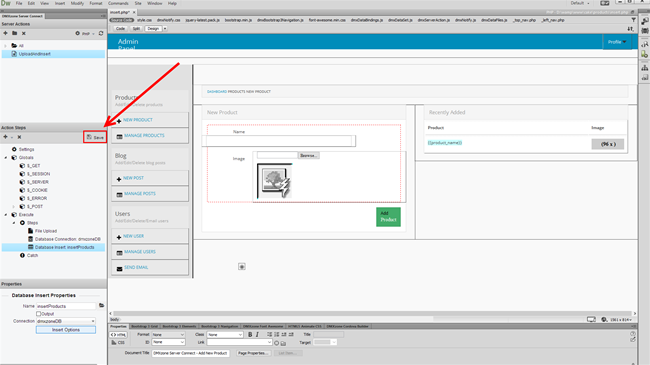
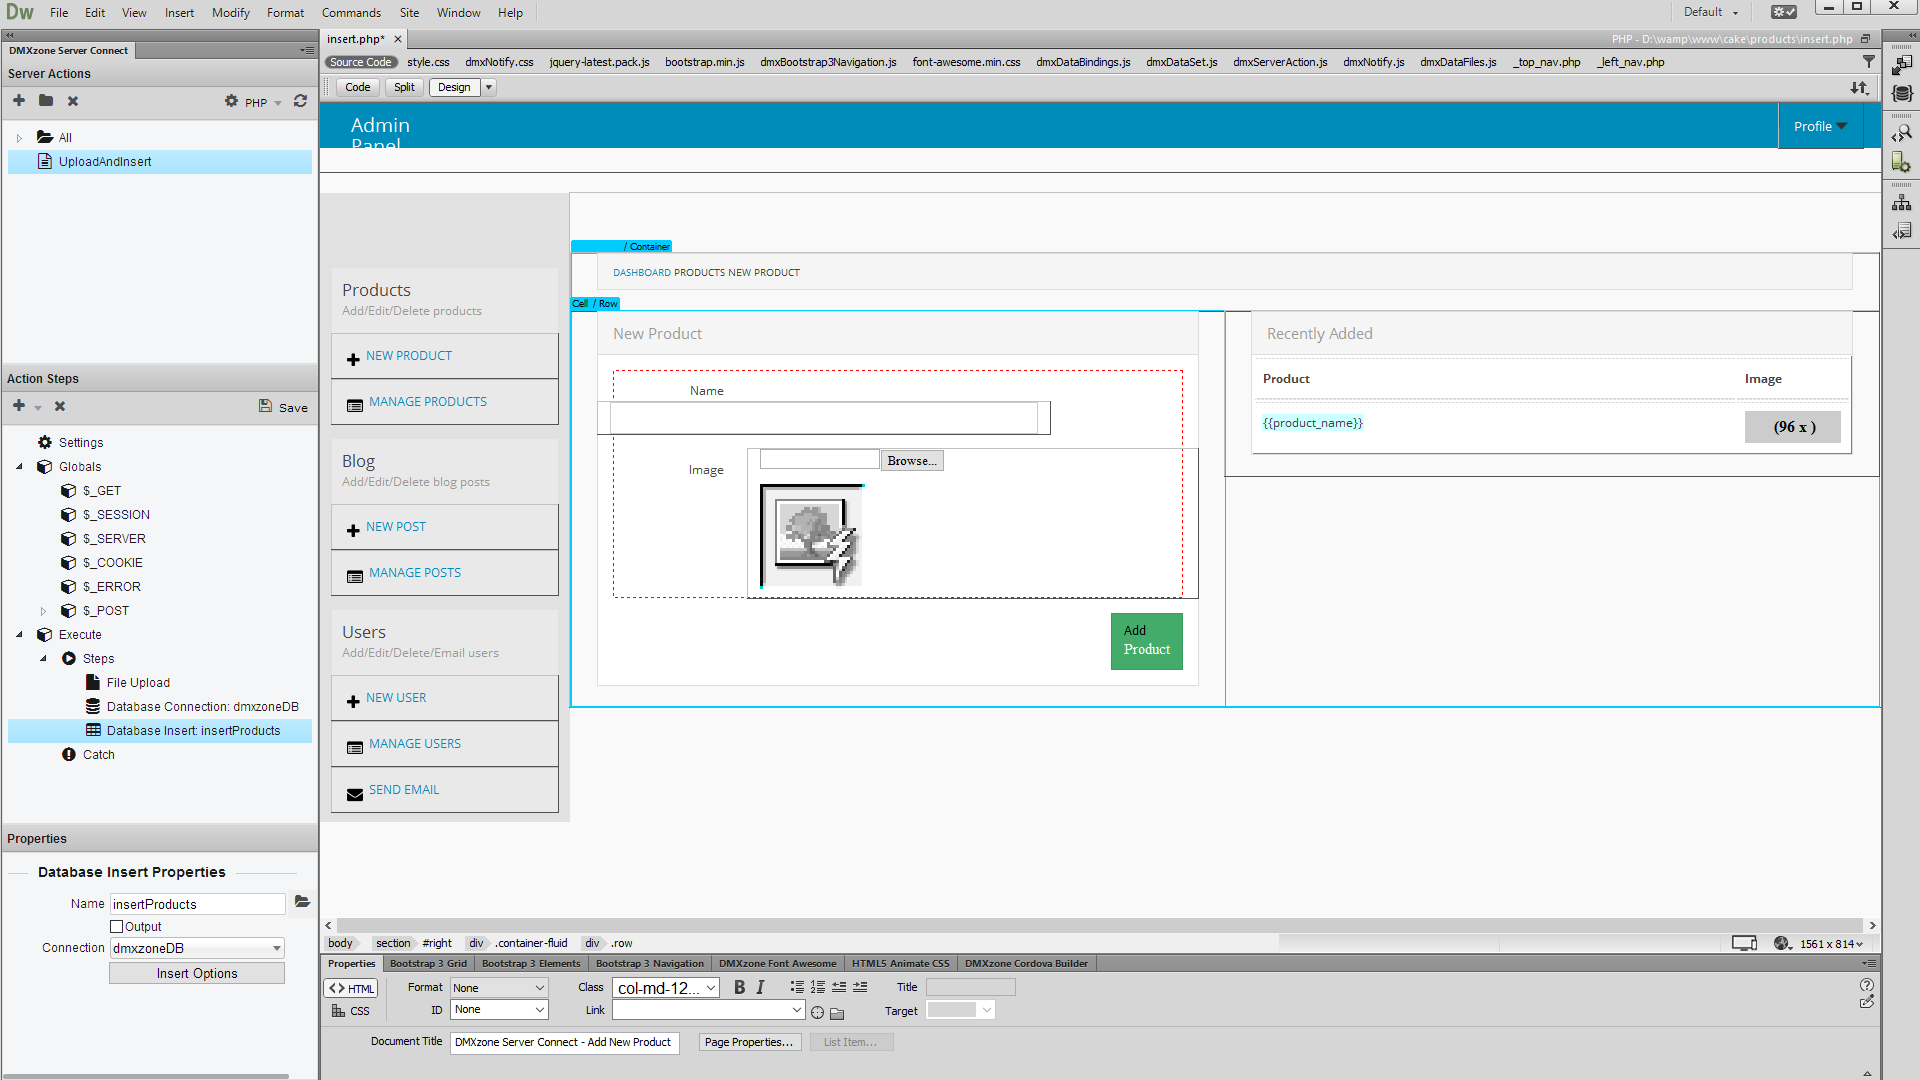
15.Let's preview the results.
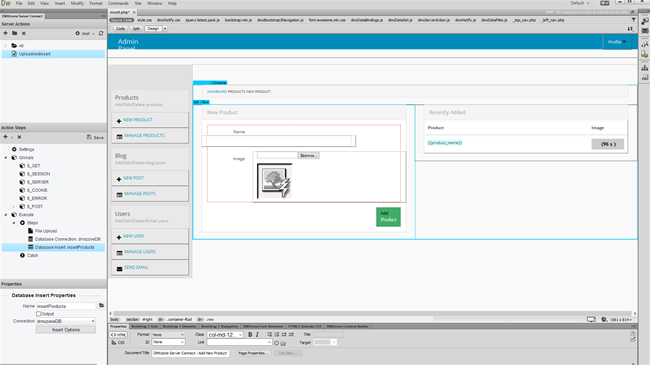
16.Enter a product name and select an image. As soon as you click
the Add Product button, the image gets uploaded, and then the server connect
runs the insert step, which inserts the data into your database. You can see
the results on the right.

Prev Index Next
 Lubov has been with DMXzone for 8 years now, contributing to the Content and Sales departments. She is bringing high quality content in the form of daily blog updates, reviews, tutorials, news, newsletters,update emails and extensions' manuals. If you have a product that needs publicity or any other questions about the entire DMXzone community, she is the one you can contact.
See All Postings From Lubov Cholakova >>


Comments
Be the first to write a comment
You must me logged in to write a comment.