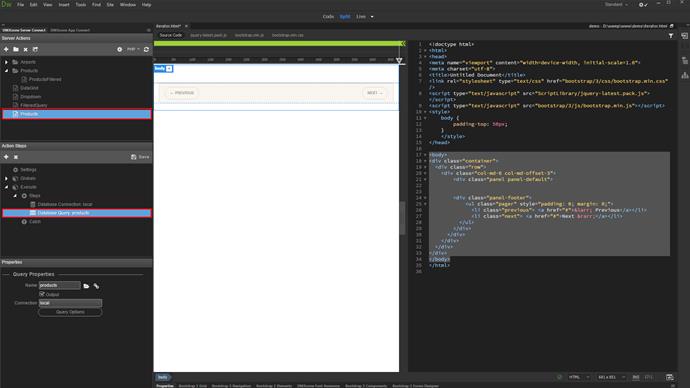
We already created a server action, called products. It contains a database connection and a query, which returns the products from our database. In our previous tutorials, we've already explained how to setup a simple database query, so we won't show this now.
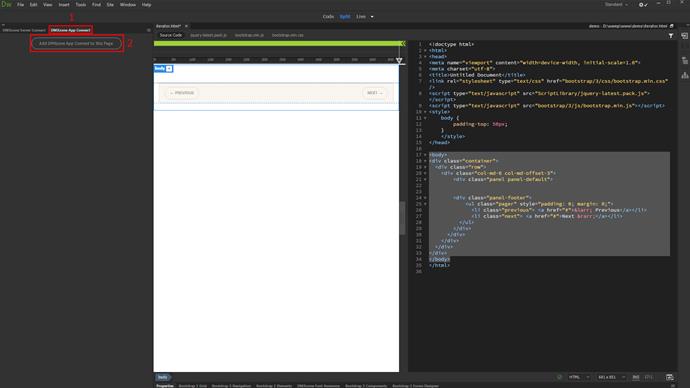
Open the App Connect panel (1) and add App Connect to your page (2).
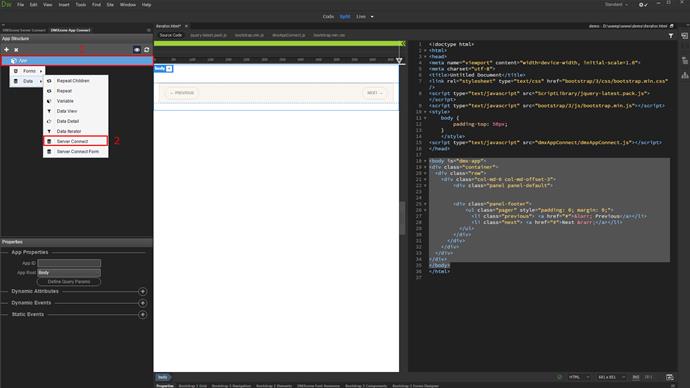
Right-click app (1) and select server connect (2).
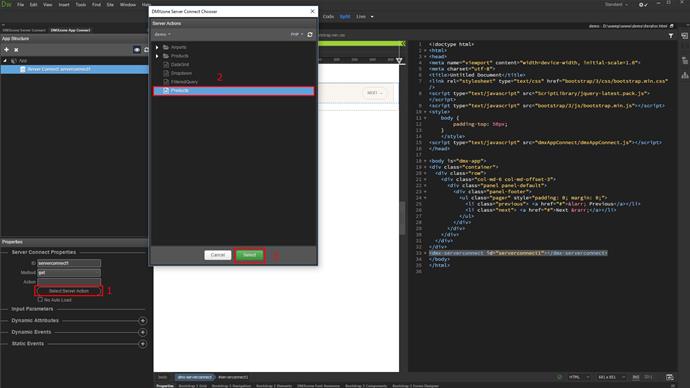
Click select server action button (1), browse your server action (2) and click select (3).
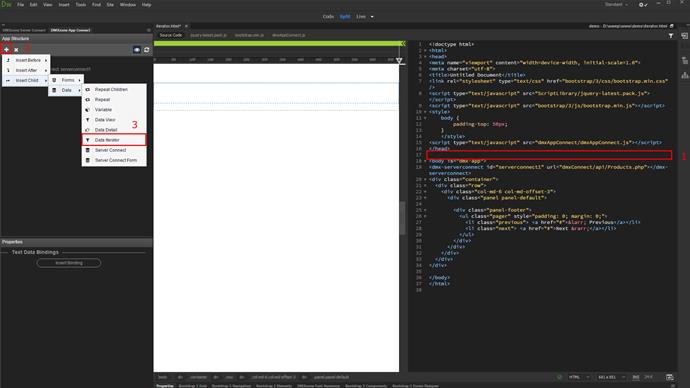
Now, click on your page, where you want to insert the data iterator (1) and add a new component (2). Under insert child, select data iterator (3).
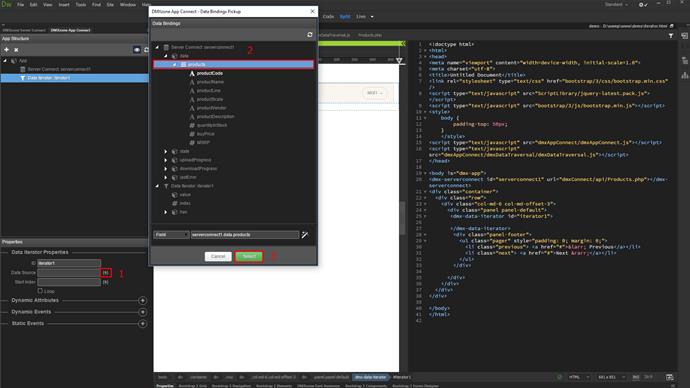
Now, select a data source for the iterator component (1). Browse your query (2) and click select (3).
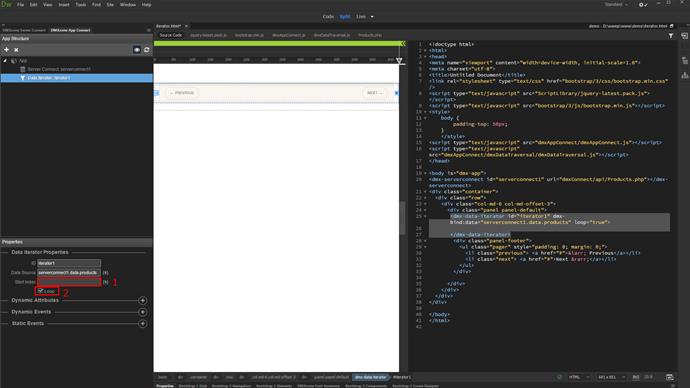
You can set a start index. This field can be used to select the initial record to be displayed in the iterator on load. The first record has an index of 0. Leave this field empty to start from the first record (1). Enable or disable the loop option. If enabled, when the last record is reached, the iterator will loop to the first one, when the user clicks the next button (2).
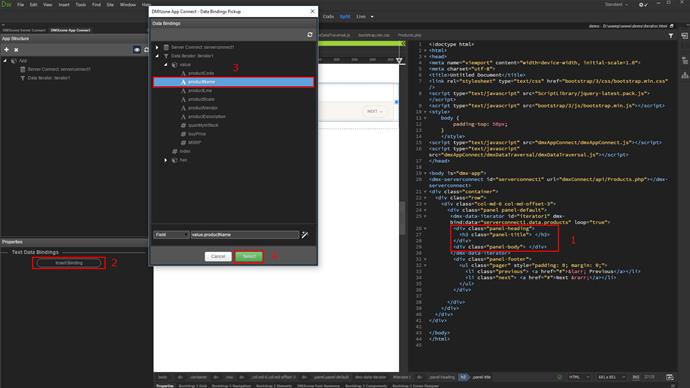
Now, let's bind some data in the iterator. Click inside it (1). We paste our own static HTML here, in order to apply some styling to this panel. You can wrap any static HTML structure with the iterator tags and then bind the data inside it. Now, click the insert data binding button (2), browse your binding (3) and click select.
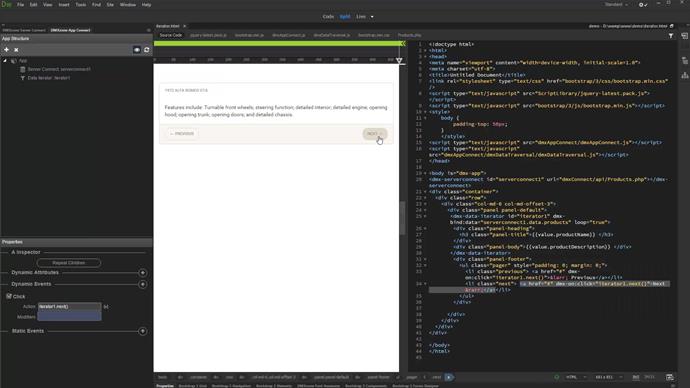
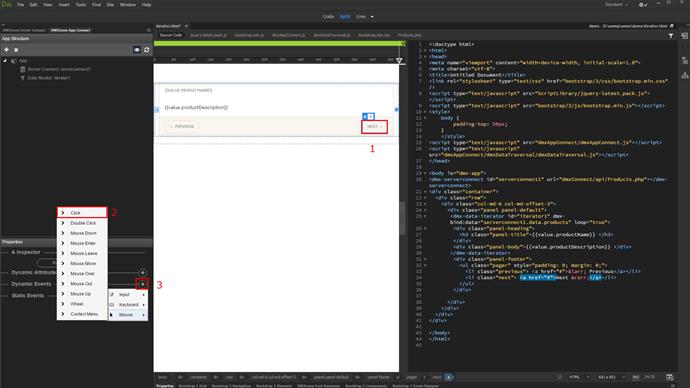
Bind as much data as you want inside the iterator. Now, let's setup the navigation. We added two simple HTML buttons on our page. We will use them to loop through our records. Click the next button (1), add a dynamic event (2) and click select (3).
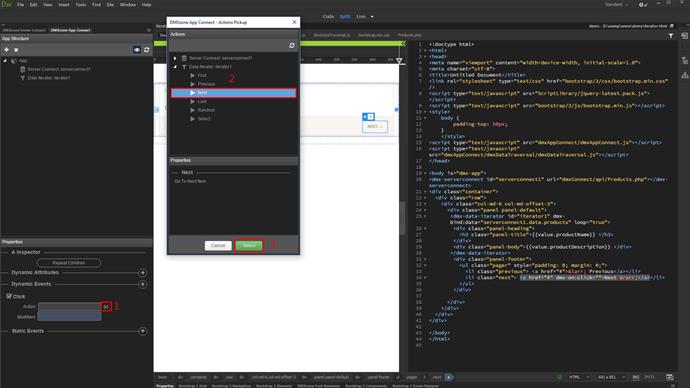
And then, click the action picker button (1) and select the next action (2). Click select when you're done (3). Do the same with the previous record button, this time select the previous action, under data iterator.
That's how easy it is to use the Data Iterator component, in order to loop through your records.
