Pure PHP Upload Tutorials - Saving size in database
Saving the image size in the database
In this tutorial we will explain how to save the image size in the database.


How to do it
To save the uploaded image size in the database, you need to:
- Start with insert or update record upload page
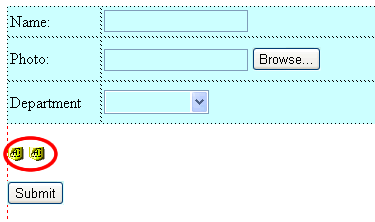
Start with an insert or update record page where you have Pure PHP
Upload on it. We have created those pages in the Upload
and insert record form and Upload
and update record form tutorials.
- Add two hidden fields to your form
To save the image size in temporary fields first, you need two hidden
fields. Insert those and name them imageWidth and imageHeight
for example.
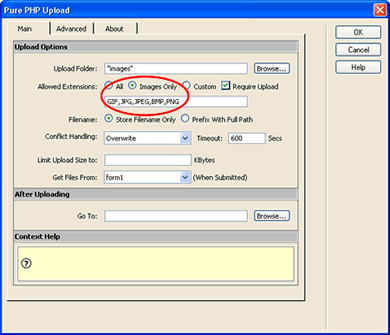
- Open the Pure PHP Upload dialog
Select the Pure PHP Upload dialog by opening the Server Behaviors
Panel. Select DMXzone - Pure PHP Upload.
Make sure you've selected Images Only for your allowed extensions.
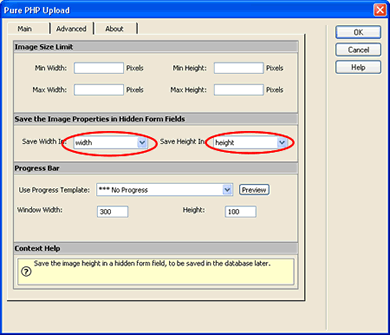
- Choose the save fields
Go to the Advanced tab of the Pure ASP Upload options. There
choose the hidden fields you just created in the Save the Image Properties
in Hidden Form Fields section.
- Reapply the Update record
After you apply the Pure ASP Upload extension, it will save the image
size in the hidden fields. Now we need to apply the Insert Record server
behavior (or Update Record if you are using an updating a page) to also save
the hidden fields.
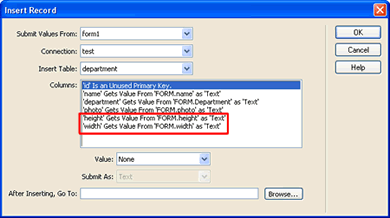
You should assign the hidden fields to the fields in your database.
- Save and done
Save your page then, upload it to your server, and you are done!
Go to your website and test it - you should be able to upload images and their
size will be saved in the database!
NOTE: This method will work only if you upload a single image! It
won't work if you try to upload multiple images at the same time - ie if you
have multiple file upload fields in your form.