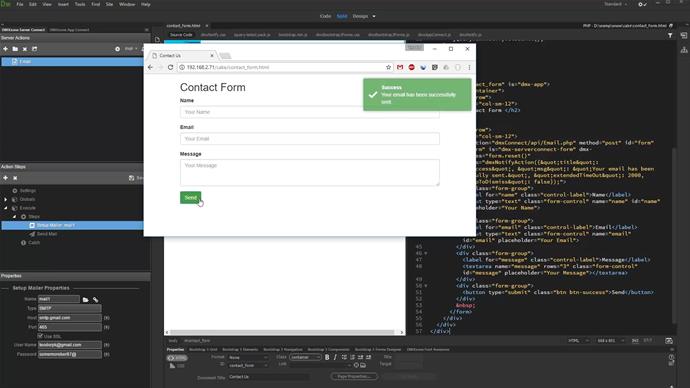
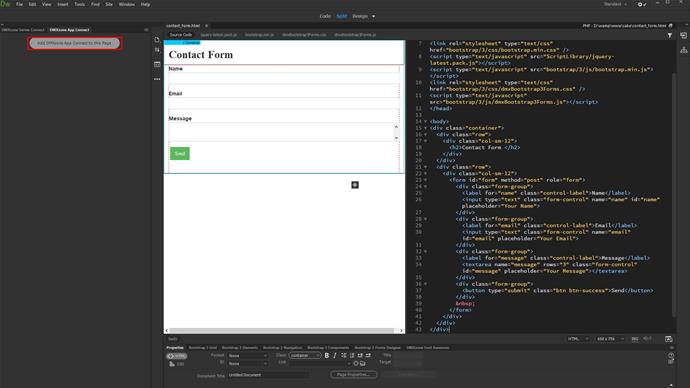
We added a really simple contact form on our page.
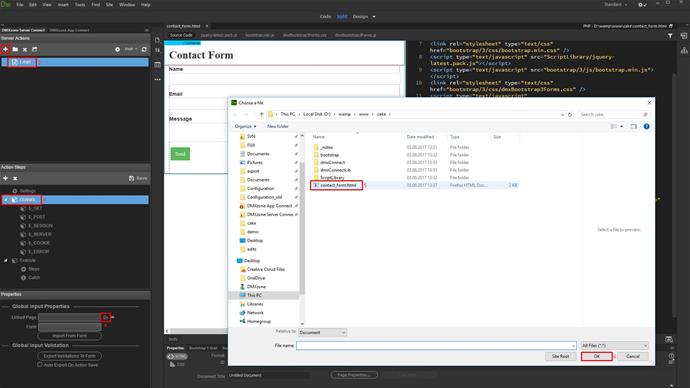
Open the server connect panel and create a new server action (1). Then add a name for it (2). Now, let's import form fields into the server action. Click globals (3). In the linked page field, add your page (4-6).
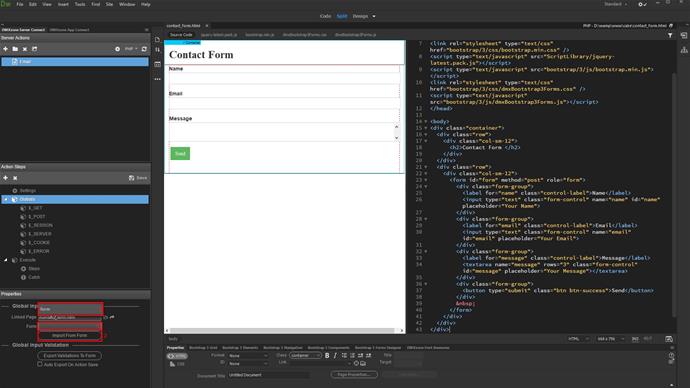
Select your form from the drop-down and click the import button (1-3).
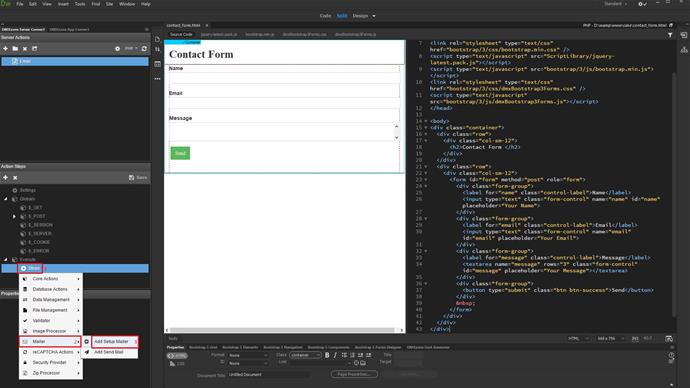
After importing the form fields, right click steps (1). Open the mailer menu and select setup mailer (2-3).
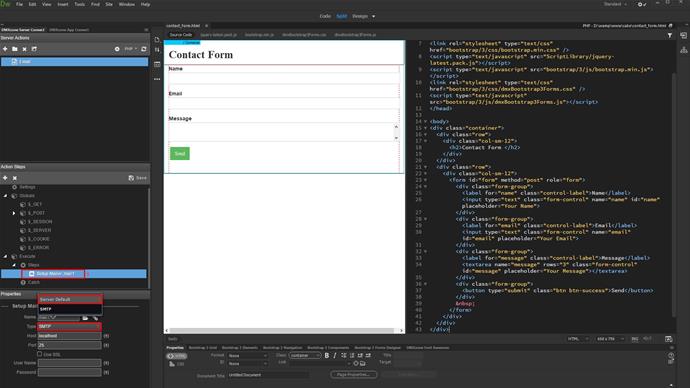
Select whether you want to use the default mail component on your server or some SMTP mail server. Then setup its settings. We select the server default mail component (1-2). Right click setup mail step (3).
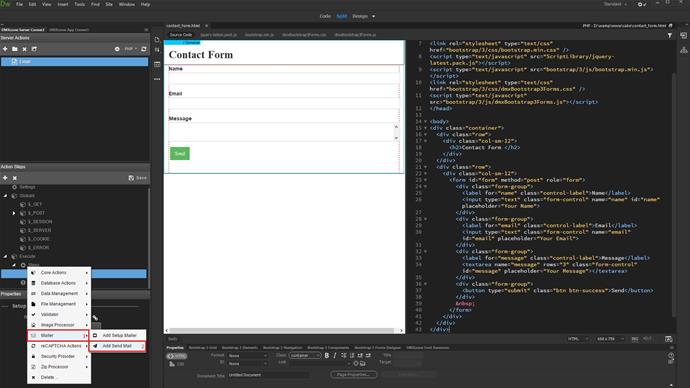
Add send mail (1-2).
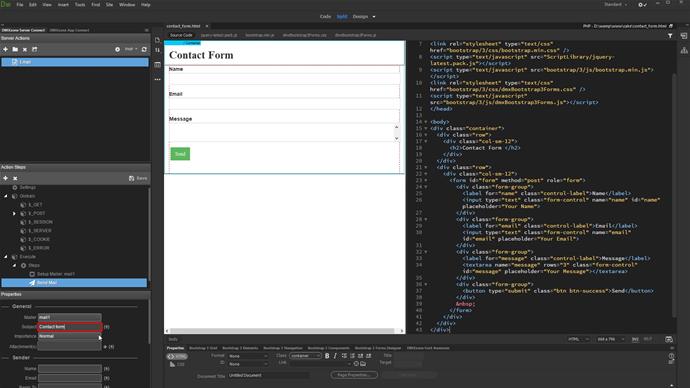
Enter the subject for the email.
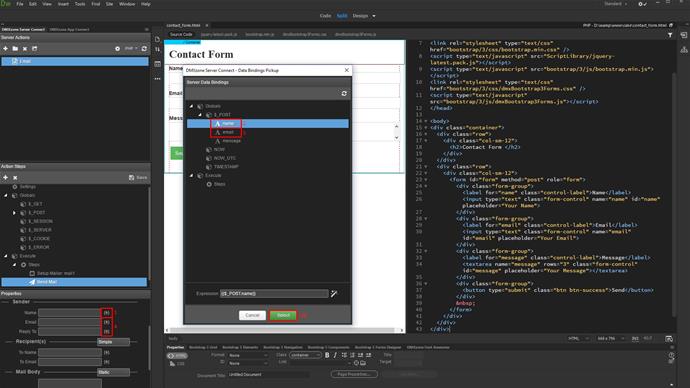
Setup the sender info. We will take this info from the form. Click the dynamic data button for the sender name (1). Under globals, post, select the name field (2-3). We do the same for the email and reply to fields (4-6).
Setup the recipient info: name and email (1). Select the mail body type. Static or file. We selected static (2-3).
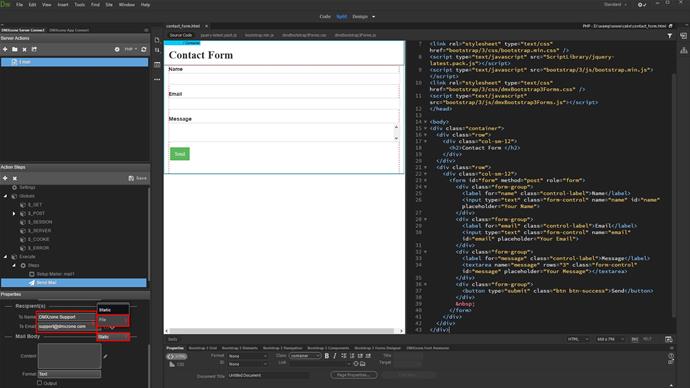
Set the mail content format to text (1-2). Click the edit content button (3).
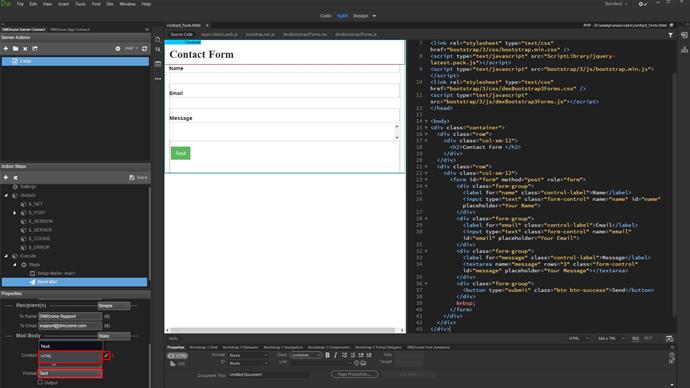
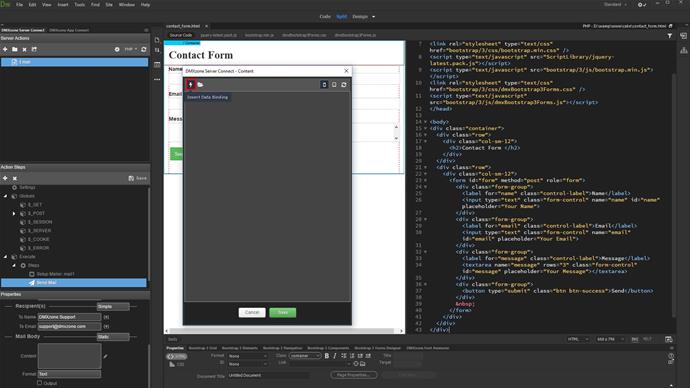
We want the content of the text area on our page to be sent as mail content. So we select the dynamic data button.
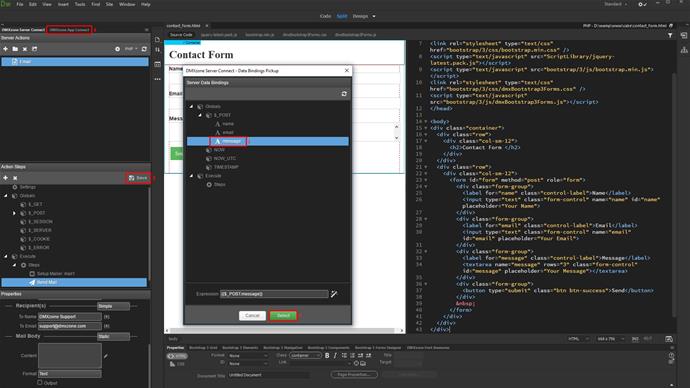
Under globals, post, we select the message form field (1-2). We are now done setting up the mailer. Save your server action (3). Open the app connect panel (4).
Add app connect to your page.
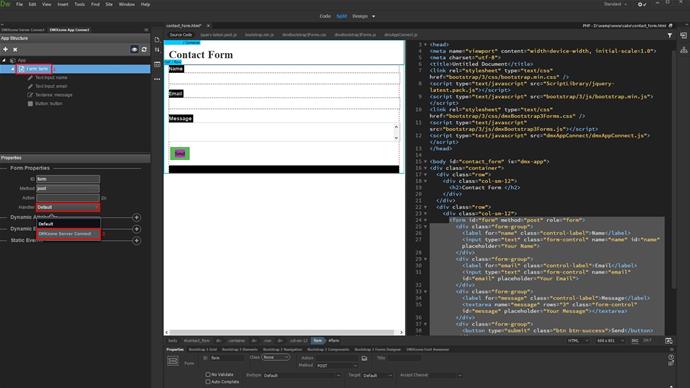
Select your form in the app connect tree (1). Change the form handler to server connect (2-3).
Select your send email server action (1-3).
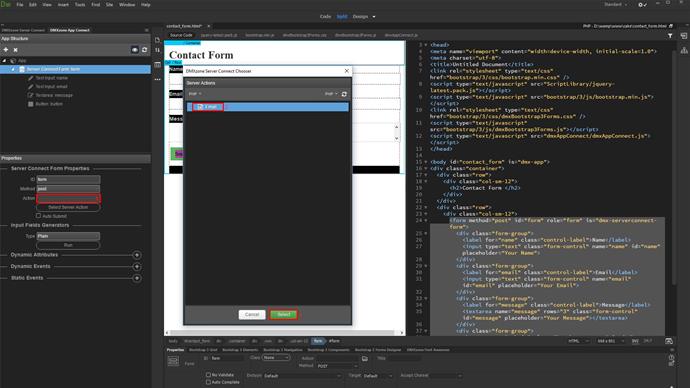
And we are done! The form data will be sent upon submitting.
You will probably want to clear the form fields after the data has been sent. Add a new dynamic event (1). Under server connect, select on success (2-3).
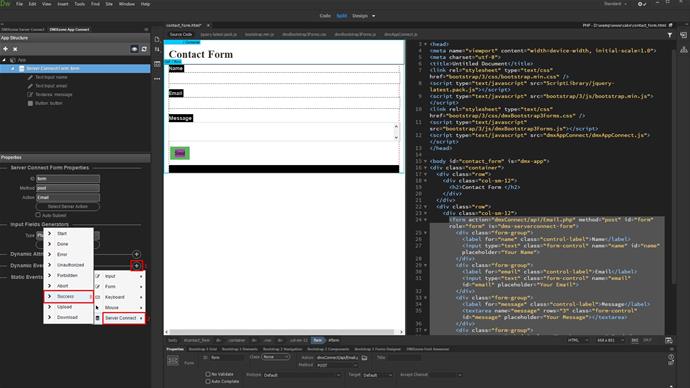
Setup the action. Click dynamic event picker (1). Under server connect form, select reset (2-3).
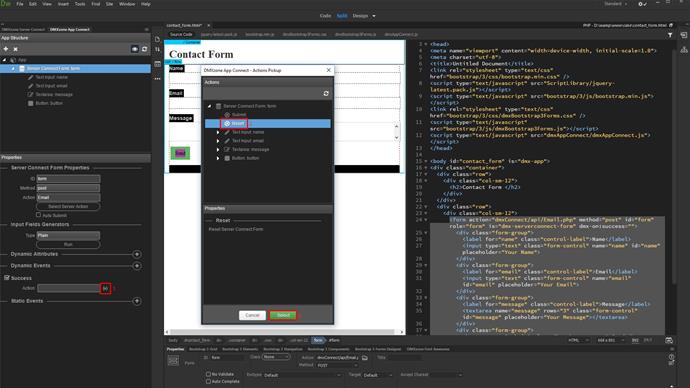
Now the form fields will be cleared when the user submits the form!
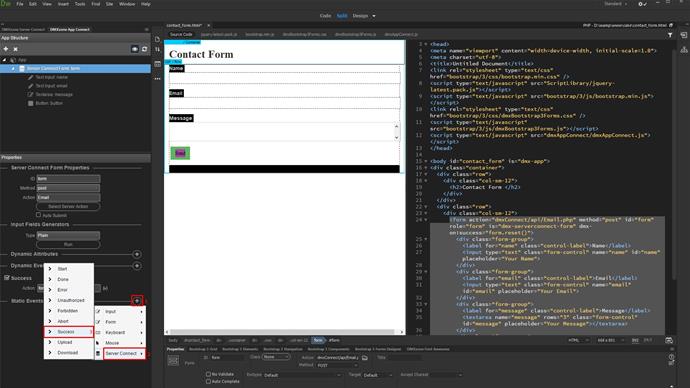
You can also attach static events on success, in order to call HTML5 Responsive Notify, for example. Note, the following steps are optional, they are not required by the mail component. Add a new static event (1). Under server connect, select success (2-3).
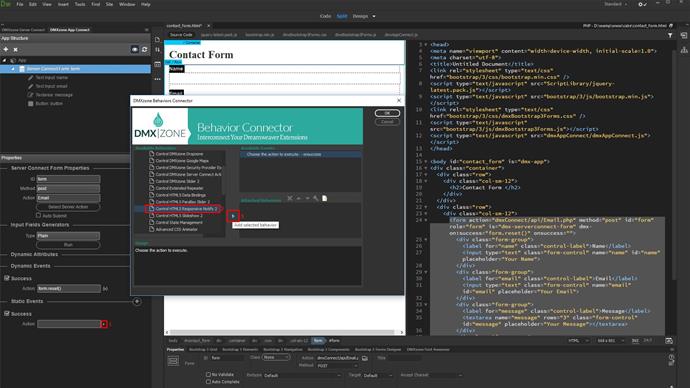
Define the static event (1). We selected control HTML5 Responsive Notify and then added it (2-3).
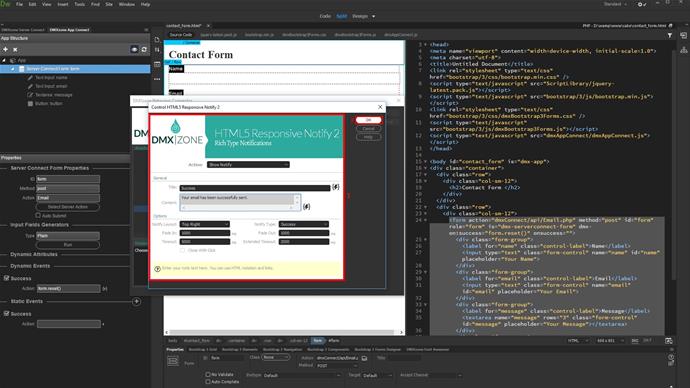
Setup the notify and click ok when you're done (1-2).
And that's all! Let's preview the results.
We entered our name, email and message and then we hit the send button. After the email is successfully sent, the form fields are reset and the notification appears. That's how easy it is to send form data to email using DMXzone Mailer.
