This tutorial will introduce to you the Objects feature in Dreamweaver and UltraDev, providing a basic grounding in the subject. In subsequent articles we will go on to discuss more complex scenarios, but to begin with, we’ll keep it nice and simple.
Creating Custom Objects in Ultradev
Creating Custom Objects in Dreamweaver UD
Overview
This tutorial will introduce to you the Objects model and provide a basic grounding in the subject. In subsequent articles we will go on to discuss more complex scenarios, but to begin with, we’ll keep it nice and simple. It also applies to the standard version of Dreamweaver.
Step 1.
When
you insert one of the pre-installed Dreamweaver Objects to a page, all you are
doing is inserting a specific piece of HTML code into the existing code. The
process, as we know is simple, position the cursor in the area of the page where
you want the particular object inserted and select the Object from the Objects
Palette.
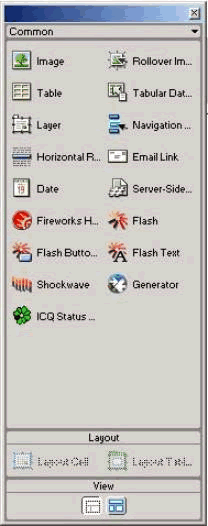
The Object Palette in UD4 (note the ICQ icon is a Custom Object)
Step 2.
All Objects must be stored in a subfolder of the Ultradev\Configuration\Objects folder. The standard installation of this path is "C:\Program Files\Macromedia\Dreamweaver UltraDev 4\Configuration\Objects\”. If you navigate to this folder you will notice that there are up to 9 folders in here: Characters, Common, Forms, Frames, Head, Invisibles, Live, Special & Tools. The amount of folders depends on what version of Dreamweaver you have installed and also whether you have added to this folder.
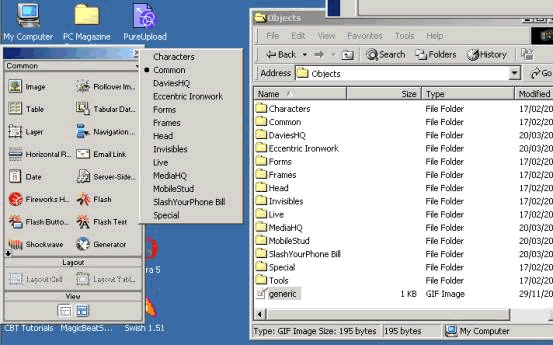
Be sure to notice that the name of the folders within Objects corresponds with the different sub-menus in the Objects palette. Now expand the Common folder and see that it consists of a series of HTML, GIF & JavaScript files. Open the “HR.html” file in Notepad and you will see the HTML code for a Horizontal Rule. Double-click the “HR.gif” file and you will notice that it is the icon, which represents the Horizontal Rule object in the Common section of the Dreamweaver Objects. Is this beginning to make sense to you now? Just nod if it isn’t – you’ll be fine when you’ve finished the tutorial.
Step 3 - Demonstration
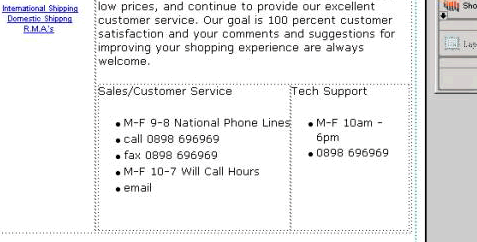
Here
we have designed a "Contact details" page and to complete it we want
to insert an email link after our phone number so that people can contact us
by clicking the link and sending an email.
Step 4.
The cursor
is postioned and we bring up the Objects palette and then select the Email Link
button. A 2-field text box appears prompting for Text and Email. We can type
what we like in “Text” field but we need to type the destination email address
in the “Email” field. These boxes are filled in and OK is clicked. In
our example we have typed the email address into both fields.
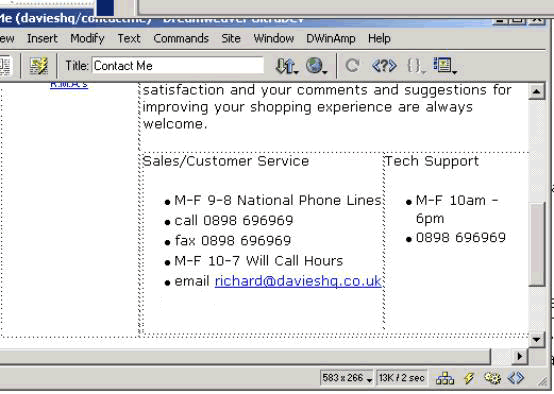
We now have an email link like the one above. Now lets cut the dawdling and get into the real work.
<Part 2 >
Comments
Thank you!
Richard, thank you for sharing such a nice tutorial with us. You have really spend some time on this one. It's very much appreciated.
Thanks Waldo
RE: Thanks Waldo
haha, people still need to find out how to discuss tutorials I think. But when I look at the number of visitors today, I think it's a huge succes ;-)
I'm looking forward to the next tutorial.
Good stuff maynard
Nice, simple, and straight forward. Good job.
Daniel Short
You must me logged in to write a comment.