Allow viewers to send you Feedback regarding your Site
In this tutorial, we will cover how to allow viewers send you feedback through a simple form and some coldFusion. It will consist of one page. We will not be using screenshots, just some code. We will also try to keep it moving fast, although still not prior ColdFusion knowledge is required. On your mark. Set. Go!
ColdFusion Get Feedback for your site.
Page 1, Page 2
In this tutorial, we will cover how to allow viewers send you feedback through a simple form and some coldFusion. It will consist of one page o) We will not be using screenshots, just some code. We will also try to keep it moving fast, although no prior ColdFusion knowledge is required. On your mark. Set. Go!
I would like to introduce you to a few CF functions and tags before getting started
| 1.
IsDefined() This is a way of checking if the parameters passed in the
function are true. In ASP, we might do something like <% if Request.Form("Submit")
<> "" %> to check if a form has been submitted. Well,
in ColdFusion, we can do this by IsDefined("form.submit")
This will become handy often in your ColdFusion Applications to check if
a certain value exists. |
||||||
| 2.
<cfmail> this is the only tag you need to trigger Mail. A simple
way of sending mail would be. The body of the email goes in between the
tags. <cfmail to="whoever@whoever.com" from = "whoever1@whoever.com" subject="Hello World"></cfmail> The to, from and subject are only necessary to send an email. you can place Hello World in between the two tags to have an email that will display Hello World in the body. |
||||||
3.
<cfif> tag is to check for conditions. A simple statement would
be:
Note: is is used instead of = for conditional statements in ColdFusion
|
Lesson:
1. Open a new page in Notepad, Ultradev or CFstudio. Save As "Feedback.cfm"
2. Create a simple form that will allow a viewer to input their Name, Email (2 textfields) and Feedback (1 textarea) Set the Action to the same page feedback.cfm and Metod to Post. Design it however you like:
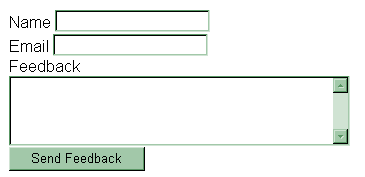
Note: Name your form frmFeedback, the Name textfield: txtFromName and the Email textfield: txtFromEmail and the Feedback textfield: txtFeedback
This naming convention isn't required but I will be using this for the tutorial.
code for form:
| <form name="frmContact"
Action="feedback.cfm" Method="Post"> Name <input type="text" name="txtFromName"><br> Email <input type="text" name="txtFromEmail"><br> Feedback <br><textarea name="txtFeedback" cols="40" class="textfields" rows="4"></textarea><br> <input type="submit" name="submit" value="Send Feedback"> </form> |
3. The form will be submitting to itself so we will place the email code on the same page. I will place my mail code below the form code:
| <cfmail to = "omar@udnewbie.com" from = "#form.txtFromEmail#" Subject = "Feedback from Site"> #form.txtFeedback# </cfmail> |
If you recall the description of the cfmail tag above, you can understand what is going on. the From Email is simply whatever was typed in the textfield. and the body which reside in between the tags is whatever is written in the feedback textarea.
Important Note: Some web hosts do not allow outgoing mail to be From a Domain that isnt hosted in their server. If this is the case, you should replace the From to one of your own email addresses that use a Domain hosted by the web host. So you will use your own email to allow the User to send the Feedback like:
| <cfmail to = "omar@udnewbie.com" from = "feedback@udnewbie.com" Subject = "Feedback from Site"> #form.txtFeedback# </cfmail> |
At any rate, you can later on change the body code to show you what Email & name was inputted in the textfields. I will show you how to do this later if you have to.
4. Let's allow this mail to be HTML by adding type = "HTML" like:
| <cfmail to = "omar@udnewbie.com" from = "#form.txtFromEmail#" Subject = "Feedback from Site" type="HTML"> #form.txtFeedback# </cfmail> |
5. After the cfmail tag, let's type a thank and display what was sent, remember we are in the html body tag:
| <cfoutput> Thank you <b>#form.txtFromName#</b>!<br> You sent the following feedback:<Br> <b>#form.txtFeedback#</b> </cfoutput> |
Note: <cfoutput> only has to be wrapped around ColdFusion Variables but instead of putting this around the 2 variables in the code, you can surround the entire section with it.
Go to Page 2
Omar Elbaga
 Starting out as a fine artist, Omar Elbaga gradually moved to computer graphic arts. He was particularly amazed by the power of the World Wide Web, so he embarked upon building small-scale sites for fun utilizing HTML and his Art background. Falling in love with designing web pages and its potential, he began a career in web design. Omar has since been in the web development field for several years. With his head in computer books nearly 24 hours a day, Omar moved on to enhance his skills from web design to web programming.
Most of his work involves building database-driven web sites for small companies. Omar is currently running a popular Dreamweaver MX resource site named dmxfire.com
Comments
Be the first to write a comment
You must me logged in to write a comment.