Free! Building a website with Restricted Access: Part 1
In this tutorial we will be creating a site, which has several user levels.
We will be using the standard behaviours of Dreamweaver MX 02/04 and we will also add some new ones.
Part one of the tutorial will be covering the Set-up of the site, creating an Access database and providing login access to our site, along with a registration facility.
We will be creating a Login page using the standard Dreamweaver behaviour, and then altering the code to allow us to use a single login page for both Administration and Standard users.
![]()
![]()
![]()
![]()
![]()
![]()
Registration page
With our database table all ready, we now need to create the registration page in Dreamweaver.
Create a new .asp page, and name it registration.asp
Add a form tag, name the form fmregister
We need to add text fields for each of the columns from website_users
It is a good idea to separate the Address details from the access details.
Now if your site is a small one, it may not have many visitors who register and thus the likelihood of two people or more registering with the same Username is unlikely. But as the site grows, or for those with an expected high visitor rate, the possibility of someone choosing a Username already taken becomes more of a reality.
To ensure we do not encounter this we can use the in-built Username checker in Dreamweaver.
We are now going to add the checker to ensure a user does not enter a Username that already exists.
Create a new page, name it sorry.asp, this will be the page that our registration page will move to if the Username our visitor enters has already been taken.
Add text, such as "Sorry, but the Username you enter has already been taken, please return to your form, and enter a new one".
Place a return link, and enter a history link (javascript:history.go(-1);) link to move back to the form.
This will enable us to move our visitor back to the registration page, without them losing the details they entered.
Move back to the registration.asp page.
In the Application palette, Select...Server Behaviours...User Authentication...Check Username
Select the field that contains the Username (txtUsername).
Enter sorry.asp for the behaviour to redirect to if the user enters a Username that already exists.
Your registration page is complete.
You may wish to add in some final touches, such as typing (dd/mm/yyyy) next to the DOB field, so the user knows to enter the date of birth in that format.
I personally use the Yaromat form checker extension to check all the fields are completed, and with the correct data type.
It is very useful in ensuring someone enters the date in the format we want, for UK visitor’s dd/mm/yyyy.
You can download this extension from http://www.yaromat.com/dw/em/checkform.mxp
Formatting our Confirmation page
Now we have the Registration confirmation page, (which our registration page will move to, once the Insert behaviour has run) it would be nice to show the login details our visitor registered..
To do this we need to know the ID of the record the user has just created. This can be achieved by adding some code to the Insert script behaviour so that it carries the information through to the confirmation page.
We will be using Sessions to capture the details from the form and pass them onto the confirmation page. We are required to do this as the Dreamweaver Insert behaviour posts to the same page, so the details from the form are lost.
So open up your registration.asp page, you need to change to code view.
Look through the code until you find the Insert script and the following lines
<%
‘ *** Insert Record: set variables
If (CStr(Request("MM_insert")) = "fmregister") Then
MM_editConnection = MM_website_STRING
MM_editTable = "website_users"
MM_editRedirectUrl = "confirm_reg.asp"
After the line
If (CStr(Request("MM_insert")) = "fmregister") Then
we insert our new code to catch the Username and the Users name.
To create a Session, you simple type:
Session("MM_Username") = Request("txtUsername")
We have created a Session called MM_Username, from the form text field, which I called txtUsername
Session("GreetingName") = Request("txtForename") & " " & Request("txtSurname")
In this line we have created a Session called GreetingName, from both the txtForename and txtSurname fields in our form, you will note we included " ", this added a space between the Forename and Surname values.
So you code should now look like
<%
‘ *** Insert Record: set variables
If (CStr(Request("MM_insert")) = "fmregister") Then
Session("MM_Username") = Request("txtUsername")
Session("GreetingName") = Request("txtForename") & " " & Request("txtSurname")
MM_editConnection = MM_website_STRING
MM_editTable = "website_users"
MM_editRedirectUrl = "confirm_reg.asp"
Now we have our sessions so we can show them to our visitor, it would be nice to display them.
Move to your confirm_reg.asp page and add in text to thank the visitor for registering and show their access details
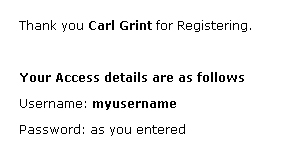
Thank you {Session.GreetingName} for Registering.
Your Access details are as follows
Username: {Session.MM_Username}
Password: as you entered
You will need to change to the Code view to add in the Sessions, and type them in as
<%=Session("GreetingName")%> etc.
Example of the text displayed on the confirmation page using our Sessions
You have now successful created a Registration page for your site, along with the database to store the details, and a confirmation page to show your visitor their access Username.
As an Add on to your Registration page, you can add an Email script, which will Email the visitor their Username and Password following their registration.
A tutorial to add this can be viewed at http://www.dmxzone.com/showDetail.asp?TypeId=2&NewsId=6846
This tutorial will show you how to add to the Insert script so that it sends an Email when it runs.
We now have our registration page and user details table created, to test them, you can open your browser and select your folder which you are working in, and select the registration.asp.
To make it easier, and you will probably find it easier in the long run, create a default.asp page, and on it place a link to the Registration page.
Ok, take 5 minutes, take a stroll, then let’s come back and move onto enabling our visitor to use their new access details to log into the site.
![]()
![]()
![]()
![]()
![]()
![]()
Carl Grint
 " Since graduating from university, I have worked with Charities and the Public sector, with my longest time being 3 years with the NHS until returning to freelance in 2003.
I would like to think my diverse experience of working for both the Public and Private sector gives me a good all rounding which enables me to approach projects with a unique perspective and enables me to bring new thoughts and initiatives to my work.
I have always enjoyed passing on the lessons I have learned so other developers can bypass the 'working out' time I had to go through, and writing my first two articles for DMXzone has given me a chance to pass on what I think are some good ways to improve on the standard Authentication behaviours Macromedia supply with Dreamweaver."