Explore the Premium Content

CSS pop-up menus

In this tutorial, you will learn how to build a completely functional pop-up menu using CSS (Cascading Style Sheets) without knowing how to write any code at all! Below is an example of such a menu;

An example of a CSS menu

This tutorial takes only 25 minutes to complete.

Read More

CSS: It’s Not Just For Screens Any More

Dreamweaver, and in particular, the new Version 8, is nothing short of a CSS wonder.  Many of us who are “mostly application” in mindset stuck up our noses that there wasn’t more for the application side in the new release, but I, for one, am learning to appreciate some of the CSS improvements that Macromedia has made in the new version. 

In my E-Book, I talked about the new Style Rendering toolbar and the ability it gives the developer to toggle between screen views for various audiences. 

In this article, I would like to expand on the Style Rendering toolbar and show you how to create a site that is for more than just the web audience.  I have created a simple unstyled page that is a home page for a fictional candy store and have attached that unstyled page and the images used in a zip to this article.  Our task here will be to create the CSS for that example from scratch.. three times.  First, we will create the “screen” stylesheet that the average web user will view in their browser.  Then we will create a stylesheet for the user who wants to print a page that is more print friendly than the screen view.  And finally, we will create a style sheet to render the same content for the handheld device.  Mobile is one of the fastest growing areas for the content developer.  It’s about that we paid this arena of business some serious attention! 

Read More

CSS: Just In Case

Welcome to Article 7, our final step in the CSS Journey of Dreamweaver 8.  In our first article, we walked through the vast world of CSS, Dreamweaver 8 style, and there is indeed a lot to talk about with this release of the product!  From the general to the specific, we applied what we had learned in Article 5 by creating a simple page using nothing but the Design Tools of Dreamweaver 8 to produce our CSS.  Then in Article 6, I showed you how I like to do CSS, using a combination of the design tools and coding and I passed along my collection of starter snippets in an extension that you can easily install into your copy of Dreamweaver 8.


This article is part of the new interactive e-book; Dreamweaver Crystal Gazer: The Power Of Dreamweaver 8

Read More

CSS: My Way

A while ago, we dissected the Unified CSS panel, took an in-depth look at the CSS rendering changes in Dreamweaver 8 and were duly amazed at the CSS Layout Aids that make it so easy to see the integral parts of the CSS layout at a glance.  Then in Article 5, we tried the whole thing out, making our first page using only the CSS tools available in Dreamweaver 8.  We made extensive use of the Unified CSS Panel, but we also used the traditional CSS dialog to create our initial CSS.  It was then a snap to make changes in the Unified Panel.

This article is part of the new interactive e-book; Dreamweaver Crystal Gazer: The Power Of Dreamweaver 8

Now that we know how to do that, in this article, I am going to show you a few things about how I like to do CSS.  I have gone the full gamut from creating everything in the design tools of Dreamweaver to handwriting the code for the entire page in code view.  I have created, I have reused code and I have developed a little set of snippets which I am giving to you with this article.  They are by no means the start to every page you will ever make, but they quickly give you a start to much of the design that is standard too much of what I do and I pass them along to you in hopes that you may find them beneficial.

Read More

CSS: Taking It Out For A Test Drive

In my previous article, we took an in depth look at the new Unified CSS Panel, the new visual aids for helping to give  the user a clearer picture of what the CSS is doing to a given page, and the rendering improvements in Dreamweaver 8.  I think we all agreed that, once again, we have a whole new CSS ballgame. 

But there is nothing quite like trying out something yourself.  You can believe everything I’m telling you but what I can’t tell you is whether or not it will work for you.  Will this improve workflow for your individual situation?  I really think I can shout a resounding YES! But I don’t blame you for wanting to try some of this yourself. 

This article is part of the new interactive e-book; Dreamweaver Crystal Gazer: The Power Of Dreamweaver 8

And so you shall.  In this article, we are going to build a page with the new CSS unified panel and put it through some of its paces.  We will do this from the standpoint of inline CSS “in the head” which makes it easier to see what is going to happen and why.

In the next article we’ll return to the case study and create an external CSS sheet and work with some different ways to work with CSS in Dreamweaver 8.  There are many ways to achieve what you want and we’ll try to show you as many of them as we can.  Enjoy!

Read More

Hybrid Layout, the peaceful coexistence of tables and CSS Part 2

Hybrid layout is a special way to create a page's layout, it stands for tables and CSS in a peaceful coexistence. In part 1 I showed you how to clean up <body> tag, how to define and modify CSS rules, and how to attach an external style sheet.  

There are still tons of <font>, <b> and <i> tags and deep nested tables in the example files. In this article we'll

  • Convert <b> and <i> tags into <strong> and <em>,
  • Get rid of <font> tags,
  • Get rid of nested <tables> used for creating small borders,
  • Add footer & header DIVs.
Read More

Hybrid Layout the peaceful coexistence of tables and CSS Part I

Hybrid layout is a special way to create a page's layout, it stands for tables and CSS in a peaceful coexistence. In this article I'll show you how to convert old web sites with tons of <table>, <font>, <b>, and <i> tags into neat hybrid layout pages without messing up the existing page's basic layout.

We won’t use any hand coding! I'll show you how to create a Hybrid layout with nothing more then the built-in features of Dreamweave! You will learn

  • How to get rid of <tables> and <font> tags,
  • How to convert <b> and <i> tags into <strong> and <em>,
  • How to create new CSS rules,
  • How to change CSS rules, and
  • How to apply CSS rules in Dreamweaver.

I will work on an old version of a web site from the year 2001 with a horrible "old-fashioned" source code. We'll convert those into a neat and easy to edit source code.  I'm sure you will soon get familiar with the techniques I use and you don't want to miss them any more.

Read More

Quotes, Citation and CSS

Everybody likes a good quote, whether it be a monologue from Hamlet or a particularly pithy piece of your own work.

From a design point of view, quotes are a handy for breaking up your web content and highlighting useful parts of our document. They are essential for any webpage that is using material quoted from elsewhere, such as a weblog. Fortunately (X)HTML provides a number of tags to help mark-up our quoted content correctly.

In this tutorial we're going to look at quotes, and how you can use the correct markup for them in (X)HTML, and how you can style this markup with CSS so that it's semantically valid AND nice to look at.

Read More

Linked Style and the Cascade

One challenge many Web designers and developers new to CSS face is to understand the various facets of the Cascade. The Cascade is a hierarchy of application and provides us with rules to both apply CSS in a hierarchical fashion if we so decide to do so and to help us resolve conflicts that might appear within our styles.

In recent articles, I’ve covered the various types of style sheets, including user, author, and browser, and then reviewed the primary author styles: inline, embedded, and linked. I discussed what the Cascade offers in terms of how it applies styles in this hierarchical fashion. What I haven’t yet discussed is the use of multiple linked style sheets in a given document, why this can be helpful, and how the Cascade applies in the instance of multiple style sheets and multiple conflicting rules.

Read More

CSS From the Ground Up: Linked Style

While inline and embedded style are also considered part of CSS’s application hierarchy, grouped within “author styles,” it is the linked style sheet that gives designers and developers the utmost power over their work.

This power isn’t limited to design, of course. It also involves several other critical issues, as I’ll examine with you in detail in this installment of CSS from the Ground Up on DMXzone.

Linked Style within the Cascade

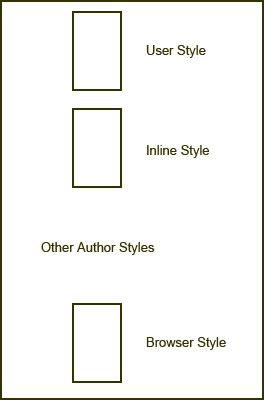
As mentioned in previous articles, there are three groups of style sheets: Browser, User, and Author styles. Browser styles are those styles that are defaults provided by the Web browser. If you don’t apply a style to some element, the default browser styles come into play. Browser styles take the least precedence over other styles.

On the other side of the fence, there’s user style, which is style created by a user. This is typically done for those individuals with accessibility needs that require they have high contrast or large fonts. User styles are typically the most powerful of all, due to the fact that they were intended for this kind of special need. In the middle we find the author styles, which are the styles we as authors create for our pages. Author styles include inline style, which controls the style of one element; embedded style, which controls the style of one document; and finally, linked style – the holy grail of CSS.

So why would I call linked style “the holy grail” of style sheets? Well, there are plenty of reasons. Let’s take a look at some of them.

Read More

CSS From the Ground Up: Embedded Style

In the past few articles, I’ve been discussing various forms of style sheets and how you can use Dreamweaver to create and work with them. As you’ve read along, you’ve noticed that I’ve been describing what is known as the “Cascade” within CSS. This is one of the primary concepts of CSS that helps us create a hierarchy of application for our styles.

In this article, the focus is on embedded style. While many readers will have likely used embedded style at some point, some might not know about how embedded style works within the Cascade. Some readers might also know when and where to decide to use embedded style and what the problems with using it as much as what the benefits are.

Read More

CSS From the Ground Up: Inline Style

Inline Style

Used in Dreamweaver for some time to manage the Draw Layer feature, inline styles play an important role within the Cascade. Because inline styles are applied to a single element only, this gives designers an unambiguous, precise ability to hone in on styling that one element. But that level of control also carries a price, as you’ll soon find out.

In the first two articles of this series, Browser Styles and User Styles I described how browser styles and user styles can be considered opposite ends of the application hierarchy that is the Cascade. Browser styles are at the bottom-most level, and user styles are at the top-most level (Figure 1).

Figure 1:  The hierarchy so far: User styles dominate the Cascade, browser styles are at the bottommost level. Inline style is more powerful than other author styles and browser style, but can be overridden by user style.

Read More
Newer articles Older articles