Create real-time image effects on your web page with Flash Image Enhancer. Use rounded corners, borders, drop shadows, blur, grayscale and mouse over effects like an image description that slides in!
Flash Image Enhancer Manual
Create real-time image effects on your web page


Applying the Flash Image Enhancerextension – Creating a Gallery
Introduction
In this tutorial we're going to create a gallery like displayed below:
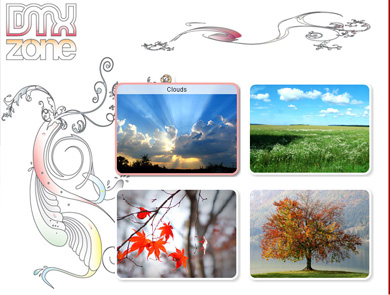
Gallery with rounded corners, shadows, text effects and links.
If the user goes over the image, the border color will change and if he presses on it a larger version of the image will appear in a new window.
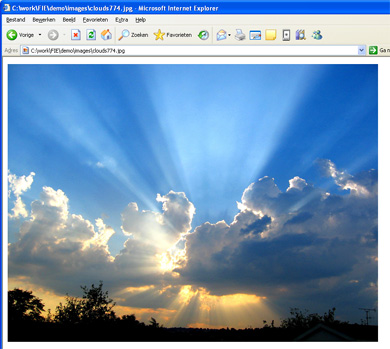
Larger versions of the images will be displayed in a new window.
1. Before you begin
Make sure you've read the previous tutorials.
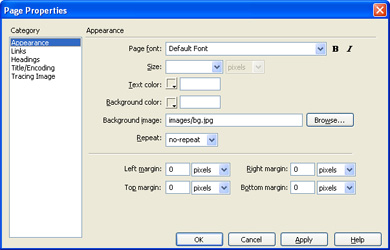
2. Creating the background
We create a basic page in Dreamweaver and we add a
background image. We set all margins to zero
3. Adding the images
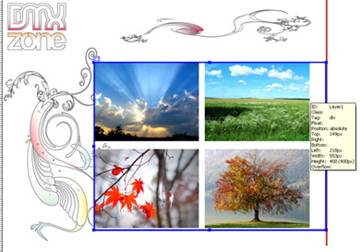
We add four images to the page, in this case we've
drawn a simple layer using the Draw Layer option in Dreamweaver

We've positioned the images inside this layer and we've given them a H Space of 10 using the property inspector of Dreamweaver. This creates the following
overview
4. Setting the options in the General tab
Now we need to set the following options in the general tab (of course you can experiment with other options). Each Image will get another Name by default, this is important, if you change the Name make sure each one is unique.
Use Advanced Layer Popup to display your enhanced images in a popup window
using Flash Image Enhancer and Advanced Layer Popup, watch the video to
see how it's done.
You can also add a link to the big version of the image using the Browse… button next to the Link field. Set the Target to _blank, so it will open in a new window (this will result in a more basic popup window).
We'll set the Corner Radius to 15. We enable the Border, set the Size to 4 and set the Color to white so it won't be too obvious when the mouse is not over the image. We enable the Drop Shadow, set the Size and Distance to 4 and set the Color to gray (0x999999).

Effect settings of the General tab
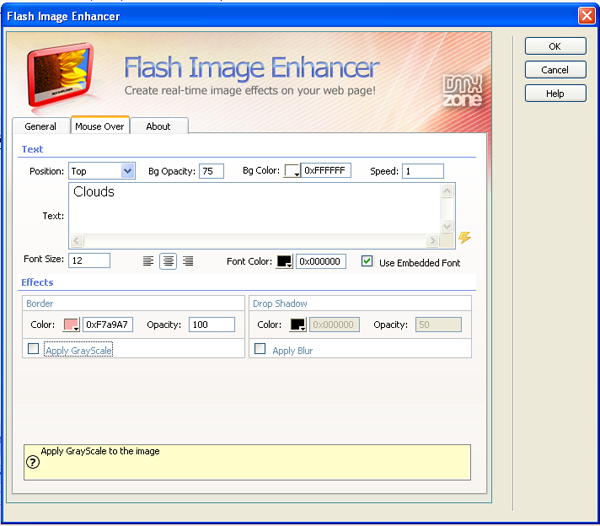
5. Setting the effect options in the Mouse over
tab
We'll add a Text to each of the images using the
default options. Then we set the Color of the Border effect to light
red (0xF7A9A7).
6. Final steps
Make sure you've applied the Flash Image
Enhancer to each of the images and the result should be as displayed below.
Save your files, upload them to your server (including the script library) and
the result should like below.
George Petrov
 George Petrov is a renowned software writer and developer whose extensive skills brought numerous extensions, articles and knowledge to the DMXzone- the online community for professional Adobe Dreamweaver users. The most popular for its over high-quality Dreamweaver extensions and templates.
George is also the founder of Wappler.io - the most Advanced Web & App Builder
Comments
Be the first to write a comment
You must me logged in to write a comment.