We created a form containing a text input and a file input. We want to send both to the database.
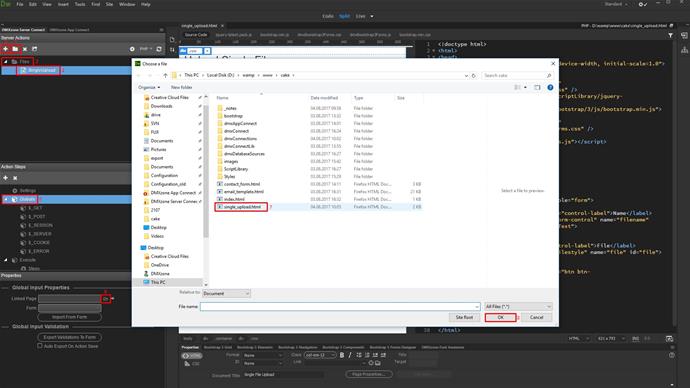
First, create a new server action. We'll put it inside a folder, as it is easier to maintain all the server actions later (1-4). Import form fields into the globals list. Click globals (5). Browse to your page (6-8).
Import the page (1-3).
Right click steps and add a database connection (1-3).
Set up your database connection or load it from the dropdown if you have already defined it (1-2).
Right click the database connection and add file upload (1-3).
Click the dynamic data button to select the upload field (1). Under globals, post, select your file field (2-3).
Select your upload folder (1-3). You can use a naming mask for your files if you like. You can see the available options in the help popup that appears (4). We don't need to rename our files, so we just leave the field empty. Setup the rest of the options, like: replacing spaces, accented characters, non ASCII characters from the file name (5). Choose whether the files should be overwritten or not. If this option is not enabled, the duplicate filename will be made unique by a specific suffix (6).
Right click the file upload step and add database insert (1-3).
Setup the insert options (1). Select database table where you want to insert the uploaded file info (2-3).
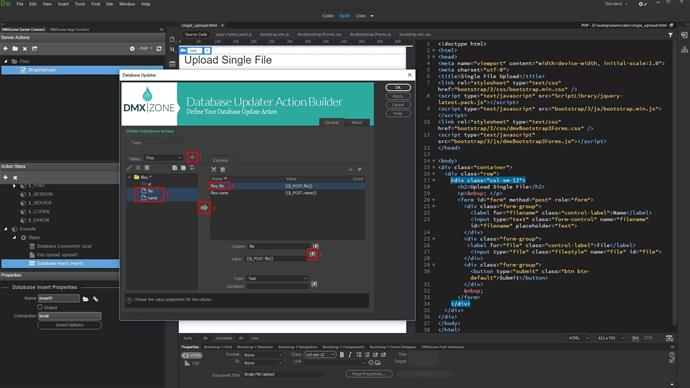
Add the selected database table (1). Select and add the columns where the data should be inserted (2-3). Click the database column where you want to inserted the uploaded file name (4). Click the dynamic data picker button to select the value (5).
Under the file upload step select "name". This is the uploaded file name. If a renaming mask is used, this will be the renamed file name (1-2).
Select the column where the text field data should be inserted (1). Click the dynamic data picker to select its value (2).
The text field value is located under globals, post (1-2). Click ok when you're done (3).
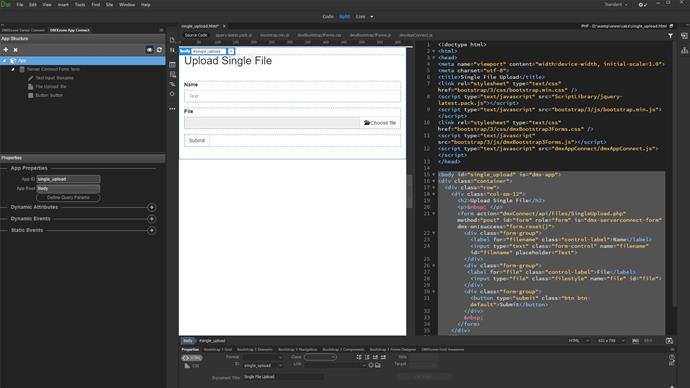
Save your server action (1). Open the app connect panel (2).
Add app connect to your page.
Select your form in the app connect tree (1). Change its handler to server connect.
Select your single upload server action in the action field (1-3).
You can clear the form fields on successful upload. Add a new dynamic event (1). In server connect menu, select success (2-3).
Click the dynamic event picker button. Under form, select reset (2-3).
And we are done!
That's how easy it is to upload a file and store its name into a database.


Comments
Be the first to write a comment
You must me logged in to write a comment.