Before you begin
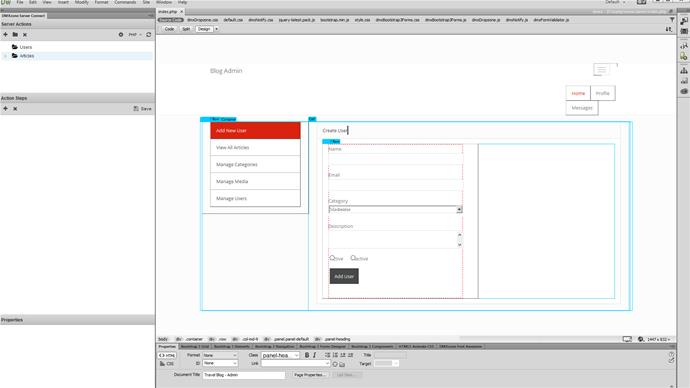
We created a form, containing several fields, using the Bootstrap 3 Forms Designer extension. We added client side validation to this form but we want to make sure that the email of the user which we will be adding through this form, does not exist in our database.
Create a server action
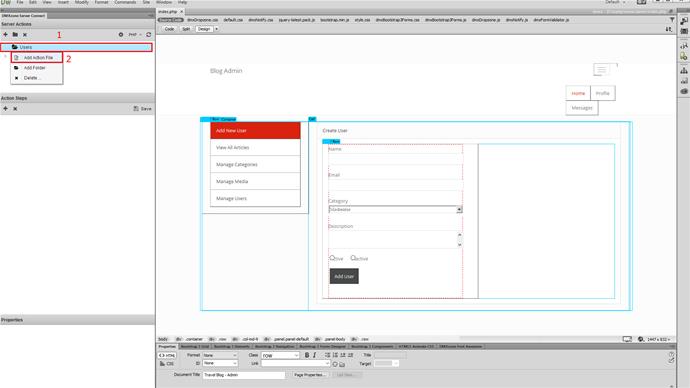
In order to add a server action, right click users (1) and click add action file (2).
Add a server action file name
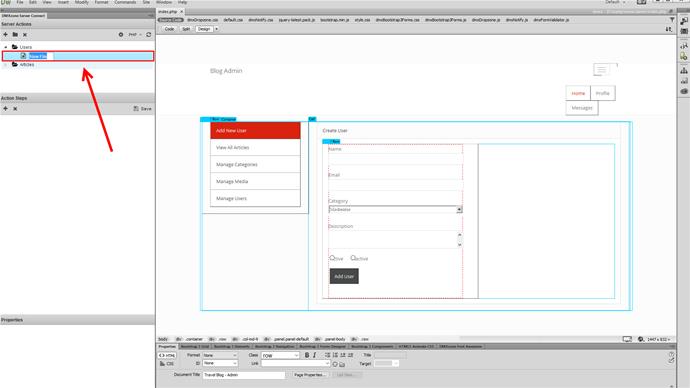
Don't forget to name your server action.
Import form variables
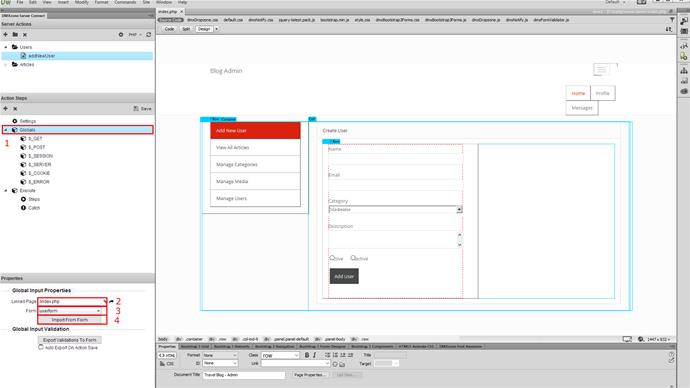
Now, click globals (1) and import form variables. Open the page, containing your form (2), select your form (3) from the dropdown and click the import button (4). Your form variables, imported with their validation rules, will appear under the post variables list.
Add a database connection
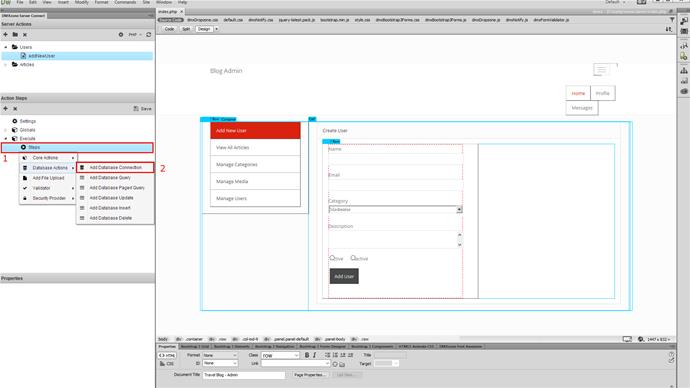
Right click steps (1) and click add database connection (2).
Select your database connection
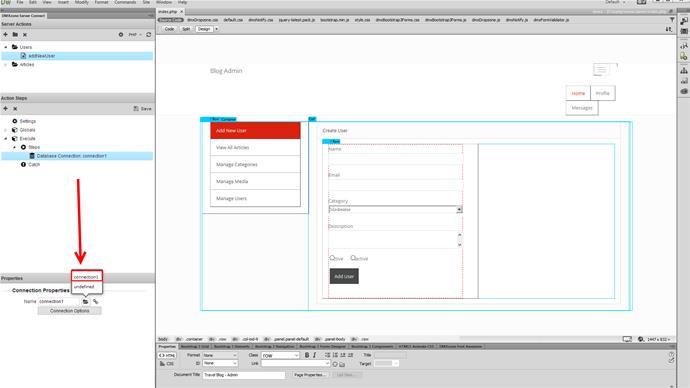
Select a database connection, from the list or create a new one.
Add validation
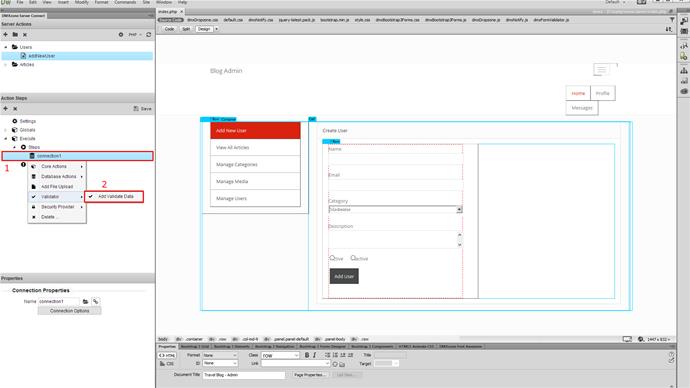
Now, right click the database connection step (1) and select add validate data (2) from the validator menu.
Name the validation step
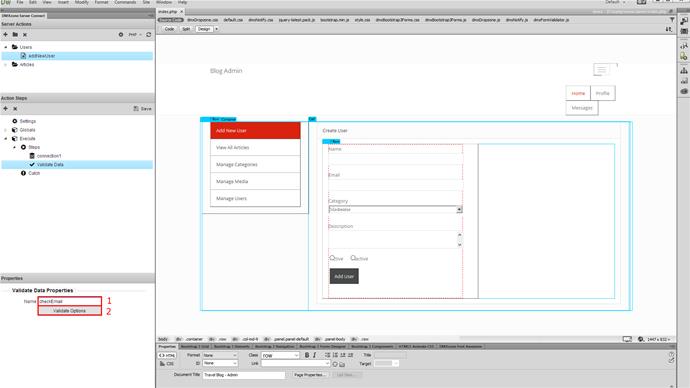
Add a name for this validation step (1) and click the validate options button (2).
Add data fields to be validated
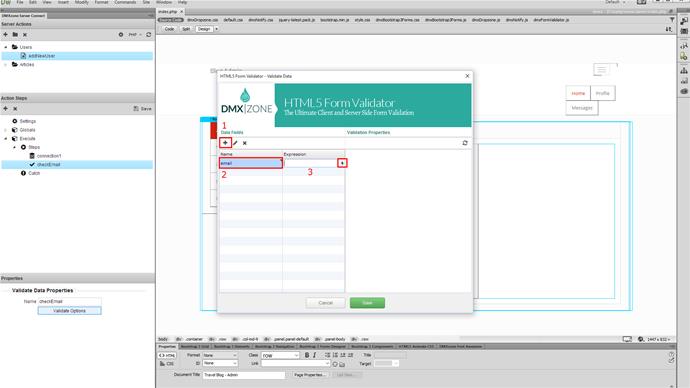
Add a new validation (1), change its default name, if you wish by double clicking it (2). Select the dynamic data button (3) in order to setup the expression, that we want to validate.
Validate the email input value
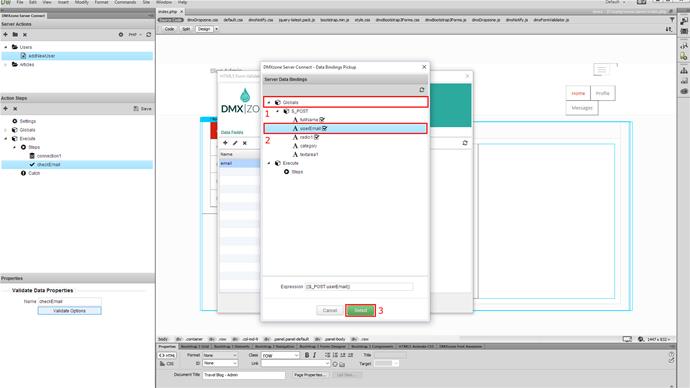
We want to validate the email input value, against our database. So expand the globals list (1) and under post select the email input variable (2). Click the select button (3).
Link the form field
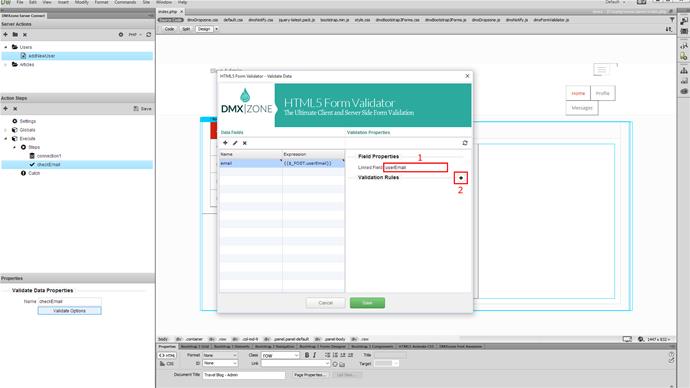
Then, we link the form field to this validation. Just enter the form field name here (1). Linking a field with the validate data step means that we tell the validator that the error messages, related to this step, should be displayed below the linked field. Now, click the add new validation rule button (2).
Check if record exists
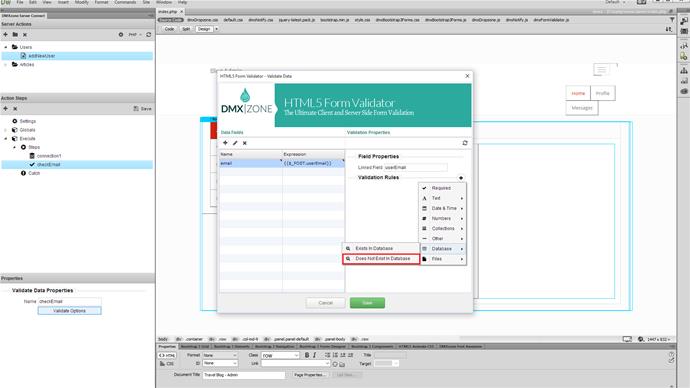
We want to make sure, that the record doesn't exist in the database already so we select does not exist in database.
Customise the source
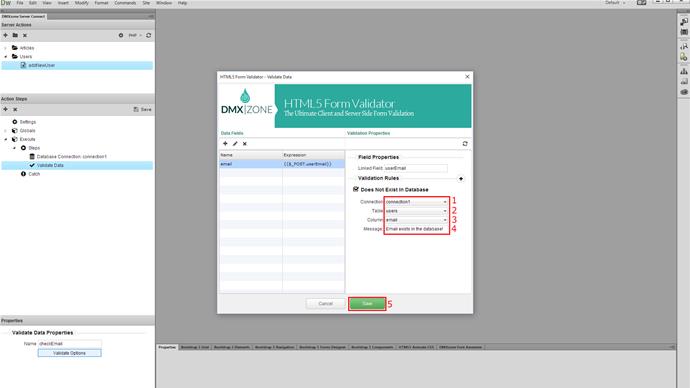
Now, select your database connection (1), select the database table, which you want to validate field value against (2) and select the column, containing the values that you want to check (3). In our tutorial, this is the email column. You can also edit the default error message (4) that will be shown if the record exists in the database. Click the save button (5), when you are done!
Add insert record step
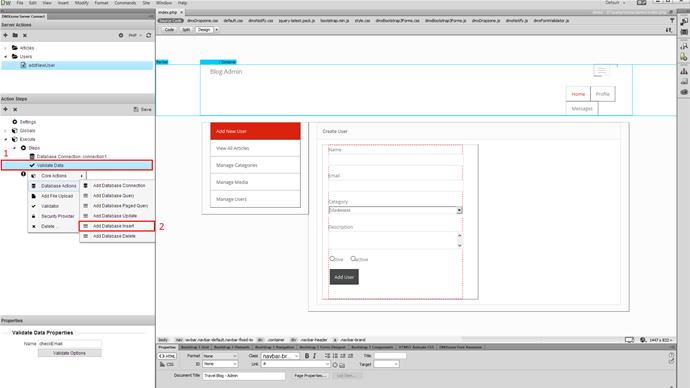
Now, you can add your insert record step, which will be only executed if the validation step is passed. Right click validate data (1) and select database insert (2). Setup your insert record step and create a server action executor. You already know how to setup these from our previous tutorials, so we won't show this again.
Save and preview
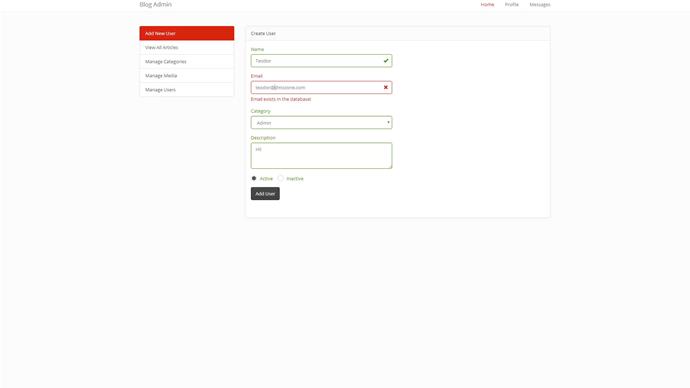
You can see that the client side validation, goes just well when all of the form fields are properly filled in. As soon as we click the submit button and the server action runs the validate data step checks the database for the email, entered in the email field. If such an email exists the server action stops and an error message is displayed below the field. The insert record step won't run, until you fill an email, that doesn't exist in the database.
Comments
Be the first to write a comment
You must me logged in to write a comment.