Before you begin
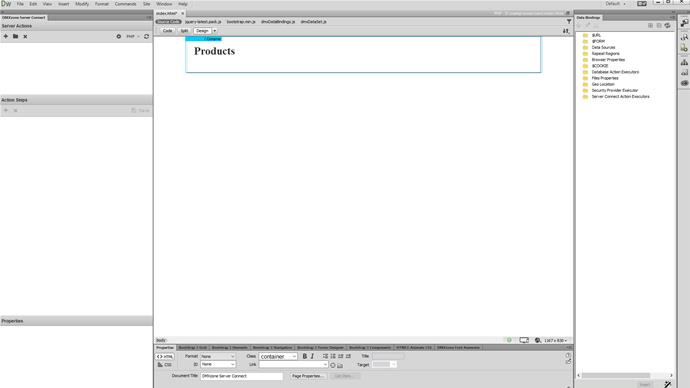
The first thing we need to do is to create a server action file. In order to have our server action files well organized, we can put them in different folders.
Create a folder
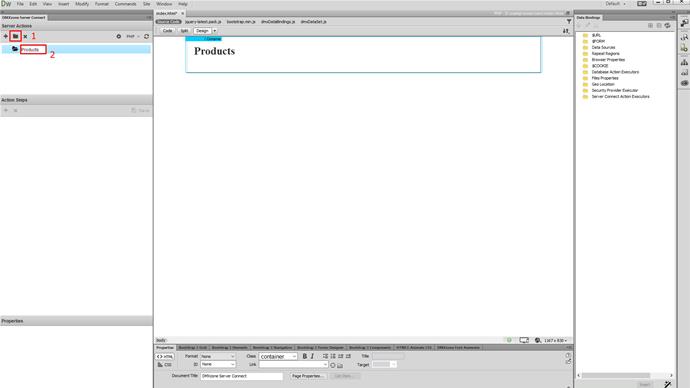
Let's create a folder, named Products. Click on the folder icon (1) and add a name (2).
Add action file
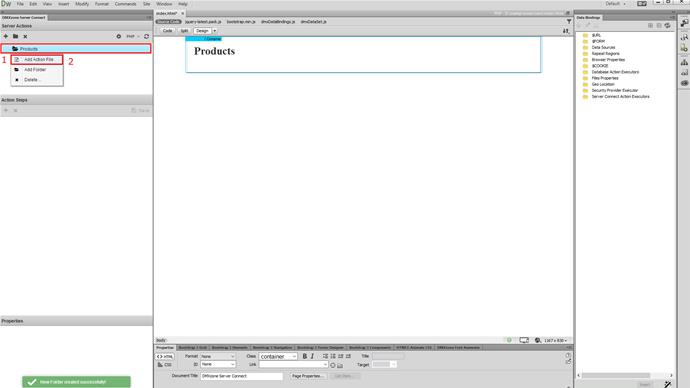
Right click the folder, that we've just created (1) and choose "add action file" (2).
Add action file name
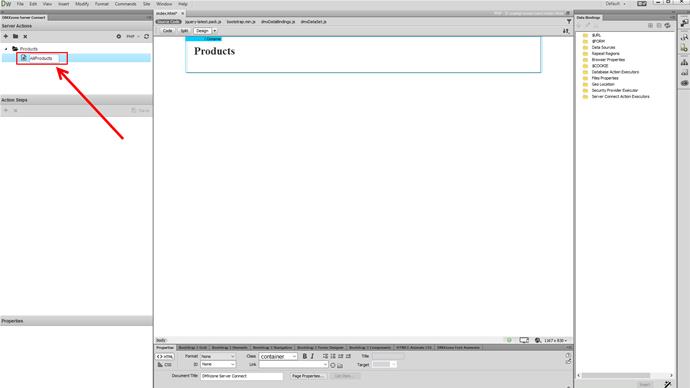
We call it - all products, as we'll use this action file to list our products.
Create a database connection
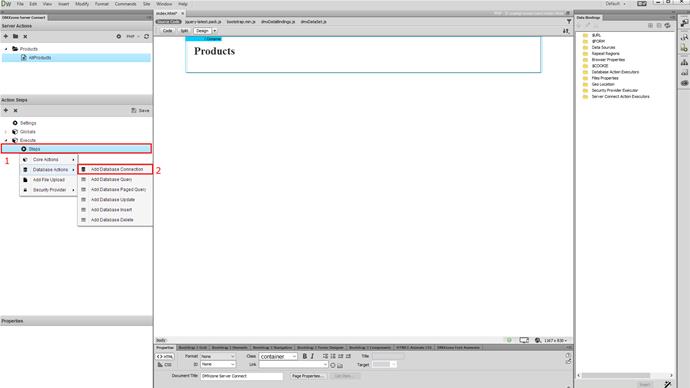
Right click steps (1), for this action file and select Add Database Connection (2) from the database actions menu.
Add a connection name
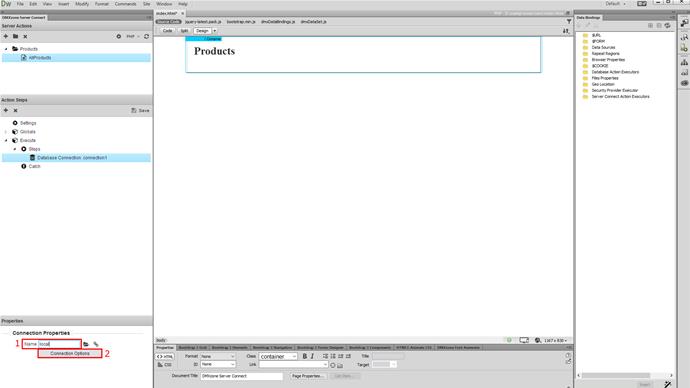
Add a name for your database connection (1) and click the connection options button (2).
Setup the connection
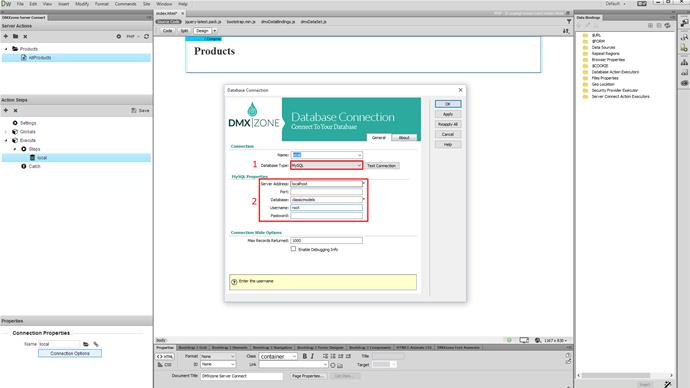
Select your database type, from the dropdown. We select mySQL as this is our database type (1). Then, enter your database properties (2) address, database name, username and password. Click OK, when you're done.
Save your action file
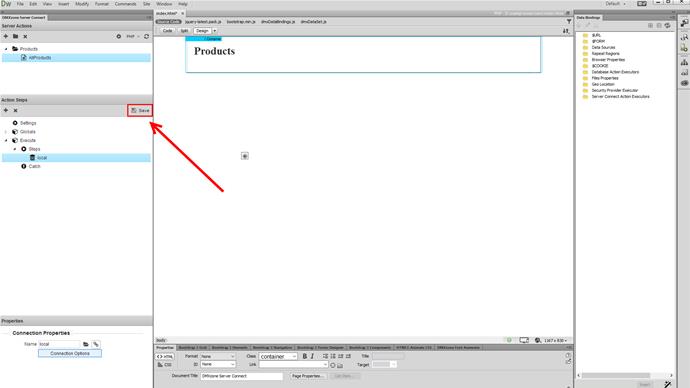
Make sure to save your action file before we continue to the next step.
Create a database query
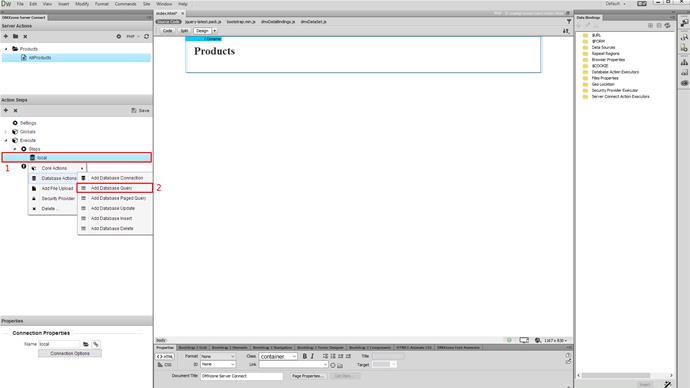
Now, after we've successfully set up our database connection we need to create a database query. Right click the database connection step (1) and under the database actions, select add database query (2).
Add a name and access the query options
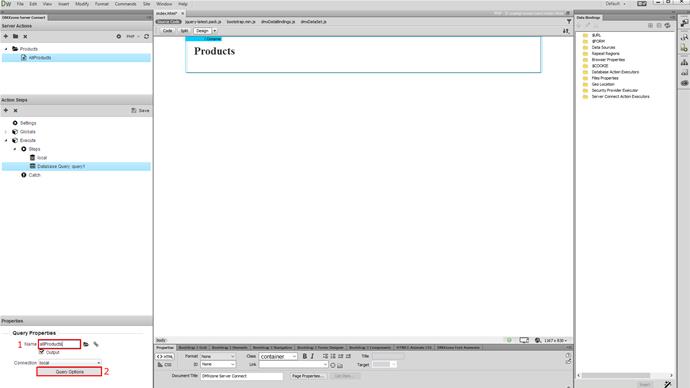
Add a name for this query (1) and then click the query options button (2).
Customize the query
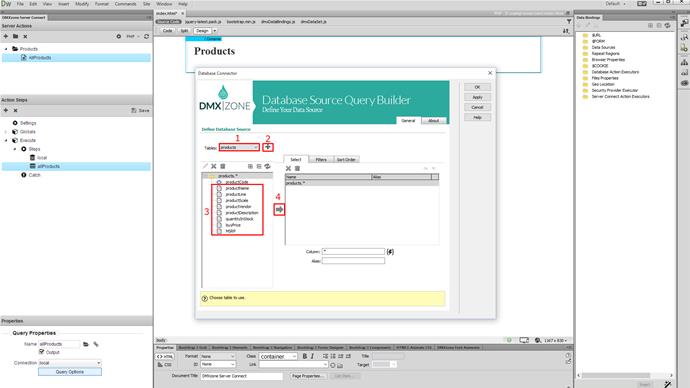
Select the database table (1), that you want to use, from the tables dropdown. We select our products table (1). And then add the selected table (2) to the query. Select which of the database table columns (3) you'd like to use and add the selected columns (4) to the query. We selected all columns. Click the Filters tab, if you want to filter your query. We don't want to do that now, as we'd like to list all of our products on the page.
Columns sorting
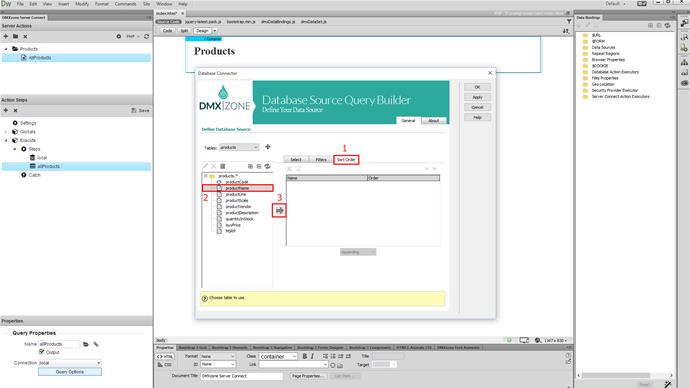
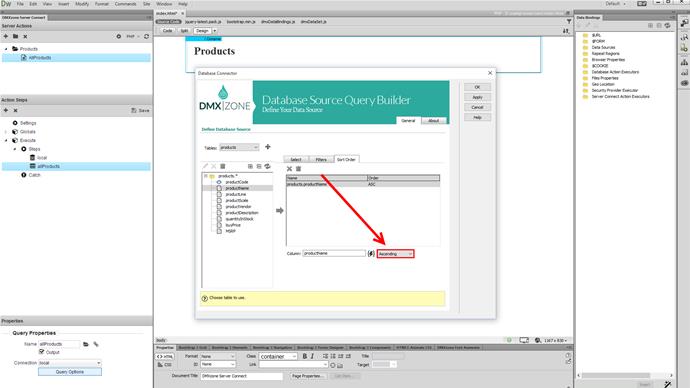
Now, go to the sort order tab (1). Select the column (2), which you want to sort your query by and add it to the sort order list (3).
Choose sort order
Now, choose the sort order - ascending or descending. For our tutorial we select ascending. Click OK, when you're done.
Save your action file
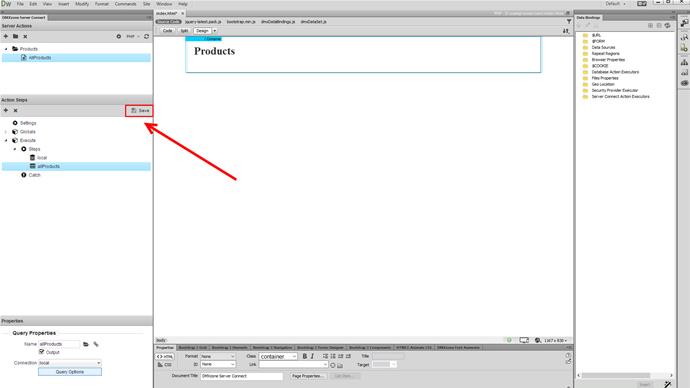
Before we continue to the next step, make sure that your server action file is saved.
Add new server action executor
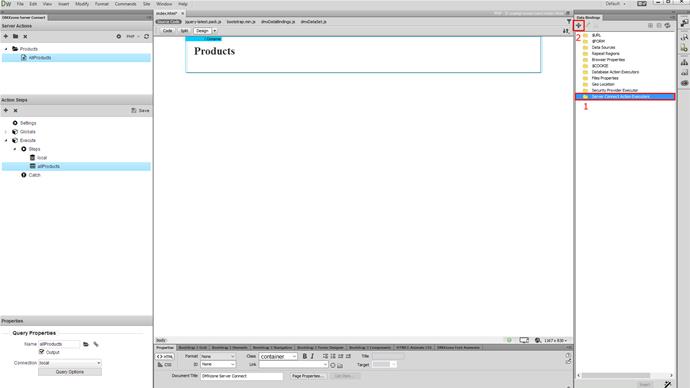
Now, in the HTML5 Data Bindings panel, select server connect action executors (1) and click the add new button (2).
Setup the server action executor
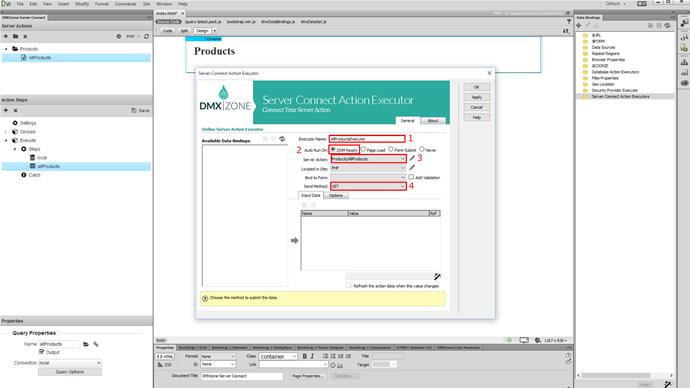
Here, we are going to setup our server action executor, which contains our database queries. Enter a name for the server action executor (1), select to auto run the executor on DOM ready (2) and choose your server action file, from the dropdown (3). Select the send method - get or post. We leave this option to its default - GET (4). Click OK, when you're done.
Create a repeat region
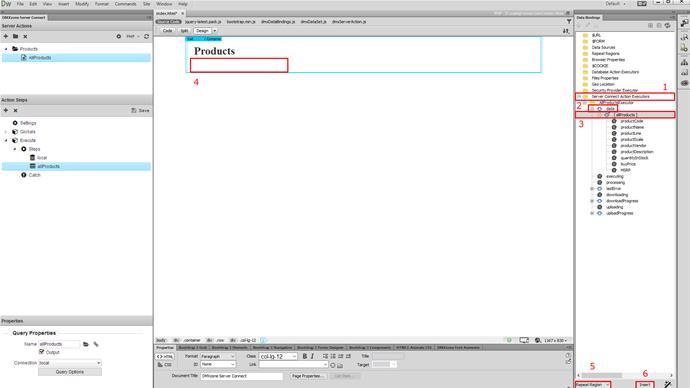
Expand the executor (1) that we've just created. You will find your queries under the element, called - data (2). And here is the query, that we created. You can expand it in order to see the available data bindings. Now, let's create a repeat region, which will list the data on our page. Select the query name (3), click on your page, where you want to place the repeat region (4), select repeat region from the bind options dropdown (5), and click insert (6).
Add data inside the repeat region
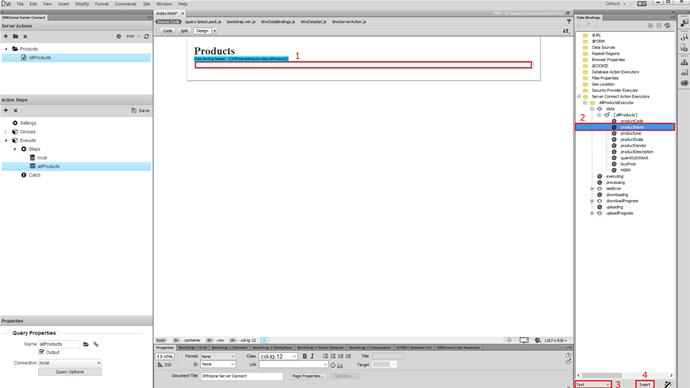
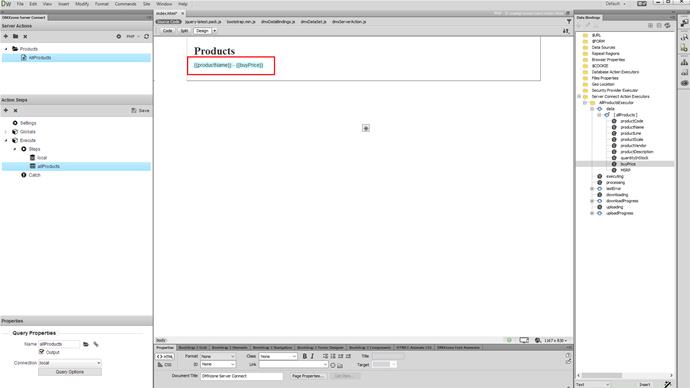
Our repeat region has been successfully created. Now let's add some data inside it. First, click inside the repeat region (1), select the data bindings, which you'd like to display (2), choose text from the bind options dropdown (3) and click the insert button (4). You can add as many bindings, as you need.
Save and preview
Save the page, when you are done and let's preview the results!
Live preview
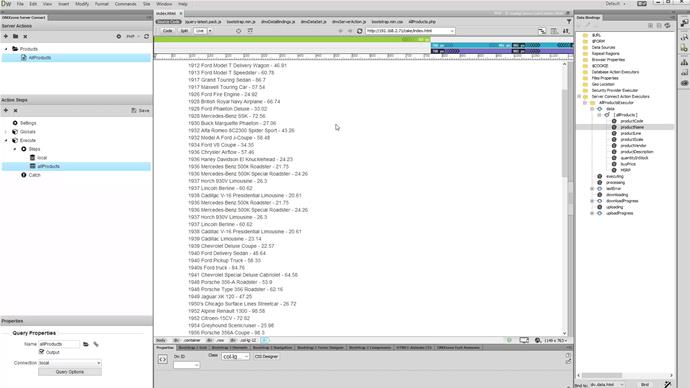
The data loads really fast on the page. You can see all our products, from our database table, sorted by name. That's how easy it is to connect to your database and list your database data on the page, using DMXzone Server Connect, HTML5 Data Bindings and Database Connector.
Comments
Be the first to write a comment
You must me logged in to write a comment.