Before you begin
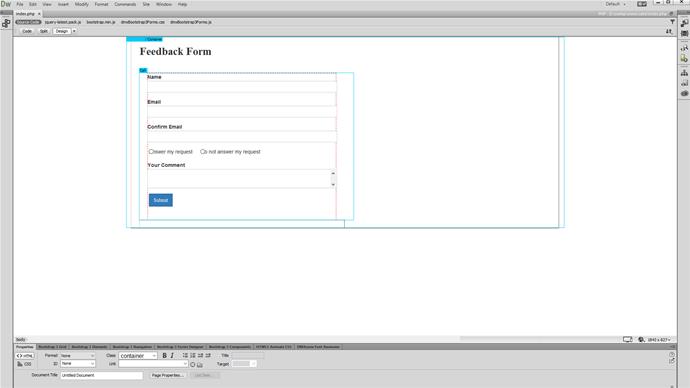
We created a simple form with several fields. In this case we used the Bootstrap 3 Forms designer extension, but you can create any HTML form.
Launch the HTML5 Form Validator
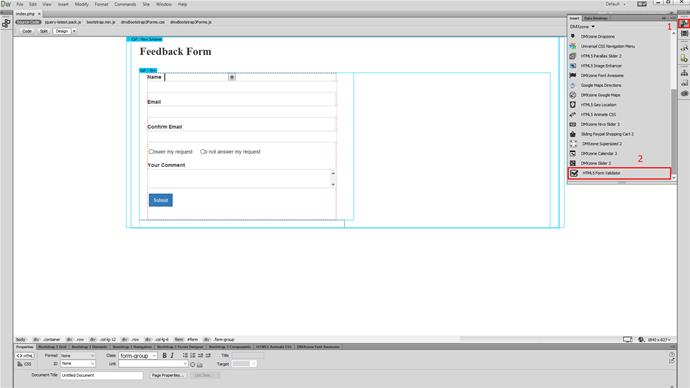
Open the insert panel (1) and click the HTML5 Form Validator icon (2).
Enable form validation
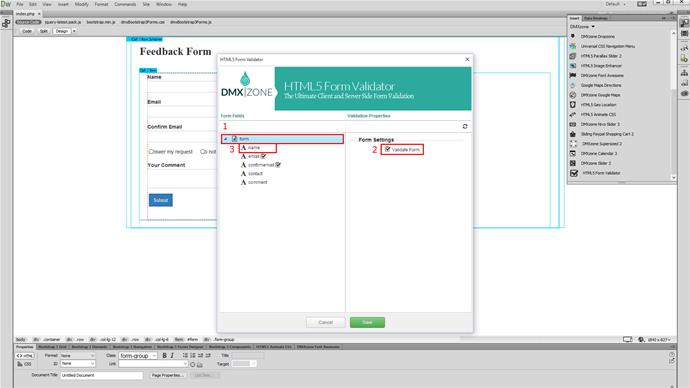
Within the form fields panel, you can see your form with the form fields. First, click your form (1) and check the validate form checkbox (2) in order to enable the validation for this form. Then, click the first of the form fields (3).
Add validation rules
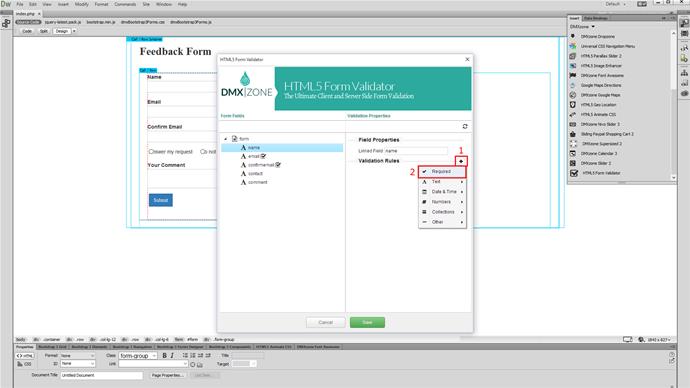
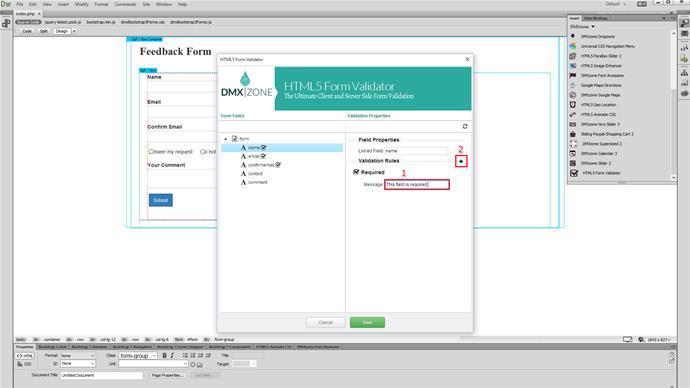
Click the add new validation rule button (1) and the first rule that we add to this field is - required (2) in order for the form to be submitted.
Customize the error message
You can customize, the default error message (1). The error message appears, when the validation rule is not met both when typing and on submit. We need to to make sure, that this field accepts only letters so click the plus button (2).
Add letters only rule
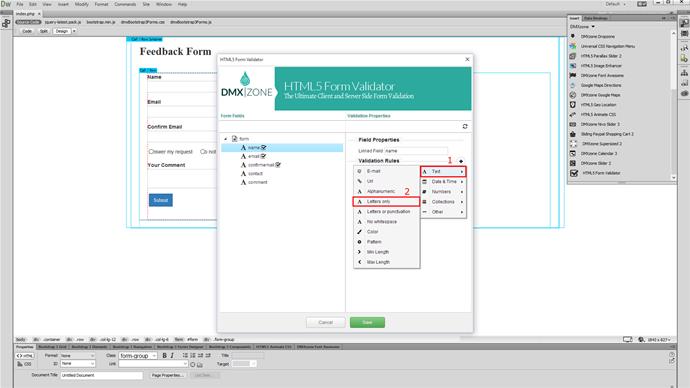
Now, open the text rules menu (1) and select letters only (2). Again, you can customize any of the default error messages.
Add validation for the email field
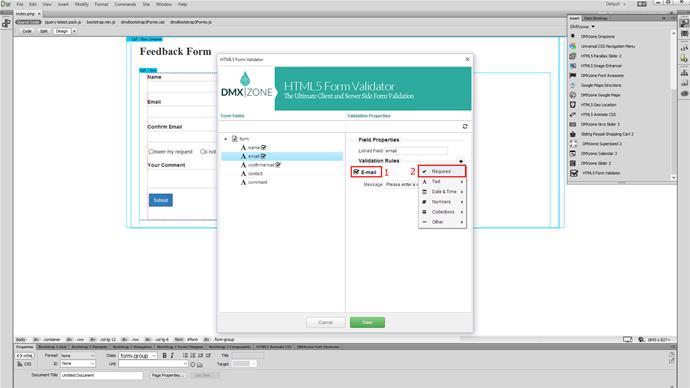
Our next field is an email field, where the user is supposed to enter his email. You can see, that there's already a validation rule (1) applied to this field. That's because we've already set the field type to email, when we inserted the form. HTML5 Form Validator is smart enough and it converts the HTML5 field type to validation rules. We only need to add a required validation rule (2).
Add validation for the confirm email field
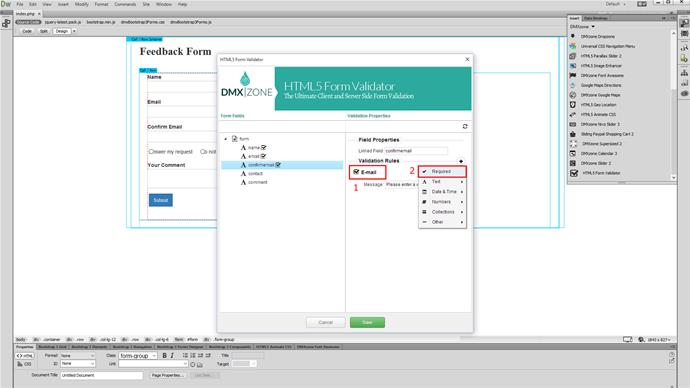
As you can see, the email validation (1) is also applied here as this field also uses the email type. We only need to add a required validation rule (2).
Make email fields values match
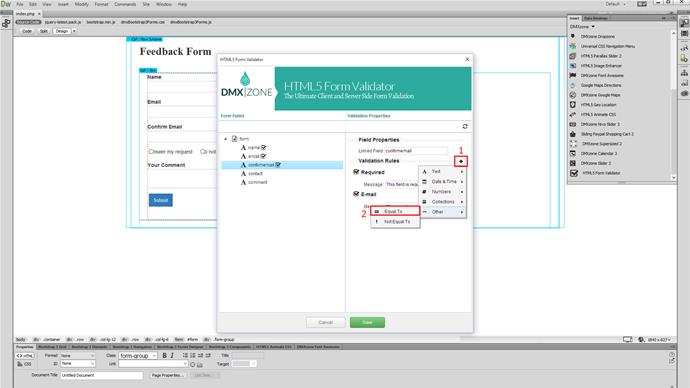
We need to make sure that both of the email fields values match. So under the validation rules (1), select equal to (2).
Customize the value field
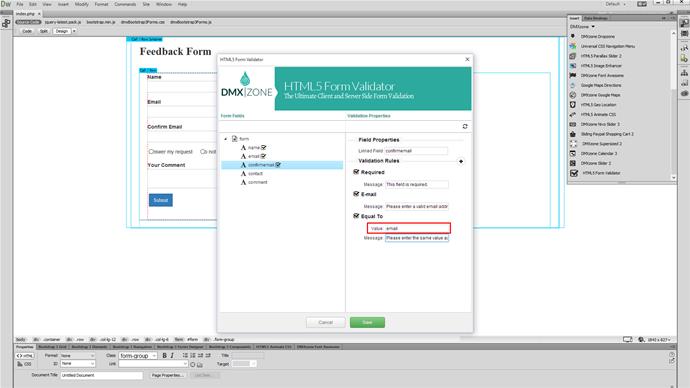
In the value field we enter the name of the field that we want to compare this field value to. We want to check if this field's value is equal to the email field value. So we enter email.
Add required for contact and comment
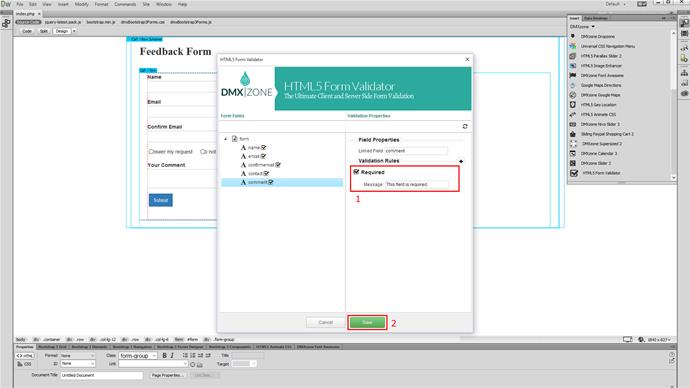
For the next two fields - a radio group and a text area, we add only a required rule (1). Click save (2) when you're done.
Save and preview
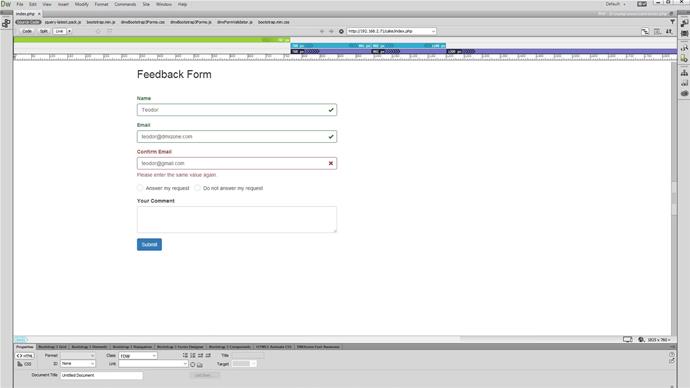
You can see that the validation works both, when typing and on form submit. When we enter a wrong value the error messages appear under the form field and also the field is then colored in red. When the validation is OK the field becomes green.
Comments
Be the first to write a comment
You must me logged in to write a comment.