Feed Genie Support Product Page
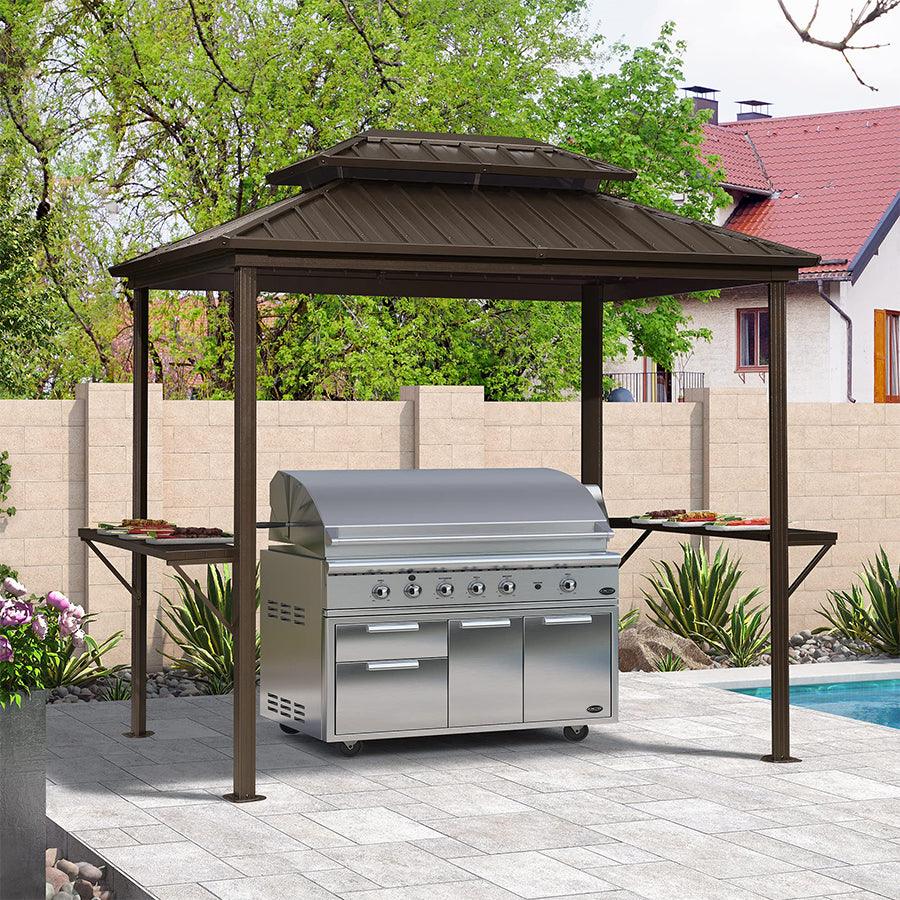
Unlock the Secrets to Effortlessly Assemble Your Dream Grill Gazebo!

Shared 12 Jun 2025 14:55:19
1
likes this idea
12 Jun 2025 14:55:19 User posted:
Unlock the Secrets to Effortlessly Assemble Your Dream Grill Gazebo!
A grill gazebo is more than just a shelter for your grill; it's a sanctuary for outdoor cooking enthusiasts. This unique structure enhances your grilling experience by providing shade, protection from the elements, and a designated space for all your grilling activities. However, the benefits of a grill gazebo can only be fully realized when it is properly assembled. Many people face challenges during assembly, from missing parts to misaligned components, which can lead to frustration and a less-than-stable structure. That’s why following detailed assembly instructions is crucial. This guide will walk you through the entire process, ensuring that your grill gazebo is both functional and durable.
Preparing for Assembly
Before diving into the assembly of your grill gazebo, it’s essential to prepare adequately. Start by selecting a suitable location in your yard or patio—ideally, a flat surface away from overhanging branches or other obstructions. Gather all necessary tools, which typically include a wrench, screwdriver, level, and possibly a drill. Having everything on hand will save time and reduce frustration later. Next, review the assembly instructions thoroughly. This may seem tedious, but familiarizing yourself with the parts and assembly sequence will make the process smoother. Also, check the packaging for any missing pieces; it’s easier to address this before starting than to halt assembly halfway through. Lastly, if you have a friend or family member who can assist, that can significantly ease the workload and help you avoid common pitfalls.
Step-by-Step Assembly Instructions
Now that you're prepared, let’s dive into the step-by-step assembly of your grill gazebo. Each step is designed to be straightforward, ensuring that you can follow along easily.
Step 1: Assemble the Base
The first step in building your grill gazebo is to create a solid foundation. Begin by laying out the base pieces according to the instructions, ensuring that all parts are accounted for. Use a level to check that the ground is even; if necessary, make adjustments to the surface. Secure the base using the provided anchors or stakes, which will help stabilize the structure. A sturdy base is crucial, as it will support the entire gazebo. Remember, this step sets the tone for the rest of your assembly, so take your time to ensure everything is aligned correctly.
Step 2: Construct the Frame
With the base securely in place, it’s time to construct the frame. Begin by connecting the vertical posts to the base, ensuring they are well aligned and secure. It's important to check each connection for stability—if the frame wobbles, the entire gazebo could be compromised. As you work, double-check that all screws are tightened and that the frame stands straight. My friend once rushed through this step and ended up with a crooked gazebo, which took hours to fix! So, patience is key here.
Step 3: Attach the Roof
Next, you’ll attach the roof structure. This step is crucial for protecting your grill and cooking area from rain and sun. Begin by securing the roof panels to the frame, starting from one side and working your way across. Make sure to follow the instructions regarding the overlap of the panels to ensure proper drainage. It’s also wise to check weather forecasts during this step; if rain is on the way, you’ll want to make sure everything is secured tightly to prevent water damage.
Step 4: Adding Accessories
Once the roof is in place, you can enhance your gazebo with optional accessories. Consider adding side panels for extra protection or shelves for organizing grilling tools and ingredients. These features not only improve functionality but can also personalize your gazebo to fit your style. When my neighbor added lights and a bar area to his gazebo, it transformed into an outdoor oasis for entertaining guests!
Final Checks and Maintenance Tips
After assembly, perform a thorough inspection to ensure everything is correctly secured. Check for any loose screws or unstable parts and address them immediately. It’s also a good idea to test the stability of the structure by gently shaking it—if it feels wobbly, re-check your assembly. Maintenance is key to prolonging the life of your grill gazebo. Regularly clean the roof and frame to prevent debris accumulation, and inspect for rust or wear, particularly if you live in an area with harsh weather conditions. Applying a protective sealant every couple of years can also help maintain its appearance and extend its lifespan.
Key Takeaways on Assembling Your Grill Gazebo
Assembling a grill gazebo may seem daunting, but with the right preparation and guidance, it can be a rewarding experience. By following these detailed instructions, you can create a beautiful and functional outdoor space that enhances your grilling adventures. Remember to take your time, enjoy the process, and soon you’ll have a sturdy gazebo that will serve you well for many barbecues to come. Happy grilling!