Active Slideshow Online Help
Bring your photos to life in an amazing Flash slideshow. This extension uses amazing effects from the famous director, Ken Burns. The slideshow slowly zooms in and pans across your photos, bringing your photos to life. Furthermore, you can add your favourite sound or music track, making it the most enjoyable slideshow ever!
This manual explains the features and how to use the Active Slideshow extension.


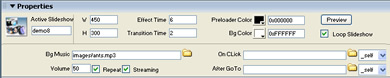
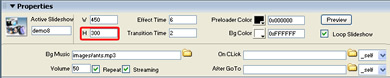
In this chapter we're going to edit the properties of the slideshow using the property inspector of Dreamweaver. Click on the Flash object in the design view to display the properties of the slideshow. Below is a screenshot of the property inspector.
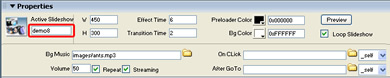
The name of the XML file is displayed at the left side of the screen, this is also the Flash ID name.
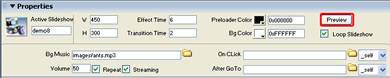
You can view your changes by pressing the preview button;
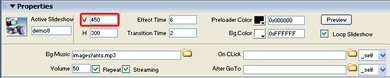
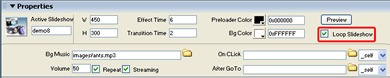
You can also change the width and height of your album dynamically by changing the width and height fields;
Let change the Effect Time to a higher value;
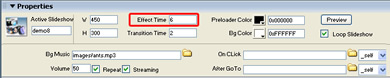
As you can see your photo's and the Ken Burns effect lasts longer then normal.
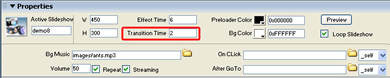
You can also adjust the Transition Time to change the time between the alpha fading between the two photos.
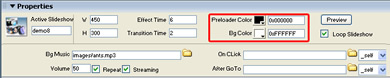
Let's change the Preloader Color to blue and the Bg Color (background color)to red.
If you want to repeat your slideshow after it's completed, please check the Loop Slideshow option.
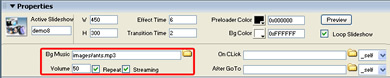
You can also change the music that is plays during the slideshow by changing the name of the Bg Music property. You can adjust the Volume settings and the Repeat option to make your song loop or not. The Streaming option determines if the player should play your music while loading data.
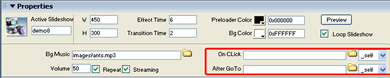
The interactivity options enable you to place a link on your slideshow. The On Click enables you to refer to a link after the user has clicked on the slideshow. The After GoTo enables you to go to a link after the slideshow is finished. Note: This option is only enabled when the Loop Slideshow option is disabled. You can choose the file that you want to link to by selecting the Browse… button. You can choose the target in the dropdown behind the Browse… button.
This concludes our tutorial. We've shown you how to use our extension and we hope you'll enjoy it!
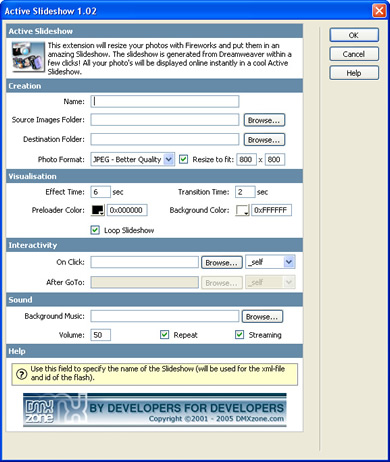
In this paragraph we give a short overview of the features of the Active Slideshow extension;
- Name: Use this field to specify the name of the slideshow.
- Source Images Folder: The source images folder specifies the source folder of your photo's. This can be any folder on your local hard drive or network drive;
- Destination Folder: The Destination Folder specifies the folder where the slideshow and the resized images are stored. You need to upload this folder to you web server;
- Photo format: adjust this value to determine the quality vs. image size options for the photo's;
- Resize to fit: enables you to resize the images of your album to the specified size
(width x height). Because the Ken Burns effect uses a zoom effect keep in mind that you make these larger then the actual Flash movie.
- Effect time: determines the time that a slide is fully visible and that the Ken Burns effect is being used
- Transition time: specifies the time between slides with the alpha blending effect.
- Preloader Color: If you'd like you can change the color of your preloader. You can use the color picker or enter a hexadecimal color value.
- Background Color: Use this property to change the background color. You can use the color picker or enter a hexadecimal color value.
- Loop Slideshow: If you want to repeat your slideshow after it's completed, please check the Loop Slideshow option.
- Background Music: Enter the path and file name of the mp3 that you want to use or use the browse button to add music to your slideshow.
- Volume: Enter the volume to specify the loudness of your mp3.
- Streaming: Enable this checkbox to allow the playing of music while still loading date.
- Repeat: adjust this parameter to determine if your sound should be looped.
- On Click: enables you to refer to a link after the user has clicked on the slideshow. You can choose the file that you want to link to by selecting the Browse… button. You can choose the target in the dropdown behind the Browse… button.
- After GoTo: enables you to go to a link after the slideshow is finished. Note: This option is only enabled when the Loop Slideshow option is disabled. You can choose the file that you want to link to by selecting the Browse… button. You can choose the target in the dropdown behind the Browse… button.
 Working as a developer creating Dreamweaver extensions and designing/programming for the community sites.
Comments
Be the first to write a comment
You must me logged in to write a comment.