Add Swiss Knife Form Validation to your forms in Dreamweaver with the Universal Form Validator PHP! Choose from many predefined validation rules like url, e-mail, dates, credit cards and ranges, apply conditional validation and even Ajax style inline validation! The validation errors and hints can be displayed in great tooltips and input masking can be applied. All fully customizable to your layout and needs! The user input is validated both client as well as server side - so there is no escape!
Universal Form Validator PHP Manual
Add Swiss Knife Form Validation to your forms in Dreamweaver with the Universal Form Validator PHP!


The Basics: Checkout Form Validation with the DMXzone Universal Form Validator
Introduction
In this tutorial we will show you how to add form validation to your simple Checkout form using the DMXzone Universal Form Validator PHP, allowing your users to get immediate feedback on their entries.
How to do it
1. Define your site in Dreamweaver and create
a new page
Create a PHP page and Define your site in
Dreamweaver. You can read more about this HERE.
You should make a page that can be uploaded to your PHP server.
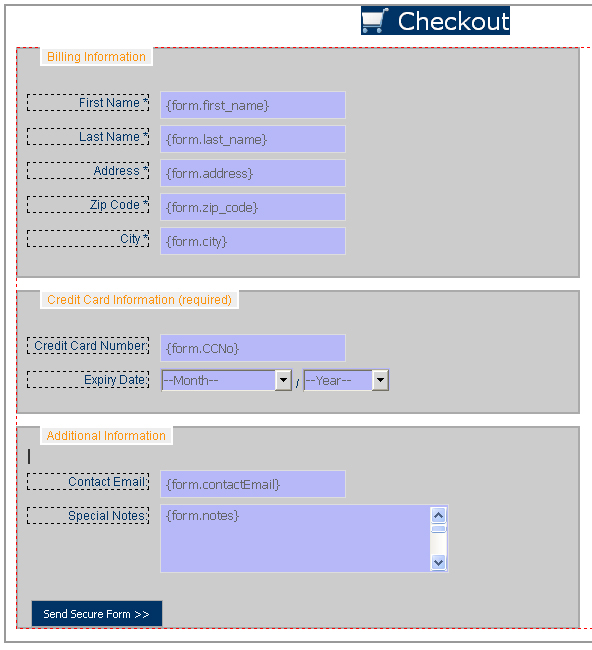
2. Create your Form
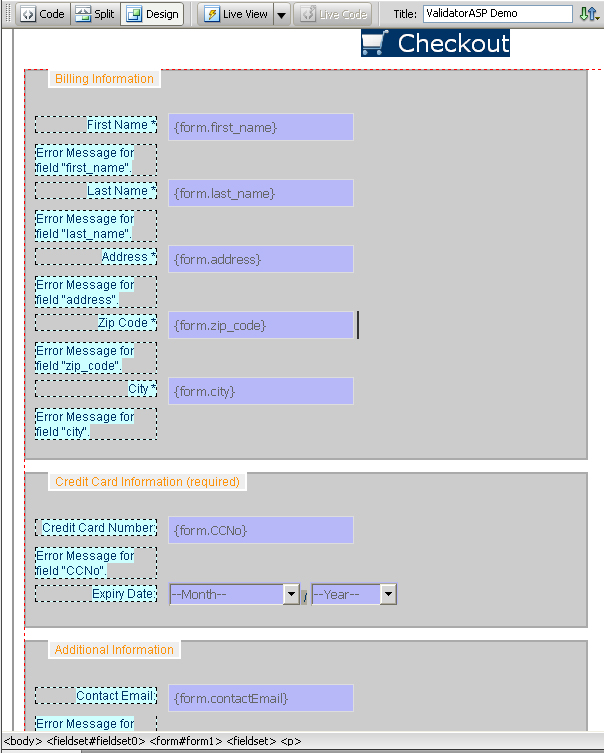
We have created a simple form that looks like this in Dreamweaver:
3. Insert the Server Behavior
Find the DMXzone Universal Form Validator PHP
Server Behavior under the Server Behaviors tab.

Note: Server Behaviors generate server code (PHP) and are executed on the
server side, while Regular Behaviors are just JavaScript functions executed on
the client side.
4. A new popup with the DMXzone Universal Form
Validator PHP server behavior interface appears:
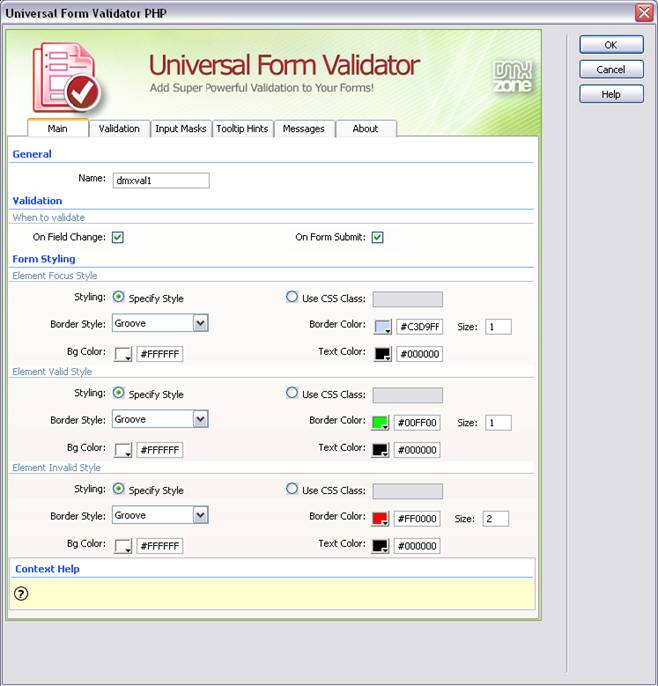
5. Main Settings
Here at the Main tab, under General you have to select a
name for the Validator's instance in the Name field.

Under "Validation" select when you want to validate the field: On
Field Change or On Form Submit. You can also choose both if you
wish. Validating On Field Change will activate the validation when
something is entered in the field and On Form Submit will validate the
field when the form is submitted.

6. Form Styling
Here you have two options. You can style the look of your field by using all
the settings provided or you can attach your own CSS. For this tutorial we will
use the styling available from the dialog.
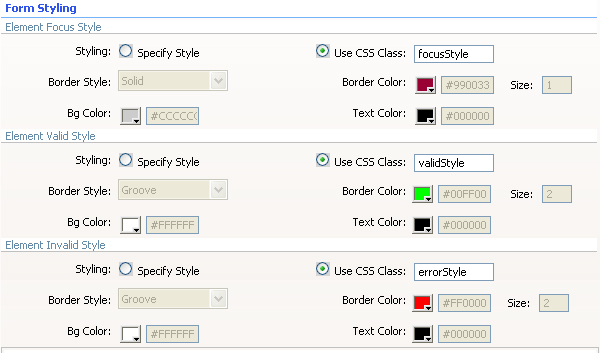
The Element Focus Style pertains to the style of the field before when
the user "Focuses" (clicks) on it.
The Element Valid Style pertains to the style of the field after
validation when the entered information is valid
The Element Invalid Style pertains to the style
of the field after validation when the entered information is invalid.
Here are the settings we have chosen:
7. Validation
At the Validation tab, you will see all your
fields' names, prefixed with the form's ID, which are recognized by the
Universal Form Validator under Form Fields no matter how many forms you
have defined on the page.
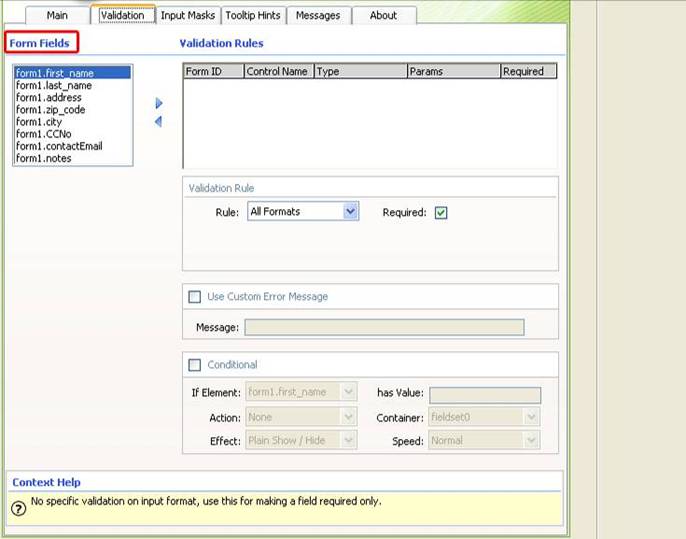
Select the field you want to validate and add it with the arrow.
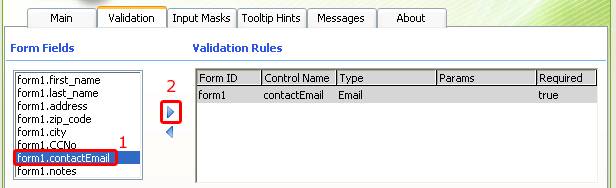
It now appears under Validation Rules. Here we can do several things.
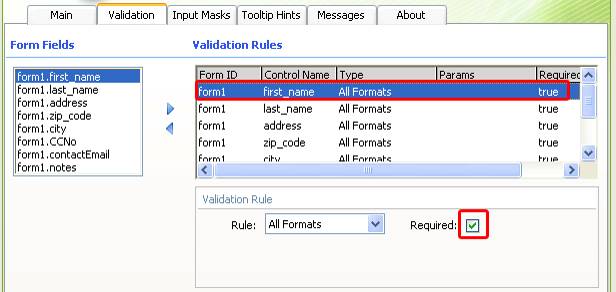
We set the Validation Rule.
In the Rule field you can choose how to
validate the entered information. We leave it at 'All Formats' for this field. The Required checkbox should be checked to specify that the field should be
filled out. You have a wide range of choices here. To learn more about each one
refer to the Reference: Validation chapter.
Choose your form1.first_name field from the list of Form Fields.
Press the arrow to add it to the Validation Rules box and then do the
same for all the others. Select form1.first_name and make sure the Required checkbox is marked.
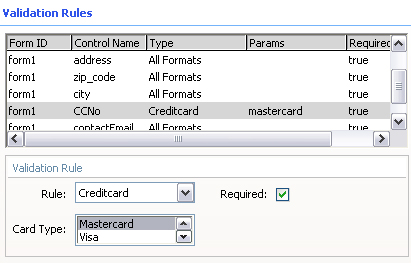
Repeat this process for all the other fields except form1.CCNo and form1.contactEmail
Now select form1. CCNo and go to Rules. Select 'CreditCard' and you will
get an additional field for Card Type.

Here we choose 'Visa' to require the user to put in only a Visa Credit Card
number. Make sure the Required checkbox is marked.
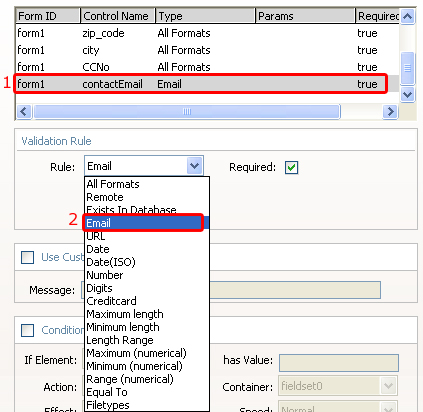
Now select form1.contactEmail and go to Rules. Select 'Email' and make sure the Required checkbox is marked.
8. Your result should look like this in Dreamweaver:
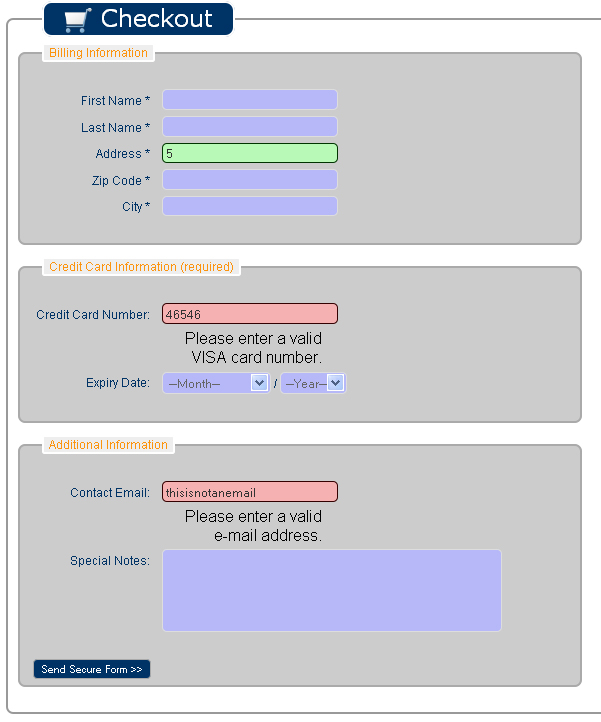
and like this in your browser:
Comments
Be the first to write a comment
You must me logged in to write a comment.