In this article you will find a detailed manual for the DMXzone Calendar 2 extensions. Everything from basic to advanced usage is covered with tutorials and videos. Also, we have included the features with screenshots for better preview.
DMXzone Calendar 2 Manual
A detailed information about the DMXzone Calendar 2 extension


The Basics: Adding DMXzone Calendar 2 on a Website
In this tutorial we will show you how to add DMXzone Calendar 2 in a reservation form on your website.
*You can also check out the video.
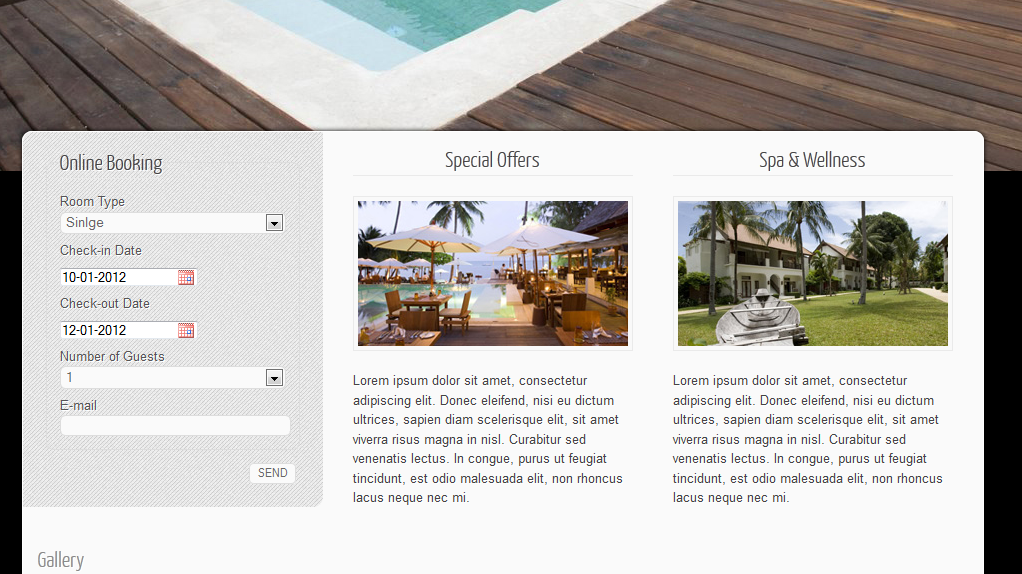
How to do it
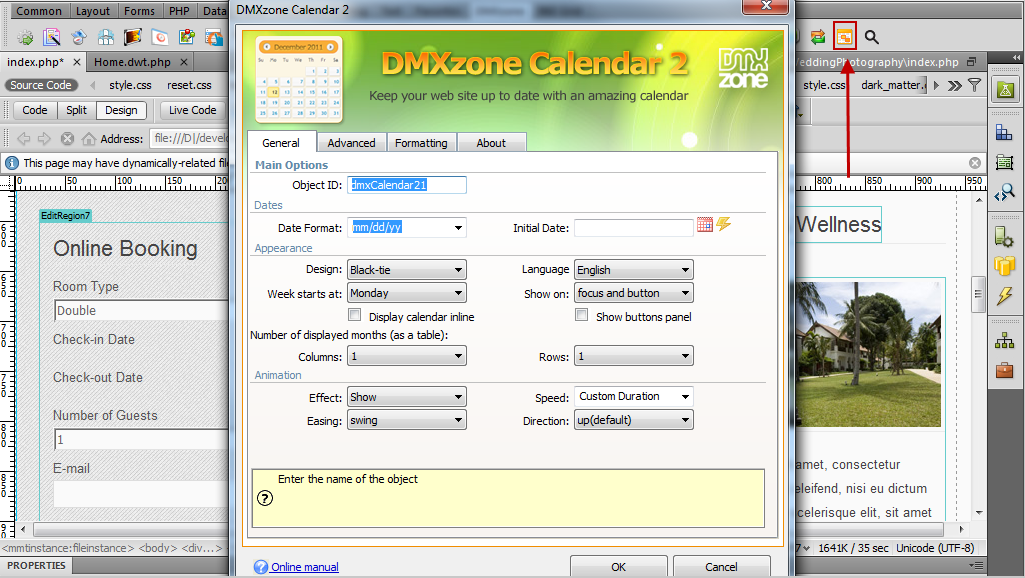
- We've already created our website layout and now we're going to insert the DMXzone Calendar 2. Click the DMXzone Calendar 2 icon and the dialog will appear.
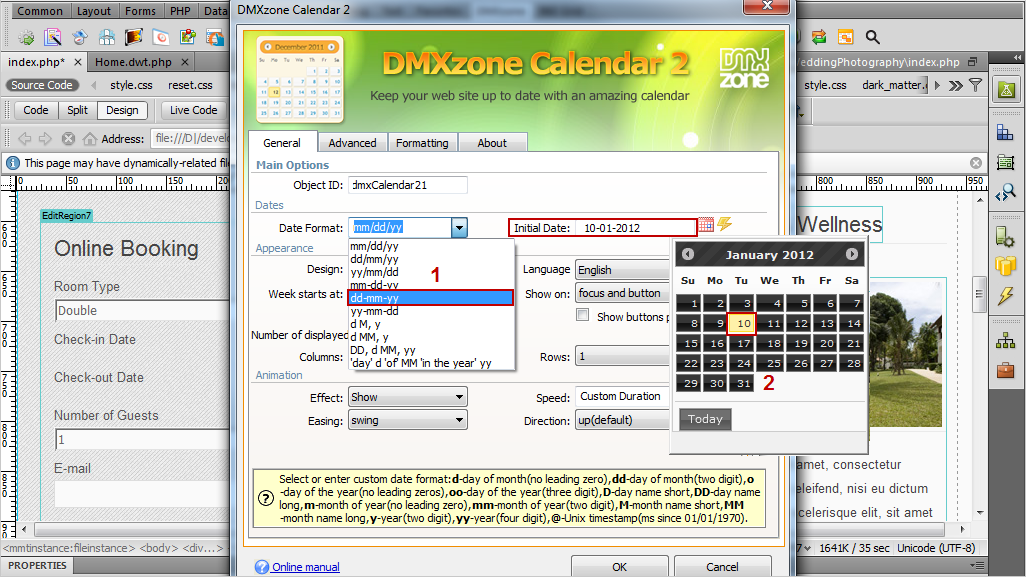
- Choose a date format (1), in our
case – dd-mm-yy and an intitial date (2).
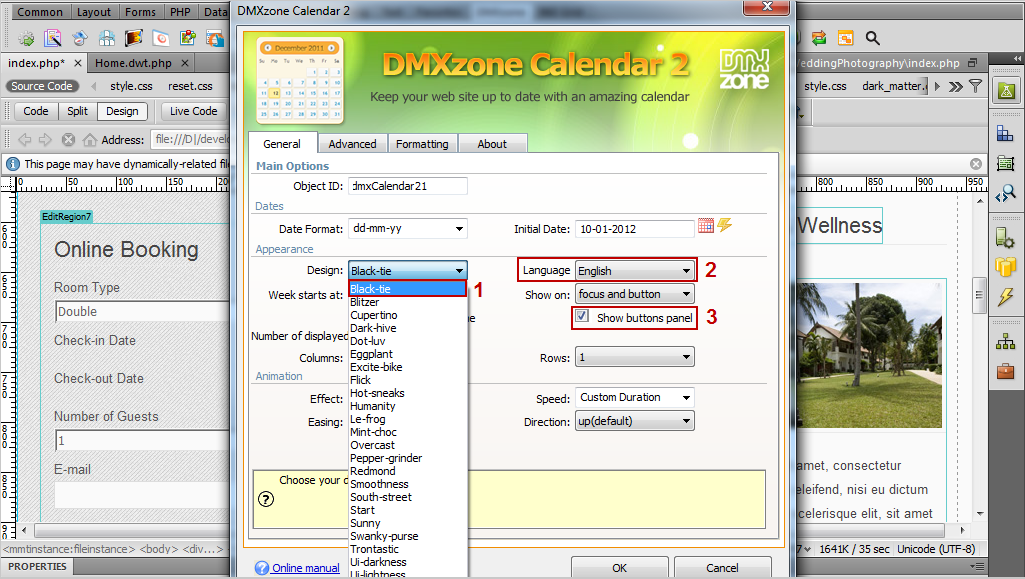
- For our calendar we will use the Black-tie design (1),
which is one of the 24 supplied in the extension. Also we set the default language to be English (2) and check the show buttons panel (3) so
that we have a quick access to the "Today" date in the calendar.
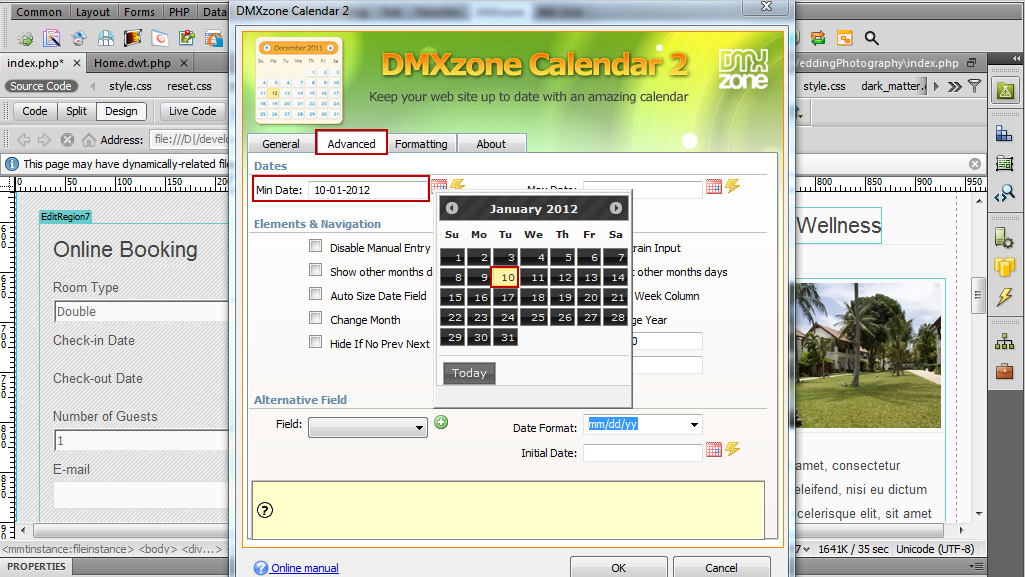
- When you are done, go to the advanced
tab to customize the calendar appearance and navigation. We're going
to display a min. date for the calendar so that no previous dates are
available for selection.
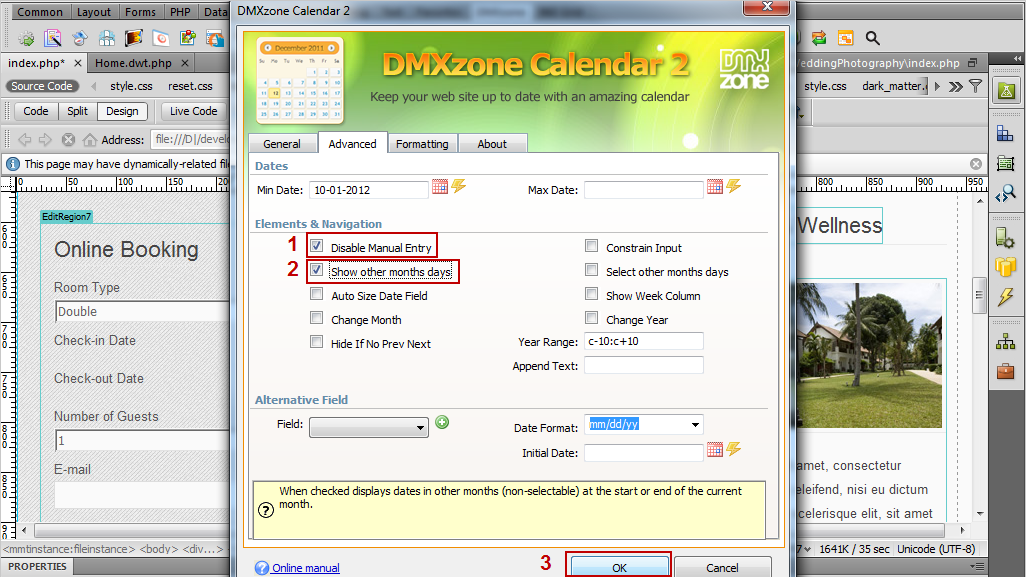
- We will disable the manual user entry (1) when an input field is used and also check the show other months days (2) to display dates in other months (non-selectable) at the start or end of the current month. Click OK (3) when you're done!
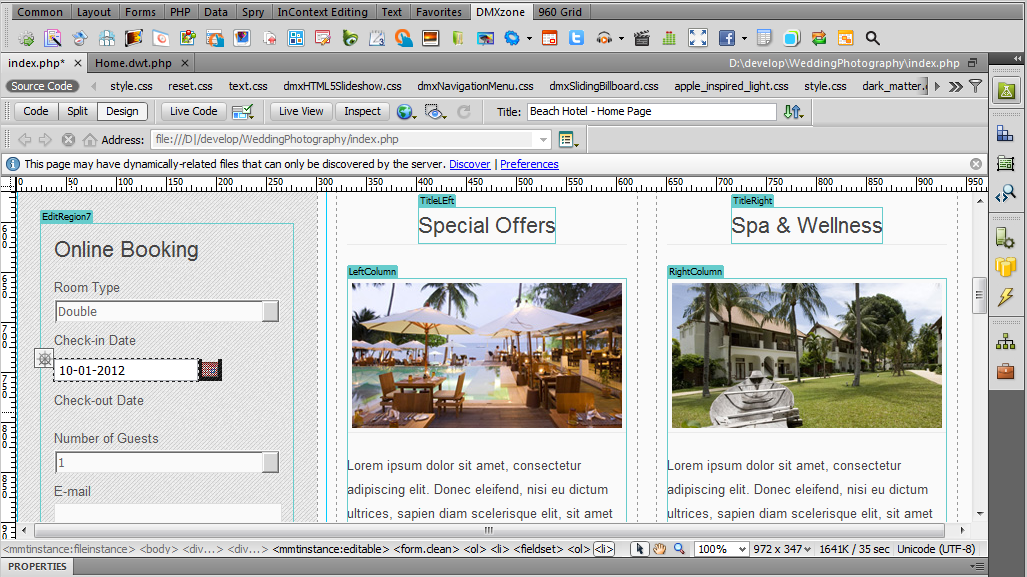
- Now, you can save your work and preview the result in the
browser.
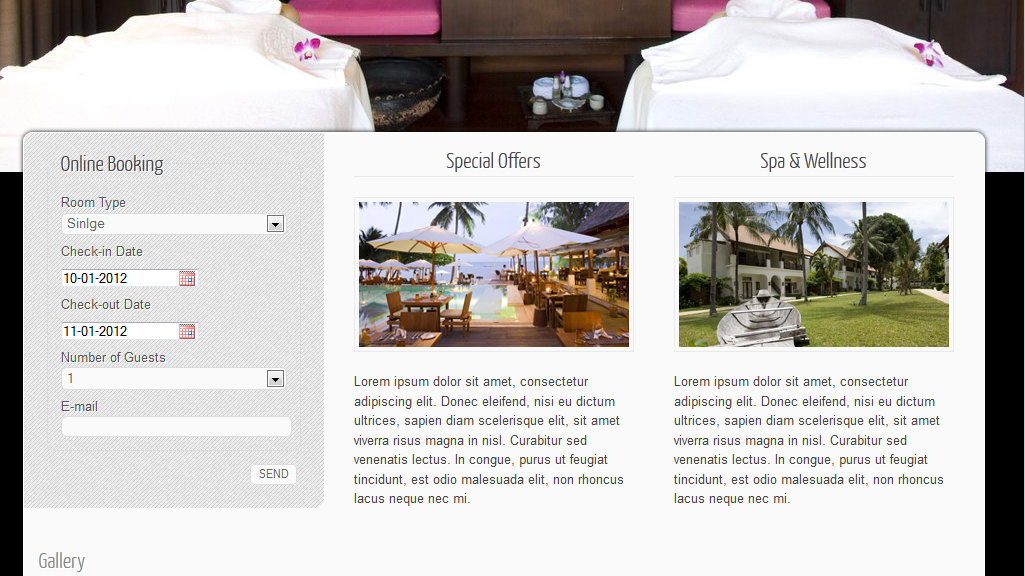
- That's how easy it is to insert a DMXzone
Calendar 2 on your reservation form.
Comments
Be the first to write a comment
You must me logged in to write a comment.