HTML5 File Upload Manual
   Learn how to work with HTML5 File Upload 
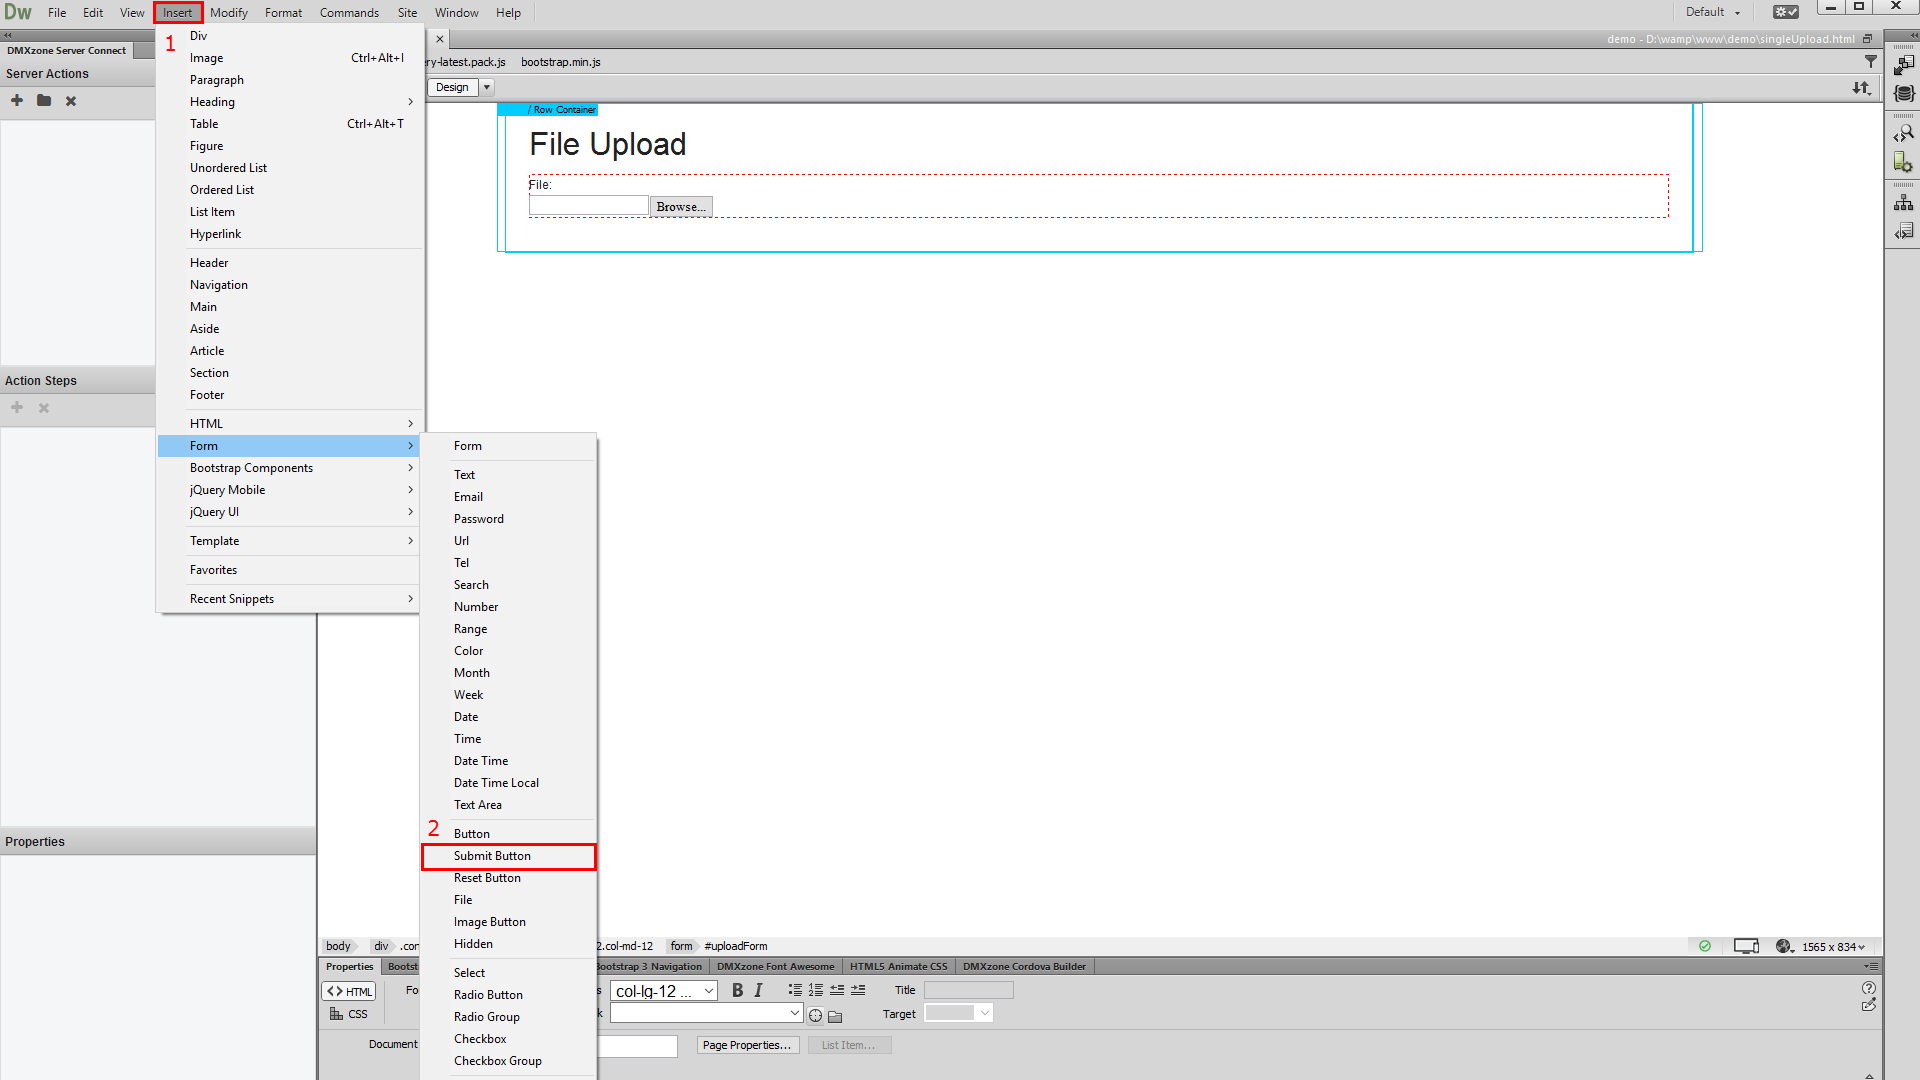
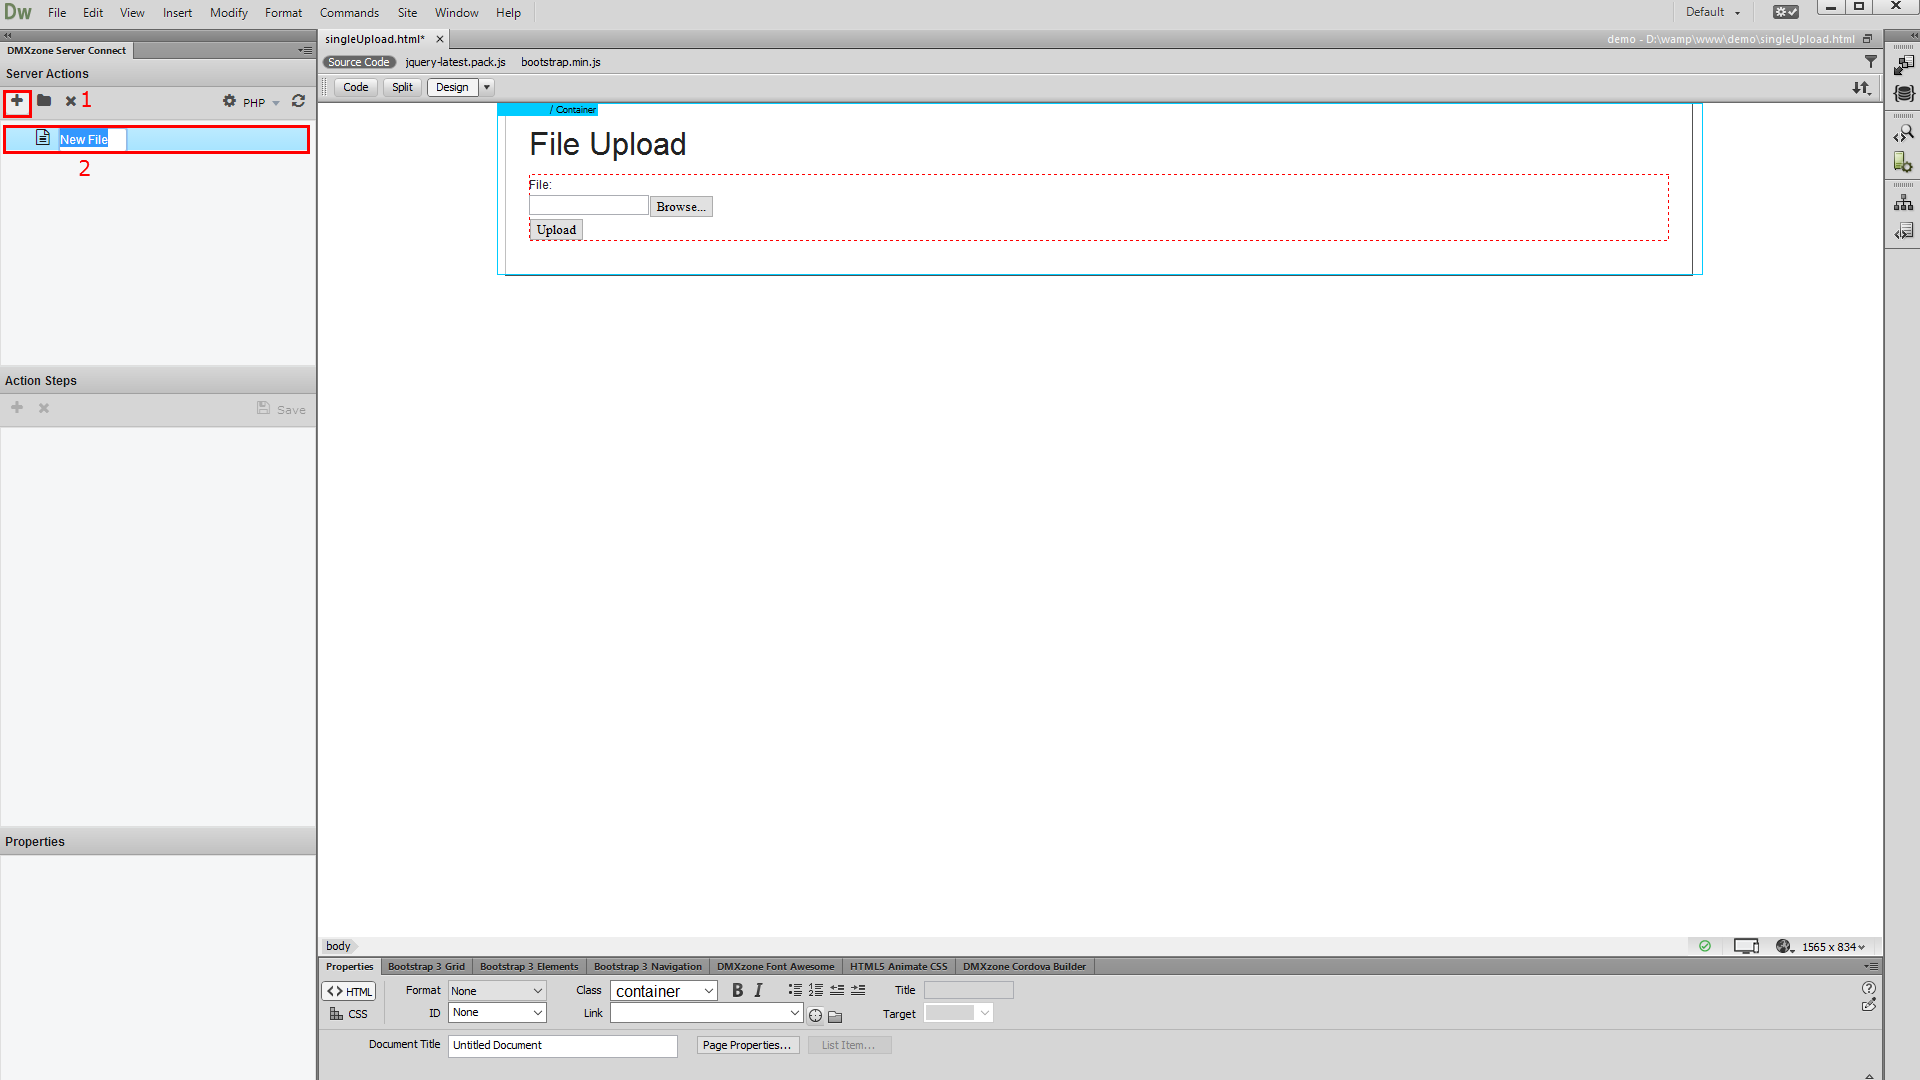
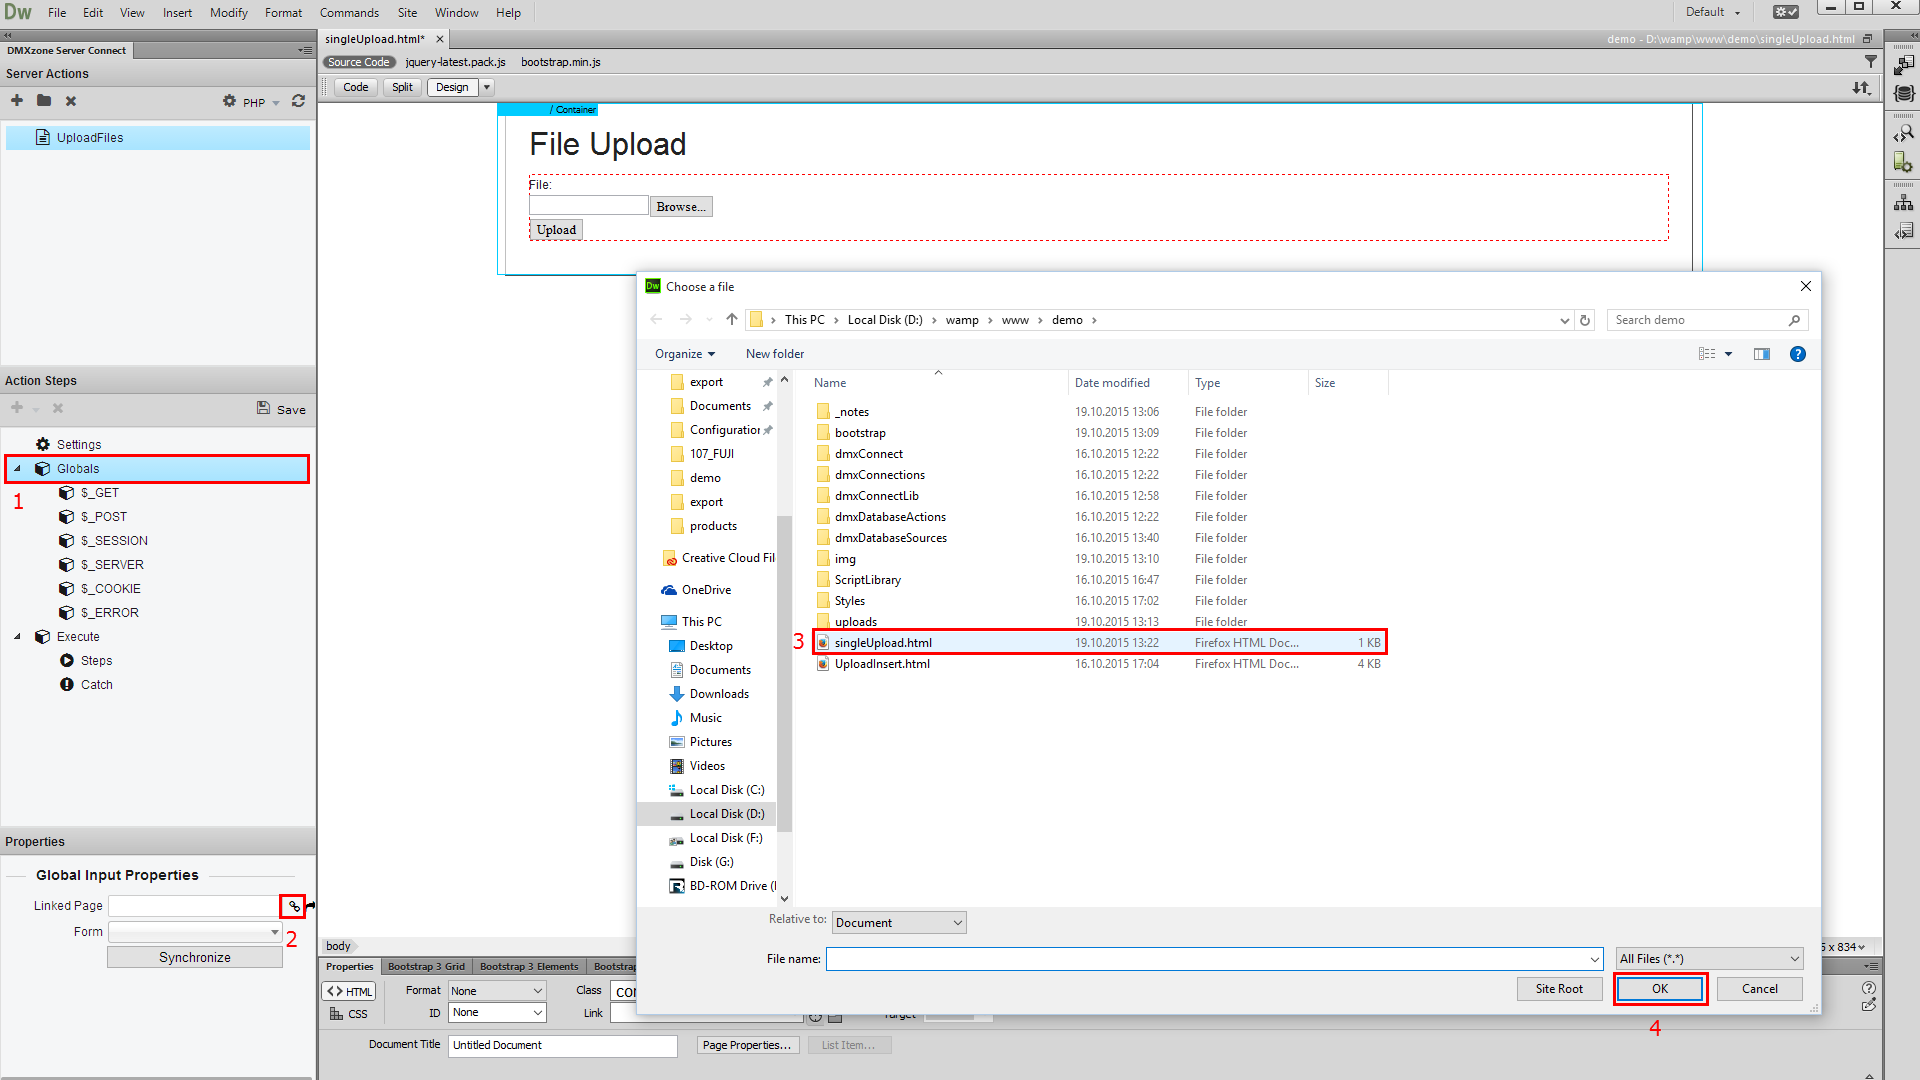
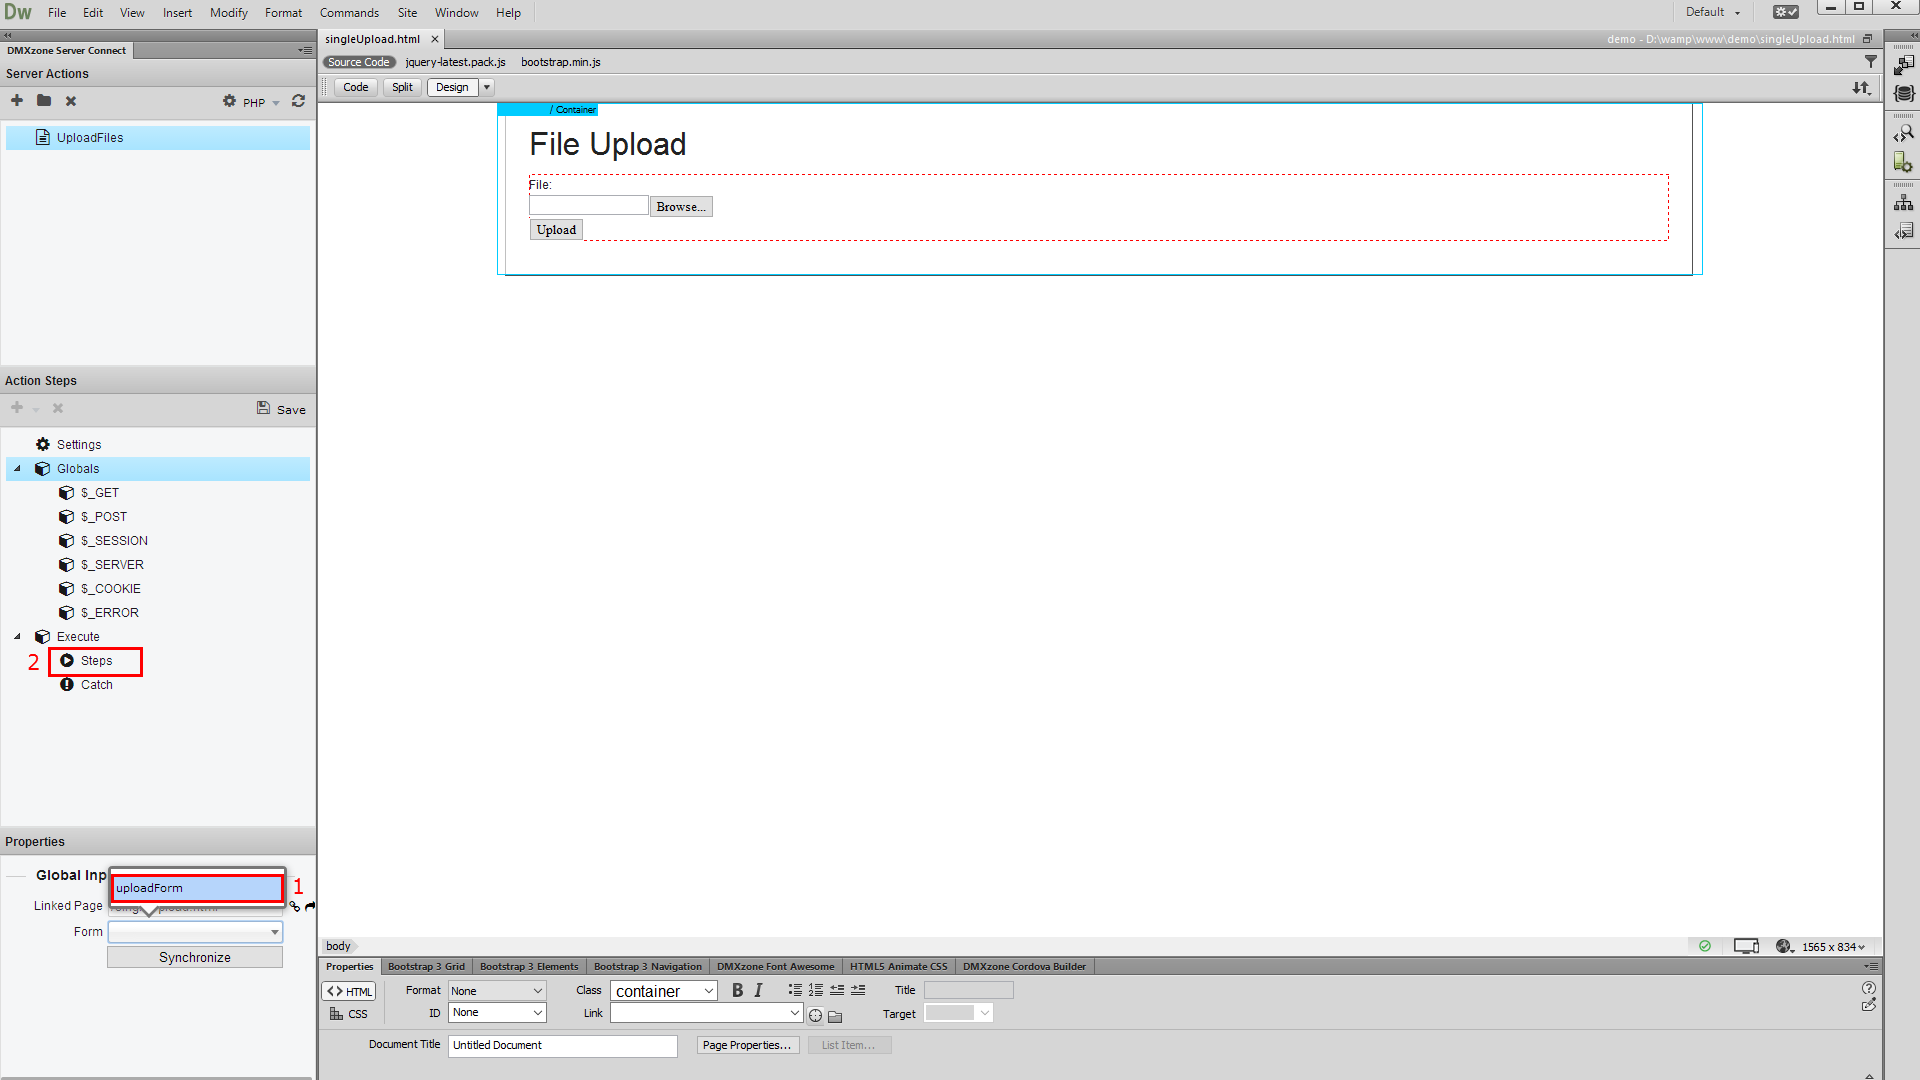
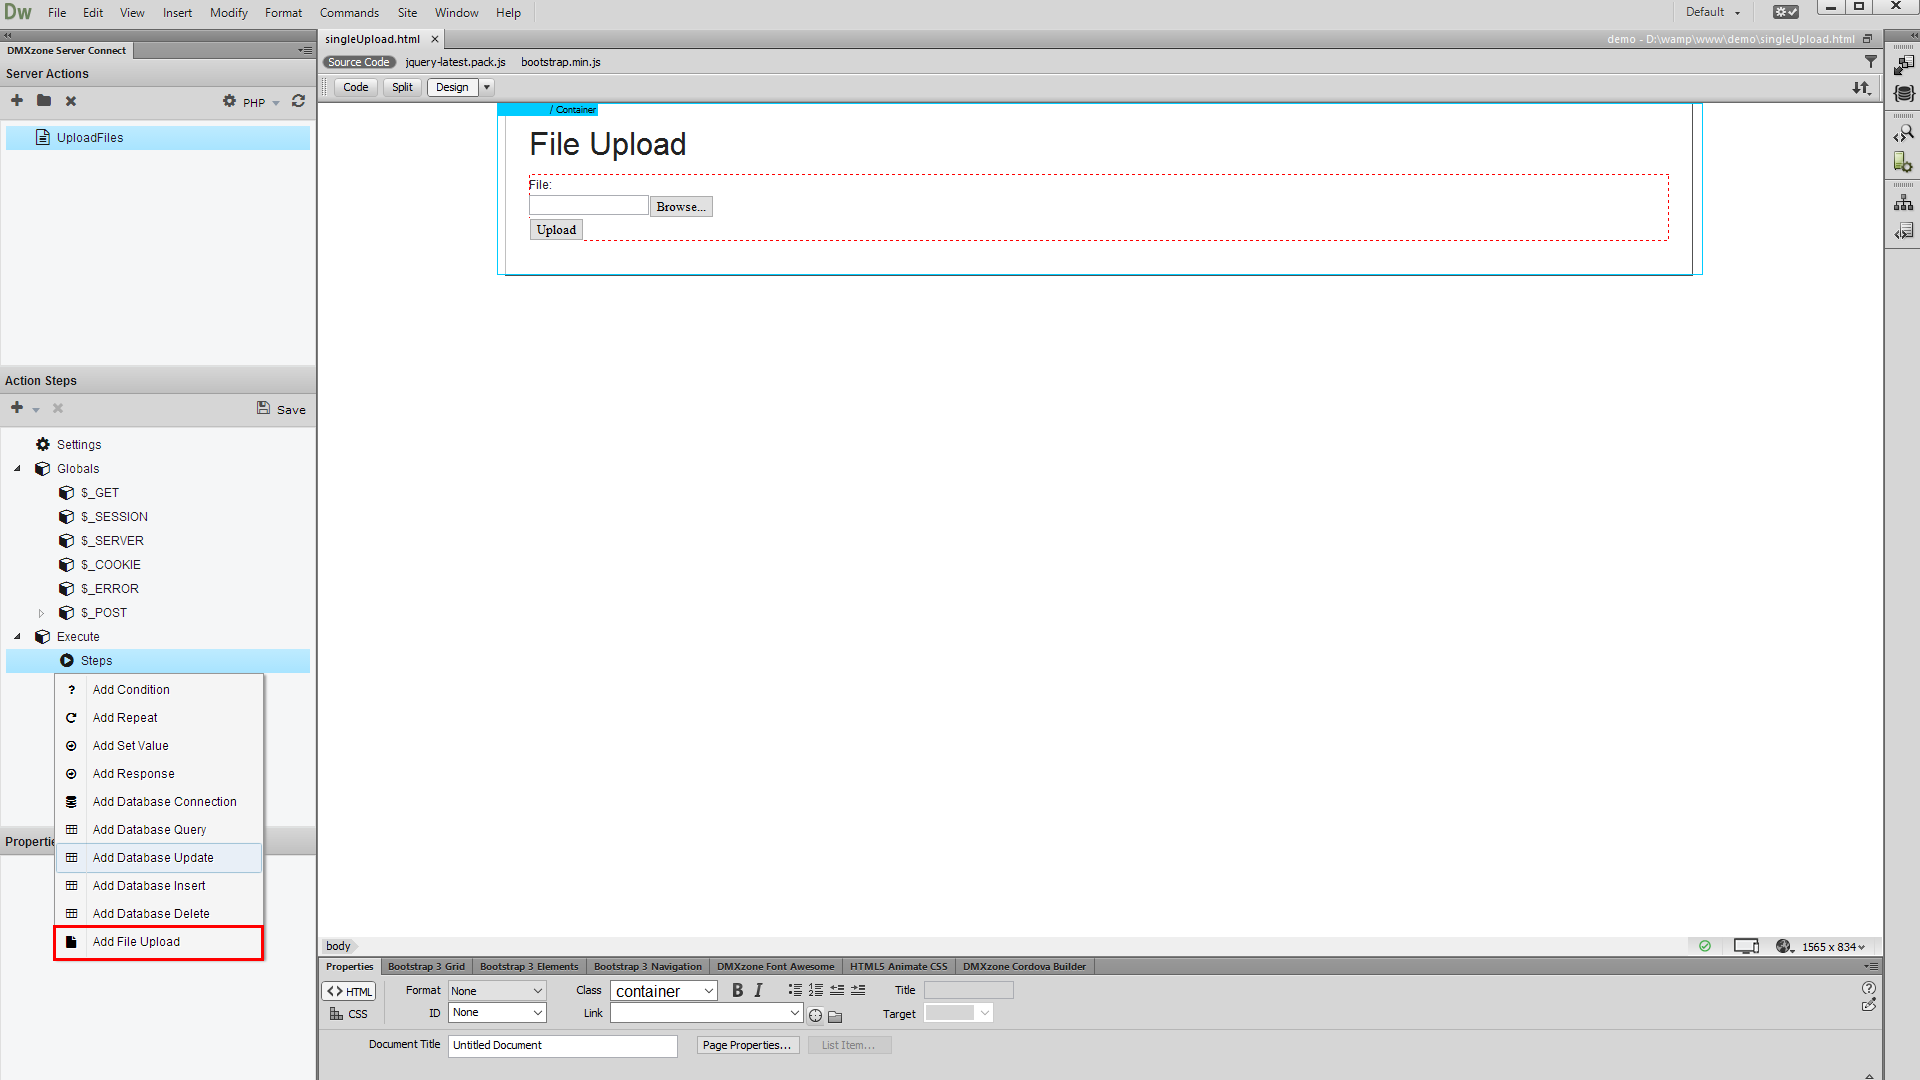
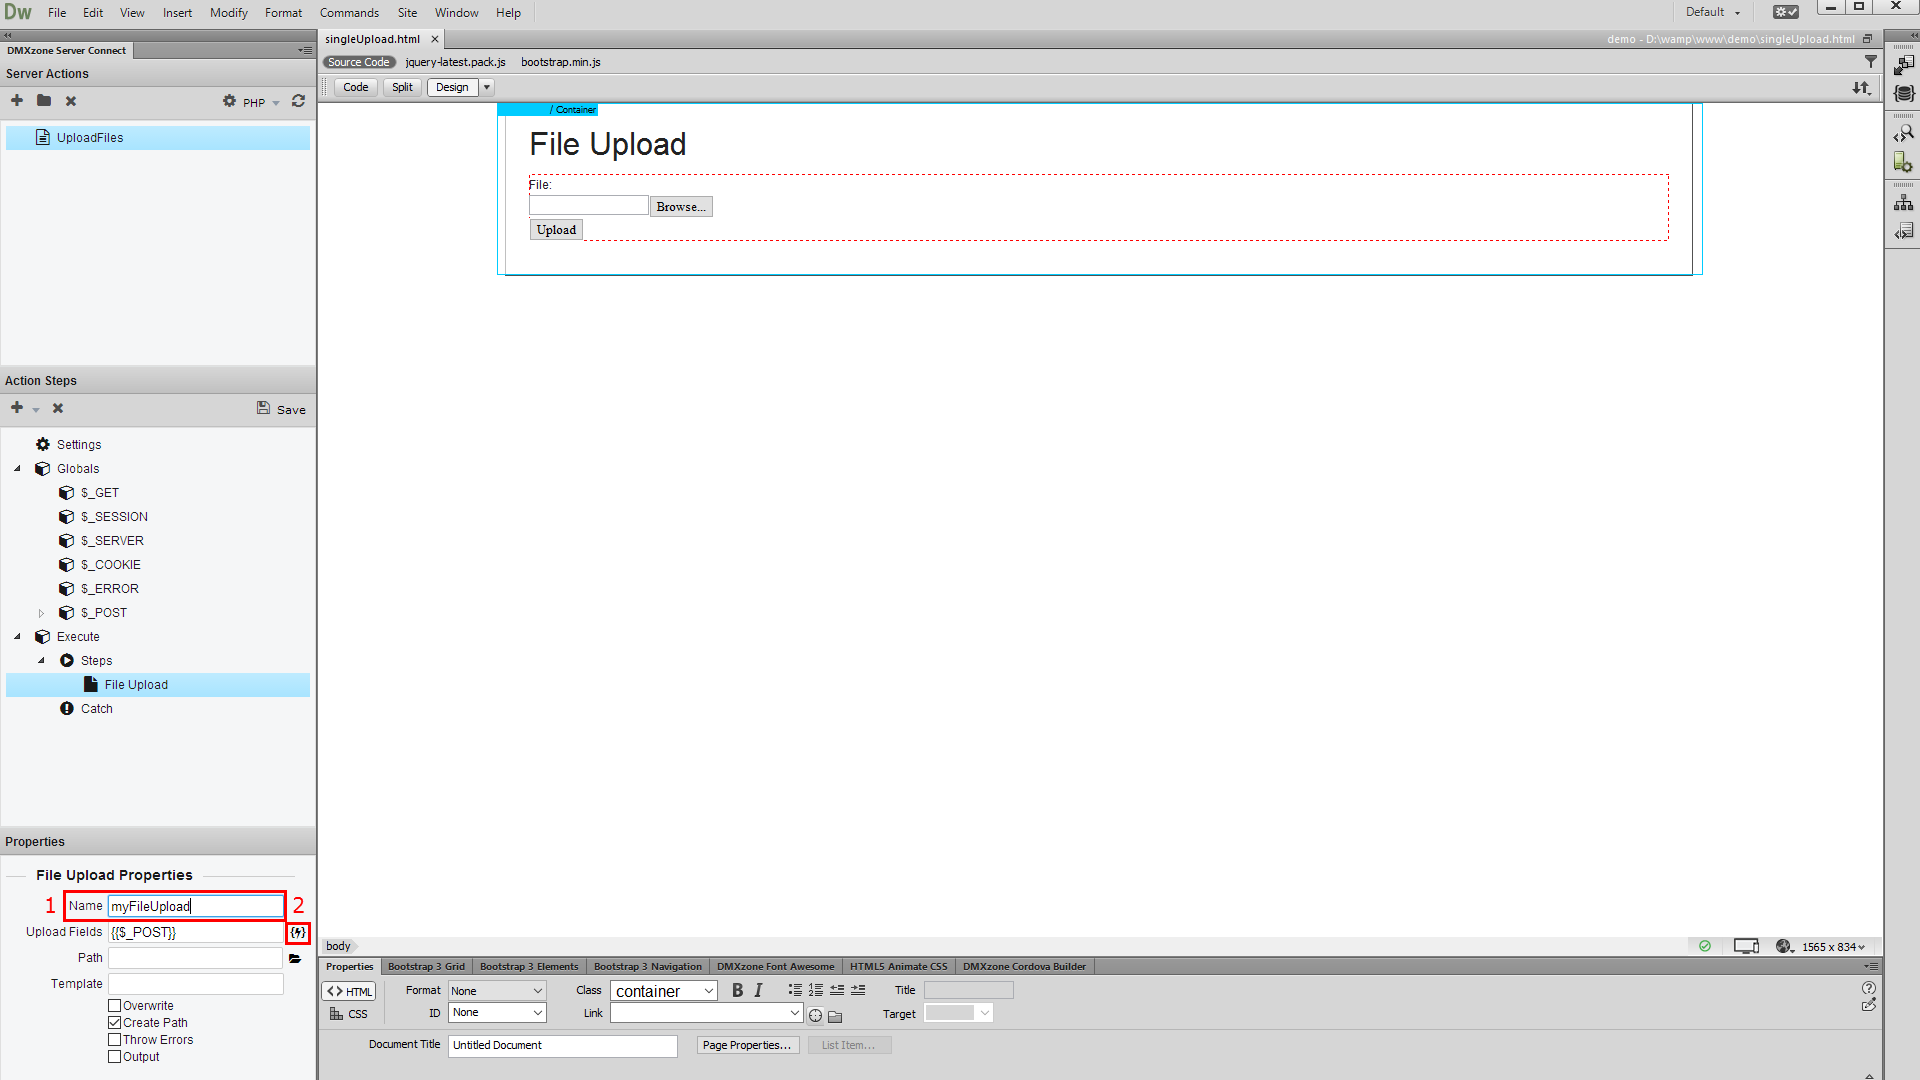
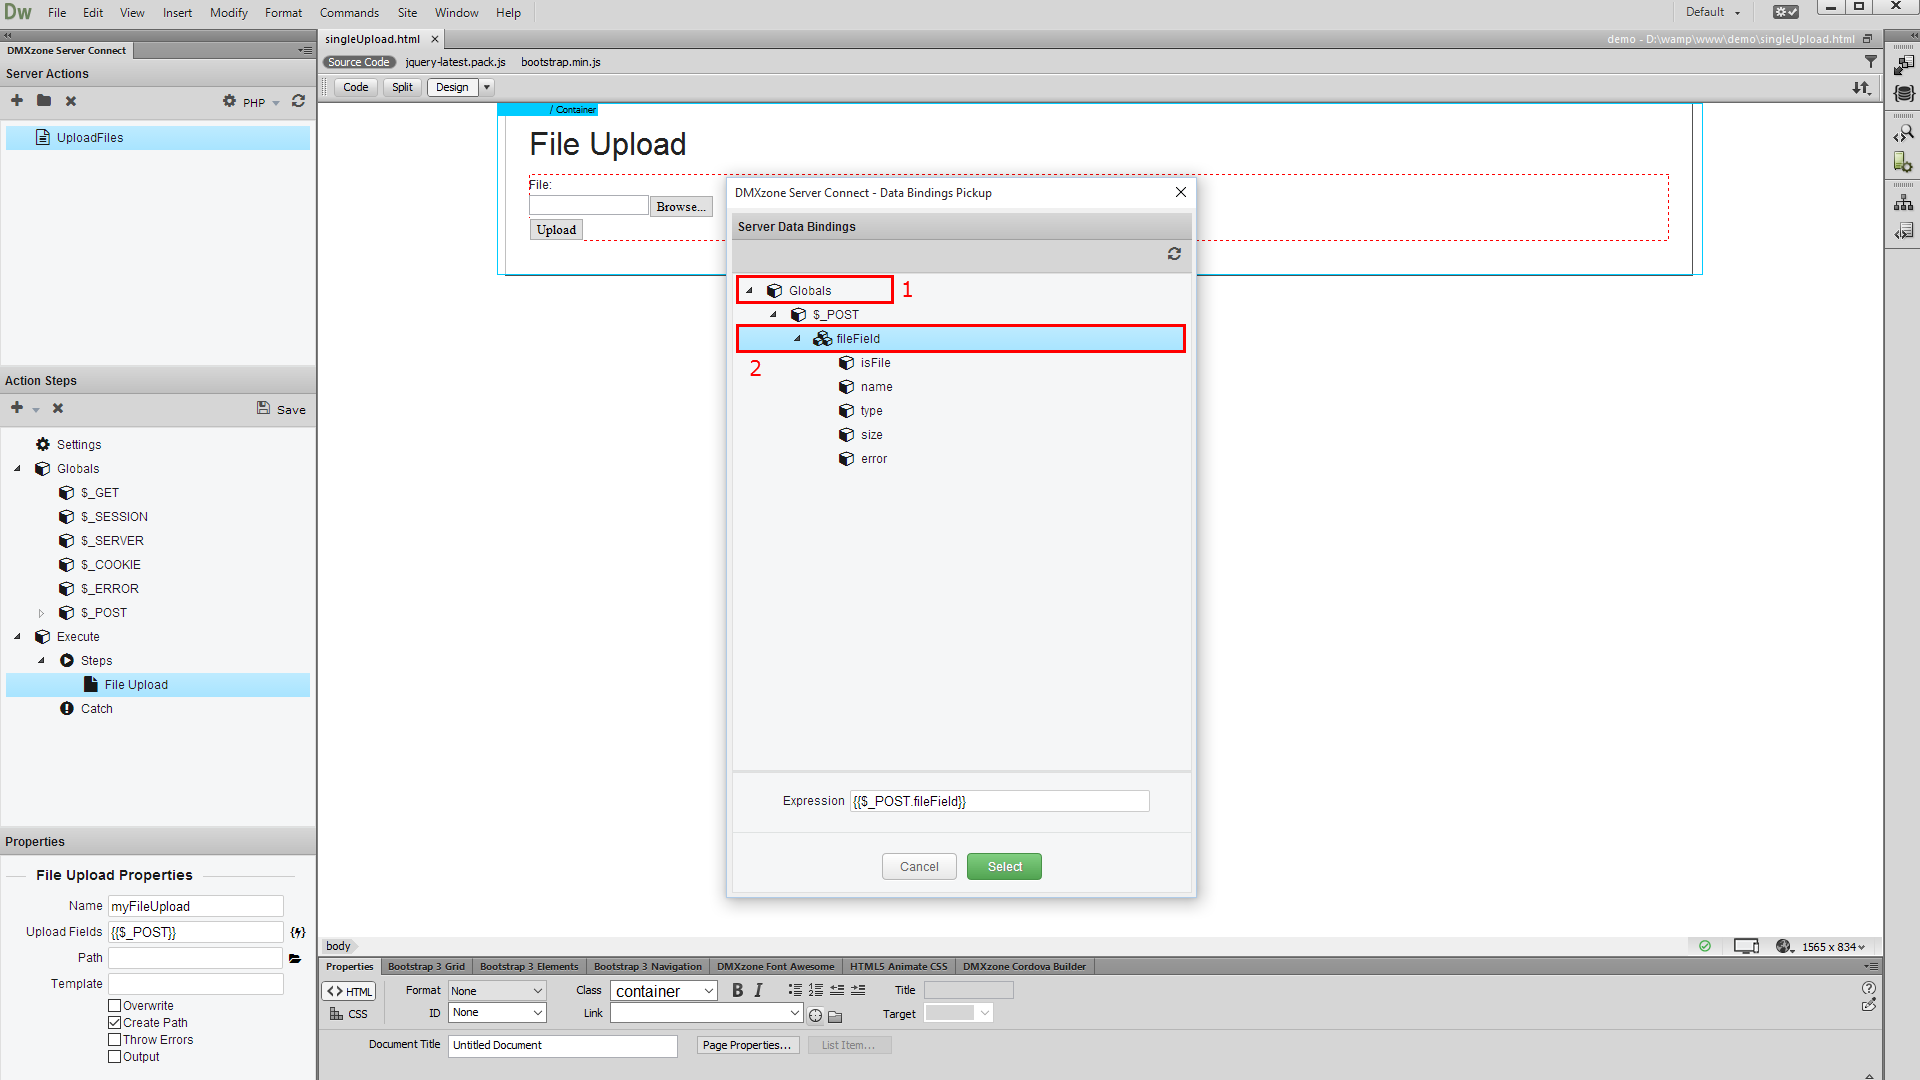
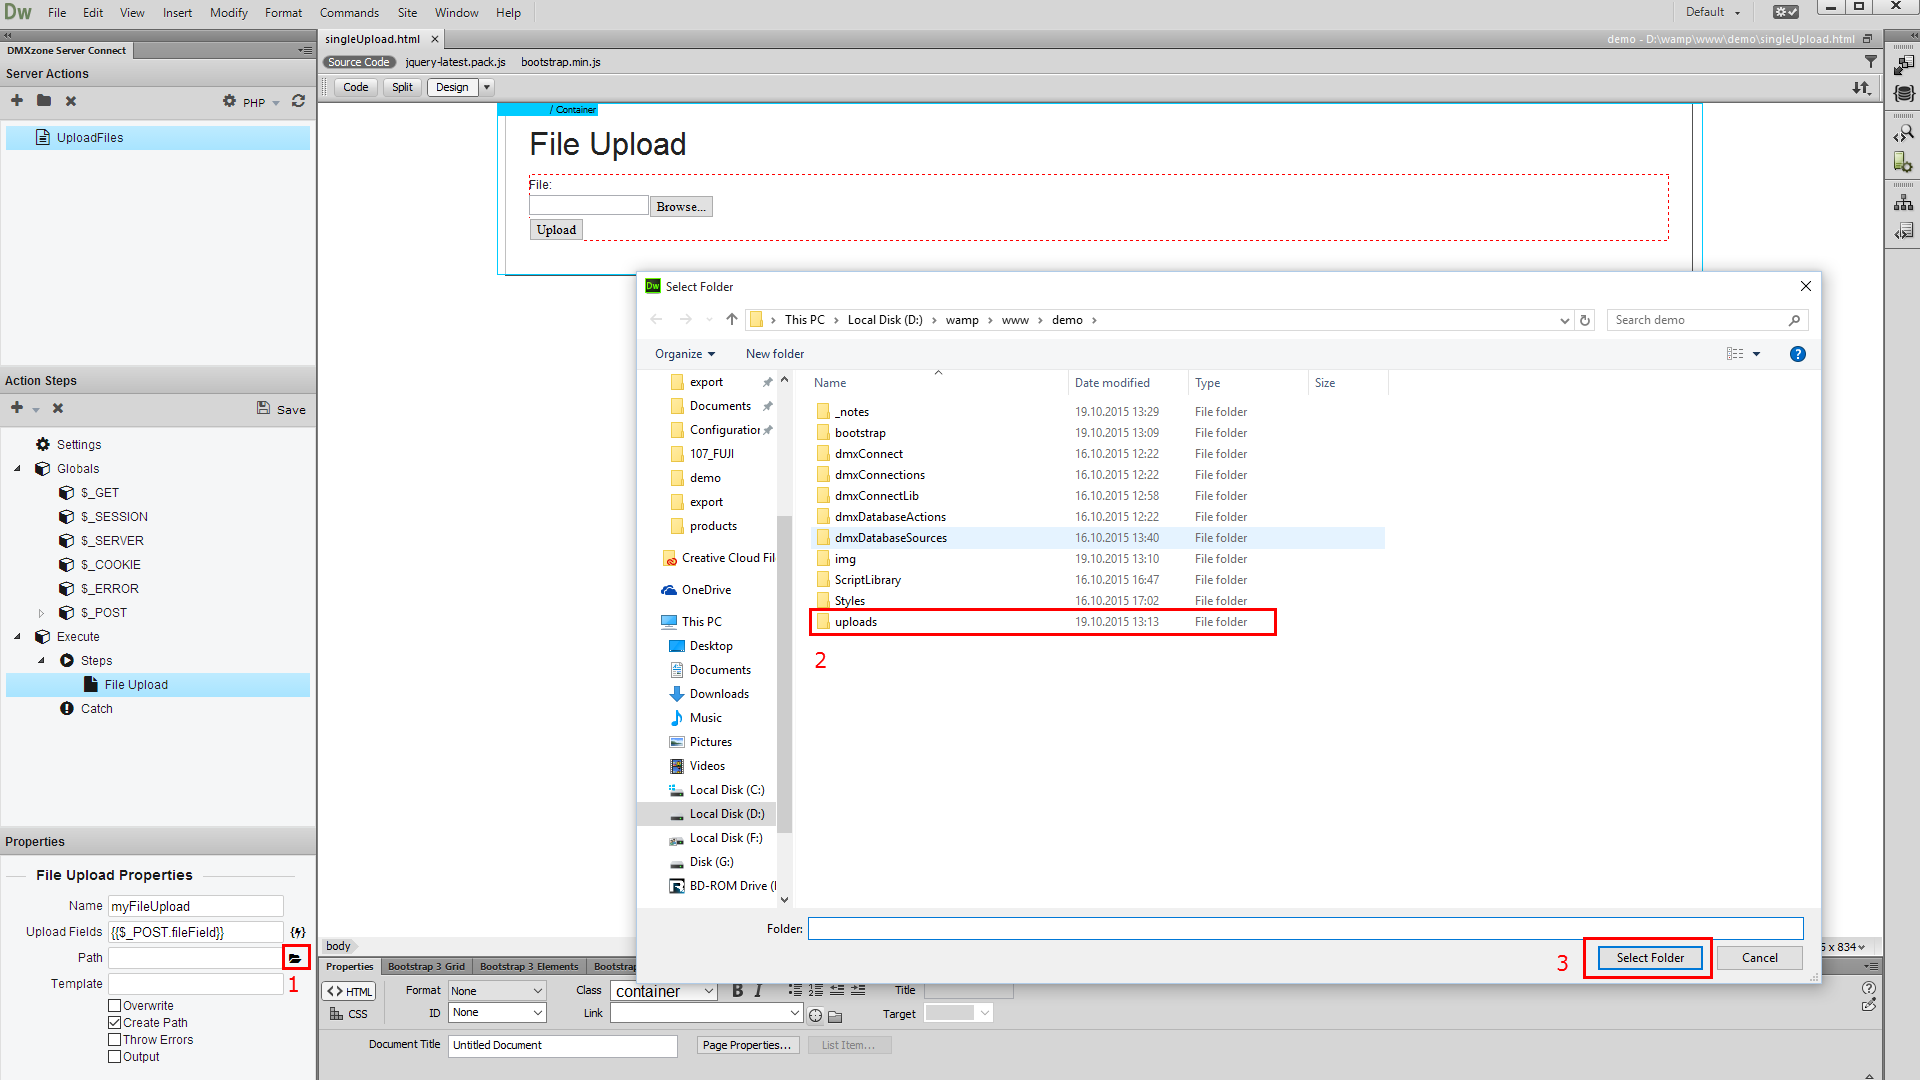
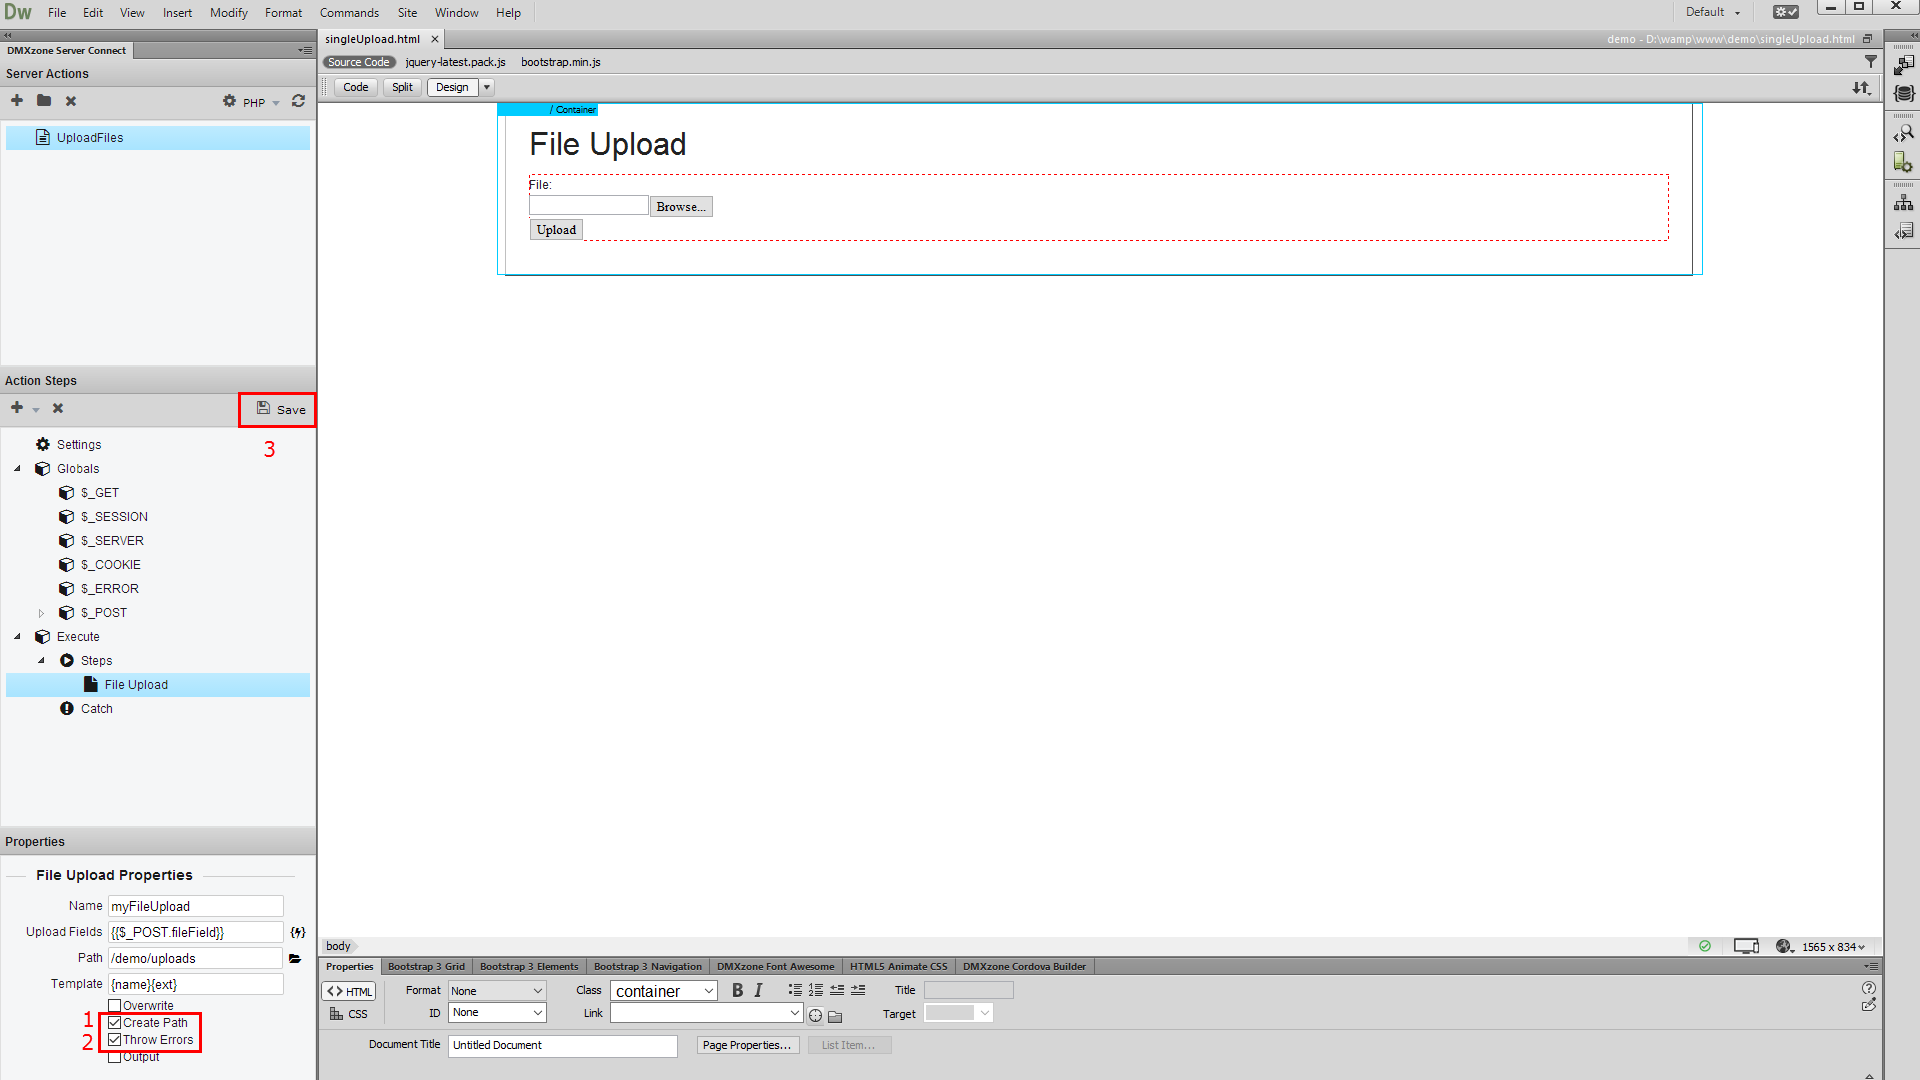
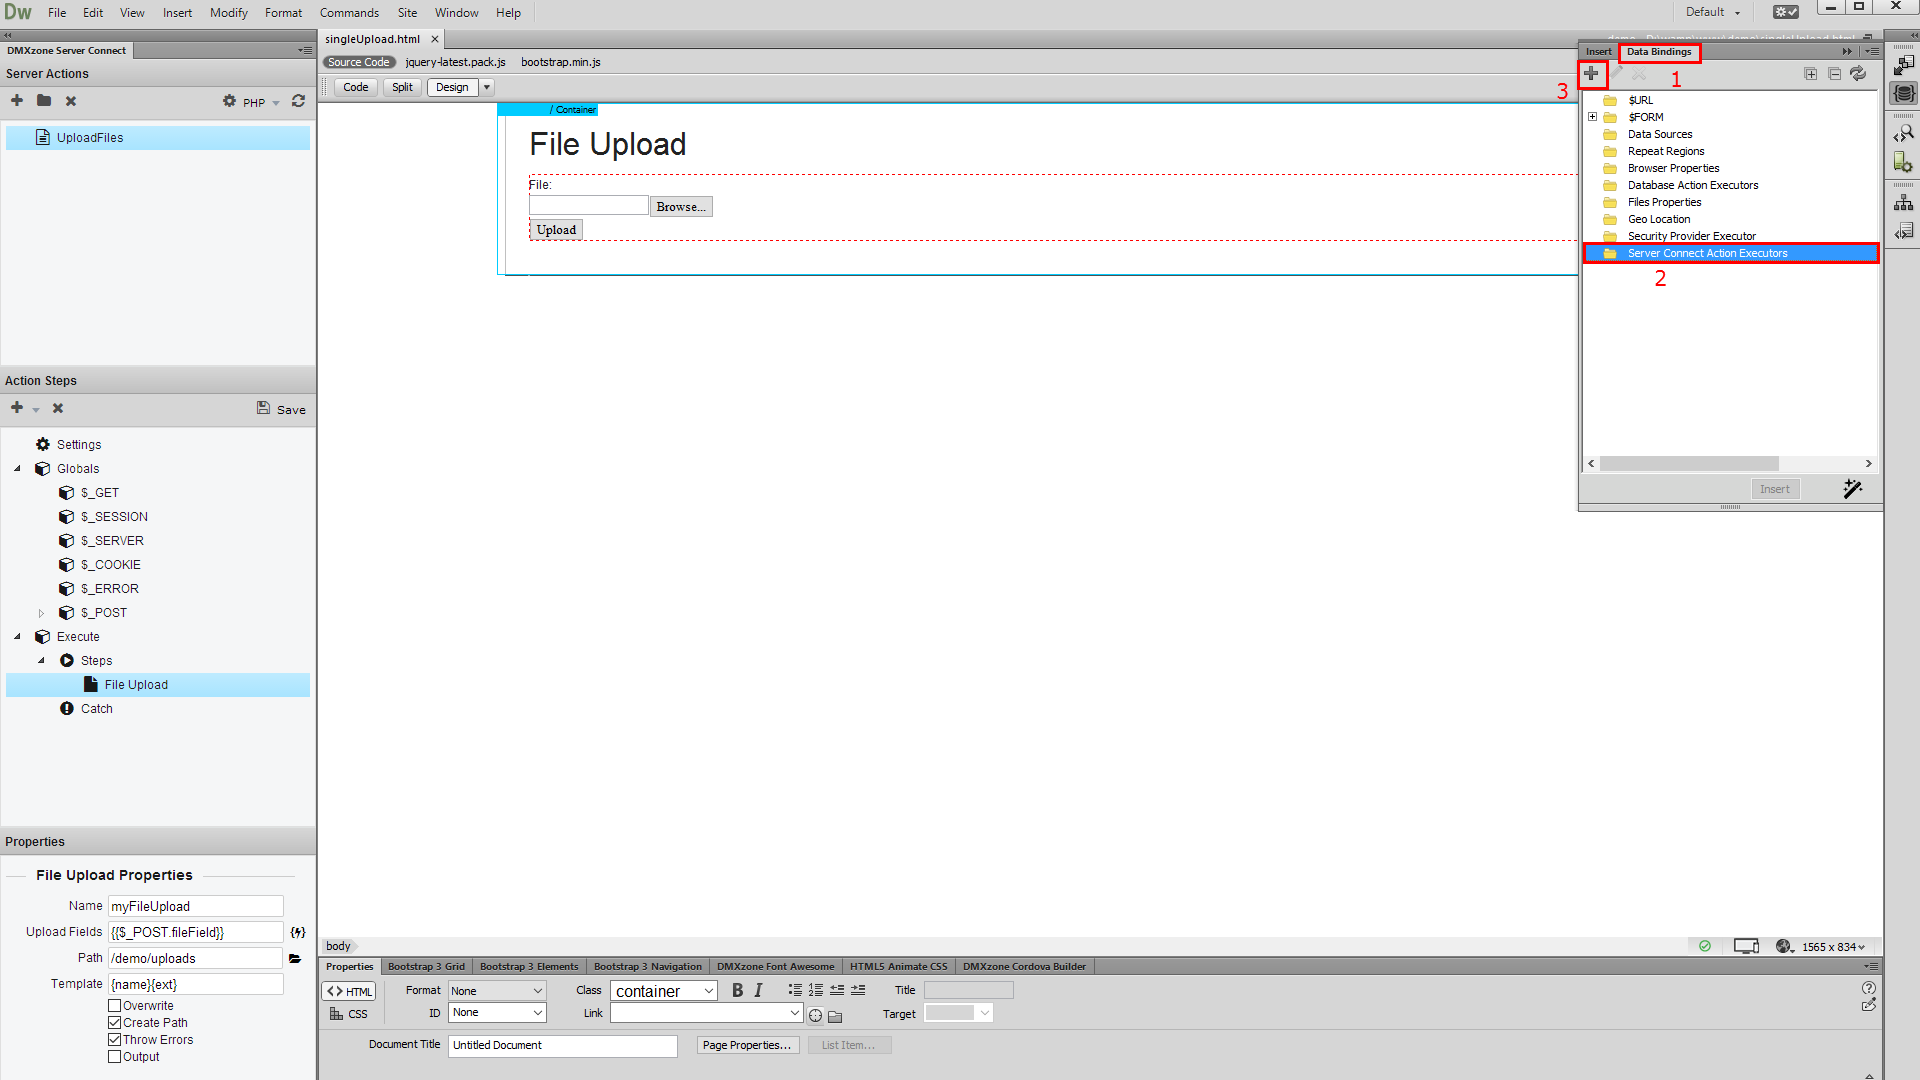
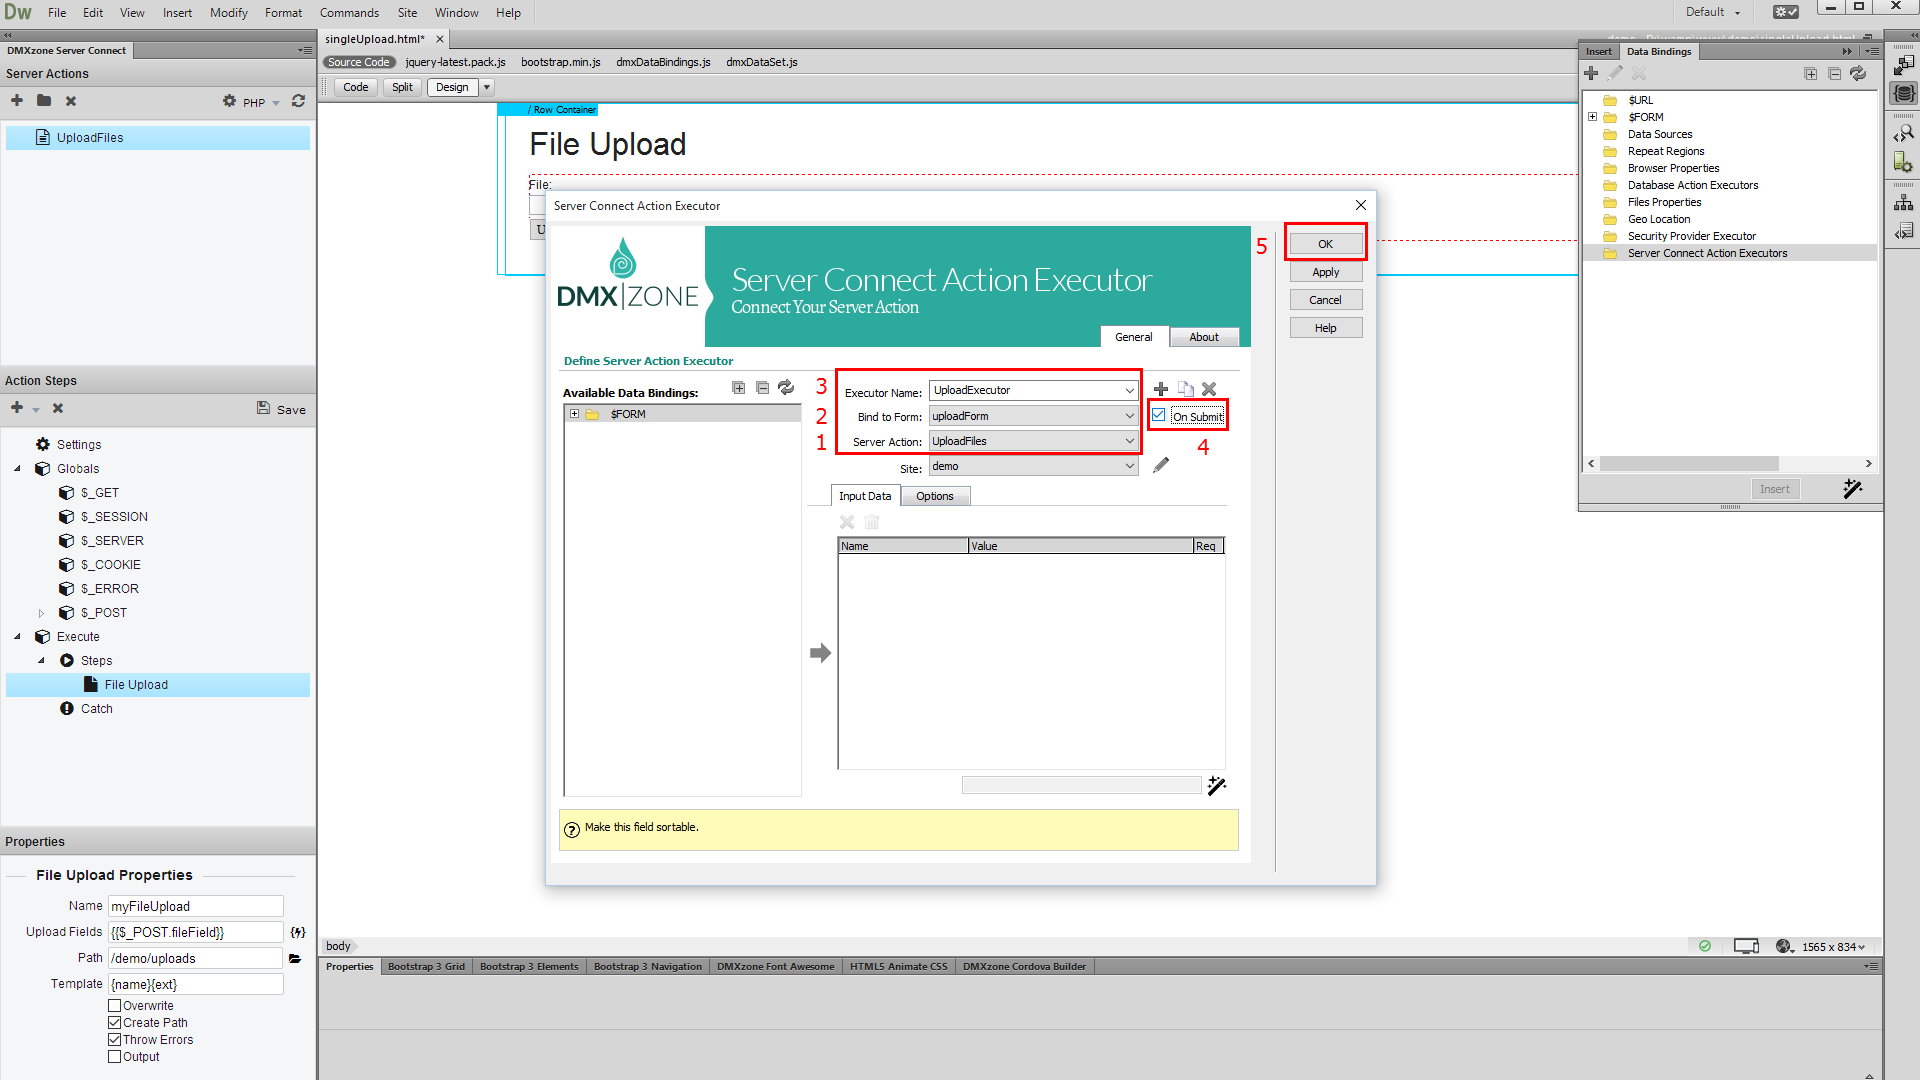
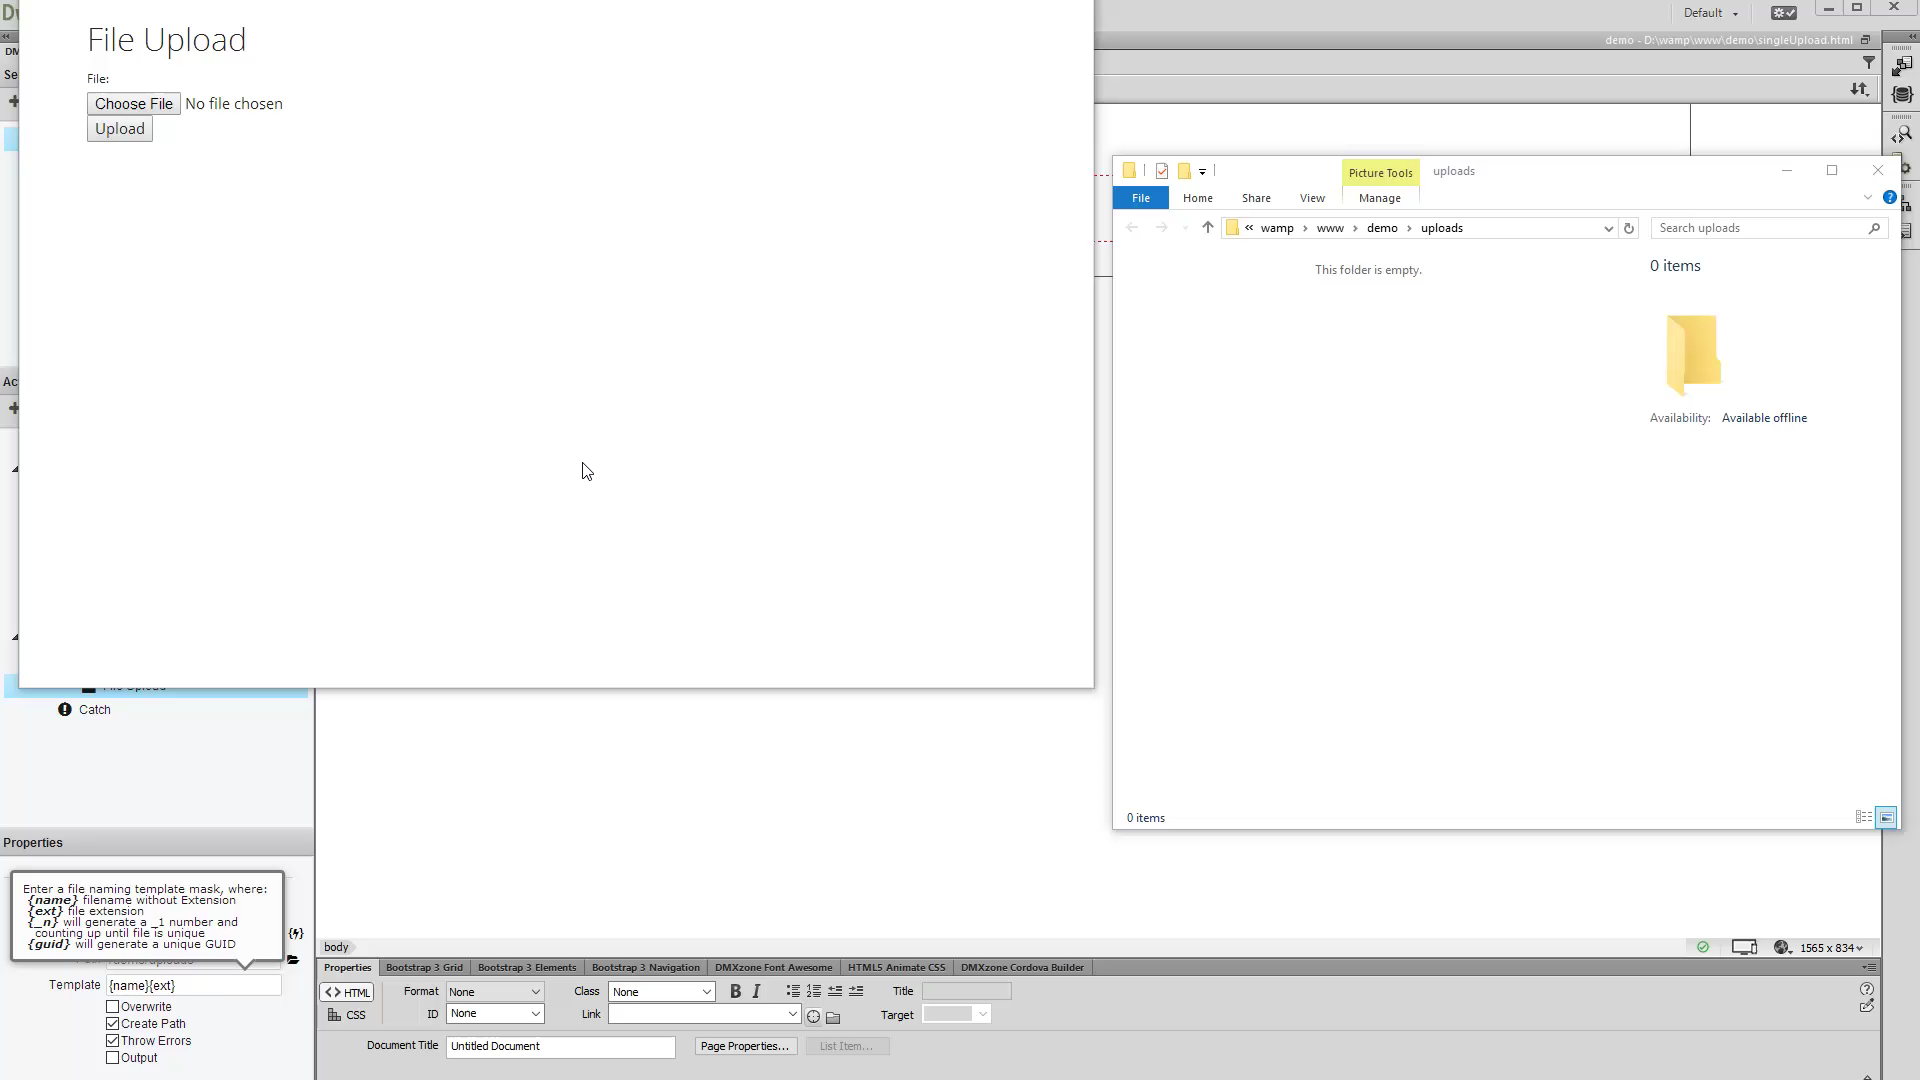
   This article is everything you need in order to learn how to work with HTML5 File Upload extension. It features basic as well as advanced tutorials. We covered everything from uploading single and multiple files, showing a loader while uploading, how to store the uploaded file names into a database and more. The tutorials are also available in video format. 
If you experience any troubles with the HTML5 File Upload, please contact our Live Support or post in the support forums.  
   
             Prev Index Next
The Basics: Upload  Files to Your Server 
In this tutorial we will show you how to upload files to
  your server, using HTML5
    File Upload. 
  *You can also check out the video.

 
How to do it
  - First, we need to insert a form,
    containing a file field and a submit button on our page. From the insert
      menu (1) and select form (2).


  - Now change its default name to: upload form. 


  - Then click inside the form (1) and from the insert
    menu (2), choose file (3).
 

  - Now, as we have our file field inserted, we need to add
    the submit button. From the insert menu (1) add a submit button
      (2).
 

  - As we've already set up our form properly, let's add the
    file upload functionality to it. First, create a new server action (1) inside the DMXzone Server
    Connect panel and add a name for it (2).
 

  - Then expand globals (1) and sync your page form
    fields. Browse to your page (2), select it (3) and click
      the OK button (4).
 

  - Now, select your form from the dropdown (1) and right click steps (2).
 

  - Select – add file upload.
 

  - First, add a name for your upload step (1) and click the server data bindings picker (2), in order to select
    your upload field.
 

  - Expand the global variables list (1) and under post,
    select your file field (2). When you're done, click the select
    button.
 

  - Browse (1) to your upload folder (2) and select
    it (3).
 

  - You can use a naming template mask, for the files, that
    you upload. If you leave this field empty, the files will be uploaded with
    their original names. Select whether to overwrite existing files, with the
    same name or not.  Enable the create path option (1) if you want
    the HTML5 File Upload to create the upload folder, if it doesn't exist on
    your server. Also, enable the throw errors option, if you'd like to
    see error messages, when there is a problem with the upload (2). Save
      your server action steps (3) when you are done.
 

  - Now, open the HTML5 Data Bindings Panel (1), select server action executors (2) and click add new button (3).
 

  - Select your server upload action (1), then select
    your form (2) and add a name for the executor (3). Check the on submit option (4) and click OK (5).
 

  - Let's preview the results.
 

Prev Index Next
      
Lubov has been with DMXzone for 8 years now, contributing to the Content and Sales departments. She is bringing high quality content in the form of daily blog updates, reviews, tutorials, news, newsletters,update emails and extensions' manuals.  If you have a product that needs publicity or any other questions about the entire DMXzone community, she is the one you can contact.
See All Postings From Lubov Cholakova >>
           
	 
Comments
Be the first to write a comment
You must me logged in to write a comment.