3D Photo Wall for Flash Manual
Transform your images into a 3D experience that will stun your
users. Create an interactive moving 3D Photo Wall directly in
Flash.Zoom in to full-size versions of images and add links.
Directly use photos from your camera or hard drive as the build-in
image processor will automatically rotate your images and make
thumbnails in an eye blink. No external application is needed!
This component is build for the Flash IDE and ActionScript 3. Take a look at the ActionScript 3.0 reference. It is designed for building Flash Applications. There is also a Dreamweaver version that is build for use in Dreamweaver websites.


Editing the 3D Photo Wall with the Property Inspector
Introduction
In this chapter we're going to edit the
properties of the 3D Photo Wall using Flash parameters. Click on the preview of
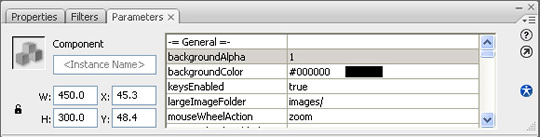
the 3D Photo Wall in the design view to display its parameters. Below is a
screenshot of the Flash Parameters before we've edited them. Read the component
reference for all properties.
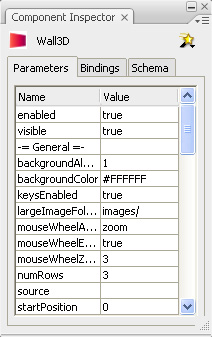
You can also use the component inspector to edit the settings.
Editing the parameters
- Setting the general options
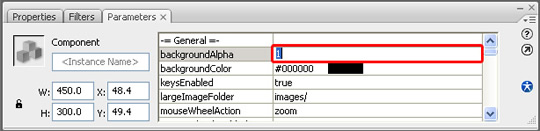
backgroundAlpha sets the transparency of the
background of your 3D Photo Wall, we'll leave it to 1.
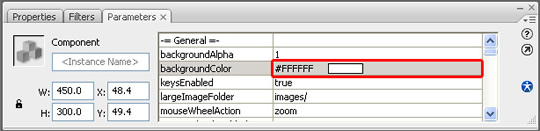
backgroundColor enables you to choose the color of the background
of your movie. We set it to white (#FFFFFF).
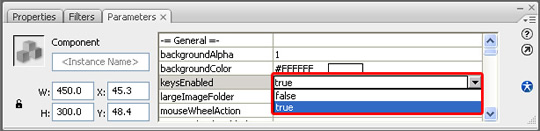
keysEnabled determines if you can navigate with the keyboard (it
only works if the focus is set on the component, search for Working with FocusManager in the
documentation of Flash to see how it works). We
set it at true.
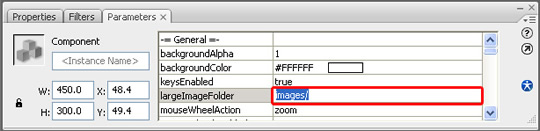
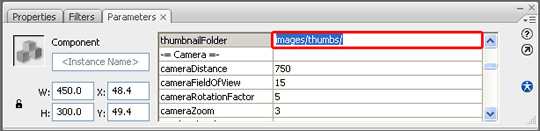
The path to your images is displayed in the largeImageFolder. We
leave it at its default value. We recommend using relative paths.
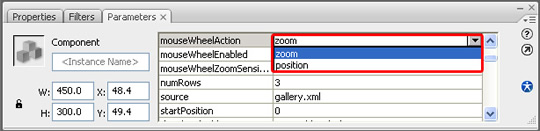
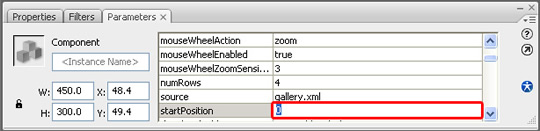
We set the mouseWheelAction to zoom to enable zooming in and
out with the mousewheel. You can also use it to change scroll left or
right trough the wall by setting this parameter to position. We'll
leave it at zoom.
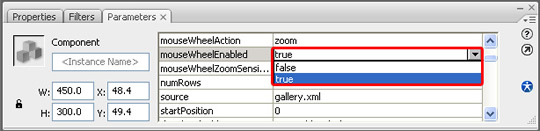
If you want to use this option, make sure to set the mouseWheelEnabled to true otherwise the mouseheel would be disabled.
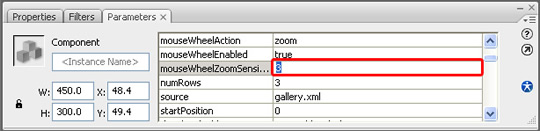
If you set mouseWheelAction to zoom you can set the zoom
sensitivity of the mouse with the mouseWheelZoomSensitivity option,
we'll leave it at 3.
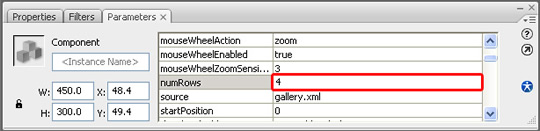
numRows sets the number of rows on your wall, we'll set it at 4.
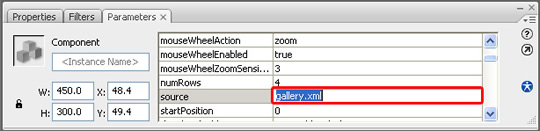
The path to your XML file is entered in the source parameter.
We leave it at its default value. We recommend using relative paths.
Use the startPosition to define the image to start with, the
counting starts at 0 and goes by column (as displayed in the screenshot
below).
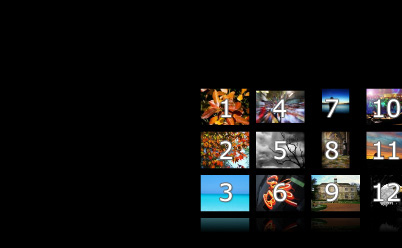
We'll leave it at 0.
The path to your thumbnails is entered in the thumbnailFolder parameter.
We leave it at its default value. We recommend using relative paths.
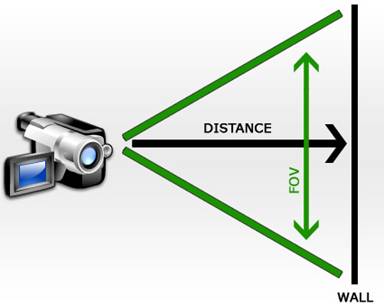
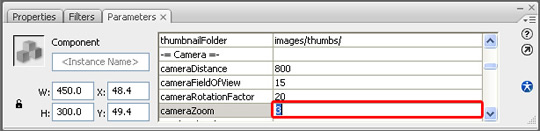
Setting the Camera options
We set the cameraDistance to 800 to
increase the space between the photo wall and the camera.
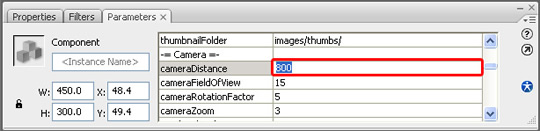
We leave the cameraFieldOfView to 15.
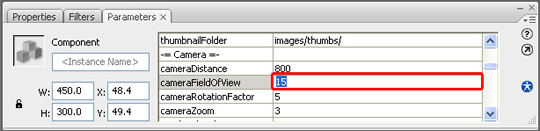
Check out the screenshot below to see how these settings work.
We'll set the cameraRotationFactor to 20 to increase how
much the camera rotates when the wall moves to the left or the right.
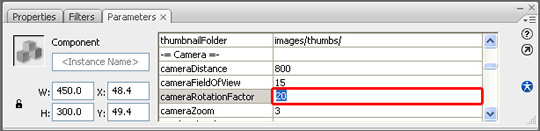
We leave the cameraZoom at 3 so we can maintain the same
zoom factor.
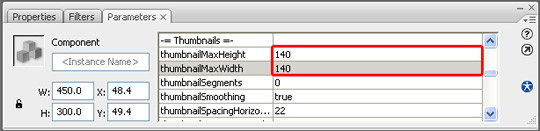
- Setting the Thumbnail parameters
We set the Size of our thumbnails with
the thumbnailMaxHeight and thumbnailMaxWidth options. We set
them both at 140 to make the maximum dimensions a little bit
smaller.
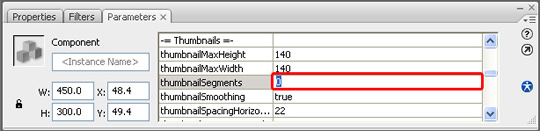
thumbnailSegments set the quality of the thumbnails of the wall,
the higher the number of Segments, the lower the deformation. We
leave it at its default value.
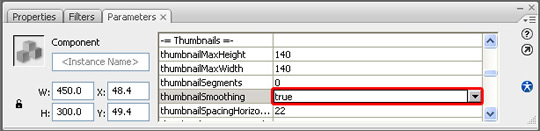
We set thumbnailSmoothing to true to enable smoothing, this
makes our thumbnails less jaggy, it means you lose a little bit sharpness
but since the thumbnails are small it will often give better results.
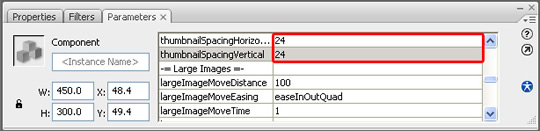
Then we set the thumbnailSpacingHorizontal and thumbnailSpacingVertical to 24 to increase the spacing between our thumbnails a little
bit.
- Defining the Large Images parameters
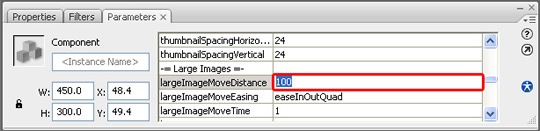
The largeImageMoveDistance sets how far
the thumbnail will move forward after the user has clicked on it. We'll
leave it at 100.
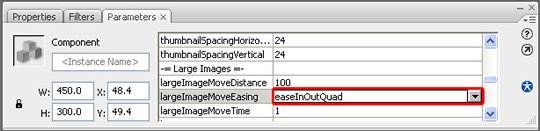
largeImageMoveEasing determines the camera
movement behaviour when a user clicks an image. Download this
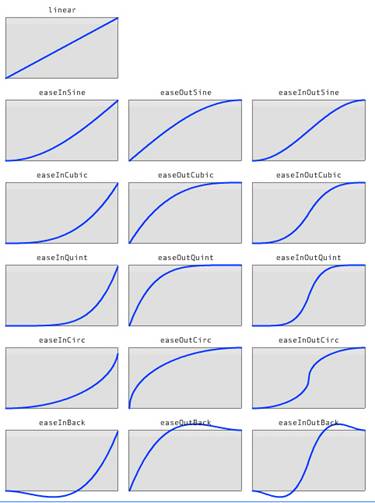
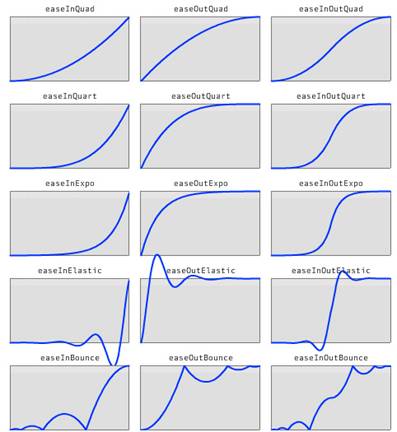
file to see the available settings. We leave it to easeInOutQuad.
You can choose from the following easing settings:
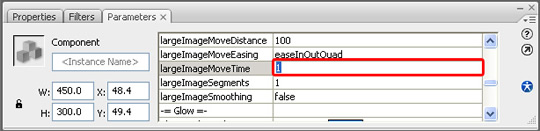
largeImageMoveTime sets the number of seconds it will take to move
the image towards the camera. We'll keep it at 1.
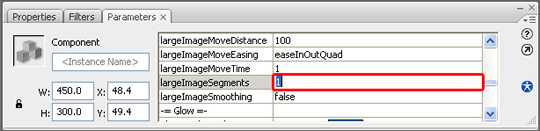
largeImageSegments sets the quality of the images of the wall, the
higher the number of Segments, the lower the deformation. We'll
keep it at 1.
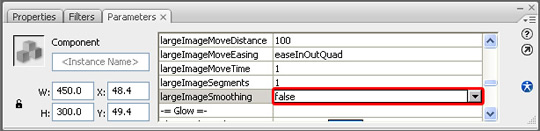
We leave largeImageSmoothing to false to keep the image as
sharp as possible.
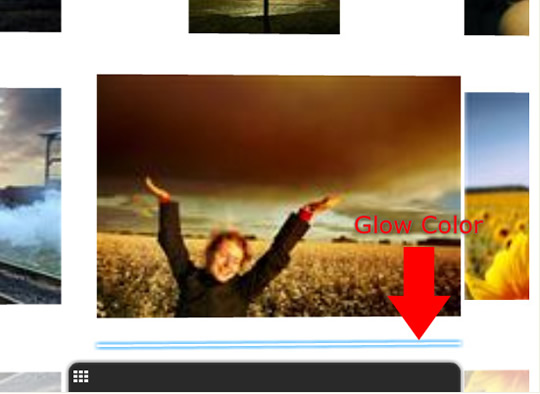
Setting the Glow options
We leave the glowLoadingColor to its default value, this is
the color of the loading bar below the large images.
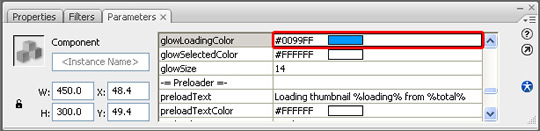
The glowSelectedColor sets the color of the glow when a thumbnail
is selected. We set it to #0066FF.
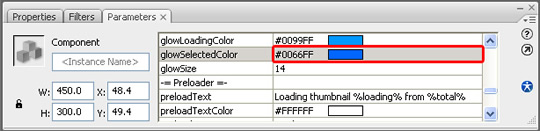
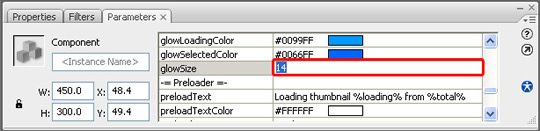
We set the glowSize to 14 to make the glow a little bit smaller.
- Defining the Preloader options
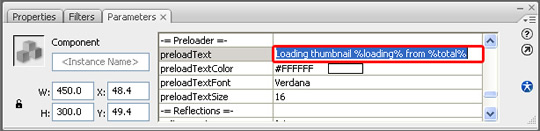
preloadText defines the text that is displayed
below the preloader. We'll leave it to its default value.
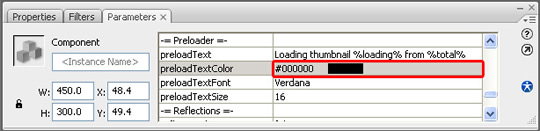
We set the preloadTextColor to black to define the text color of
the preloader.
We leave the preloadTextFont at Verdana to define the font
of the preloader.

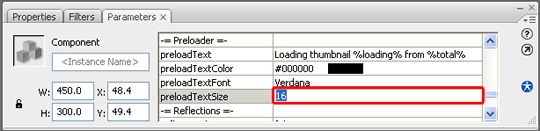
The preloadTextSize at 16 to maintain the same preloader
font size.
- Setting the Reflections options
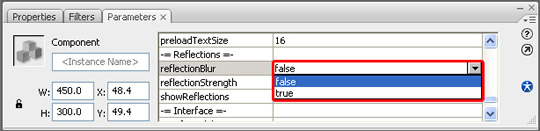
We set the reflectionBlur to false to
maintain maximum detail at our reflections.
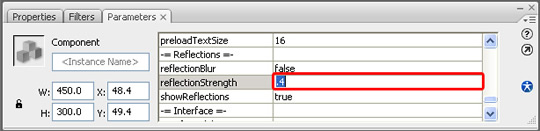
We leave reflectionStrength at .4 to keep the same strength
and transparency of our reflections.
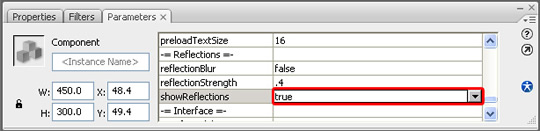
We set showReflections to true to keep our reflections.
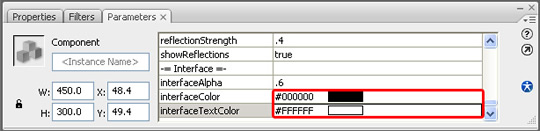
- Defining the Interface options
We leave the interfaceAlpha to .6 to
keep the same transparency of the interface bar that is visible when
viewing a large image.

We leave the interfaceColor to black and the interfaceTextColor to
white.
- Changing the Movie Size and the Frame
rate
We make our movie a bit bigger, we change the
Width to 550 and the Height to 400. We set the X and Y to 0.

We switch to the Properties tab and set the Frame rate to 31 fps for a smoother display.

 Lubov has been with DMXzone for 8 years now, contributing to the Content and Sales departments. She is bringing high quality content in the form of daily blog updates, reviews, tutorials, news, newsletters,update emails and extensions' manuals. If you have a product that needs publicity or any other questions about the entire DMXzone community, she is the one you can contact.
See All Postings From Lubov Cholakova >>
Comments
Be the first to write a comment
You must me logged in to write a comment.