Add Swiss Knife Form Validation to your forms in Dreamweaver with the Universal Form Validator PHP! Choose from many predefined validation rules like url, e-mail, dates, credit cards and ranges, apply conditional validation and even Ajax style inline validation! The validation errors and hints can be displayed in great tooltips and input masking can be applied. All fully customizable to your layout and needs! The user input is validated both client as well as server side - so there is no escape!
Universal Form Validator PHP Manual
Add Swiss Knife Form Validation to your forms in Dreamweaver with the Universal Form Validator PHP!


Advanced: Tooltip Hints and Messages
Introduction
In this tutorial we will show you how to use Tooltip Hints and customize the error messages that appear when you use DMXzone Universal Form Validator.
How to do it
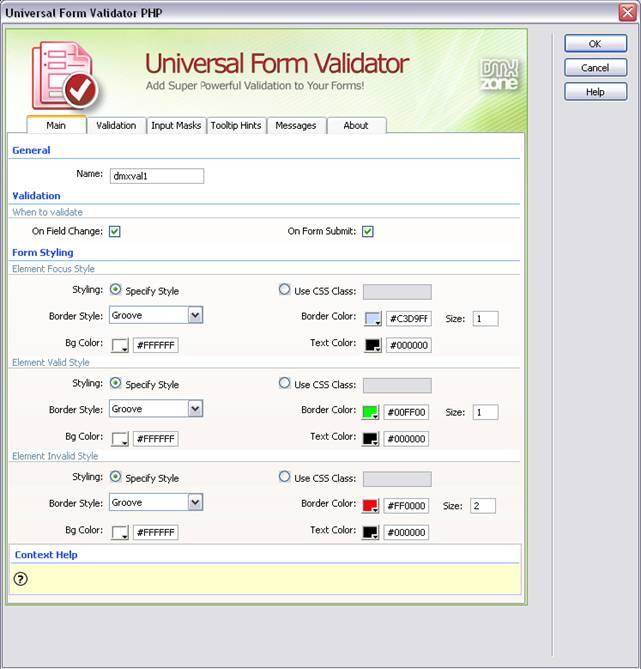
1. Add your Universal
Form Validator
As you can see, we've already added a Universal Form Validator and set
up its primary options in the previous chapter. If you don't know how to do
that, refer to the previous chapter.
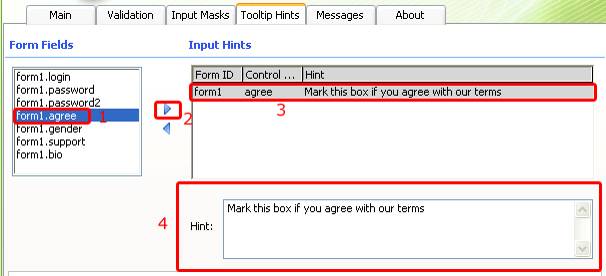
2. Go to the Tooltip
Hints tab
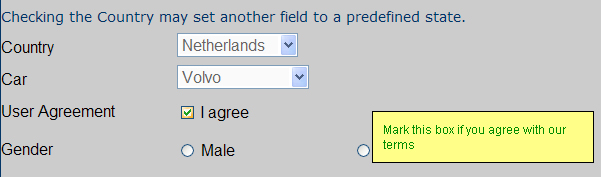
Select the field you want to add a tooltip for under Form Fields and
click the blue arrow to add it under Input Hints. You can add more than
one field and add a field multiple times here.
Select each one to add a specific hint to it. We choose form1.agree for
this tutorial.
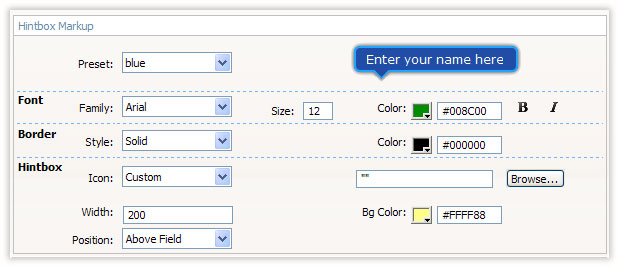
3. Set the Hintbox Markup.
Here you can customize the look of your tooltip. Take a look at the settings we
have chosen.
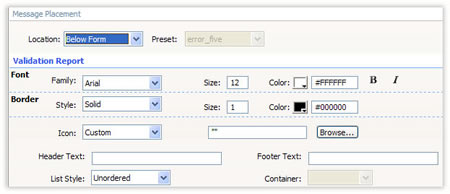
4. Moving on to the Messages tab
Here, you can customize all your error messages.
You can set the Font, Size, Color and Bold/Italic properties as well as add an Icon (your own design or from the Validator's list) and Edit
Messages by changing their Language and editing the text in the
message itself. Something very important to remember to save your updated
messages by pressing "Update Language Files" after you've finished editing
them.
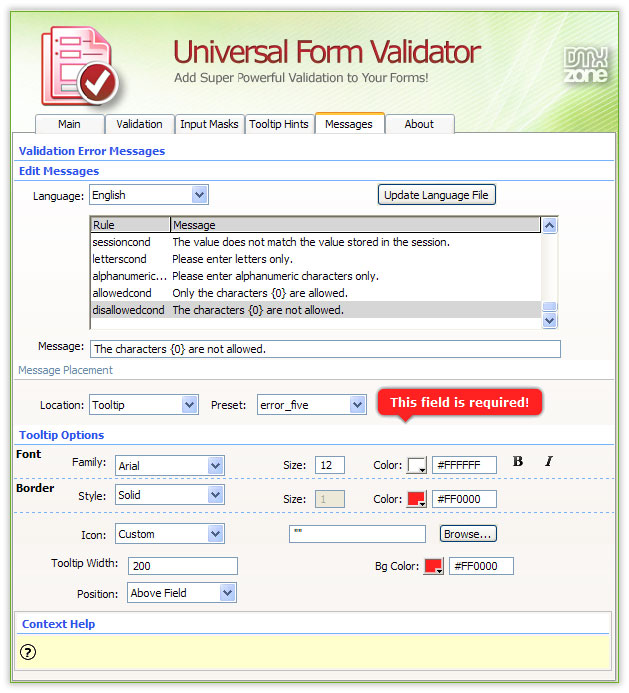
You can also select the Location appearance for the error message on your page.
You can read more about each type of locations and see
its options in the Reference: Messages chapter.
Let's select "Below Form" for example. You can also set the Header Text, Footer Text, List Style, Border Size, Icon, Text Font, and Border Color. Here are the settings we have chosen.
5. When you are done
Save your work and test it in your browser.
Comments
Be the first to write a comment
You must me logged in to write a comment.