DMXzone Nivo Slider 3 Manual
Learn how to work with DMXzone Nivo Slider 3 extension
In this article you'll find all the information about working with DMXzone Nivo Slider 3 extension. We covered everything from basic to advanced usage of this tool, including - creating a responsive slider, using DMXzone Nivo Slider 3 behaviors, creating of custom controls and building a slider from dynamic image source. If you need additional help, please post in our support forums or contact our Live support during business hours.
Advanced: Custom Controls for DMXzone Nivo Slider 3
In this tutorial we will show you how to create custom controls for DMXzone Nivo Slider 3.
*You can also check out the video.
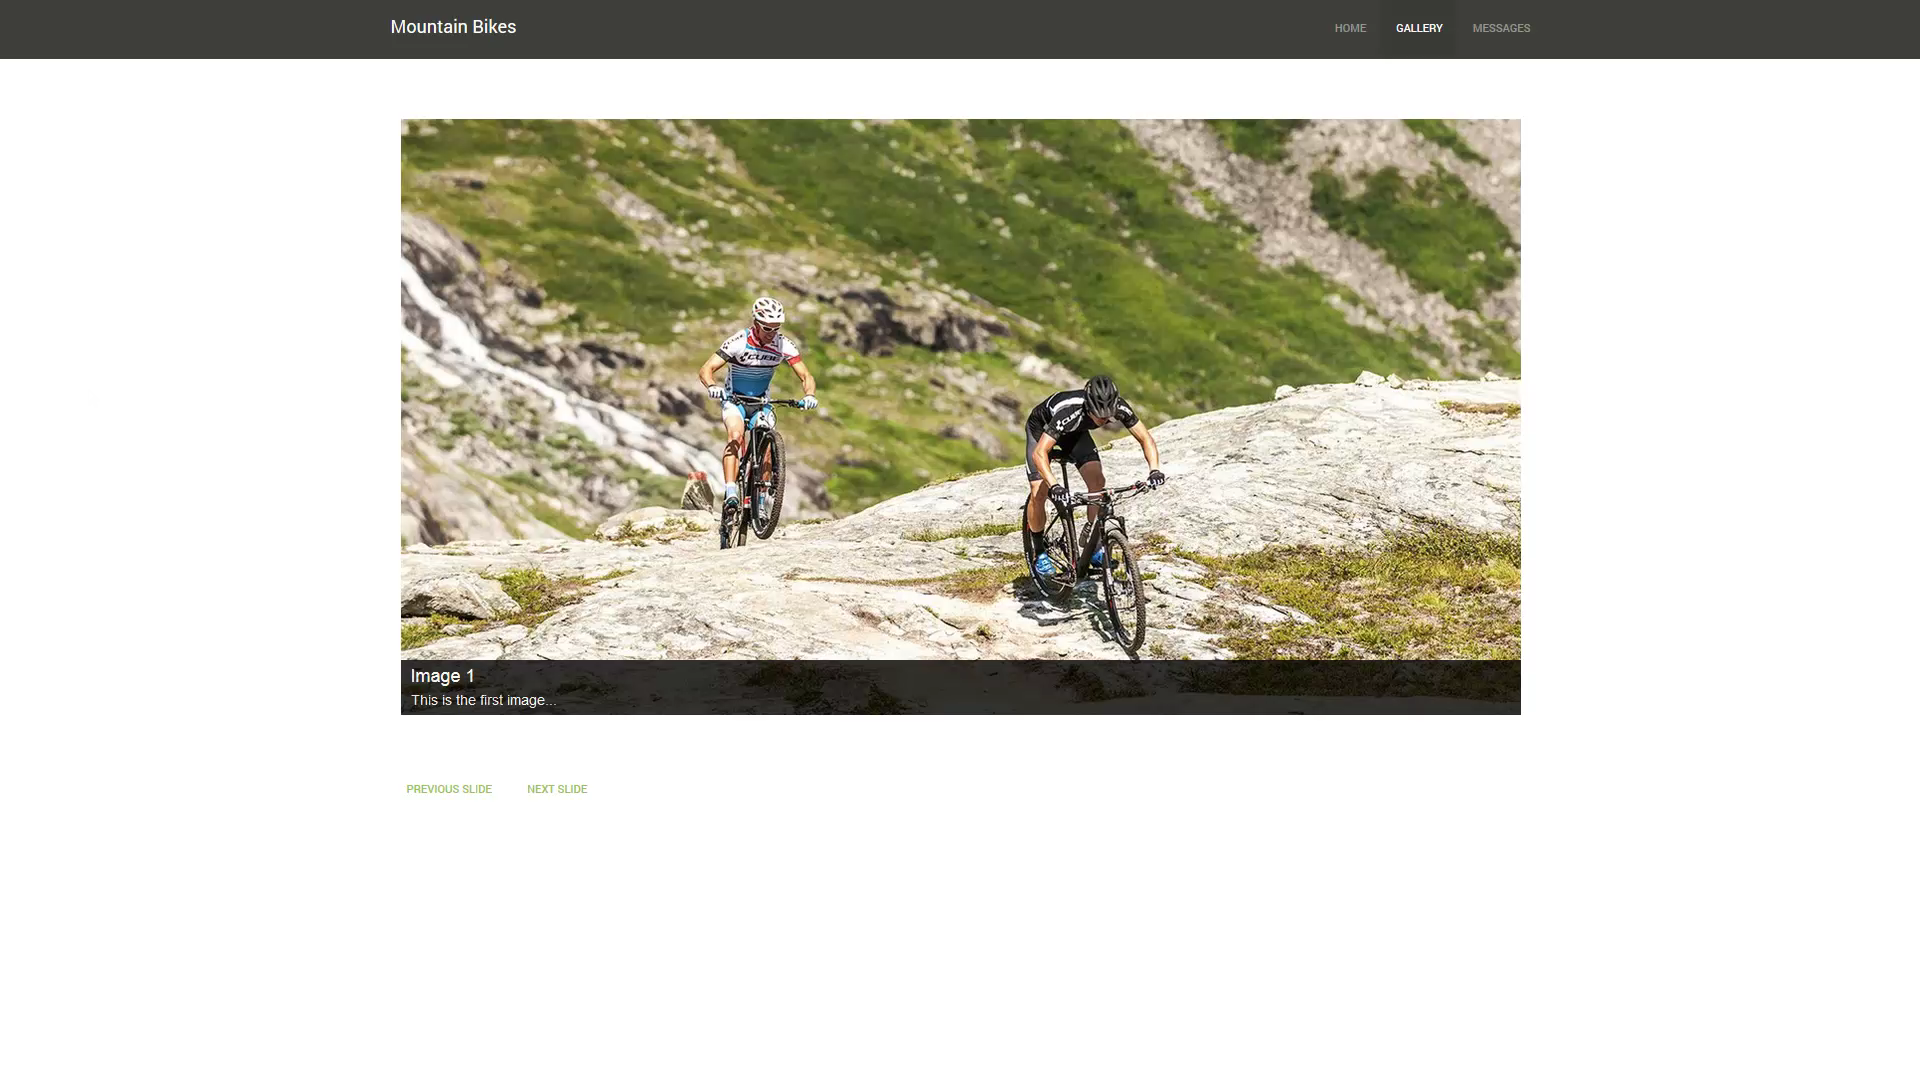
How to do it
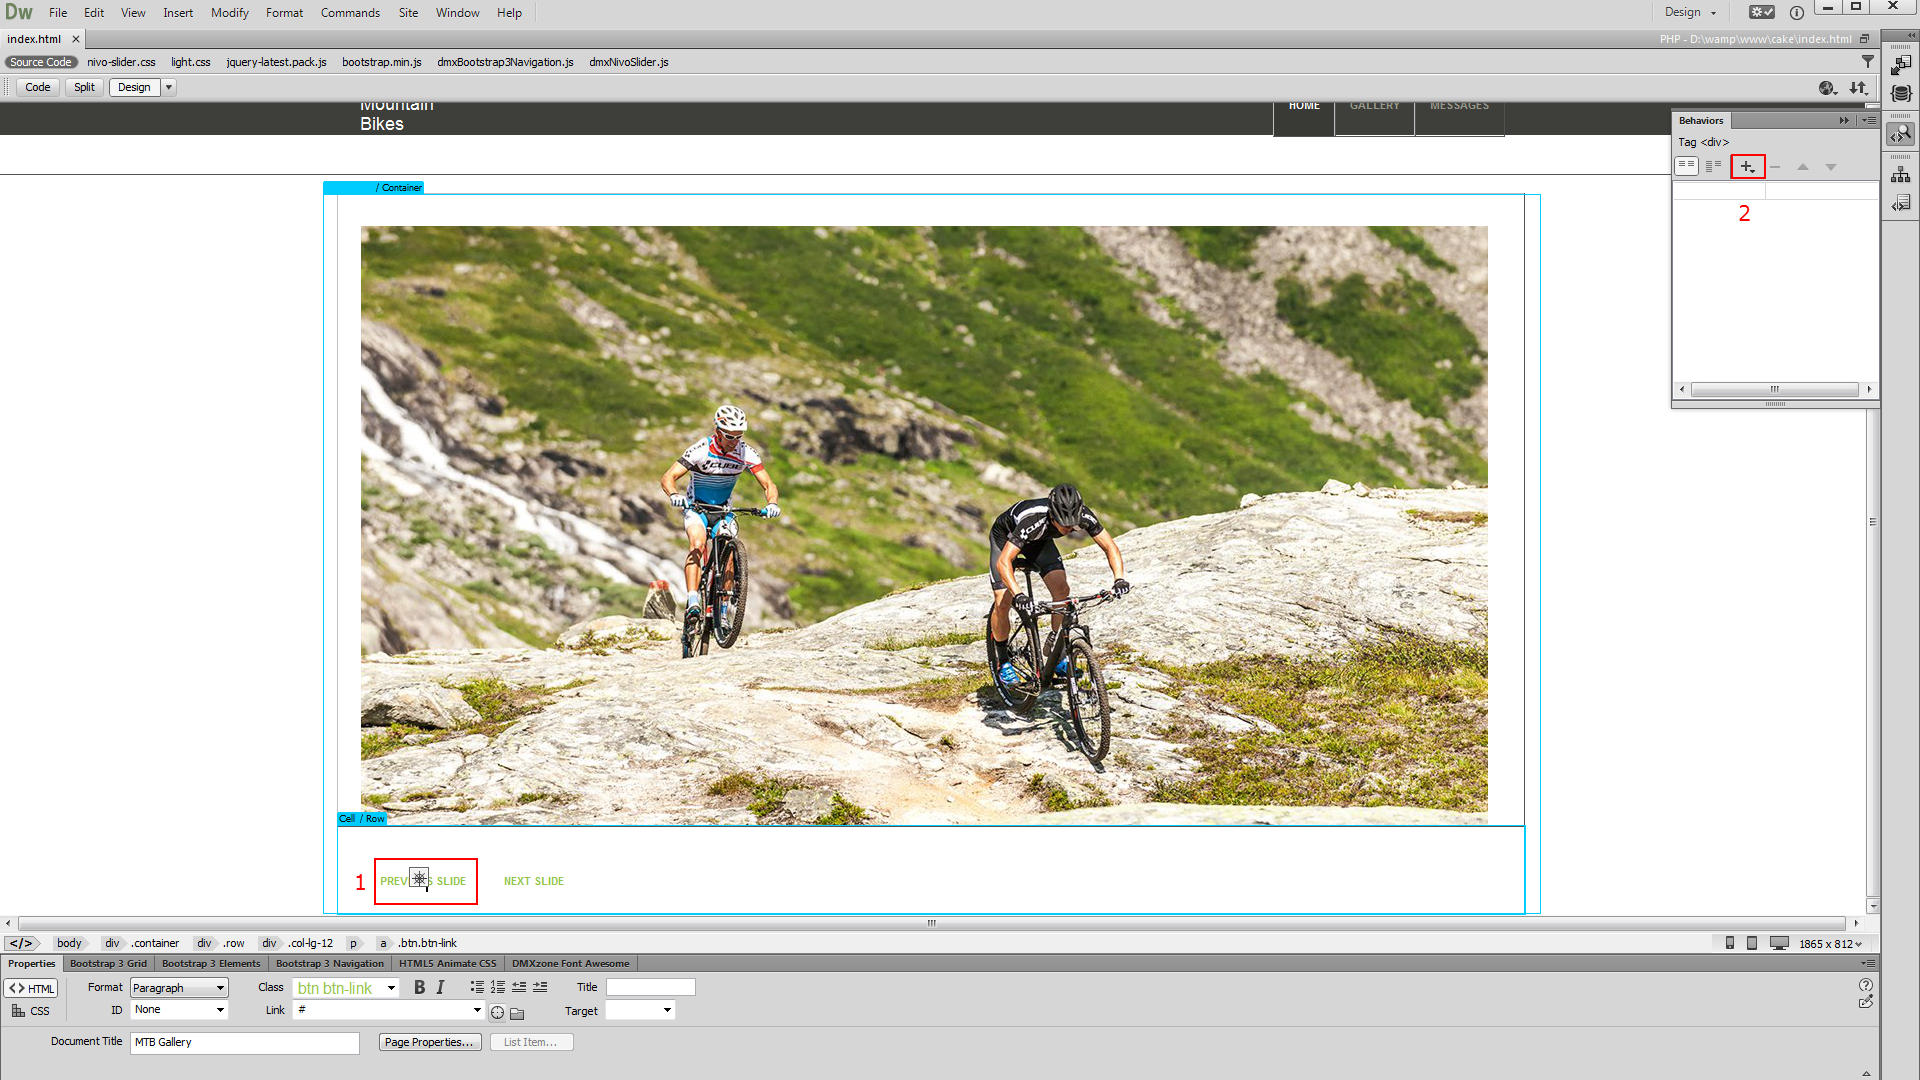
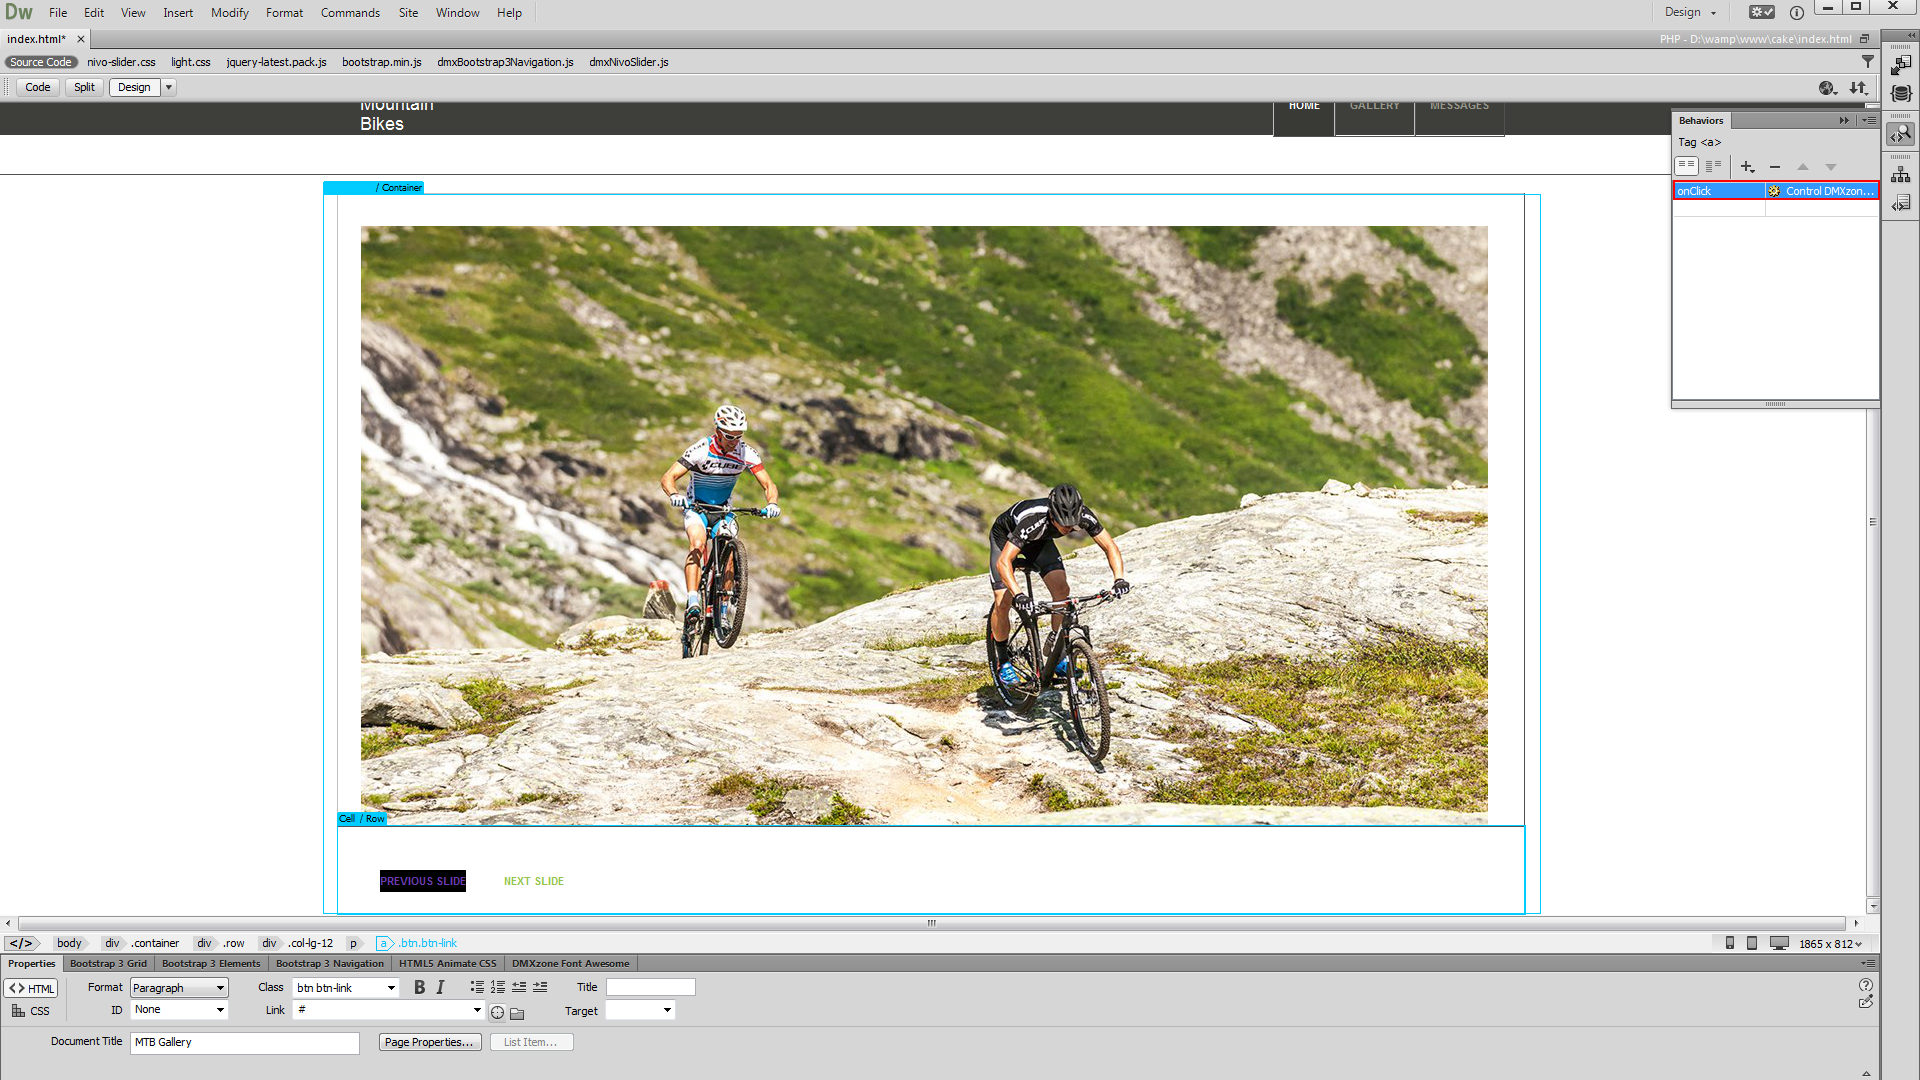
- We already added the slider on our page but we want to use custom control buttons that we created to match our page layout. We turned the previous, next and paging controls off from the advanced tab. And we also created two simple anchor buttons that will change the slides, when clicked. Select the previous slide button (1) and from the behaviors panel, click add behavior button (2).
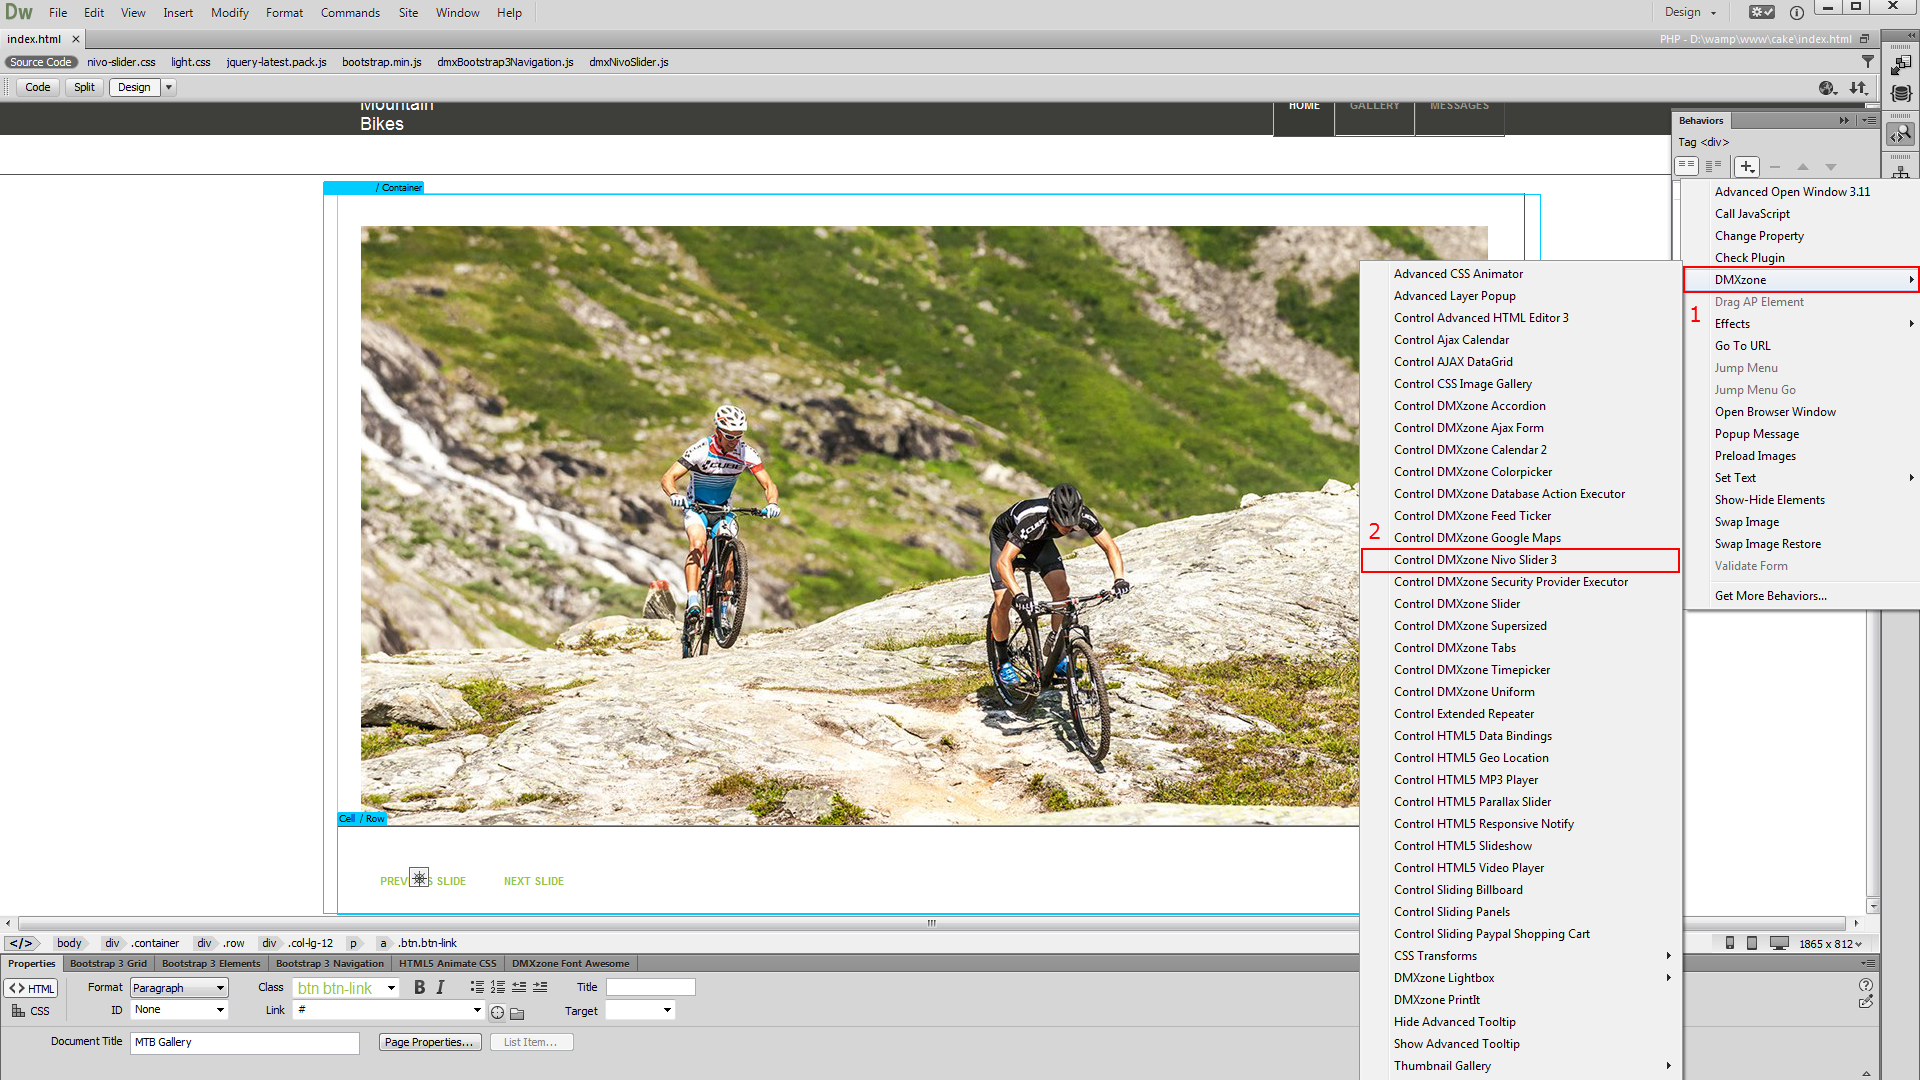
- From the DMXzone menu (1) select control DMXzone Nivo Slider 3 (2) options.
- Open the action menu and select previous (1) as this is our previous slide button. When you're done, apply the behavior (2).
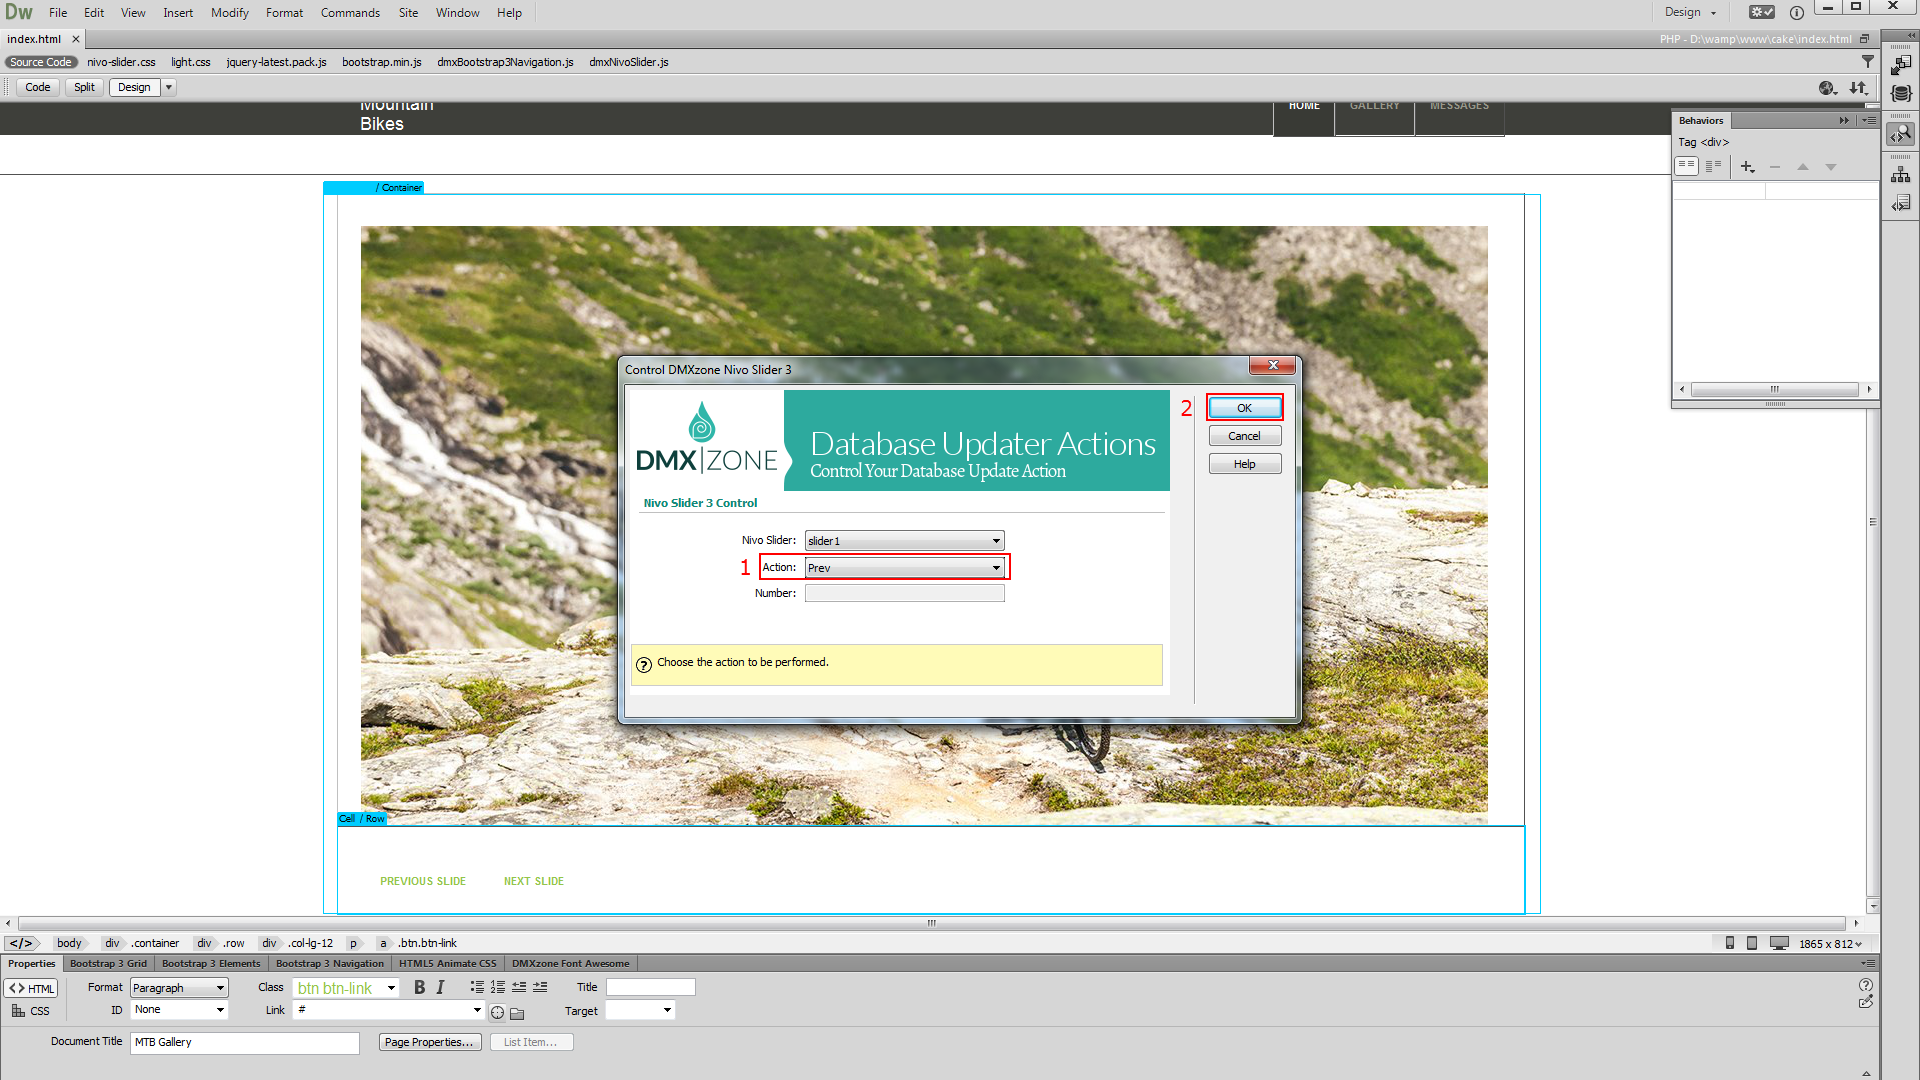
- Make sure that it is applied on click. We do the same with our next slide button this time we select the next action.
- Now you can save your work and preview the results in the browser.
Comments
Be the first to write a comment
You must me logged in to write a comment.