DMXzone Nivo Slider 3 Manual
Learn how to work with DMXzone Nivo Slider 3 extension
In this article you'll find all the information about working with DMXzone Nivo Slider 3 extension. We covered everything from basic to advanced usage of this tool, including - creating a responsive slider, using DMXzone Nivo Slider 3 behaviors, creating of custom controls and building a slider from dynamic image source. If you need additional help, please post in our support forums or contact our Live support during business hours.
The Basics: Creating a Responsive Nivo Slider
In this tutorial we will show you how to add a responsive image slider to your page using DMXzone Nivo Slider 3.
*You can also check out the video.
How to do it
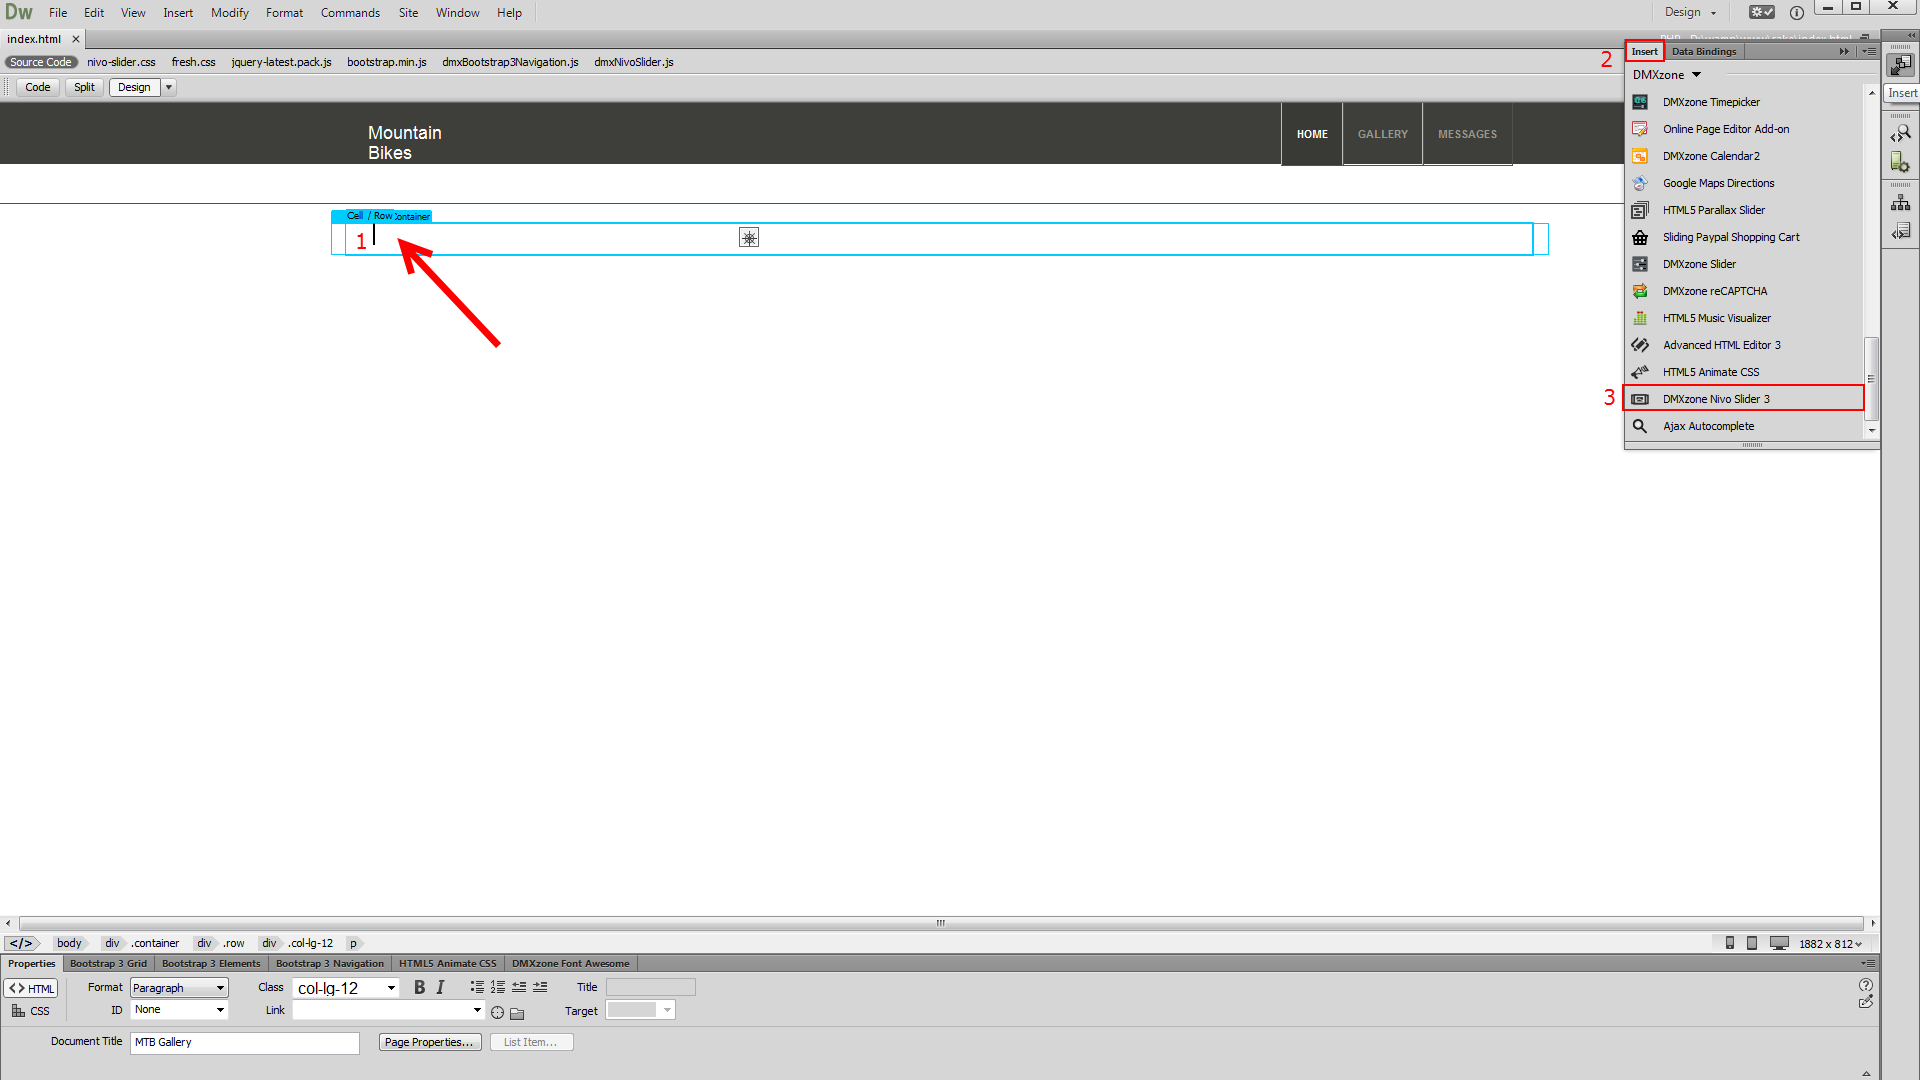
- We created a really basic page layout. Our page contains a
responsive Bootstrap 3 container. Inside the container we want to add an
image slider that takes 100% of its width. Click inside the container (1) and from the insert panel (2) select DMXzone Nivo Slider 3 (3).
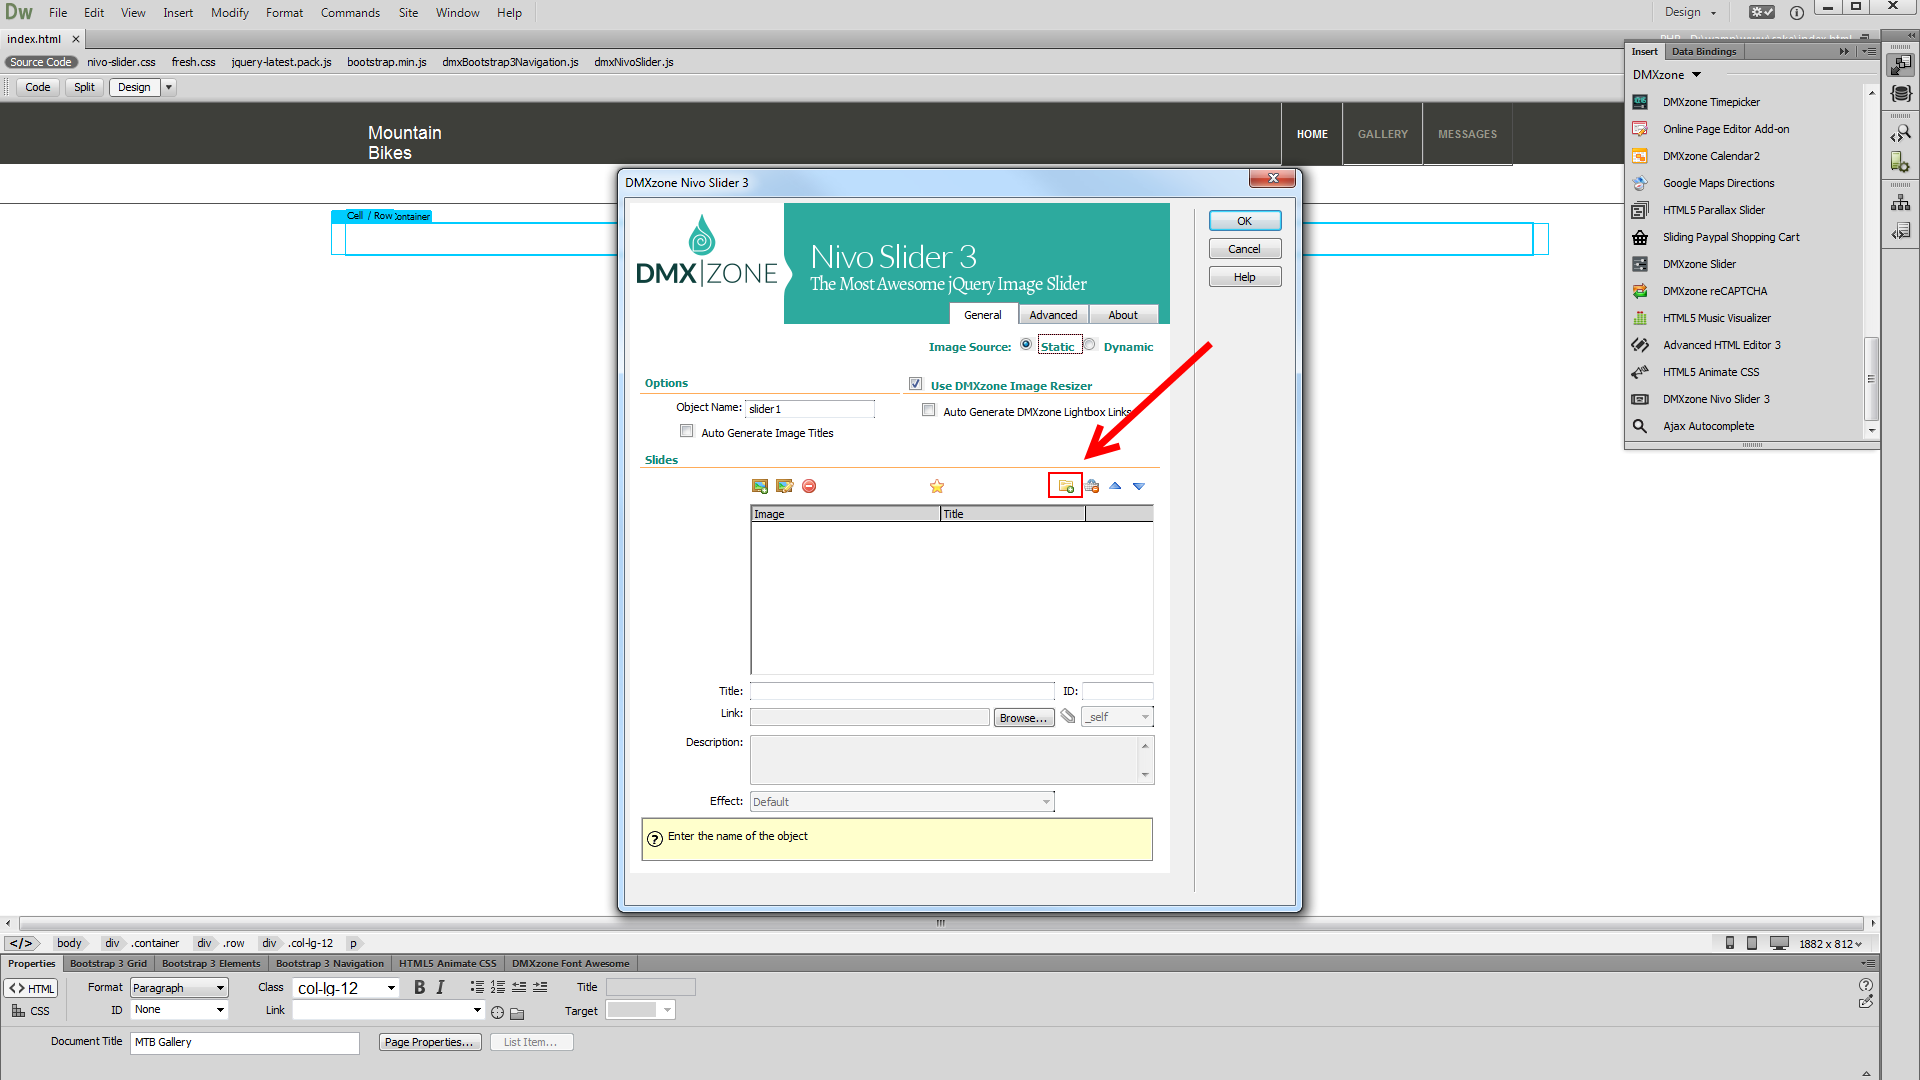
- For this tutorial we are going to use a static image source. That means that we will select the images manually from some location, on our hard drive. You can choose whether to use the DMXzone Image Resizer 2 when importing the images into the slider. If you already resized your images with some image-editing software, like Photoshop you can turn this option off. You can import a single image or a folder of images. We'll add a folder of images.
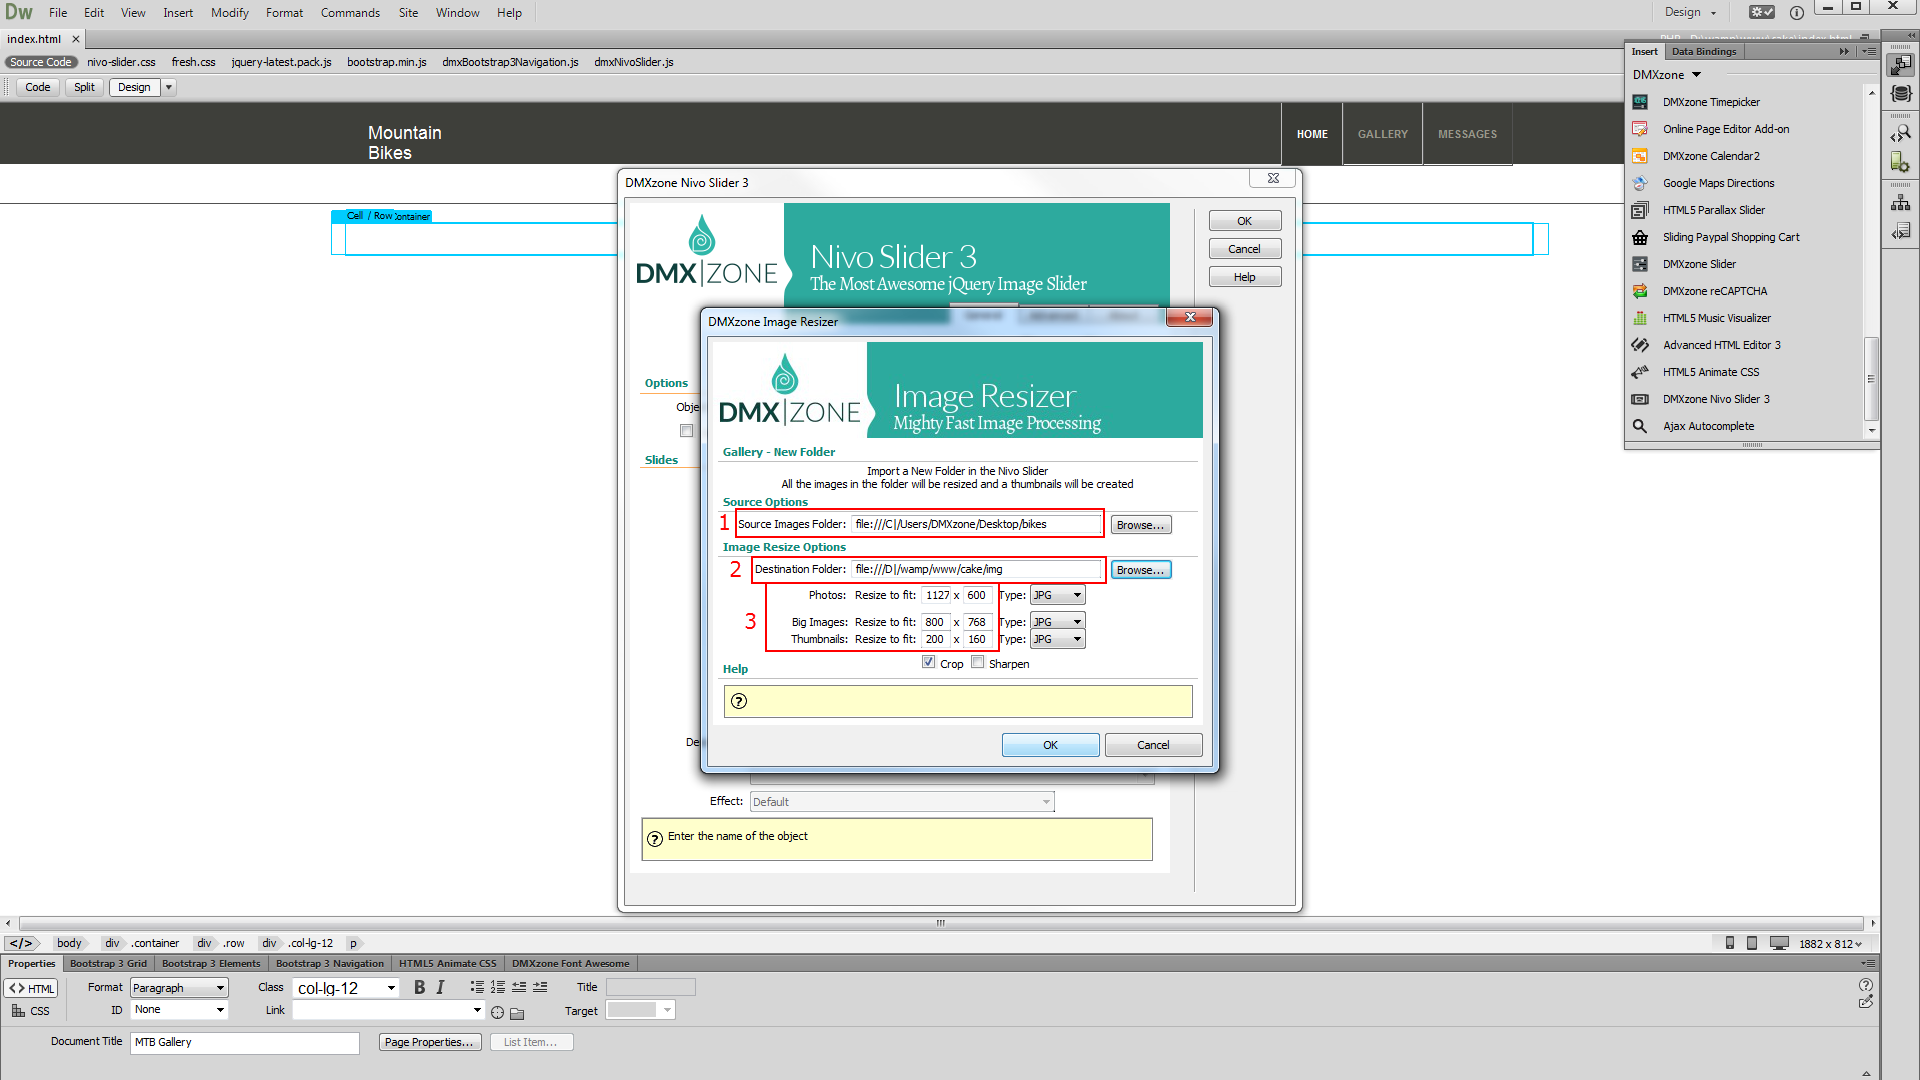
- The DMXzone Image resizer 2 dialog appears as we enabled it. Select the source images folder (1) and select the destination folder (2). Note, that the destination folder should be located inside your site root. Adjust the images resize options. Enter the width and height (3) that your Slider Images, Big Images and Thumbnails should be. When you're done, click OK.
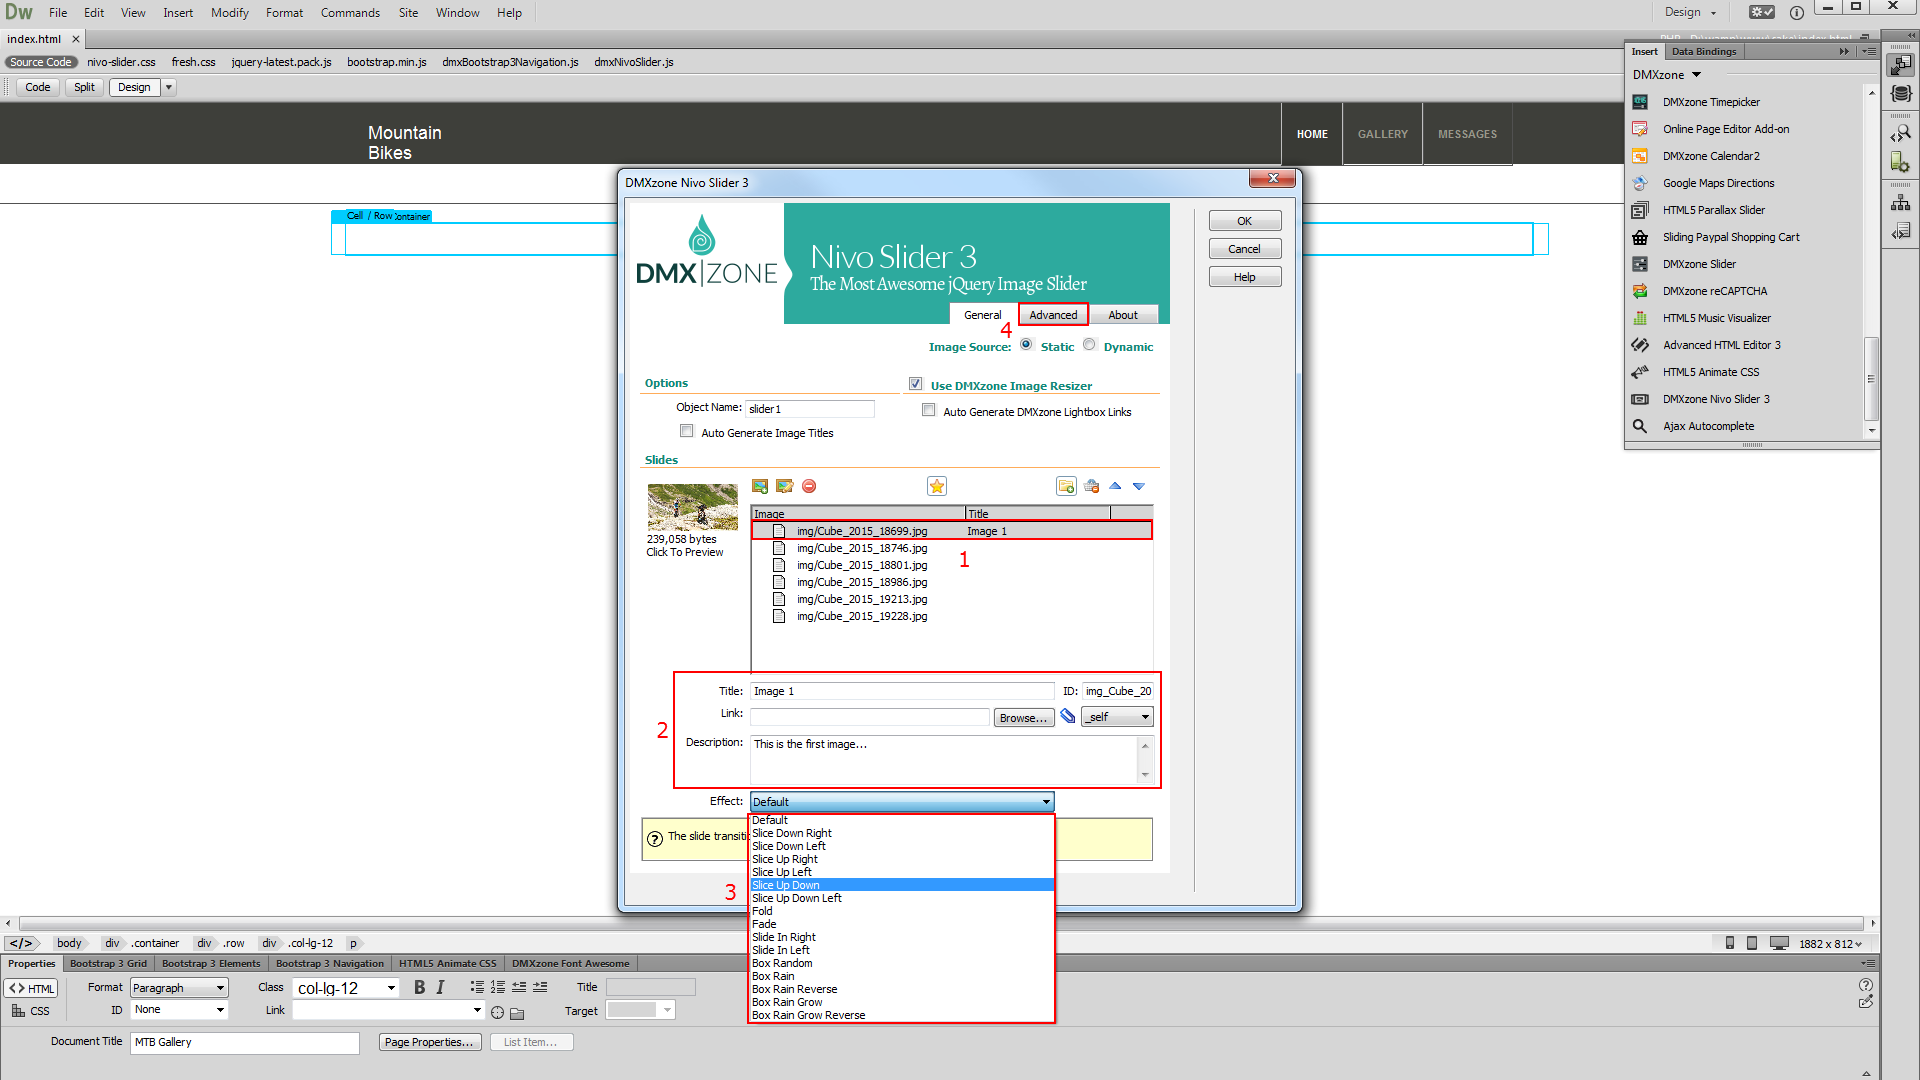
- You can see the slides, created by importing the folder
with images. When you select any of the slides (1) you can add title,
link and description (2). Also, you can select a different animation
effect for each of your slides (3). When you're done
customizing the slider, click the advanced tab (4).
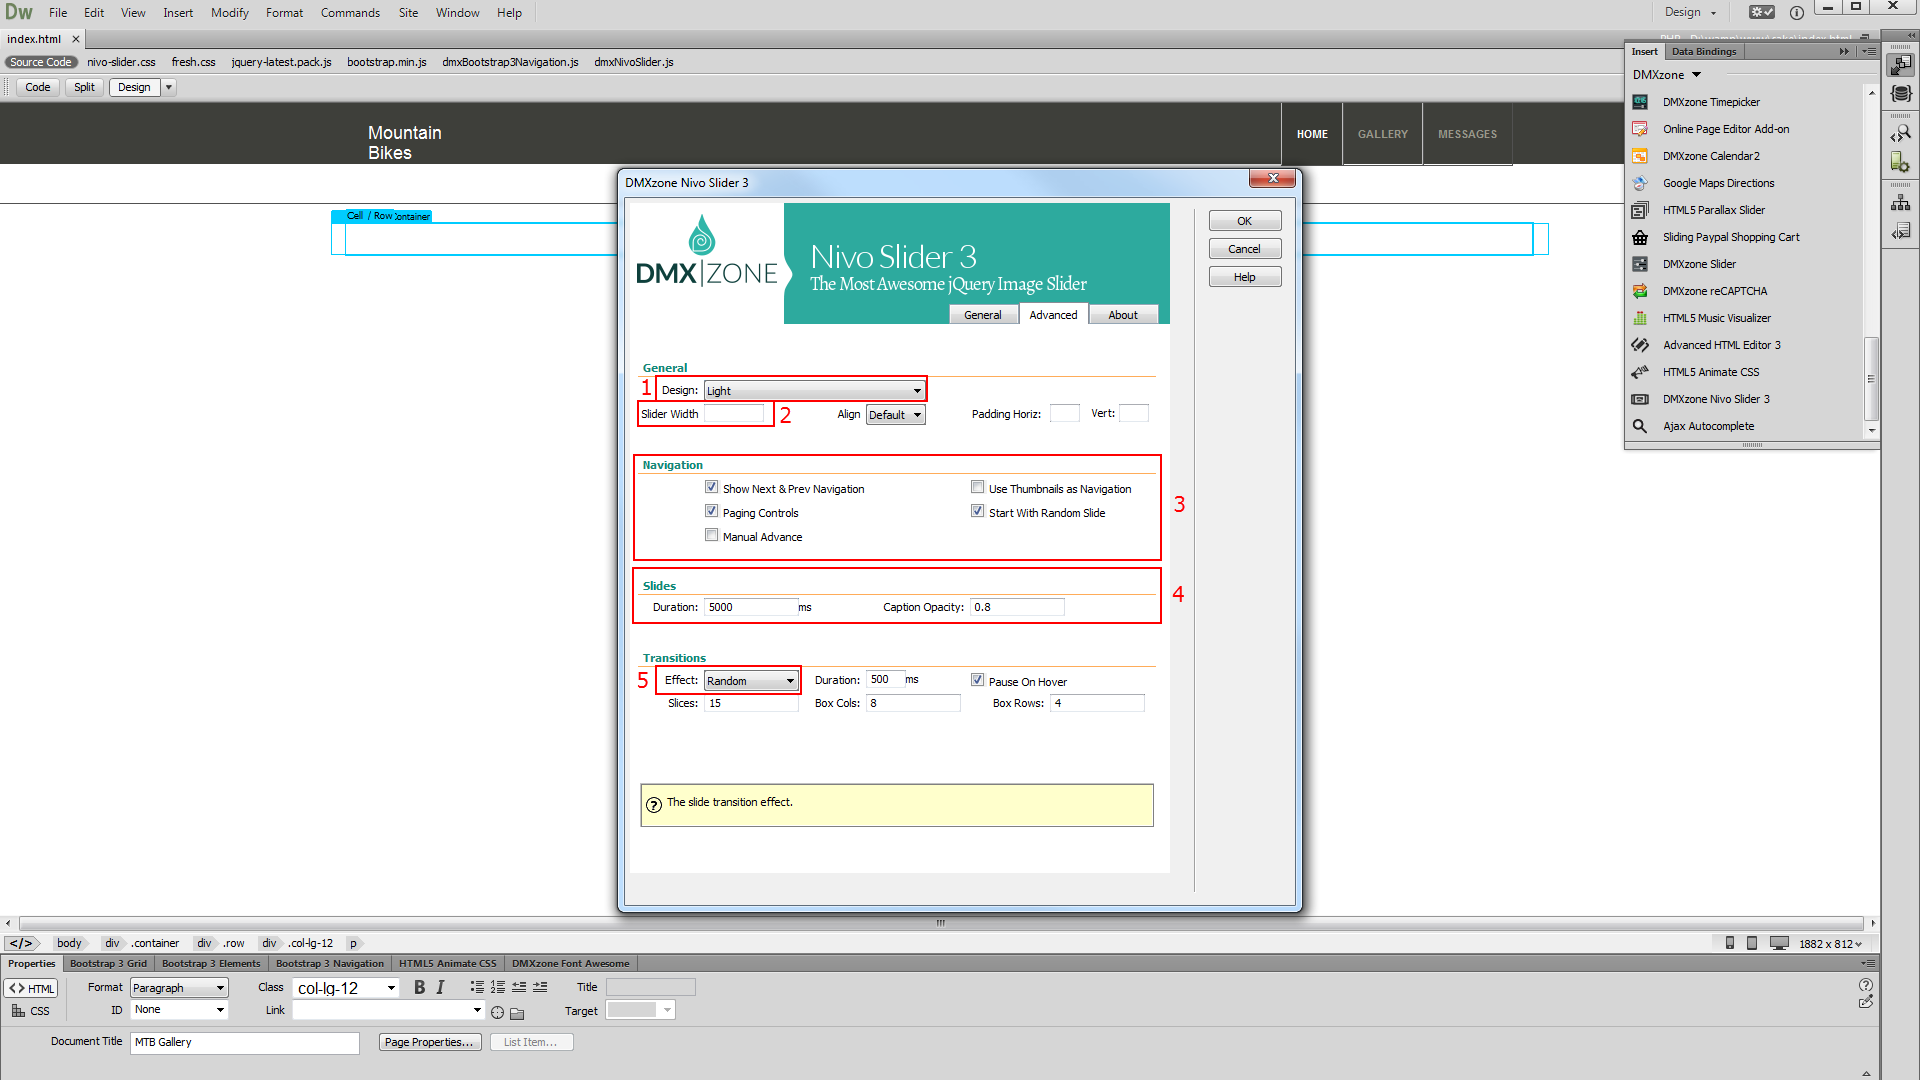
- For this tutorial we use the Light preset (1). You can set a width for the slider but we leave the width field empty (2). This way our slider width is 100% of the container that is placed into in order to be responsive. You can also customize the navigation options (3). Also you can setup the slides duration and captions opacity (4). We select the default animation effect for our slider - random (5). When you're done, click OK.
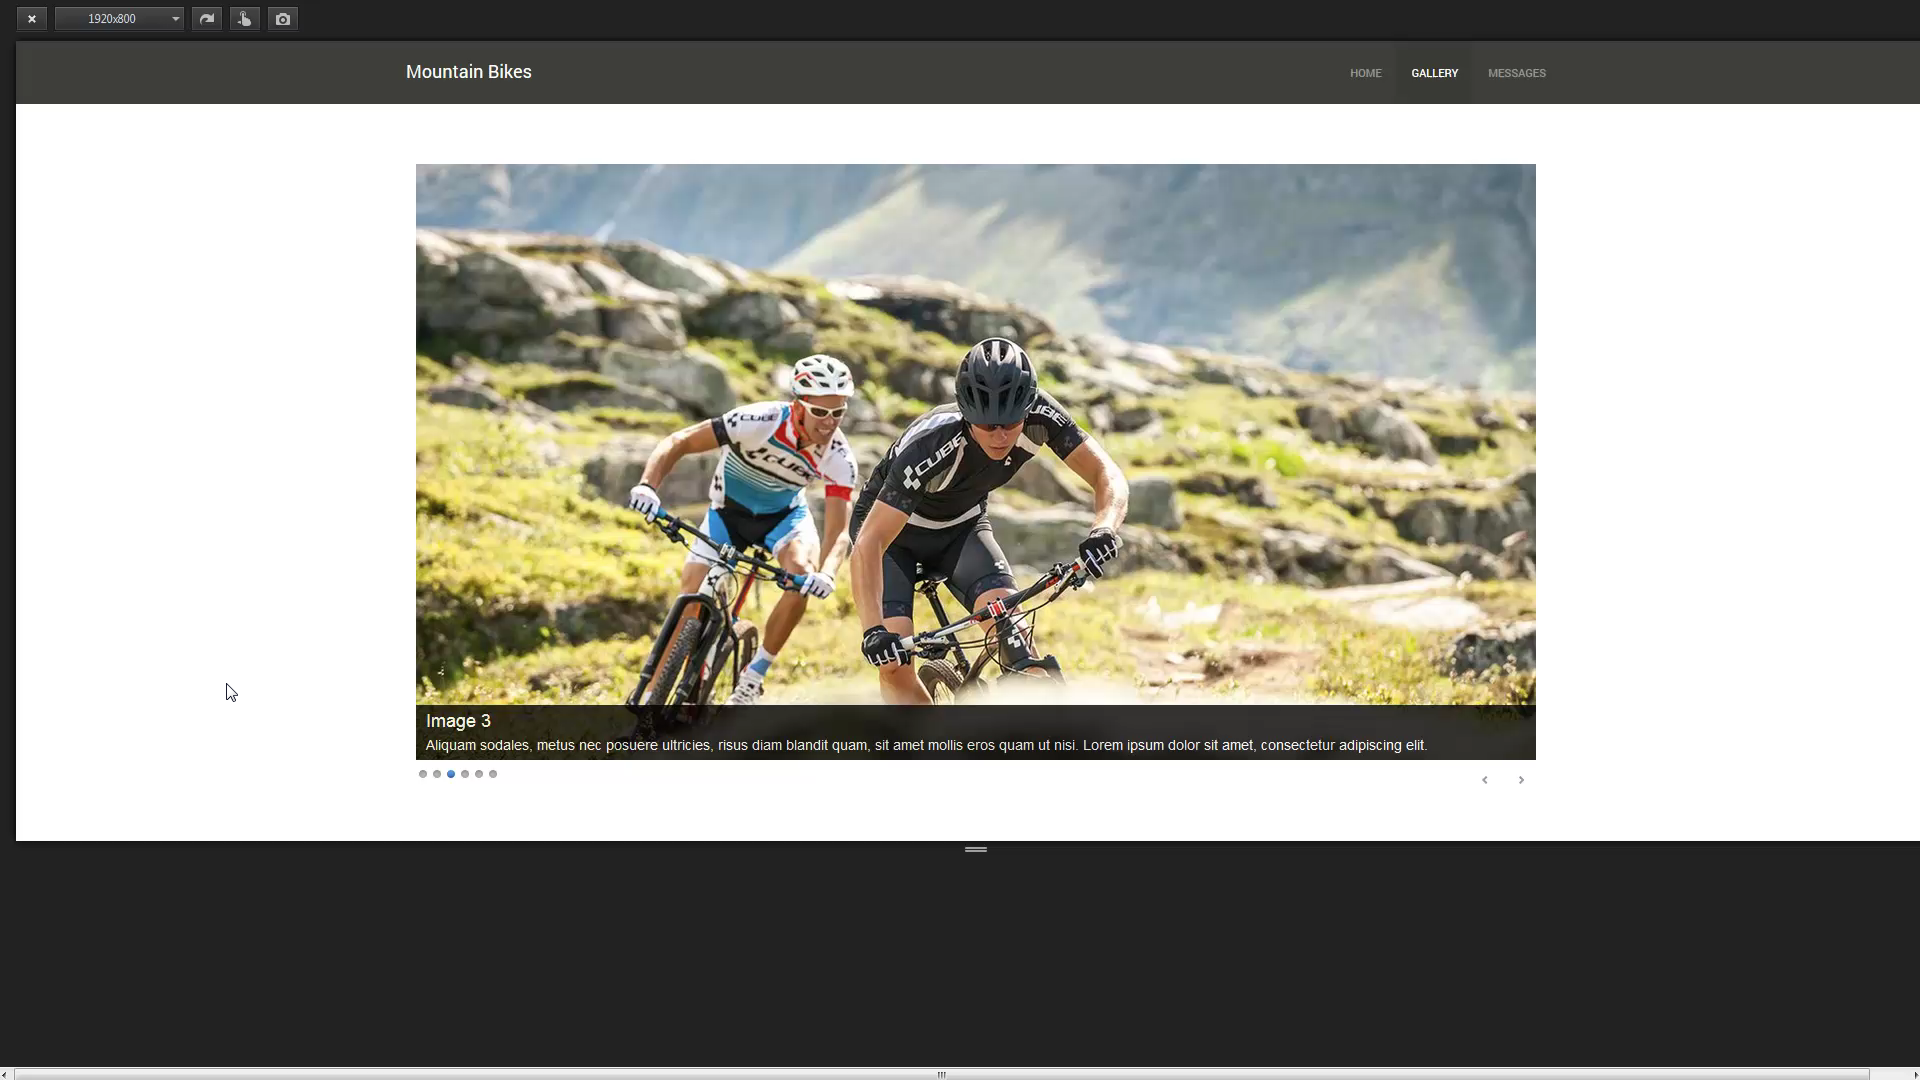
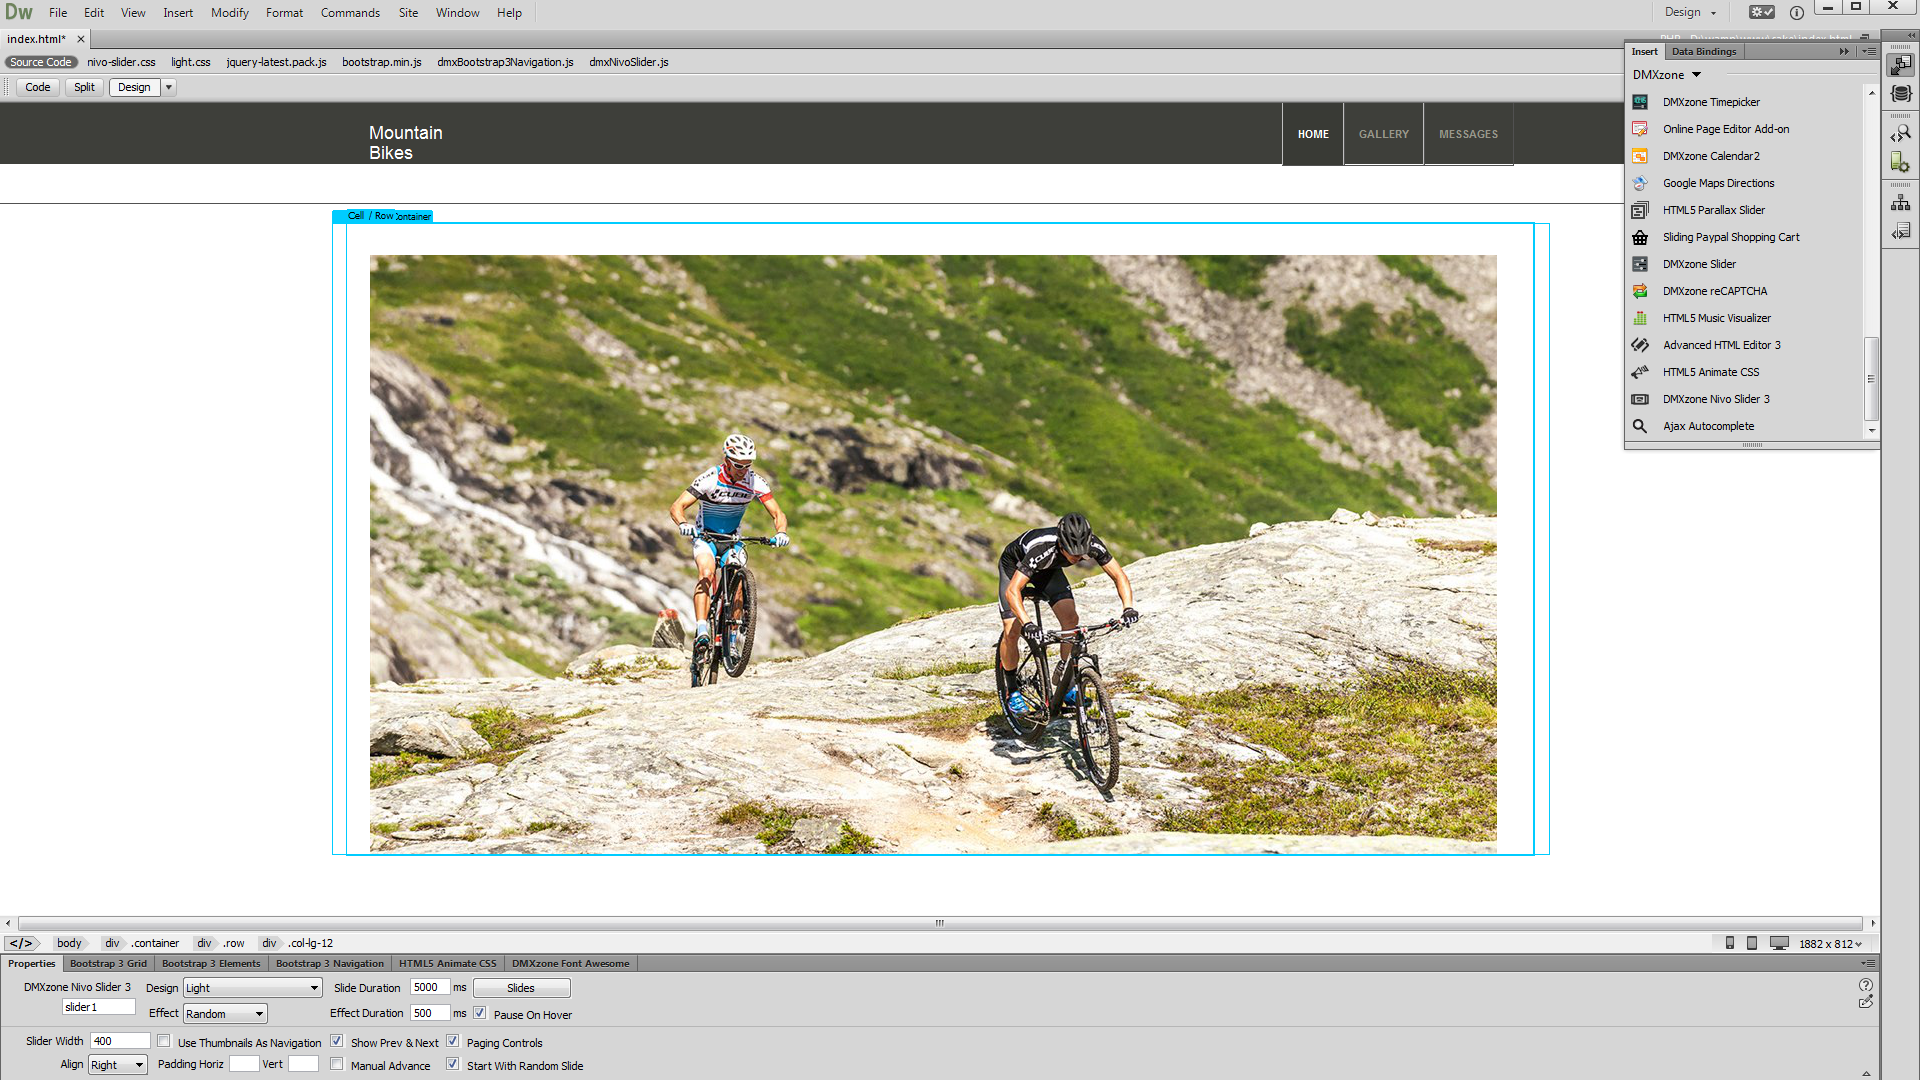
- Now, you can save your work and preview the result in your browser.
Comments
Be the first to write a comment
You must me logged in to write a comment.