In this article you'll find everything you need in order to work with the DMXzone Tabs 2 Dreamweaver extension. We covered basic usage such as how to insert it on your page as well as dynamic usage. The tutorials are also available in video format. If you ever experience any troubles working with the extensions, please contact us via the support forums or the Live support during business hours.
DMXzone Tabs 2 Manual
Learn how to work with DMXzone Tabs 2
The Basics: Insert DMXzone Tabs 2 on your Page
In this tutorial we will show you how to insert DMXzone Tabs 2 on your
page.
*You can also check out the video.
How to do it
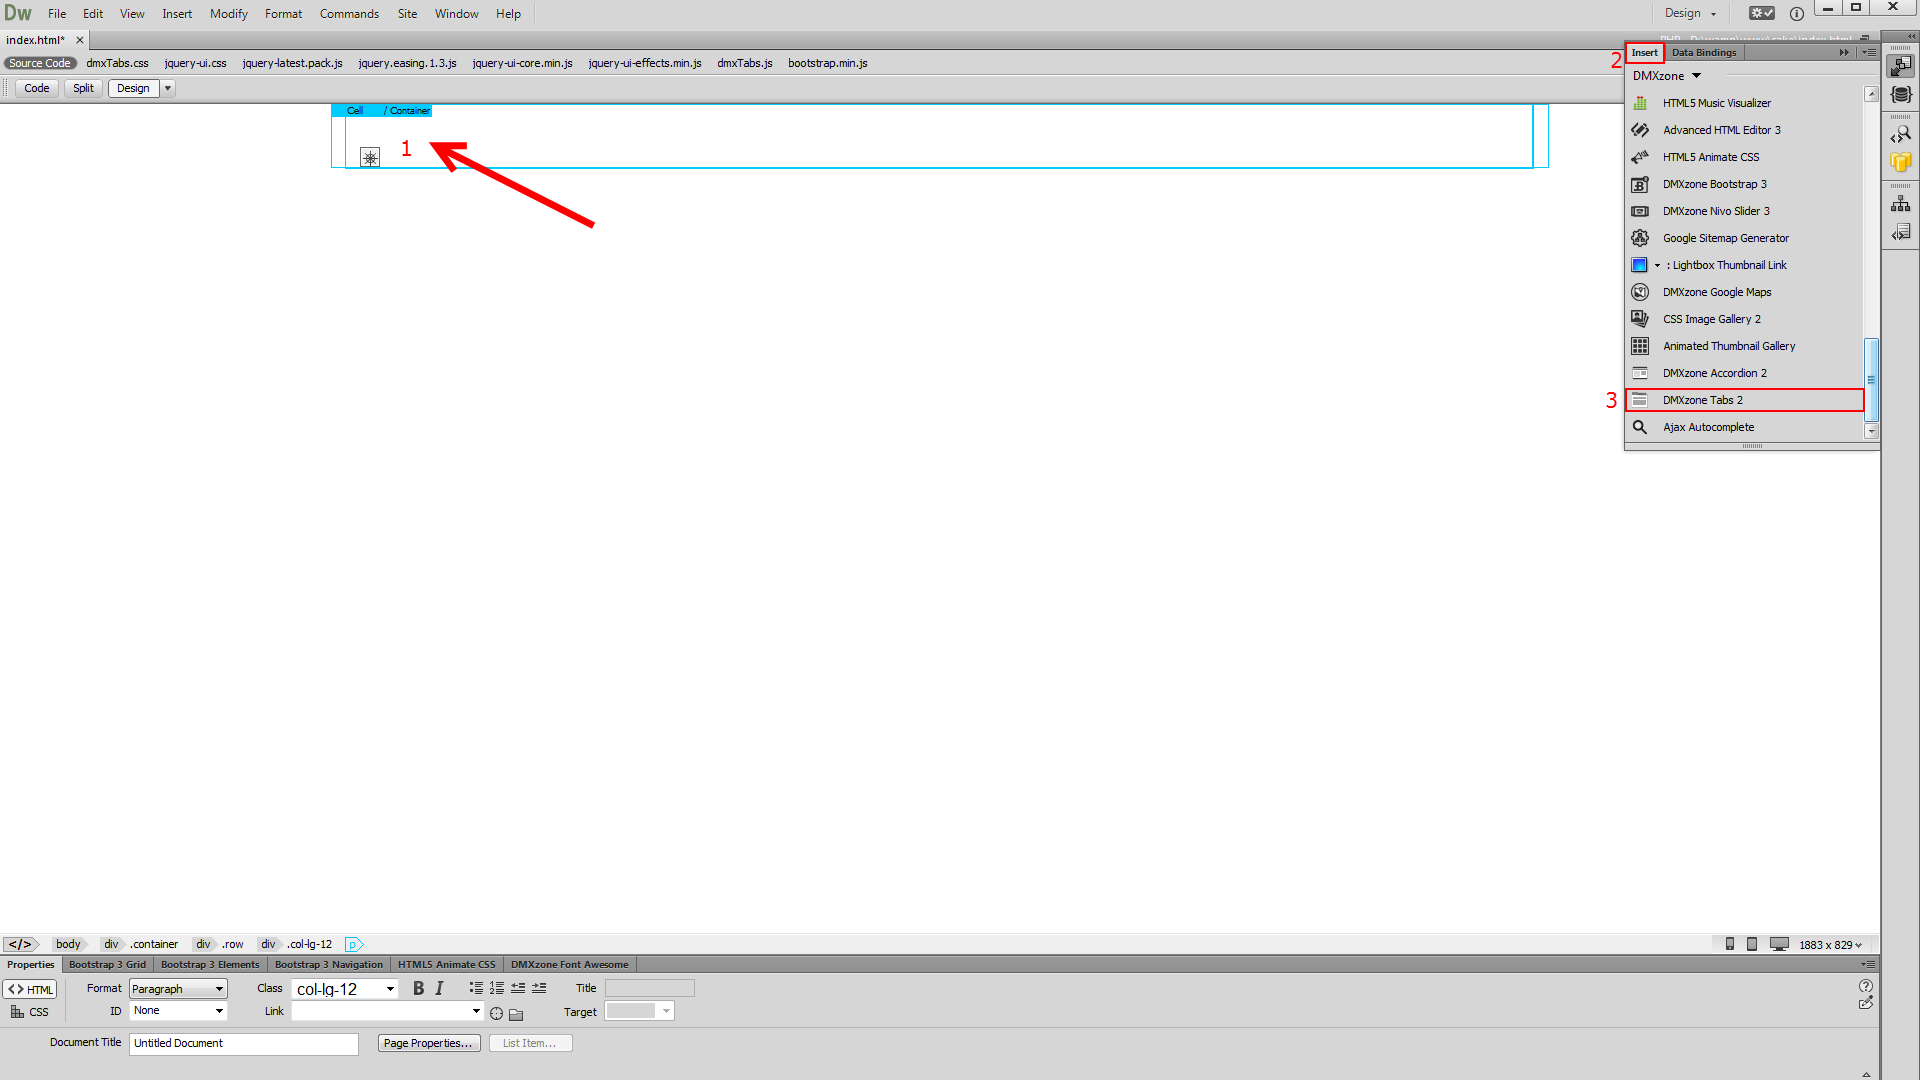
- We created a really basic page layout. Our page contains a responsive Bootstrap 3 container. Inside the container we want to place the DMXzone Tabs. Click inside the container (1) and from the insert panel (2) select DMXzone Tabs 2 (3).
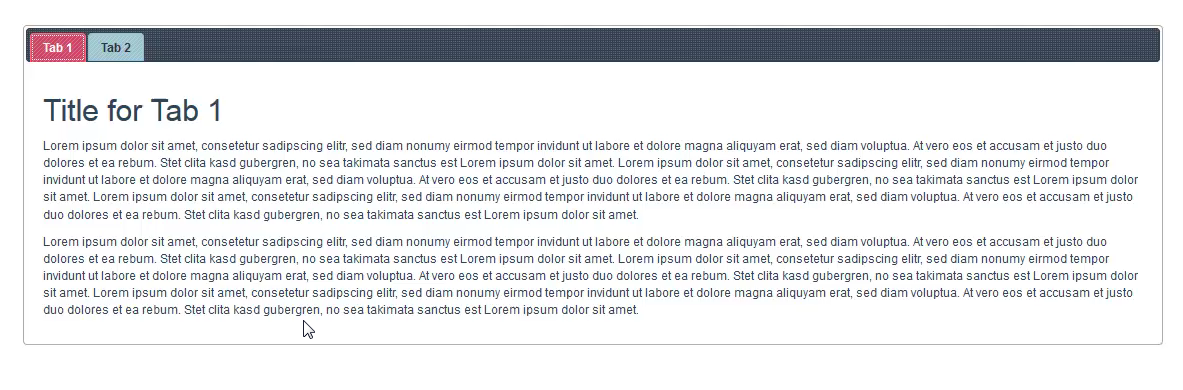
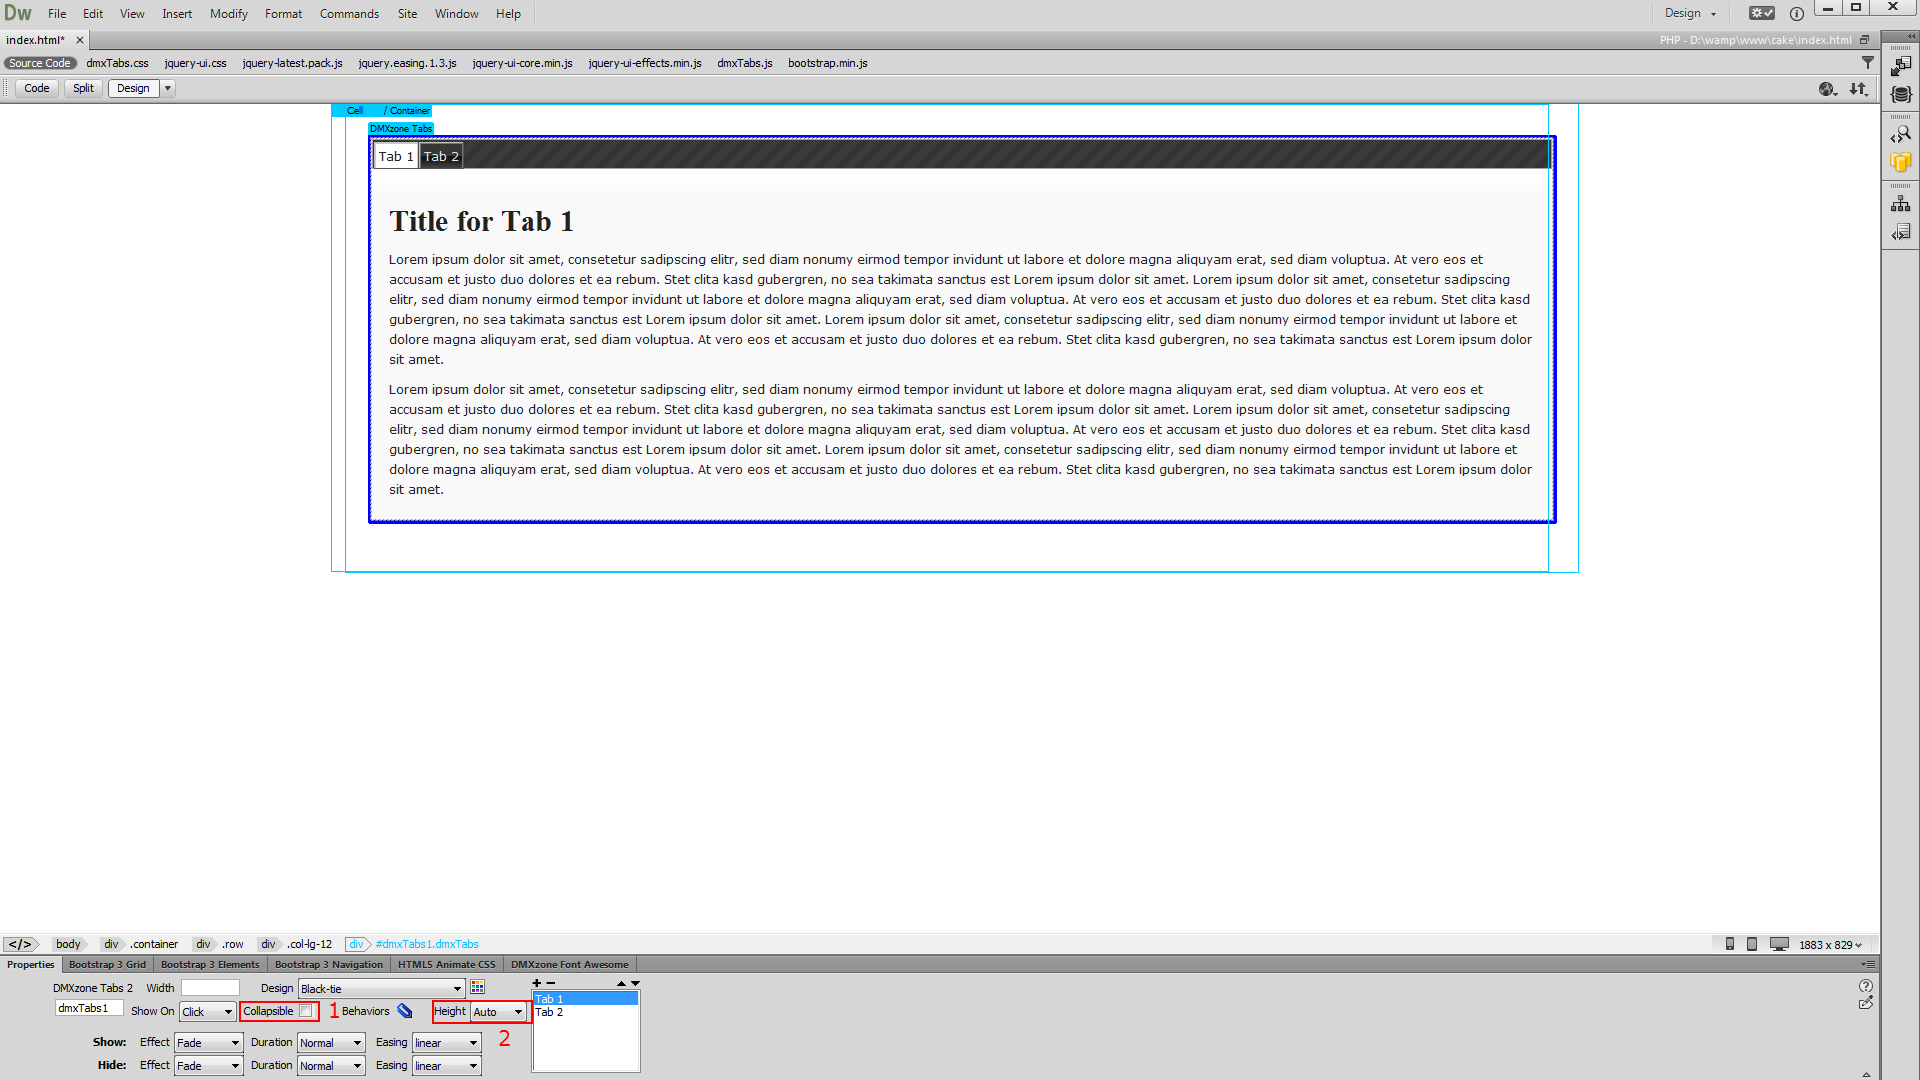
- DMXzone Tabs 2 was successfully inserted on your page. Click the blue label (1), in order to adjust the tabs settings. You can find the settings of the tabs, in the properties inspector panel (2).
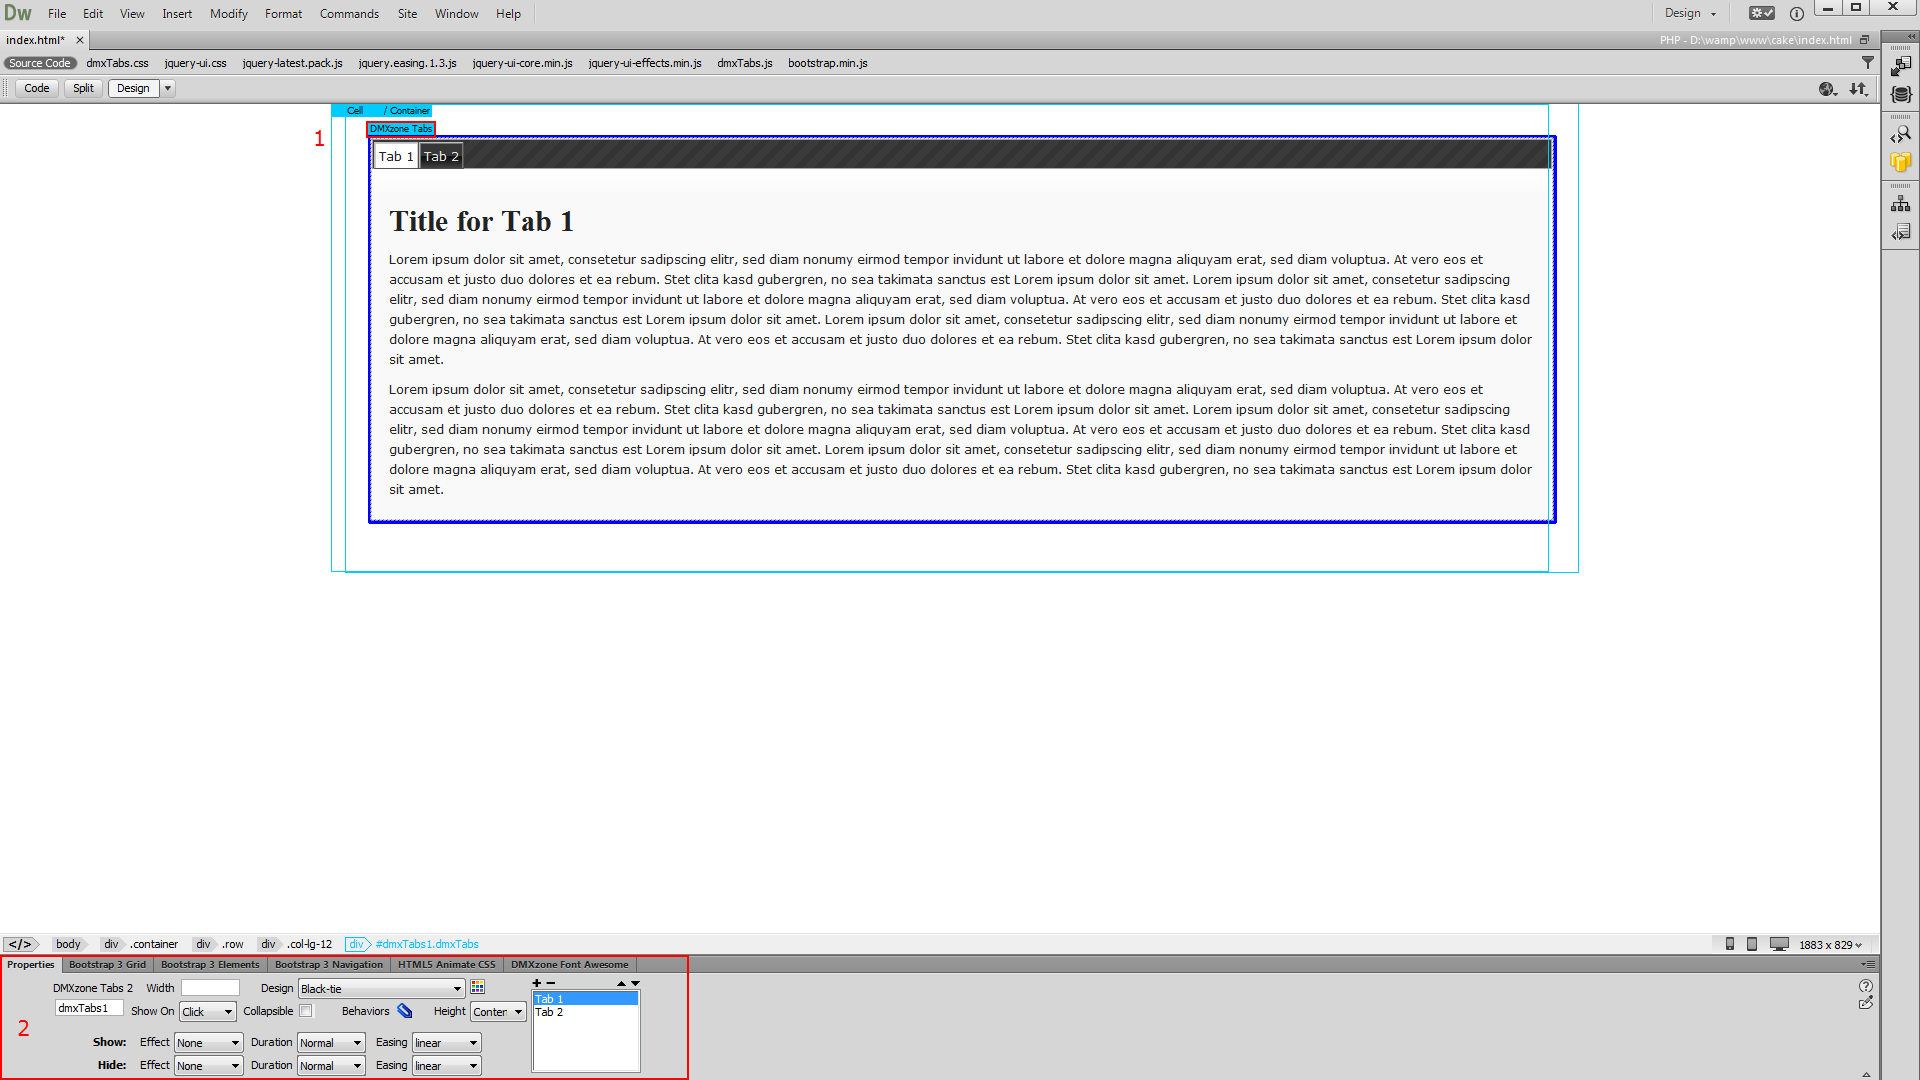
- Here you can adjust the width of the tabs container (1), in pixels or percent. We leave this field empty, which means the tabs will fill 100% of the container it is inserted into. You can choose whether to show the tabs content on click or on hover. We want to show our tabs content when a tab is clicked (2). You can select show and hide effect, duration and easing. We select the fade effect (3) and leave the rest of the settings unchanged.
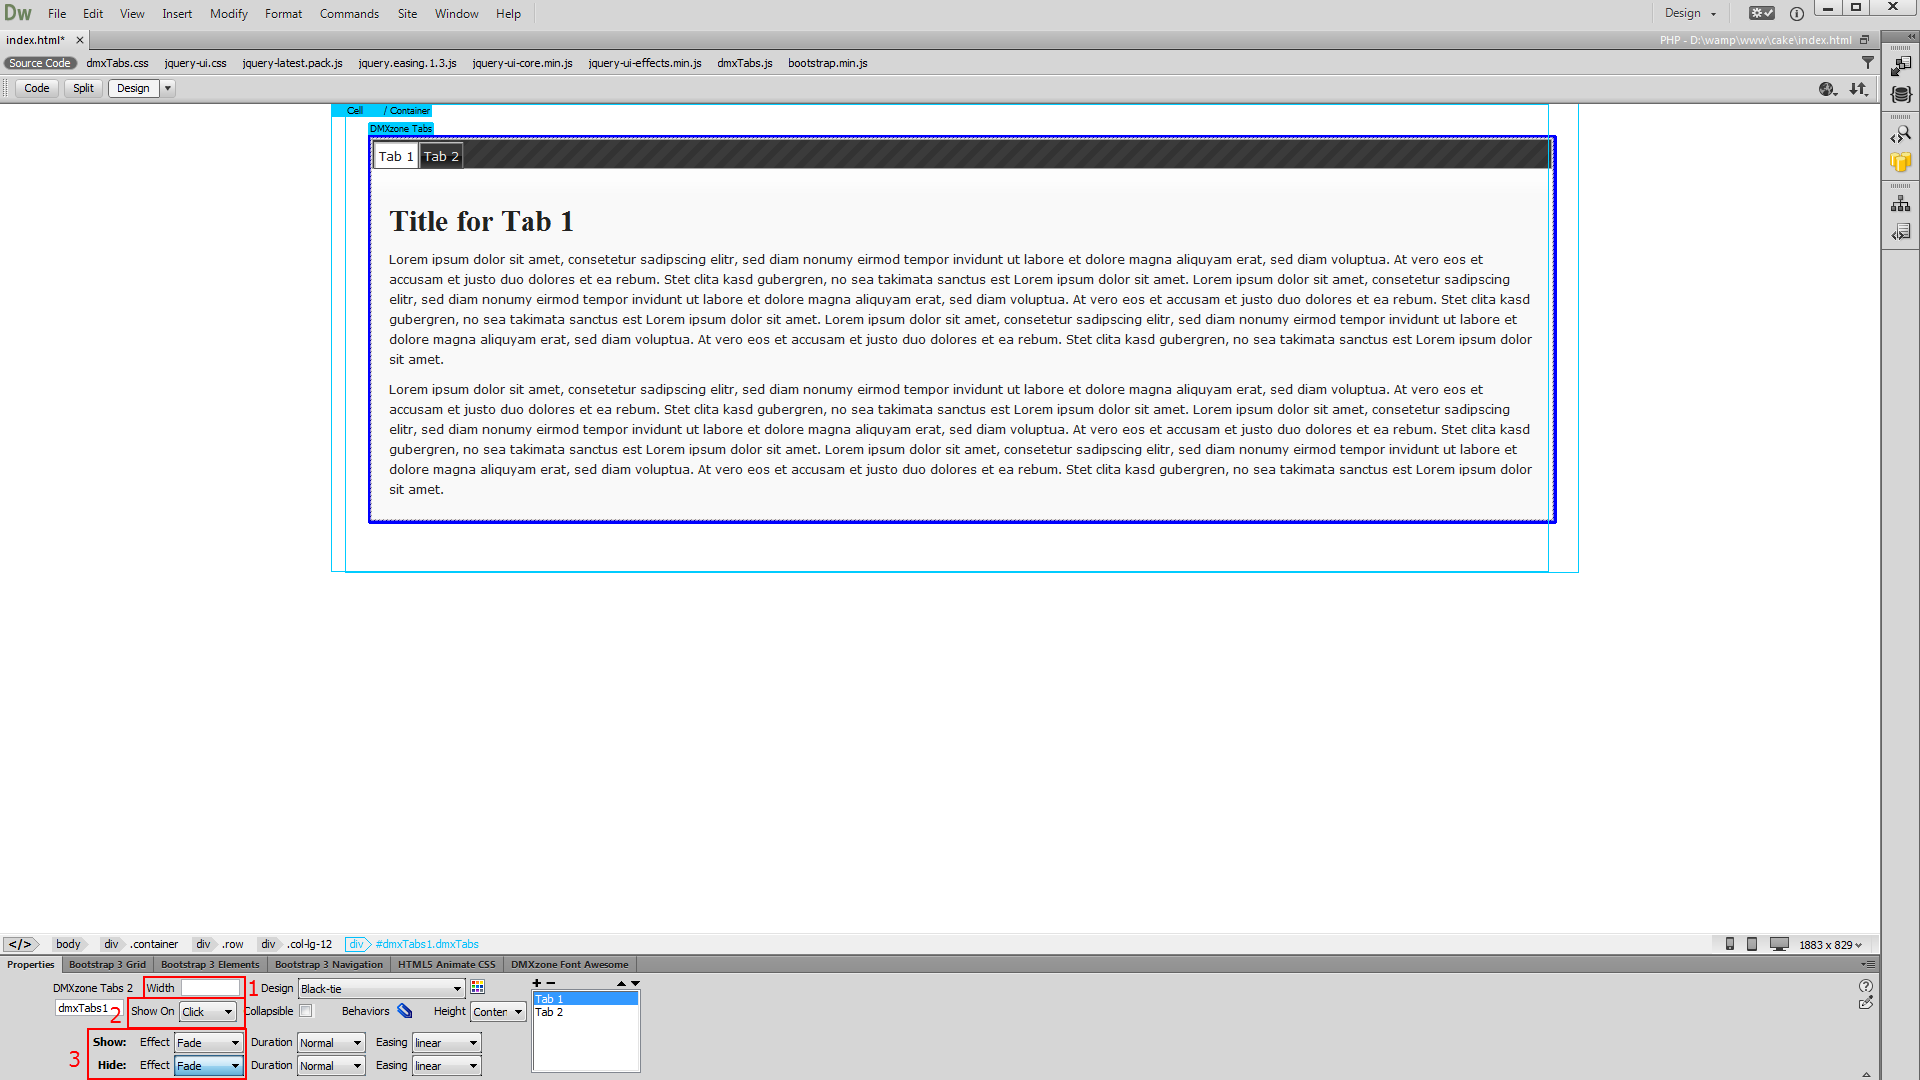
- Select whether the tabs should be collapsible or not (1). Set the height type of the tabs. There are three options available, when the auto option is selected, all tabs will be set to the height of the tallest tab. When the fill option is selected the tabs will be expanded to the available height, based on the tabs' parent height. When the content option is selected each tab will be as tall as its content. We select the auto option (2).
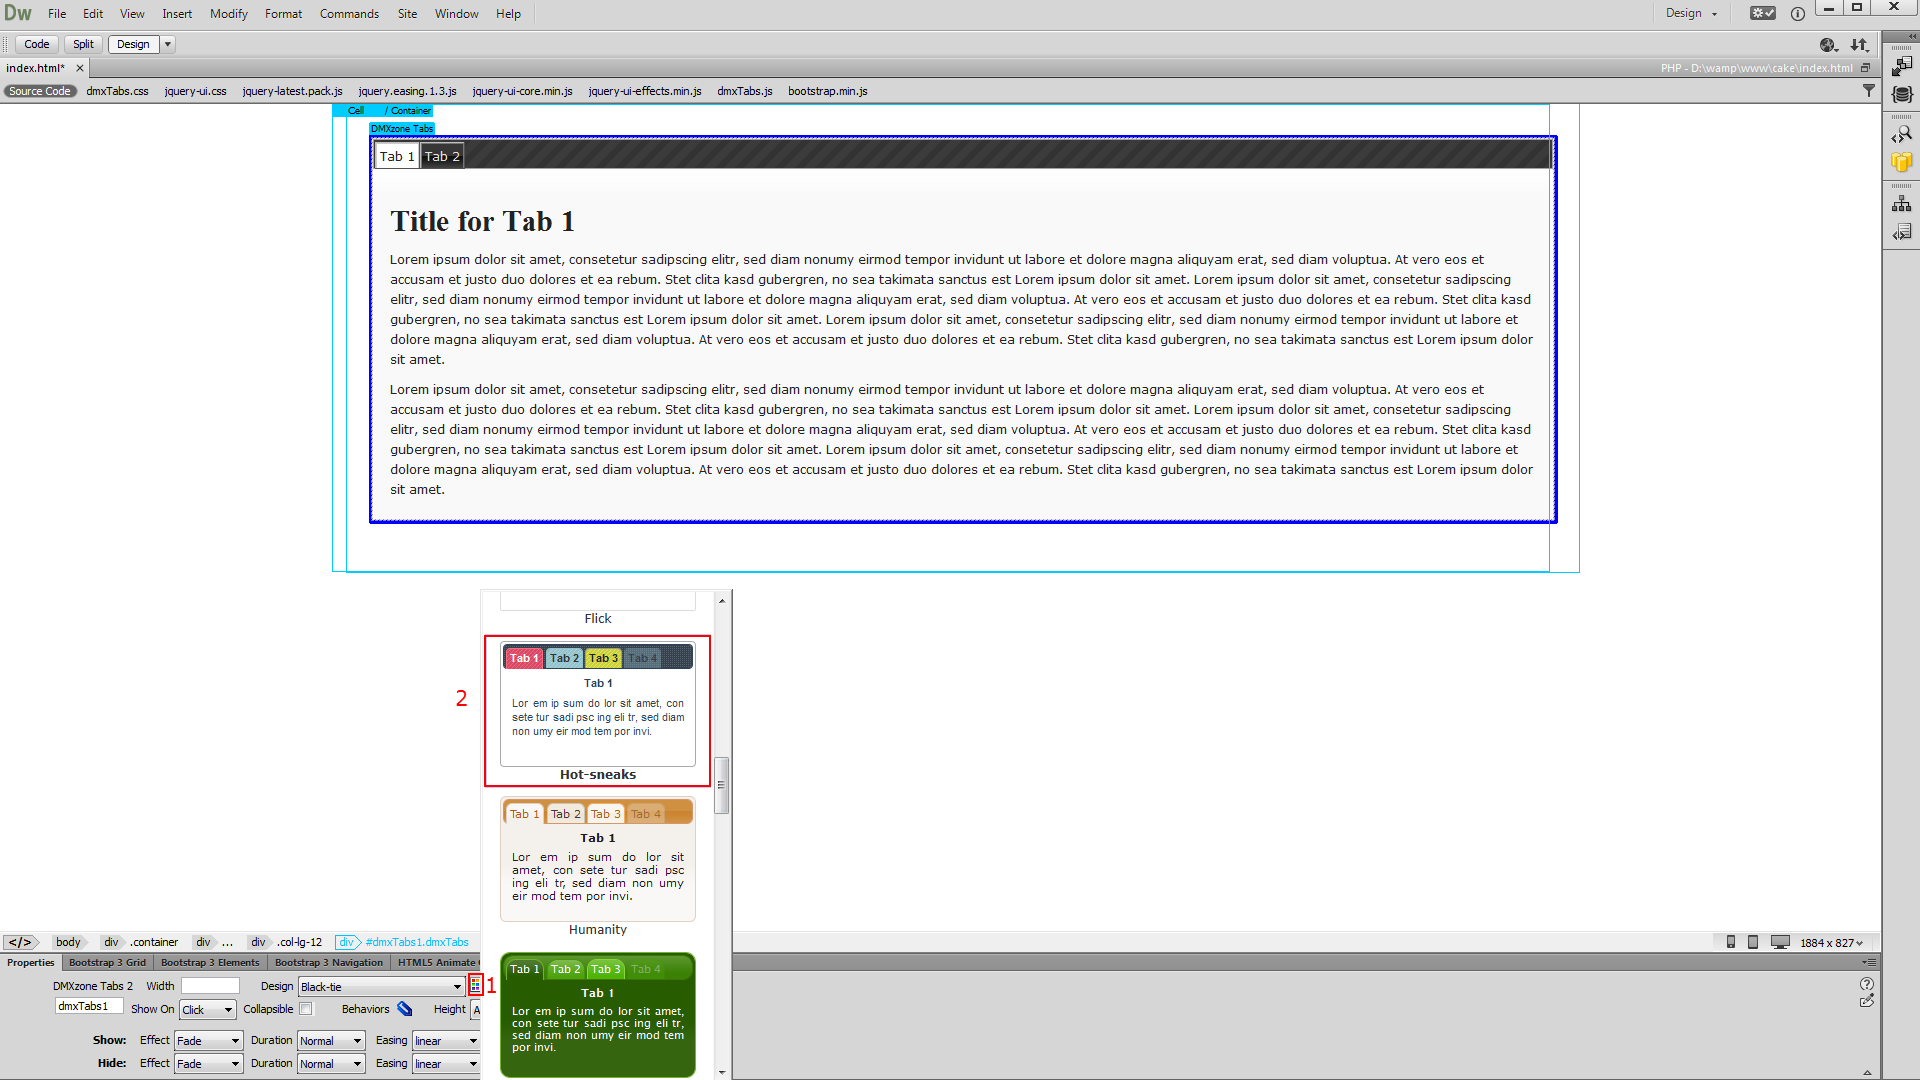
- Also, you can add, remove or move tabs. For our tutorial we select the hot-sneaks design preset (2) from the design picker icon (1), which gives us preview of all available styles.
- Now you can save your project and preview the result.
Lubov Cholakova
 Lubov has been with DMXzone for 8 years now, contributing to the Content and Sales departments. She is bringing high quality content in the form of daily blog updates, reviews, tutorials, news, newsletters,update emails and extensions' manuals. If you have a product that needs publicity or any other questions about the entire DMXzone community, she is the one you can contact.
Comments
Be the first to write a comment
You must me logged in to write a comment.