It is super easy to work with our DMXzone Server Connect if you follow the tutorials in this article. We provided step by step guidance on how to access the extension in Dreamweaver, how to insert/delete/update and do a multiple update of records, and many more. We covered everything from basic to advanced usage of this tool in conjunction with other DMXzone extensions such as HTML5 Data Bindings, DMXzone Database Connector and DMXzone Database Updater.
If you experience any troubles please contact our Live support during business hours or post in the support forums.
Prev Index Next
Advanced: Update Multiple Database Records
In this tutorial we will show you how to how to update multiple
database records, using DMXzone Server Connect. In order to do that you'll also
need HTML5 Data Bindings and DMXzone Database Connector extensions.
*You can also check out the video.
How to do it
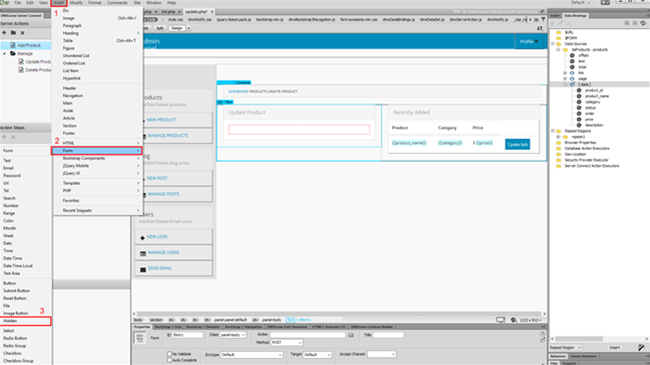
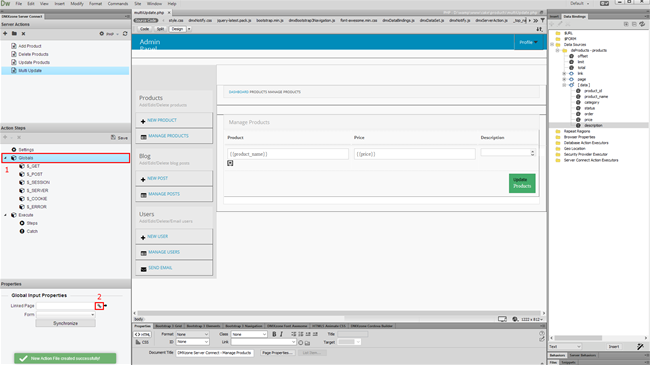
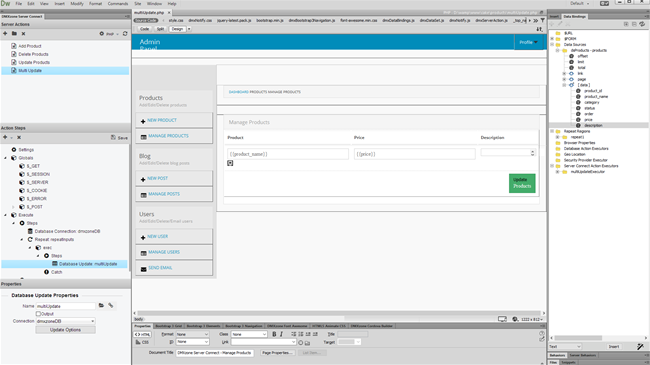
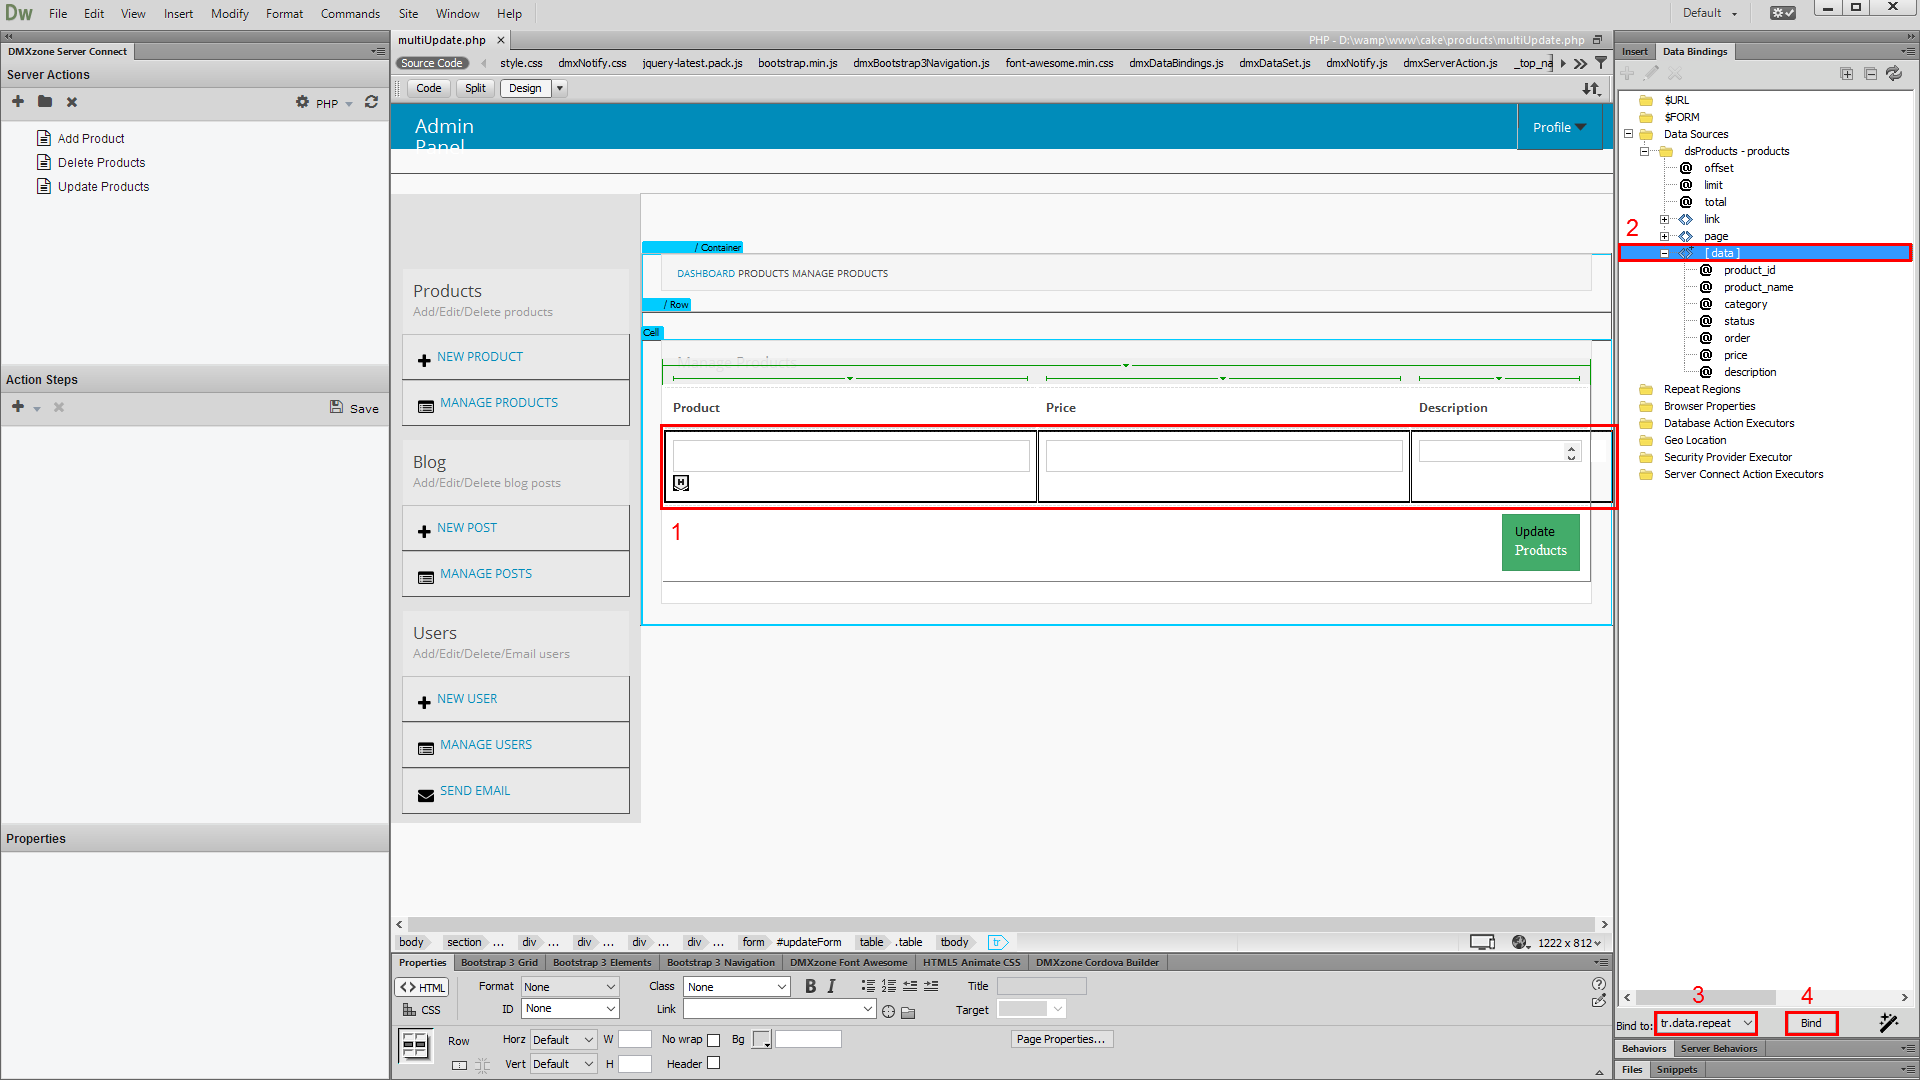
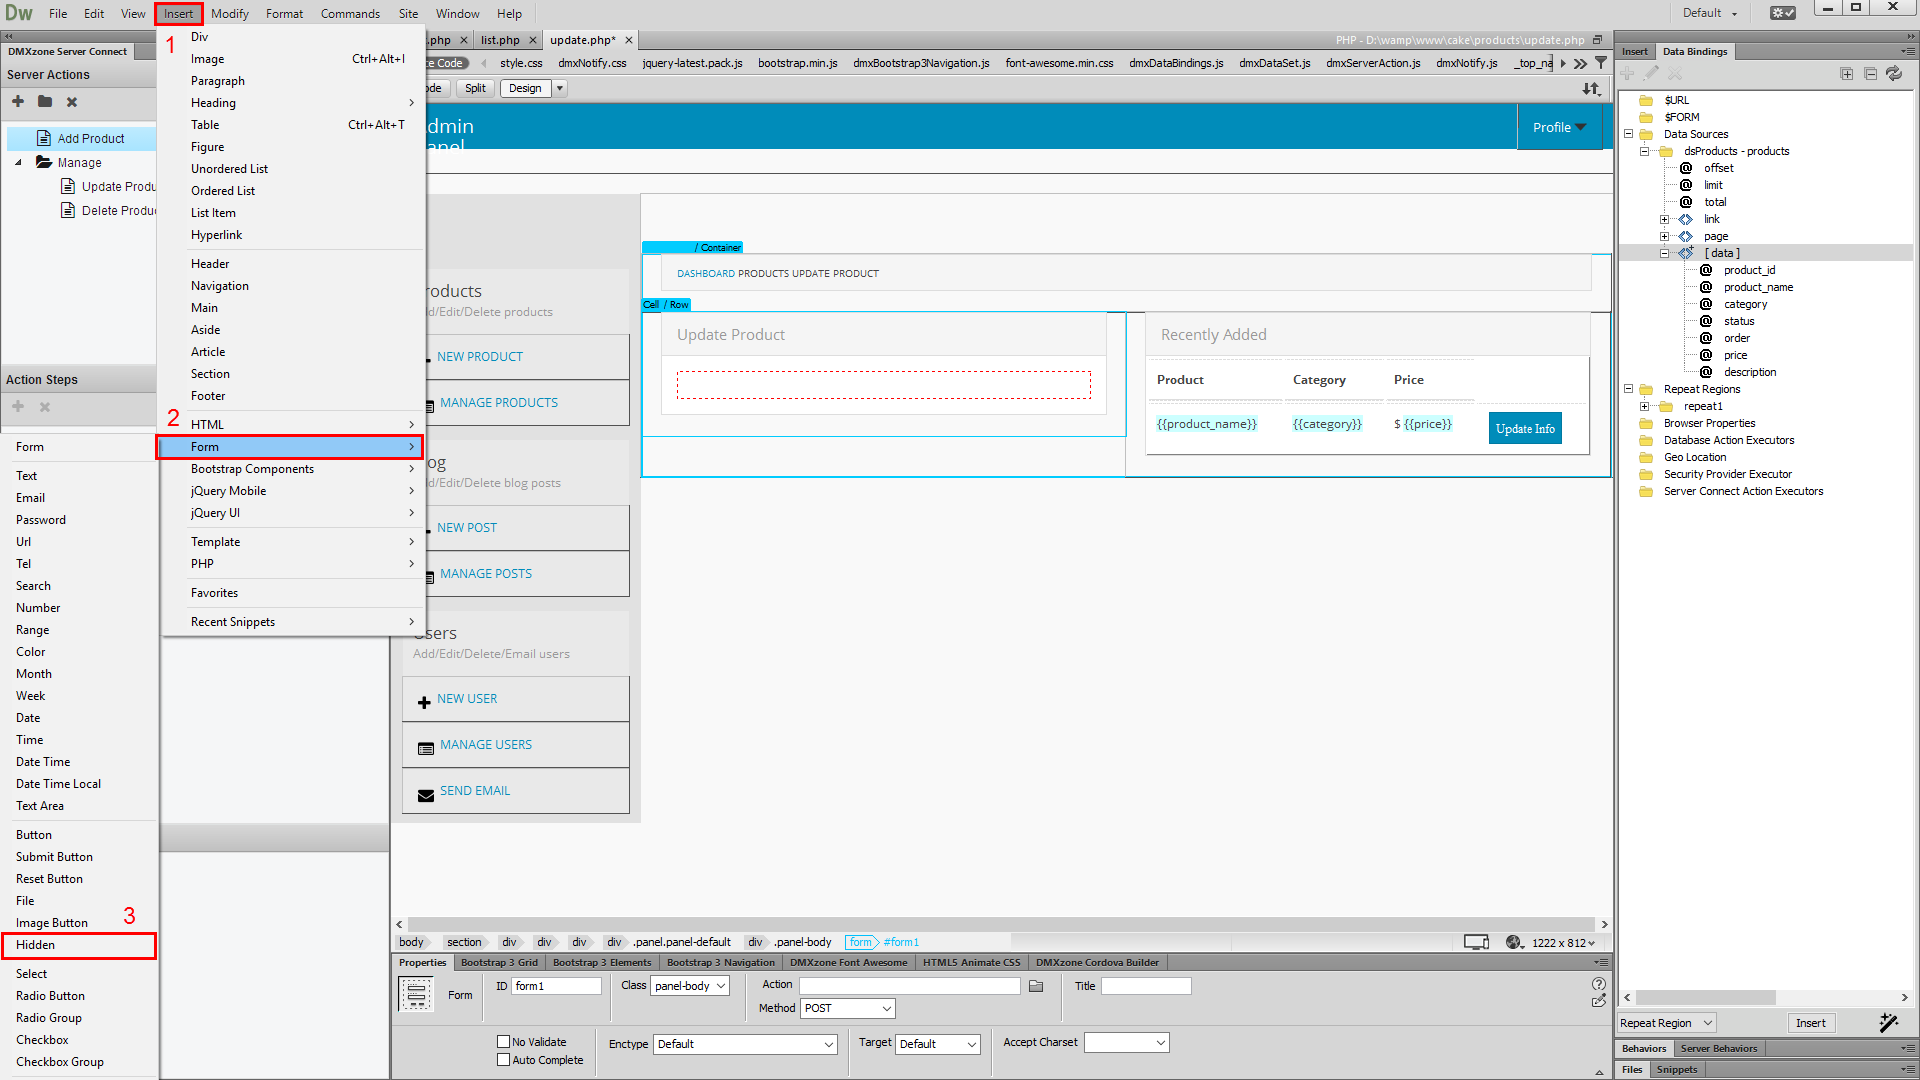
1.We created a page, which contains a form with a hidden field and
several text fields inside. We will use the hidden field, in order to filter
the records that we want to update and we will use the text fields, in order to
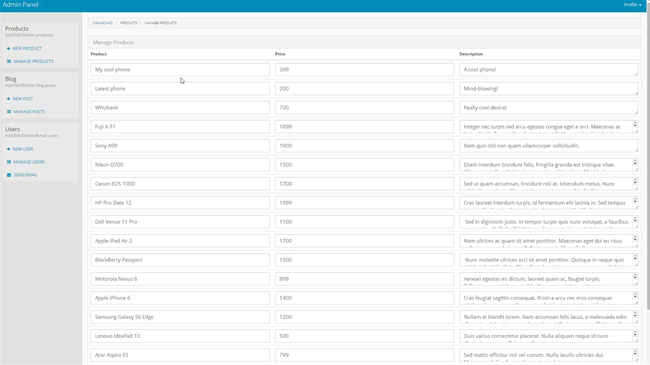
update the records info. We also created a database source, using the DMXzone
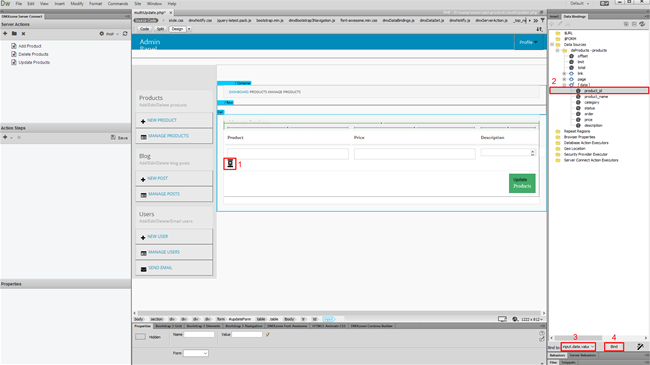
Database Connector. It lists our products from the database. First, select
the container (1) that wraps your form inputs. If there is no such container
- then just add one. In this tutorial, our form fields are wrapped inside a
table row. Then click the repeating element (2) of your data source and bind
(4) to the data.repeat.option (3) in the bind to menu.

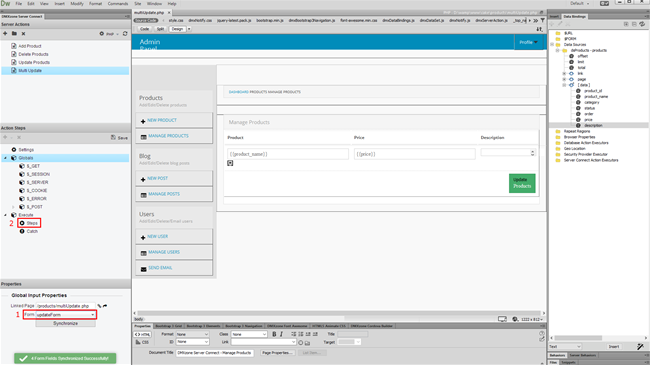
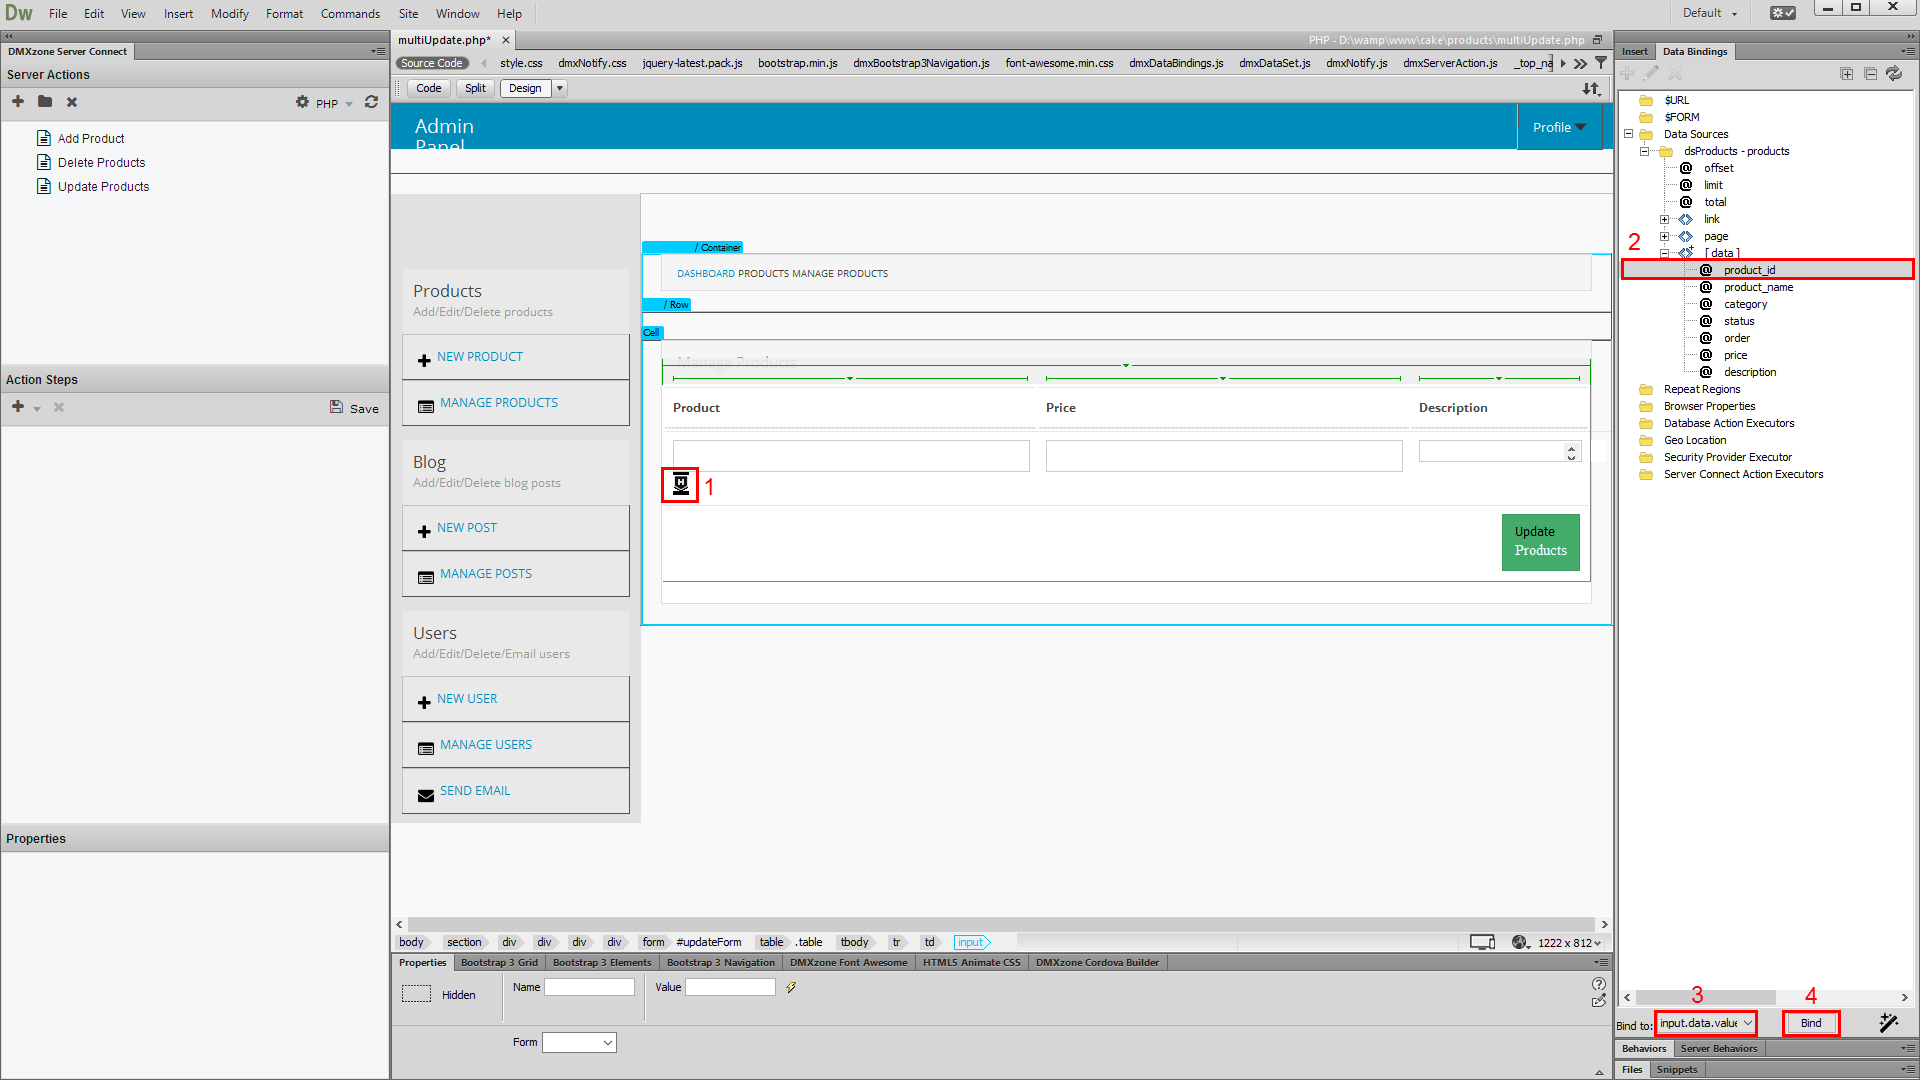
2.Then, select the hidden field (1), inside the repeat
region that we've just created, and select the ID data binding (2) from
your data source. Bind (4) it to the input.data.value (3).
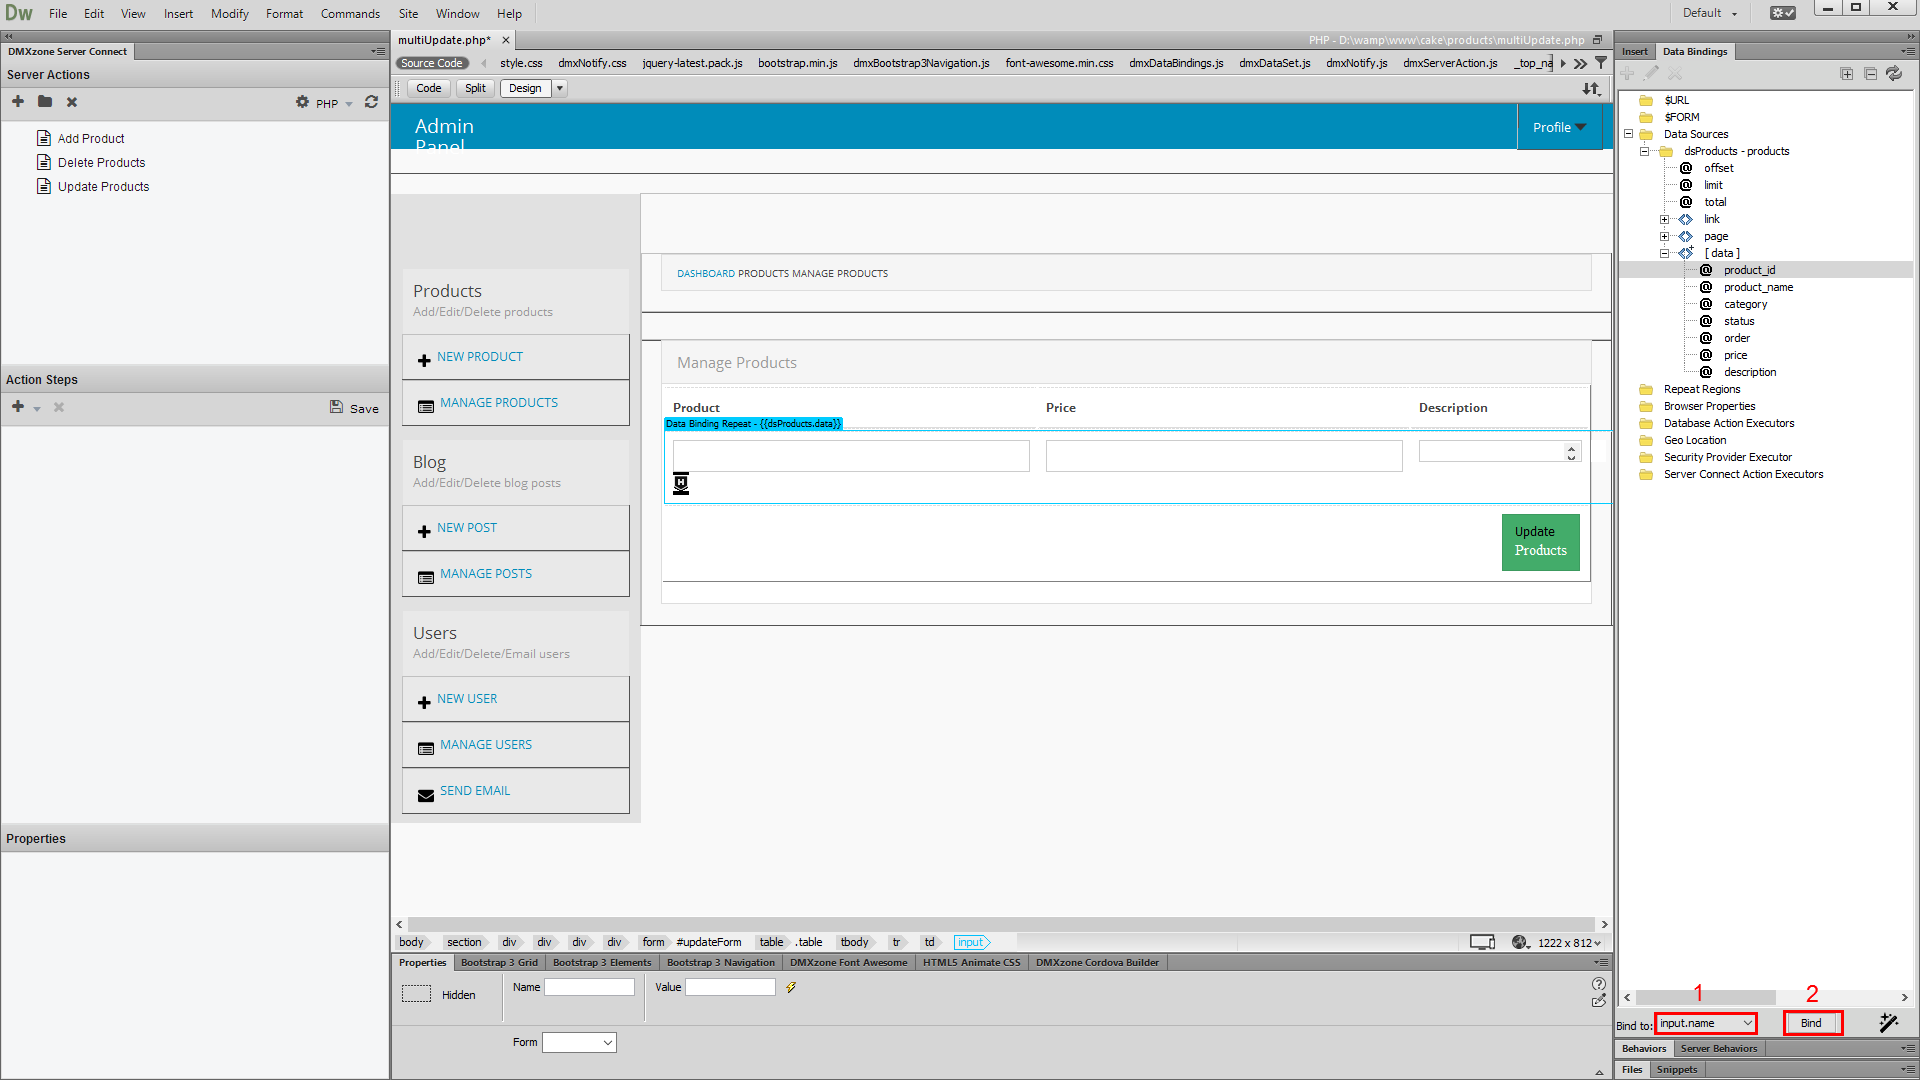
3.And also bind (2) it to the input.name (1).

4.Do the same for the text fields, binding the proper bindings to
the input.data.value and input.name.
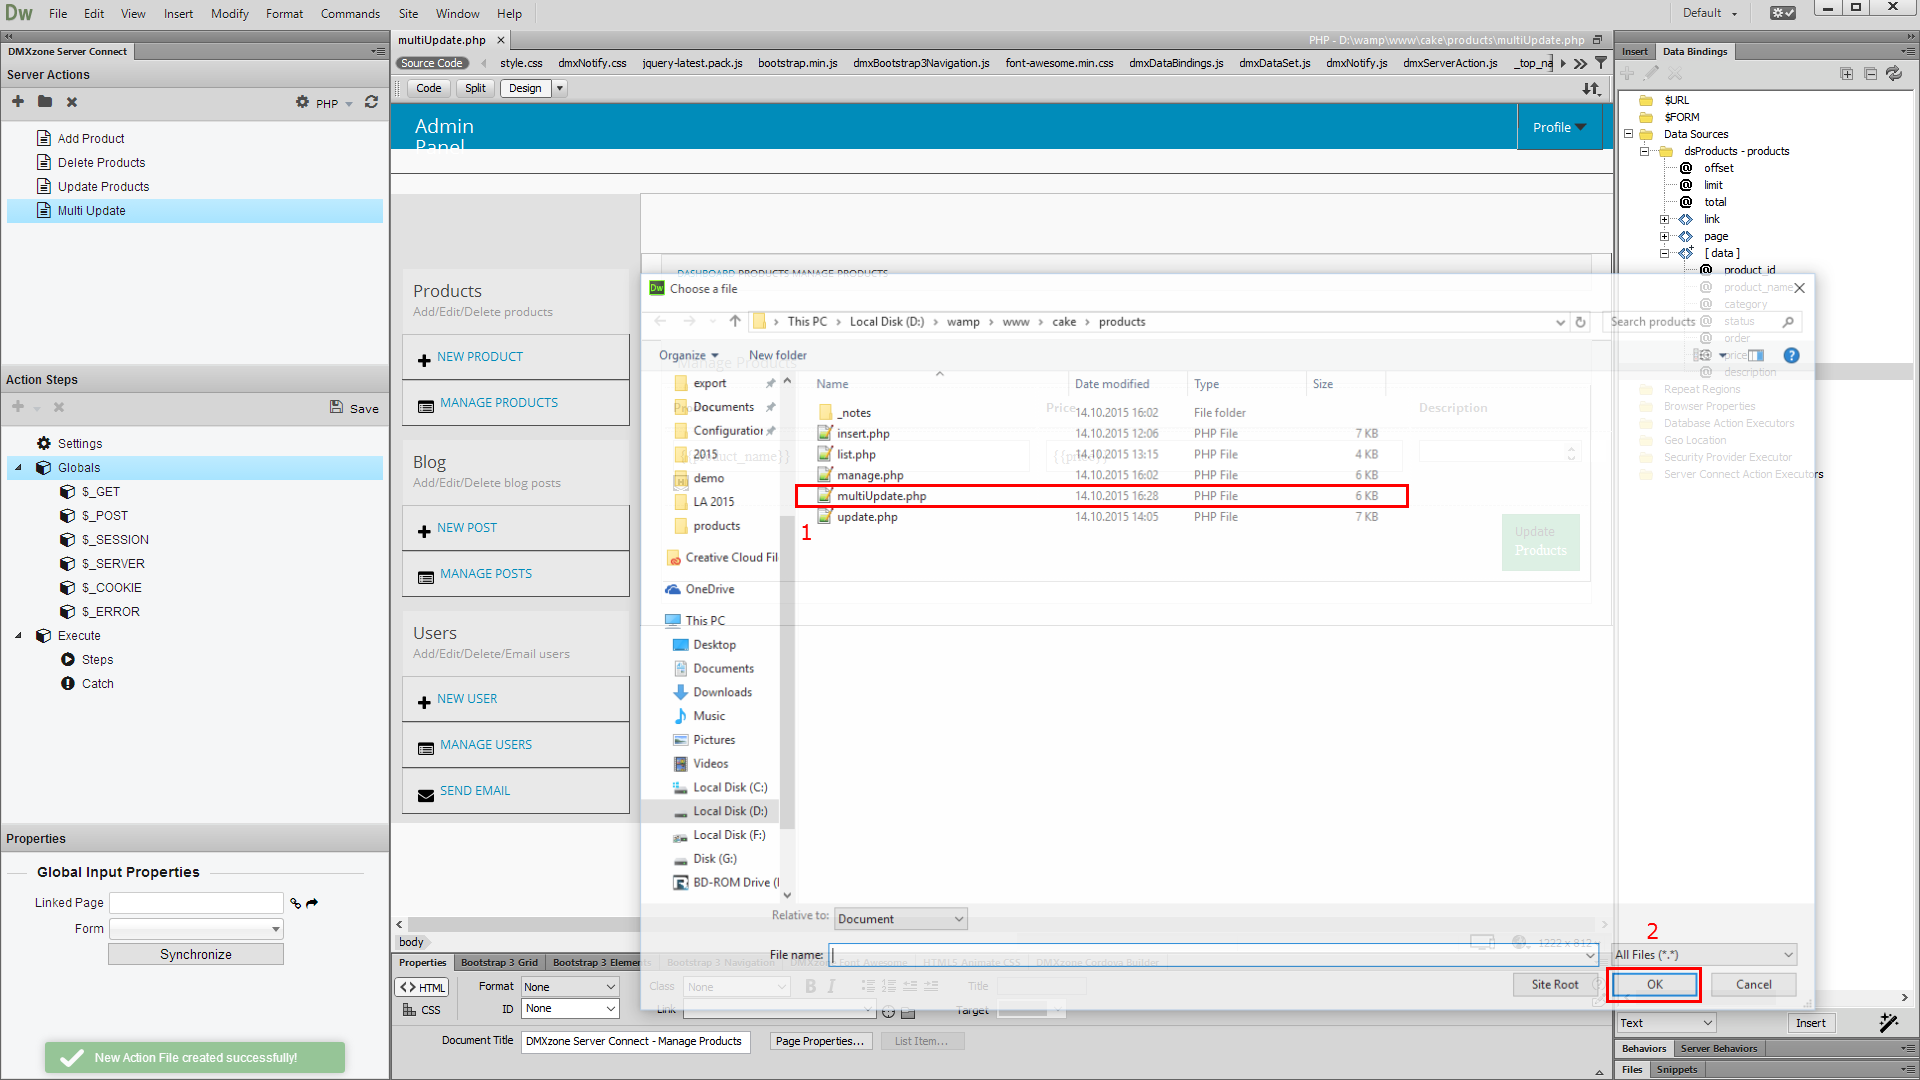
5.Click add new server action button (1), when you
are done binding the fields names and values. And add a name for this
server action (2).
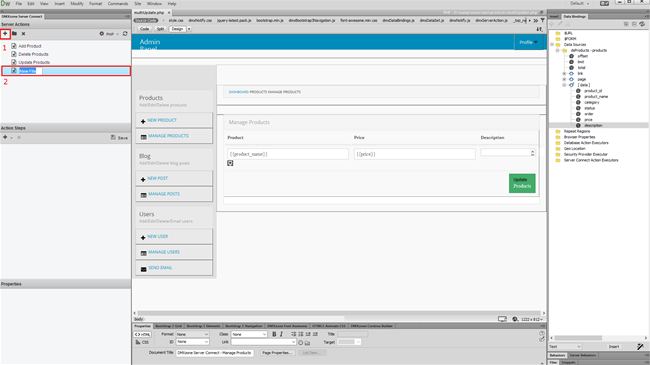
6.Expand the global variables of this action (1) and link your page, containing the
form inputs. (2).
7.Choose your page (1) and click OK (2).

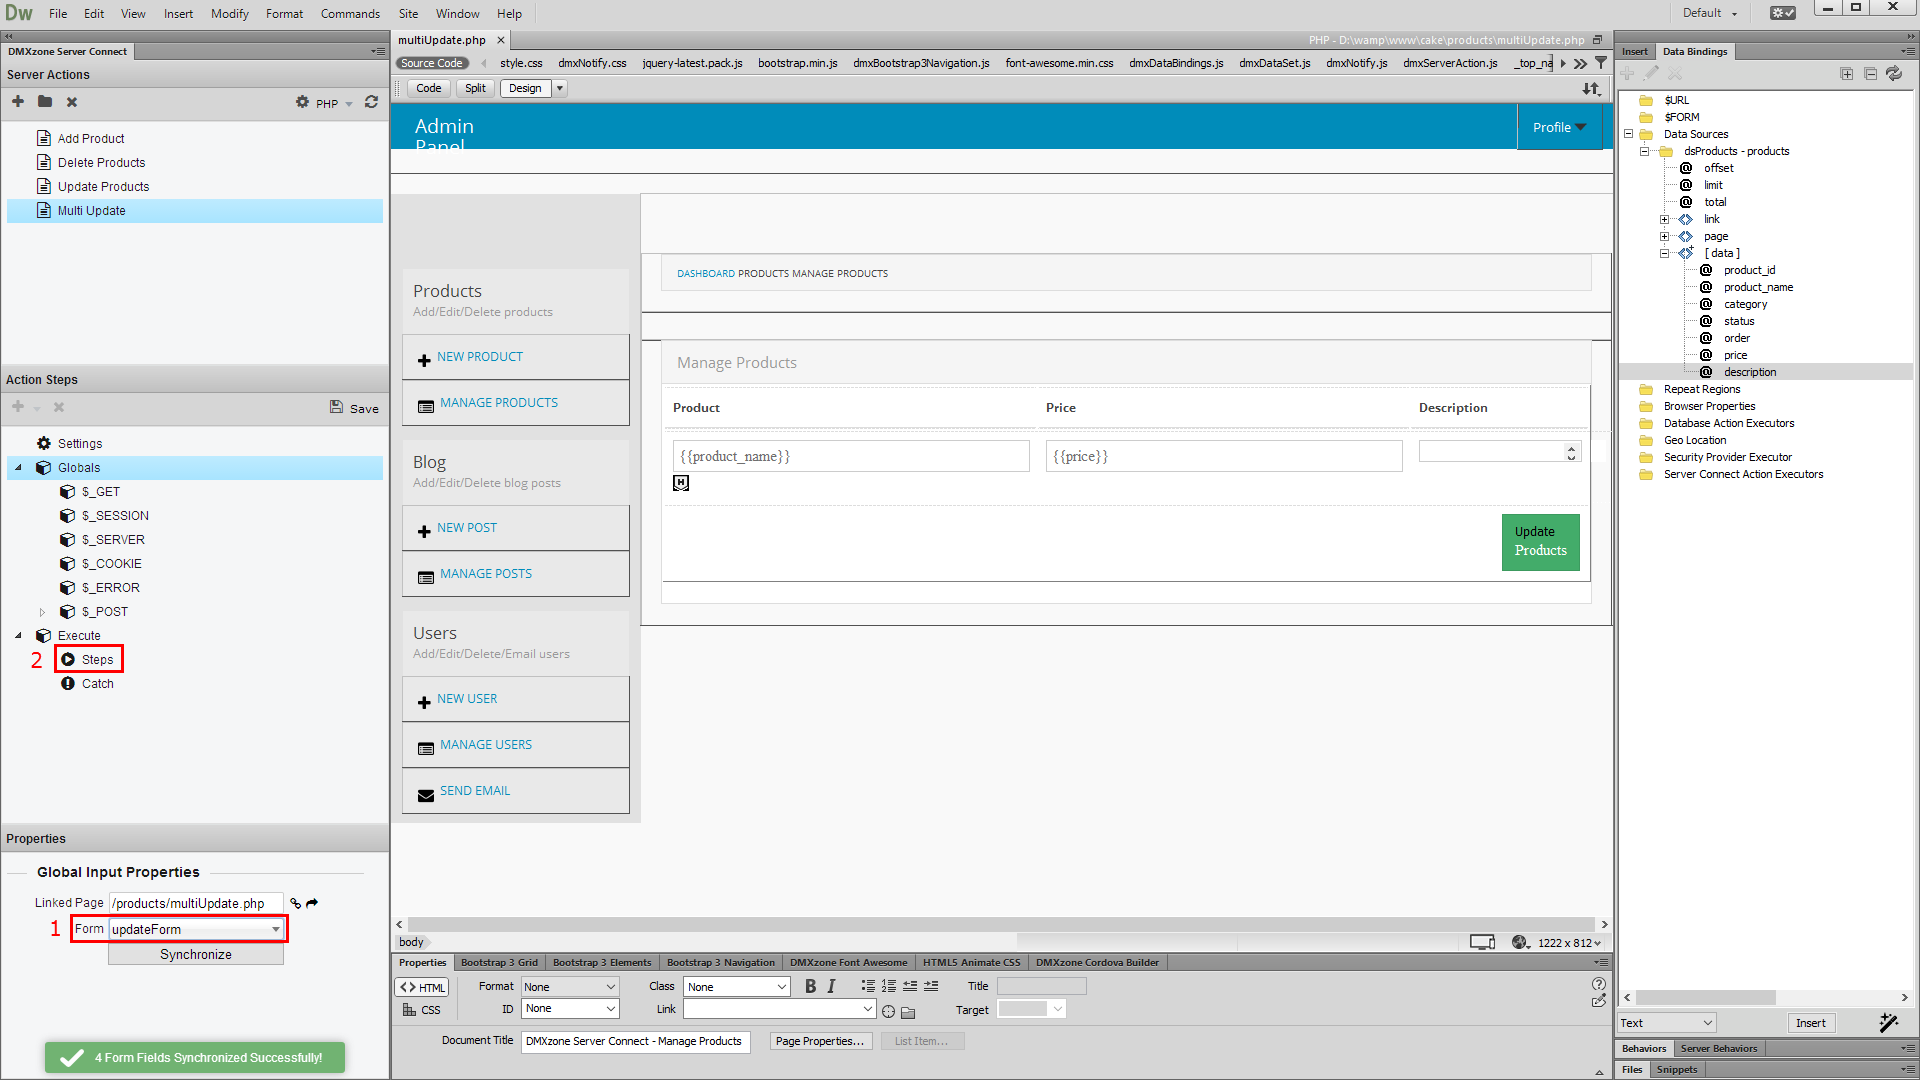
8.Select your form, from the dropdown (1) and right click steps, under the execute list (2).
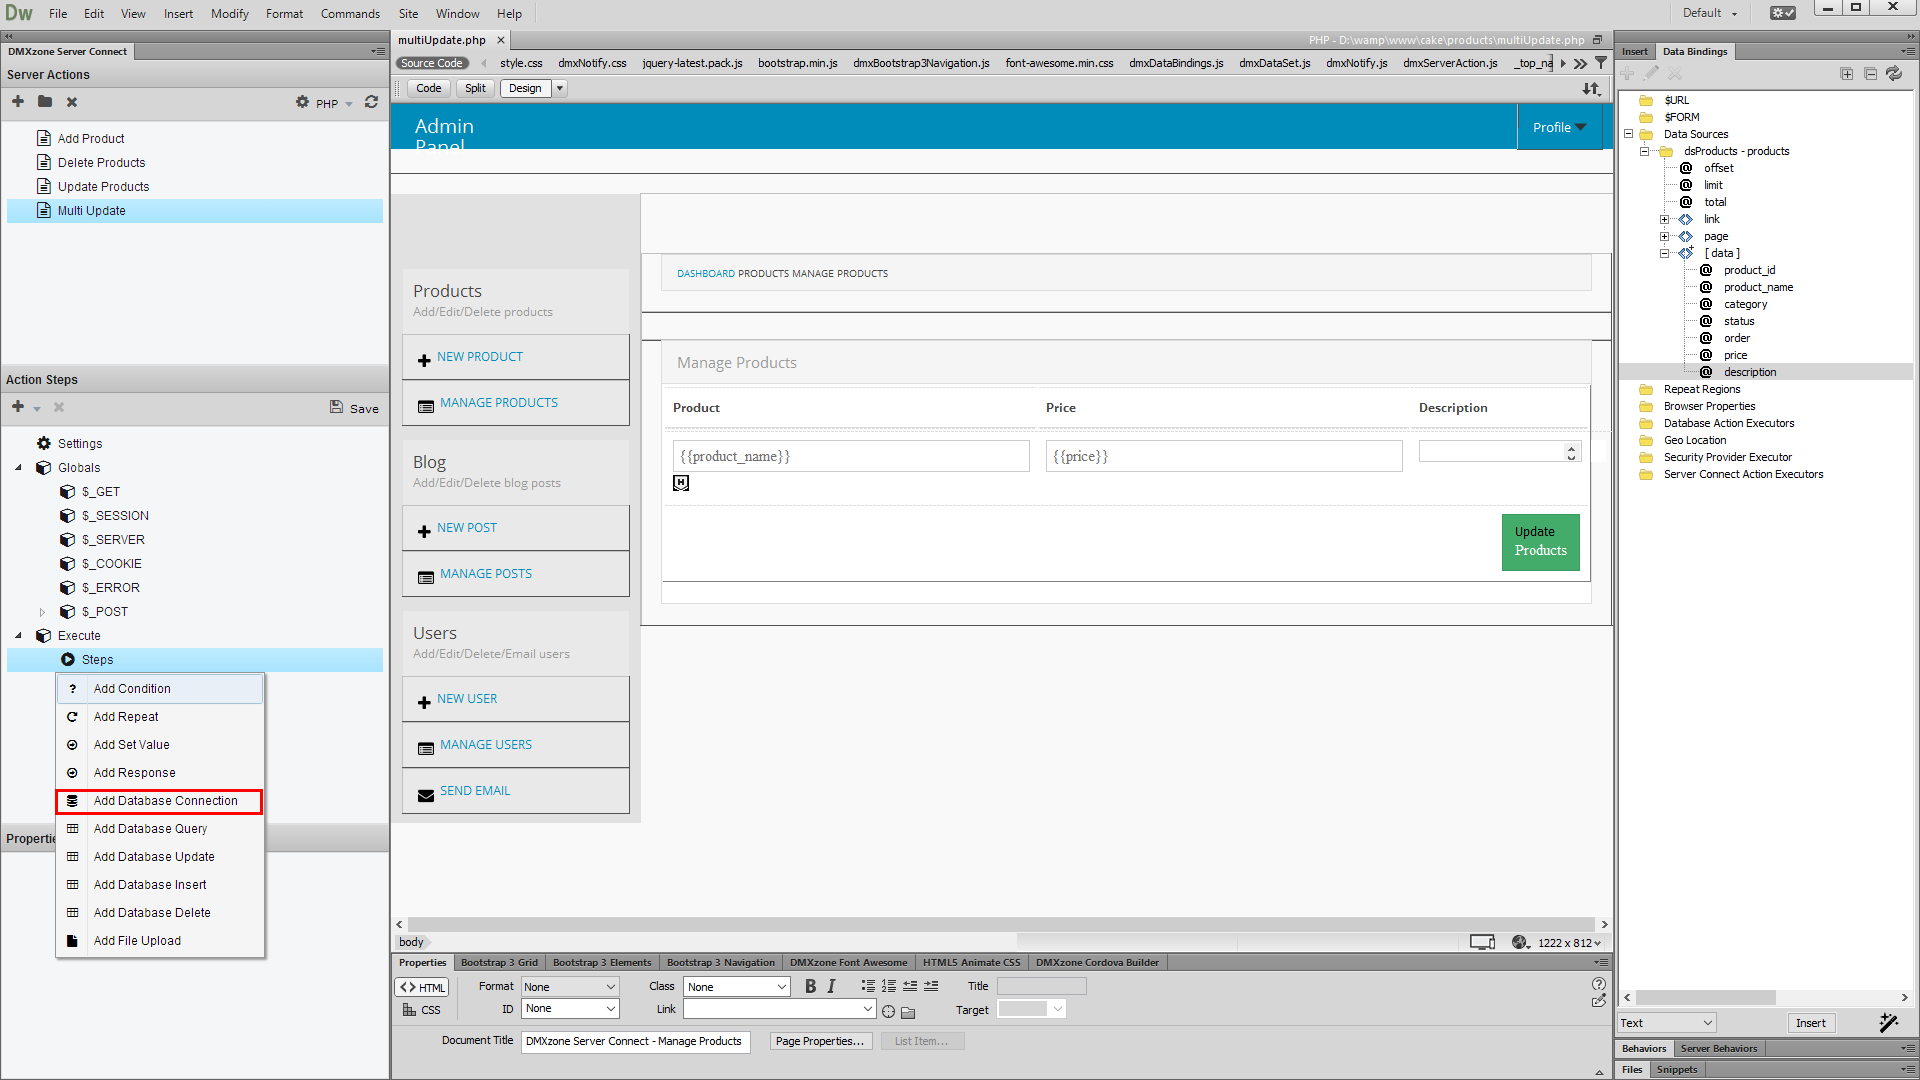
9.Now, add a database connection.
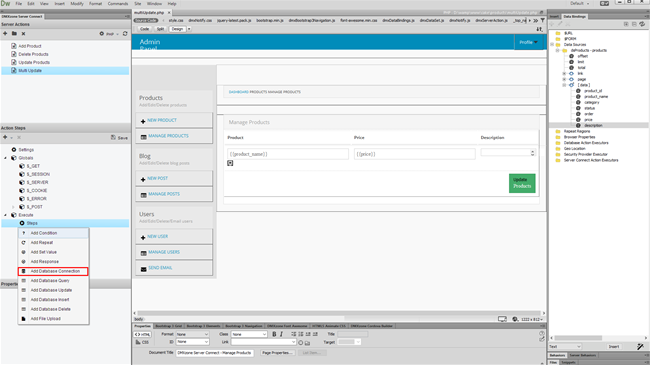
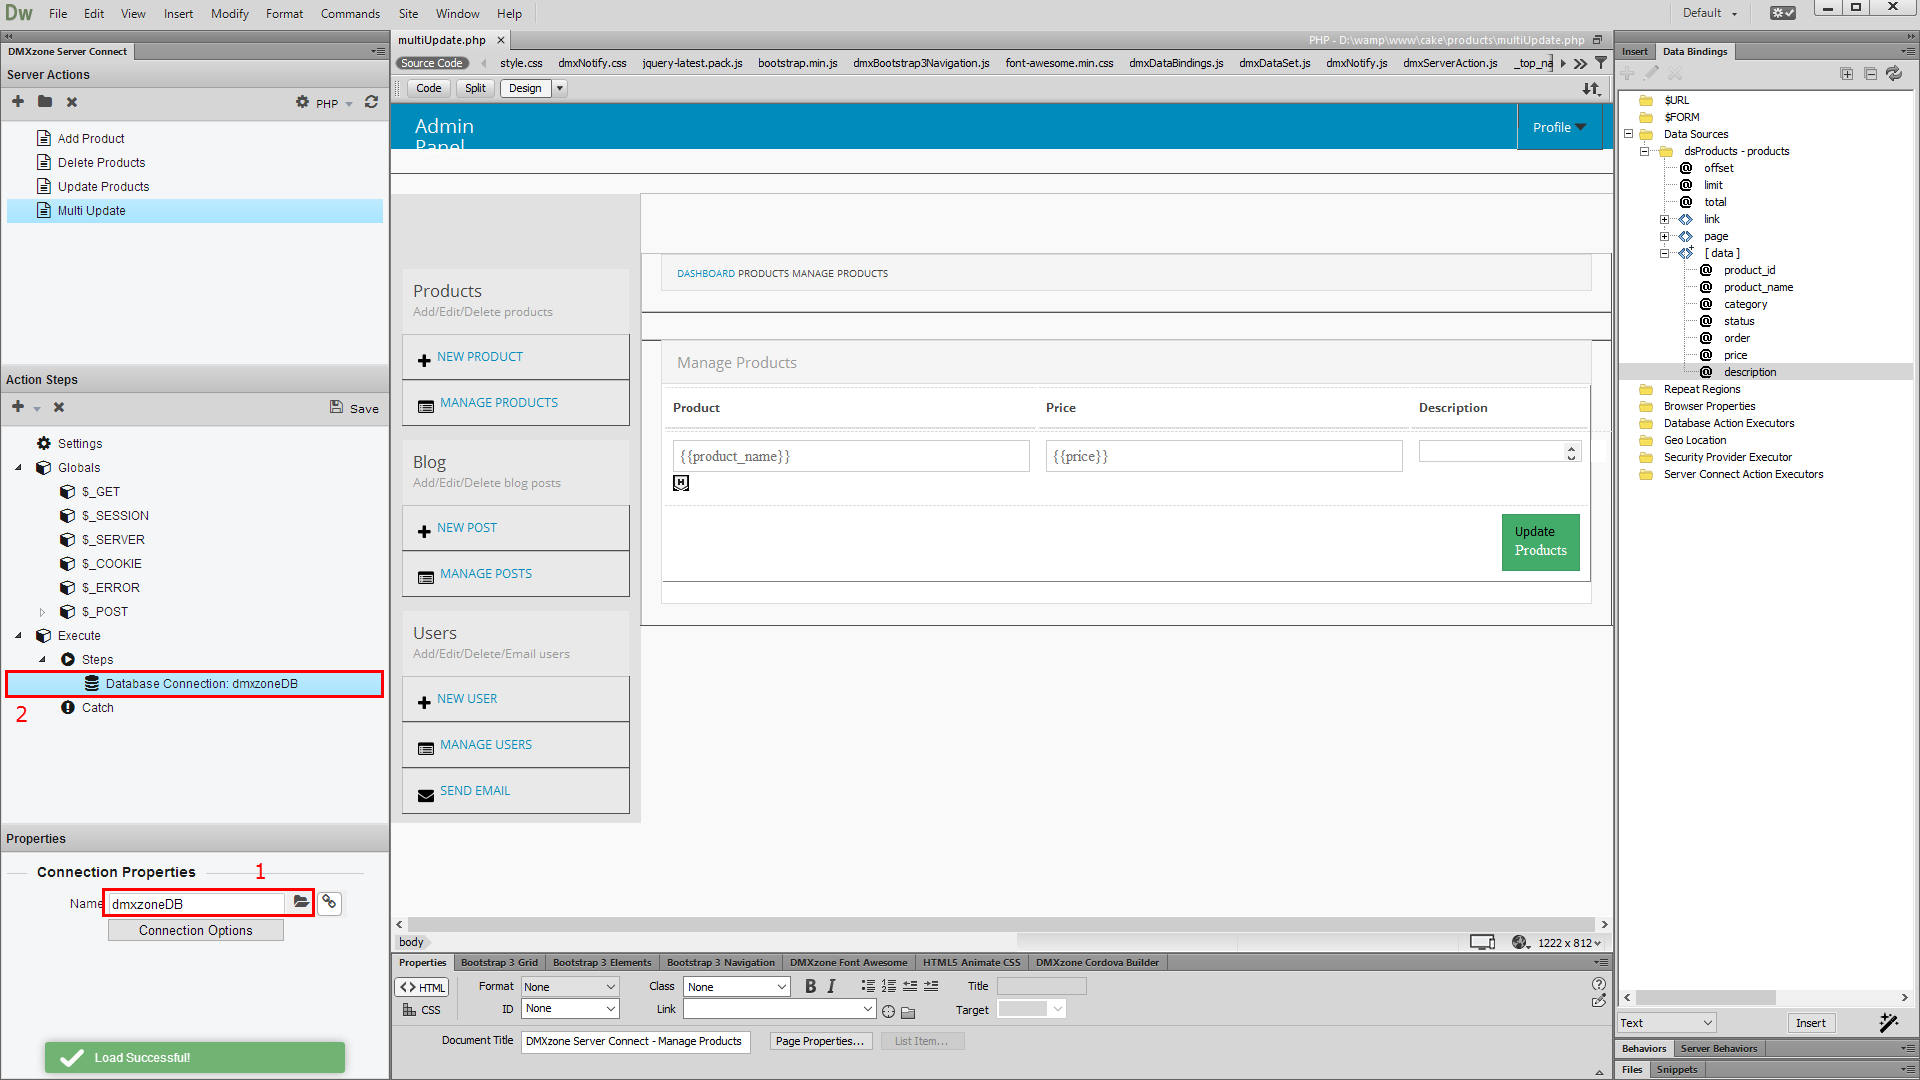
10.We already defined our database connection, when we created our
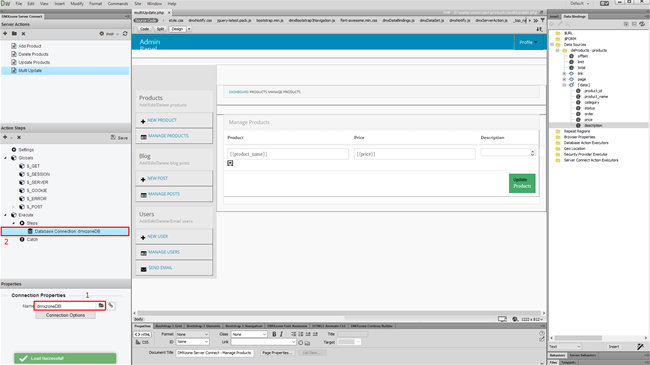
data source, so we just select it from the dropdown (1). Right click the database connection step (2).
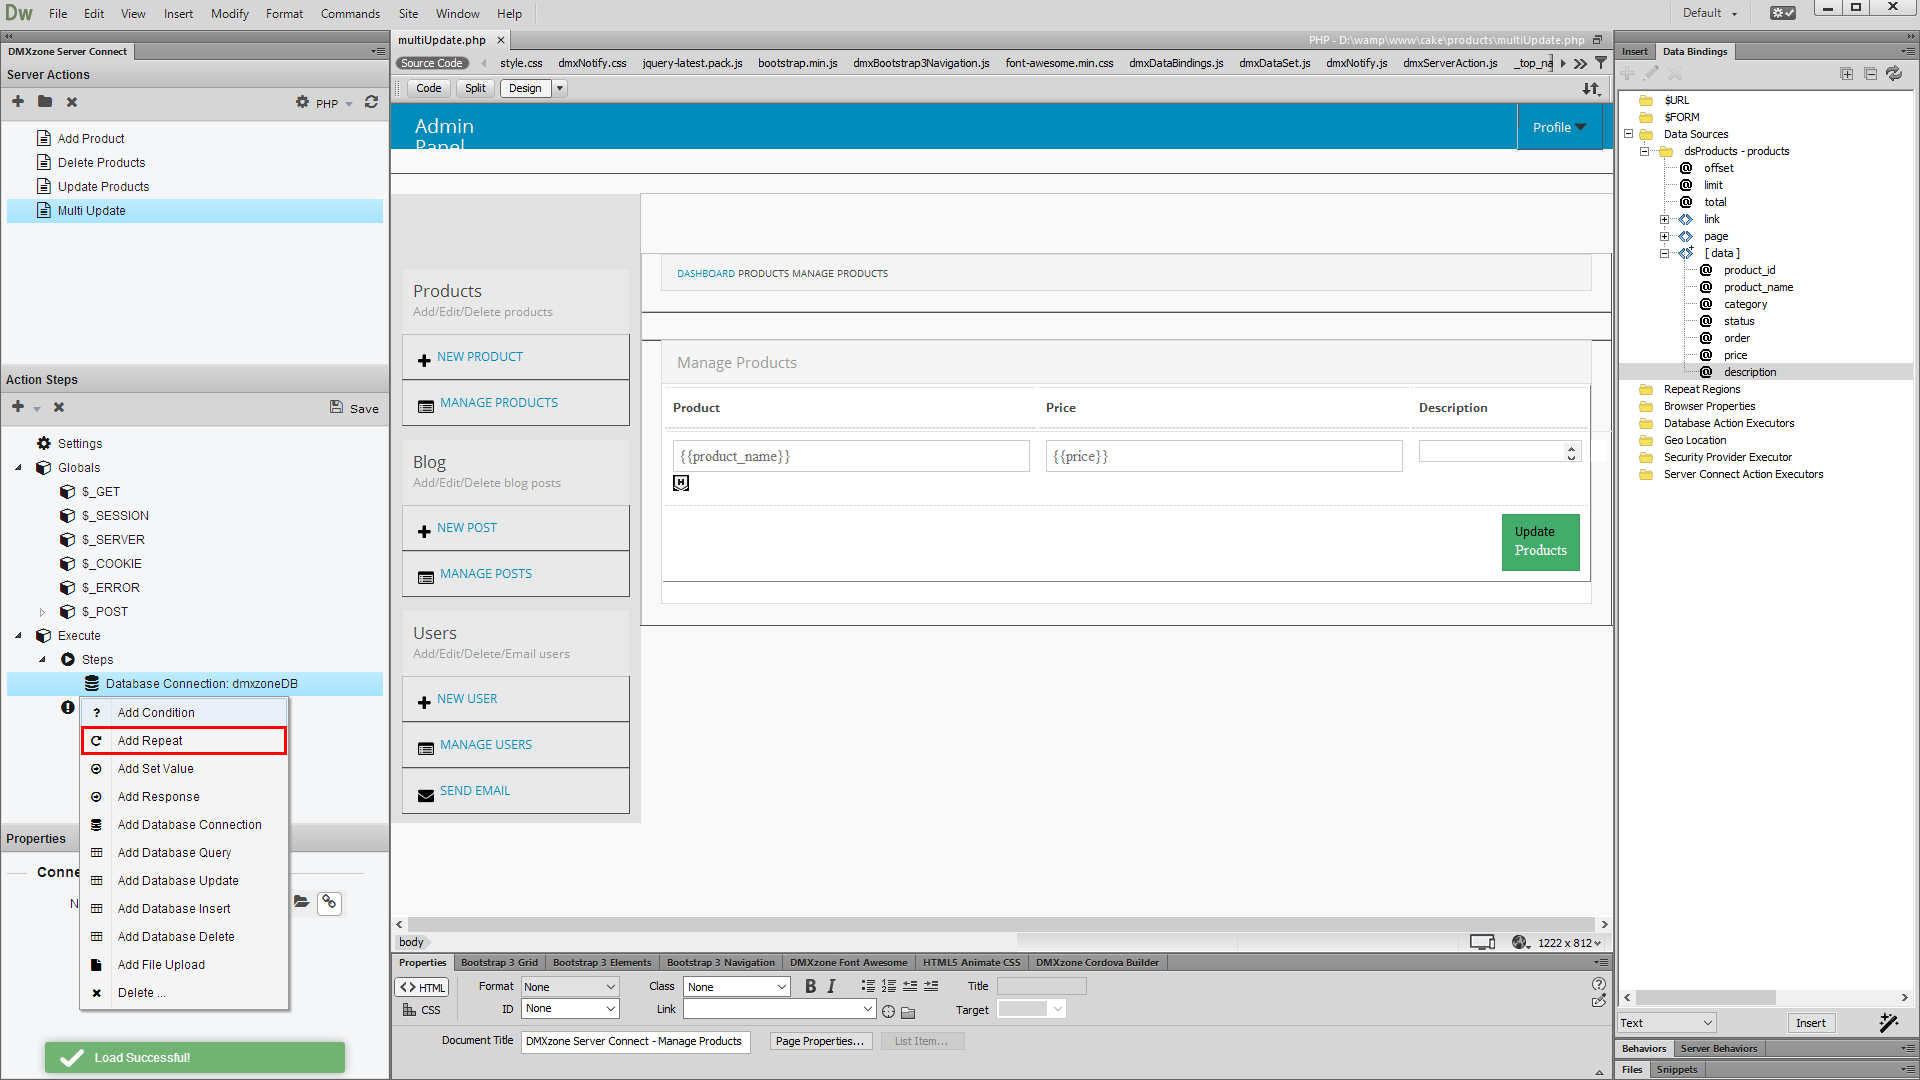
11.Now, add a repeater.
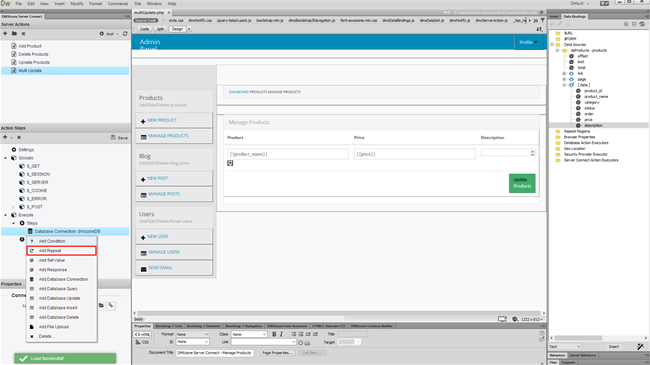
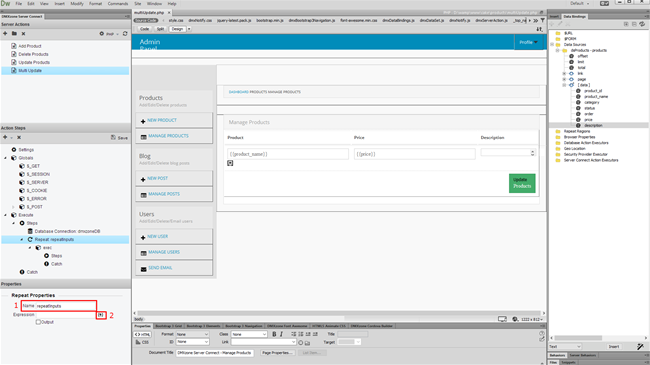
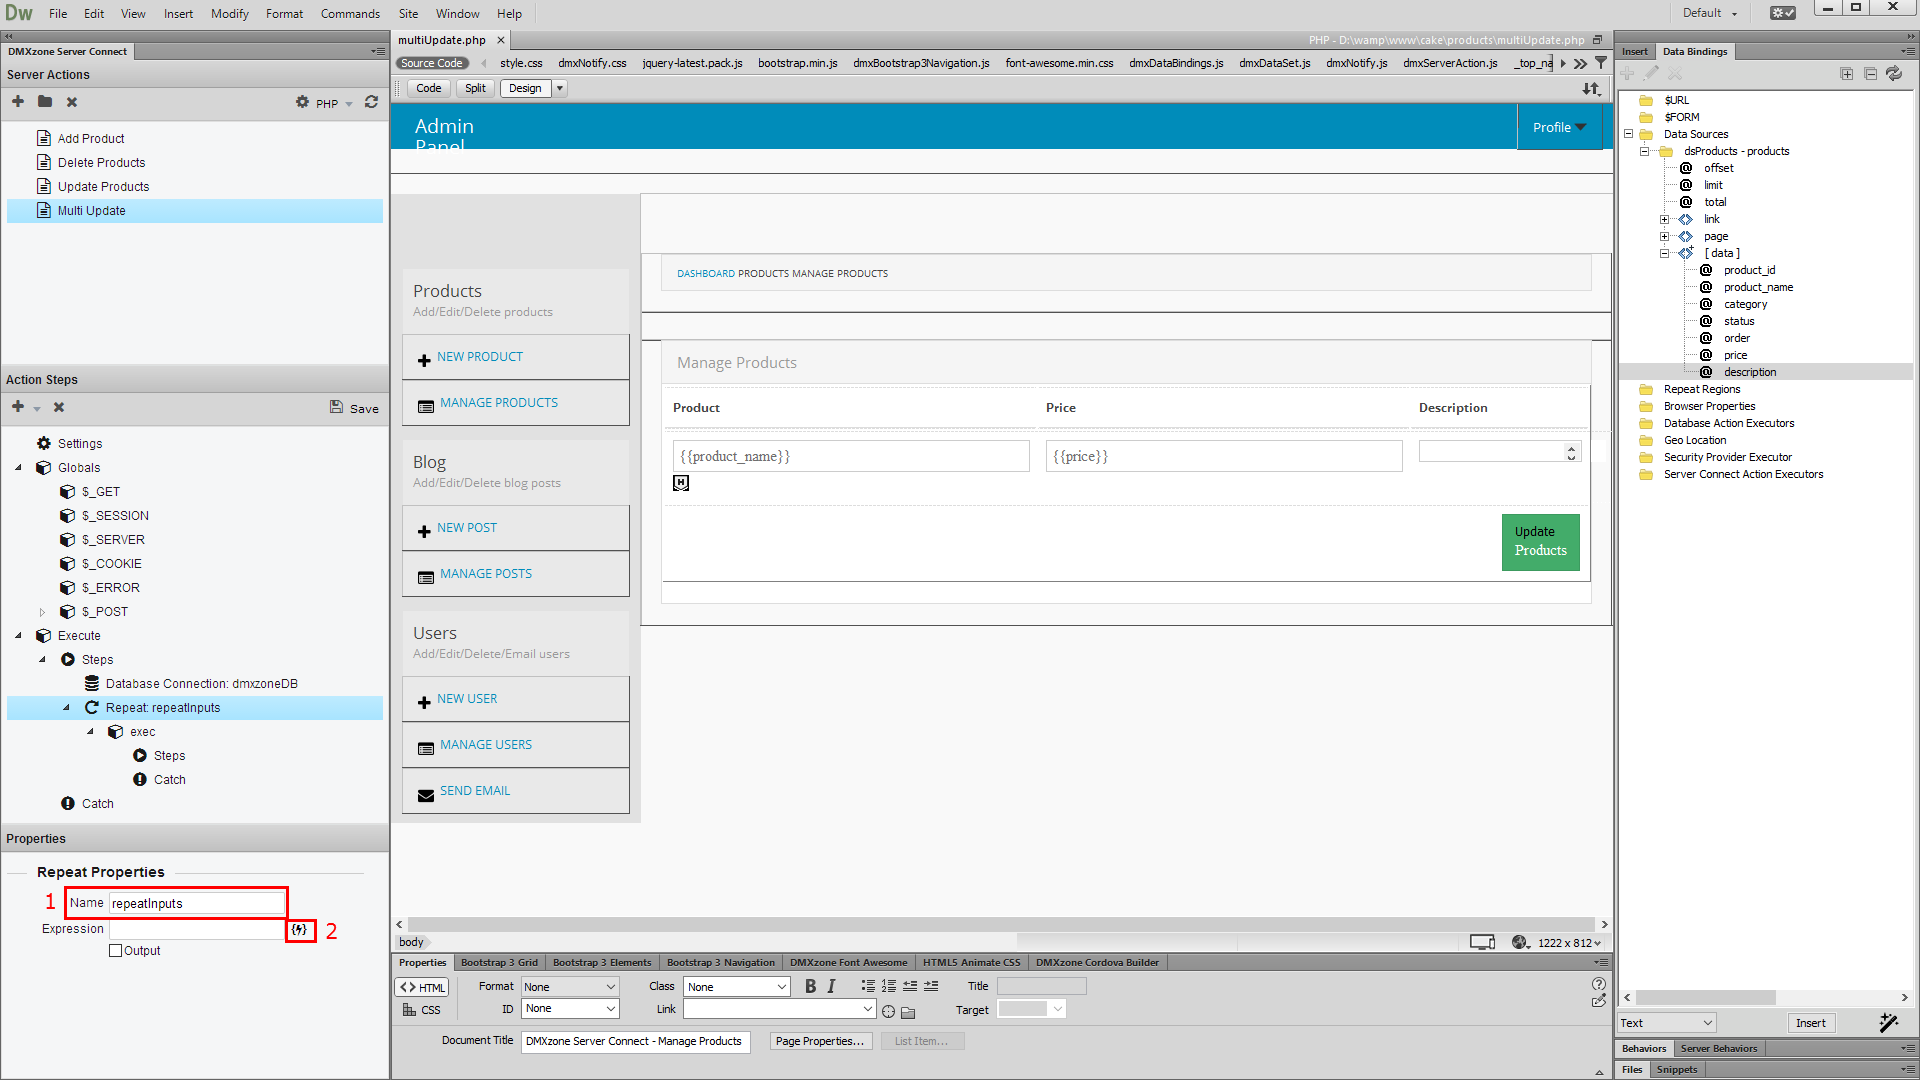
2.And a name for the repeater (1). Then click the server
data bindings picker (2), in order to the repeat expression.
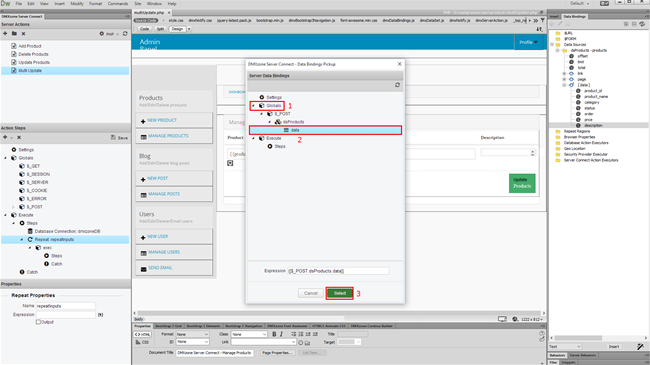
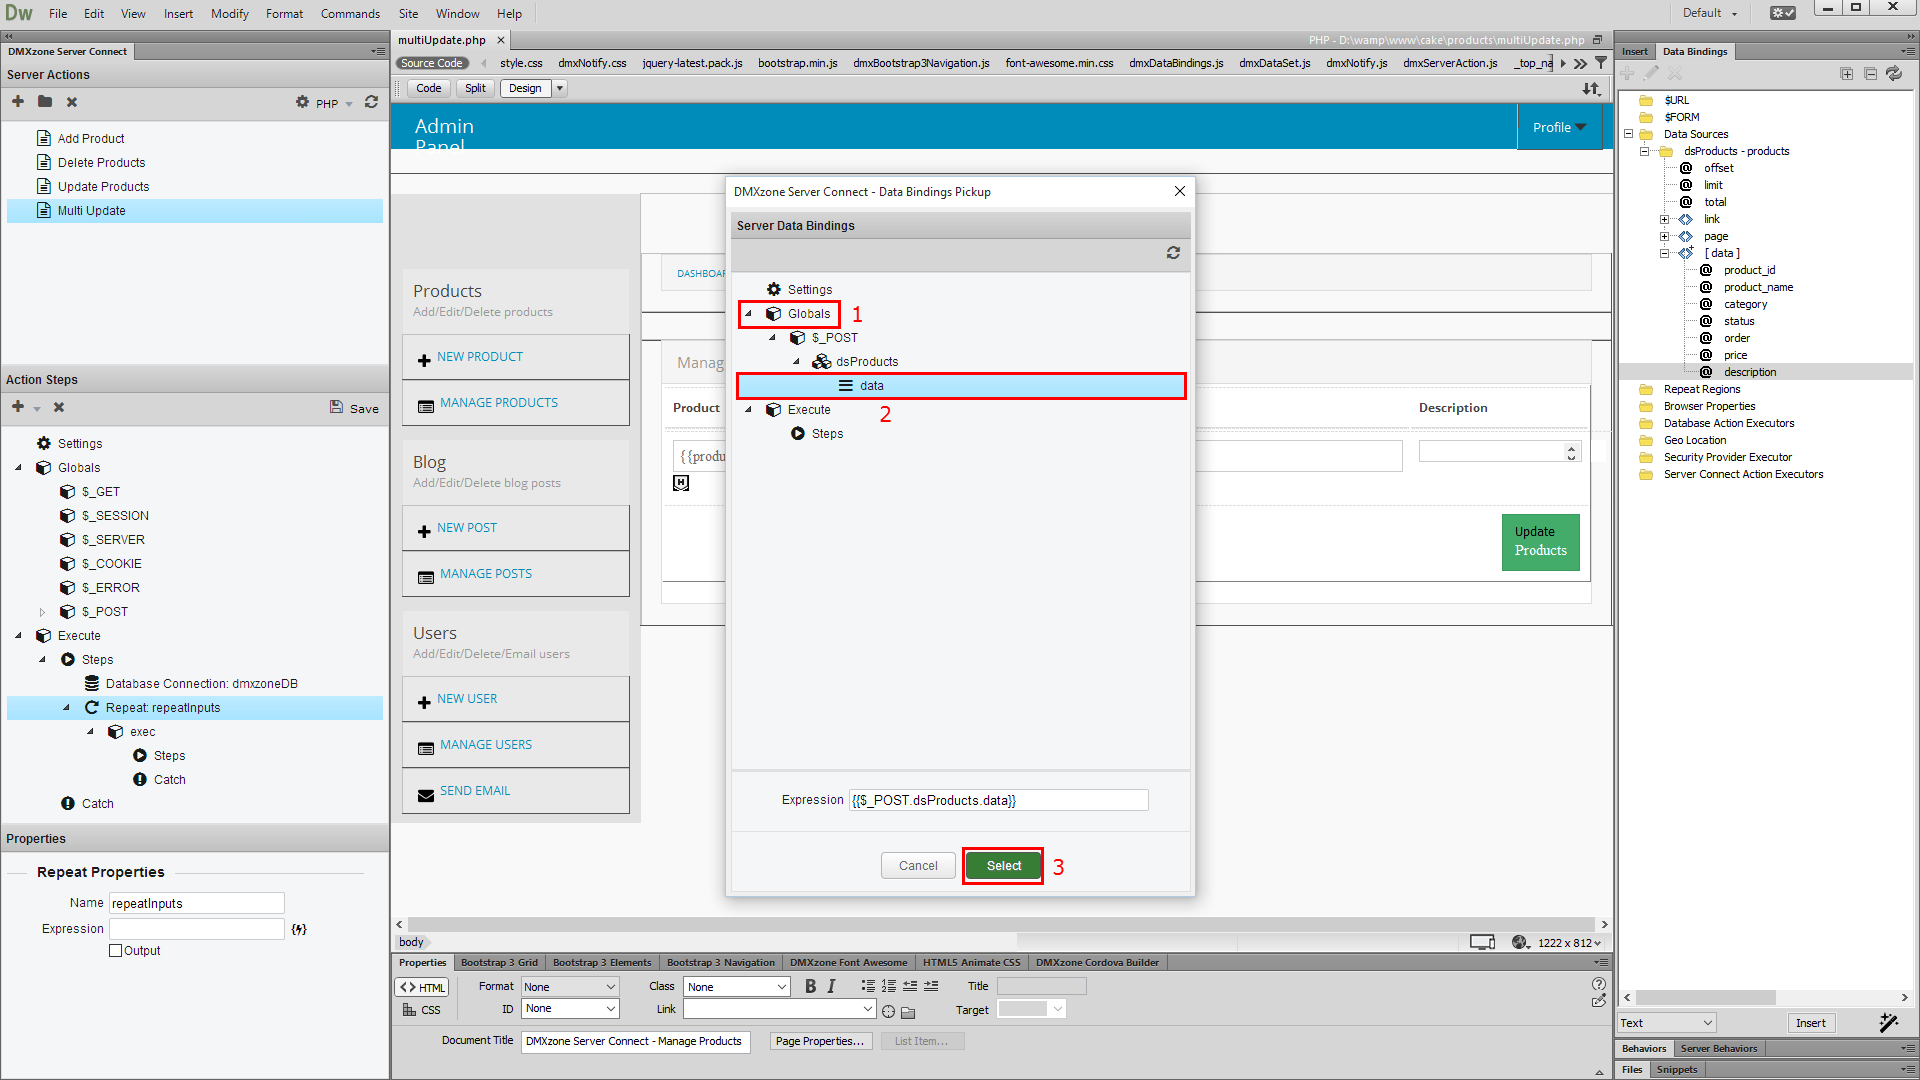
13.Expand the globals (1) and under post you'll find an
object, which has the same name as your data source. Select the data array,
located inside it (2). When you're done, click select (3).
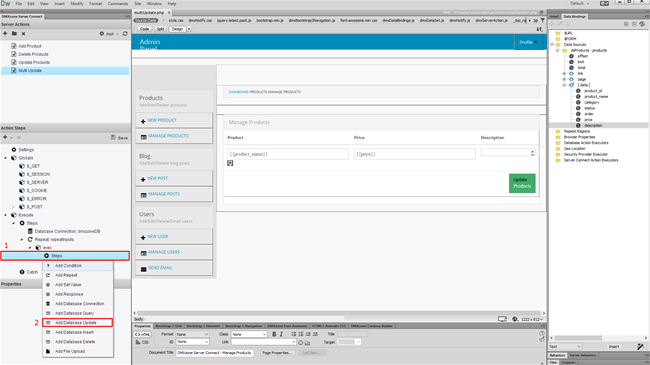
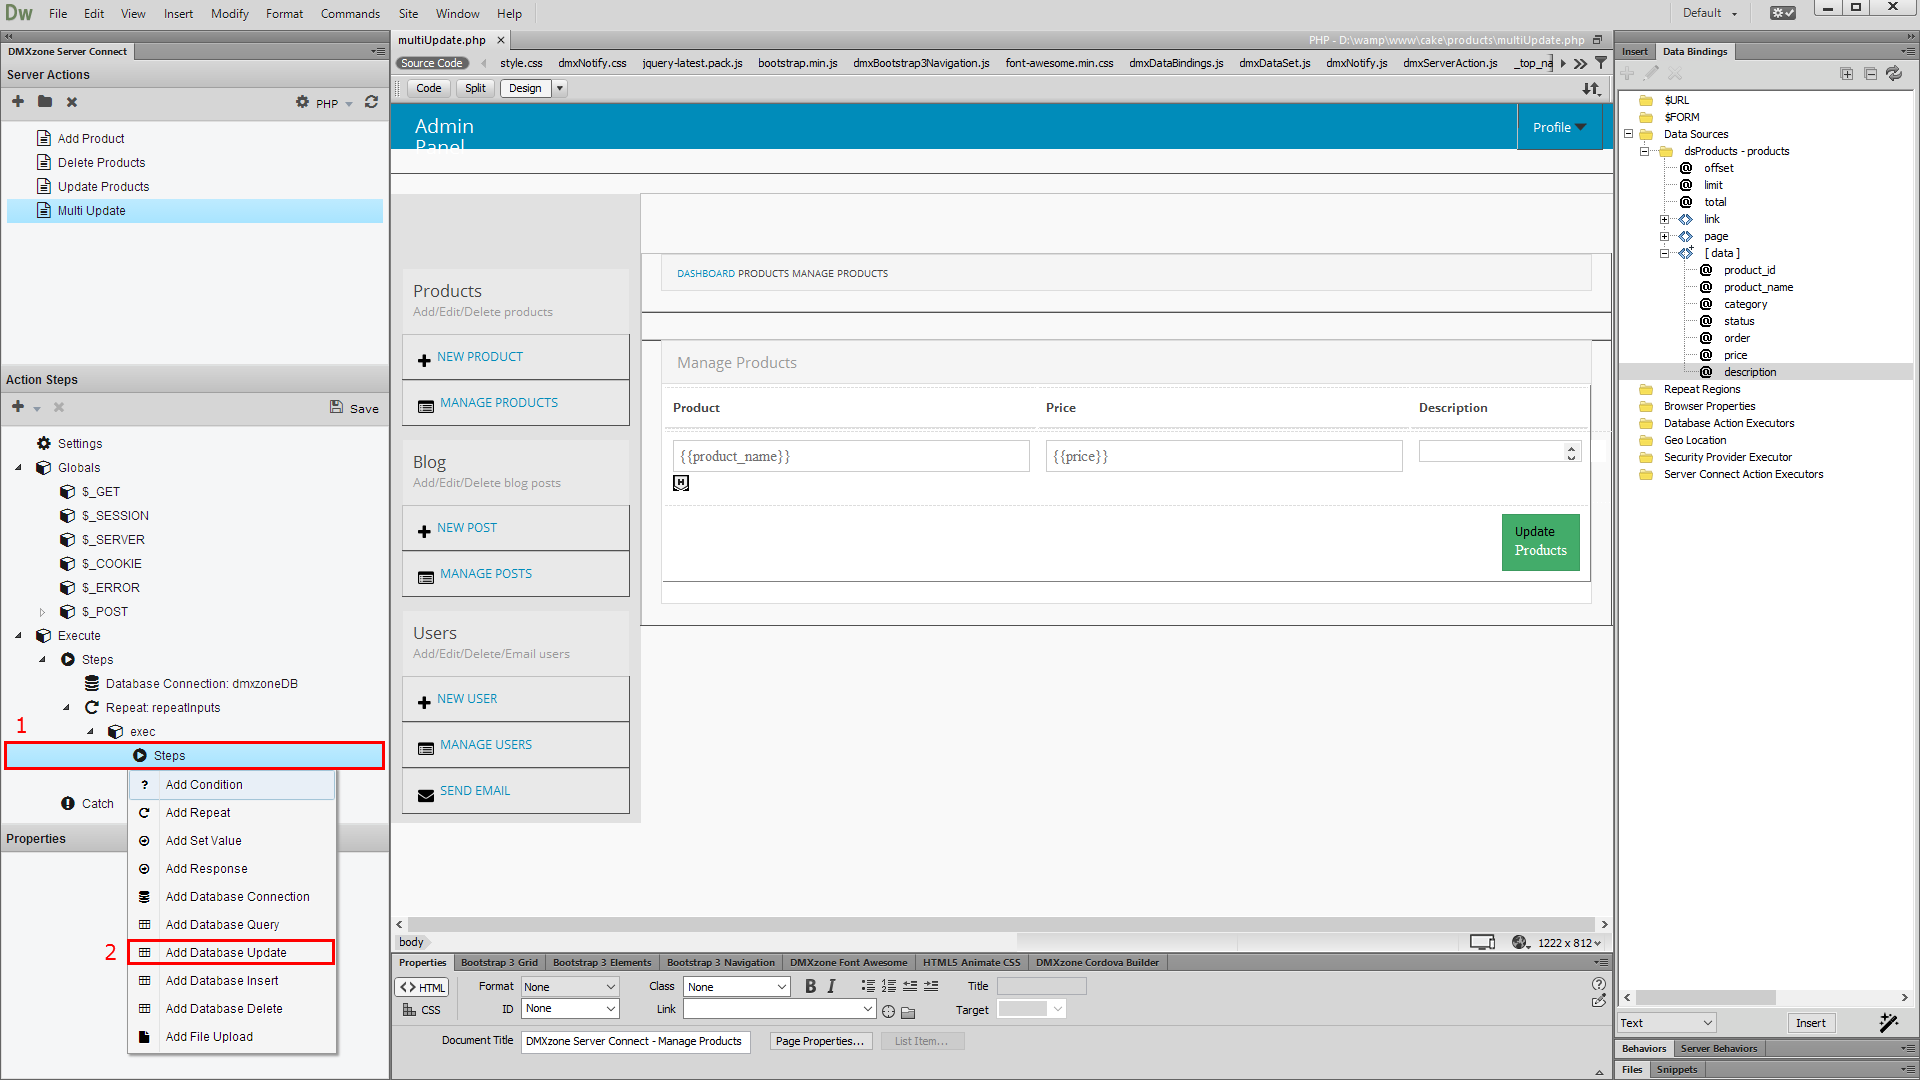
14.Right click steps, located in the repeat that we've just
added (1) and add database update (2).
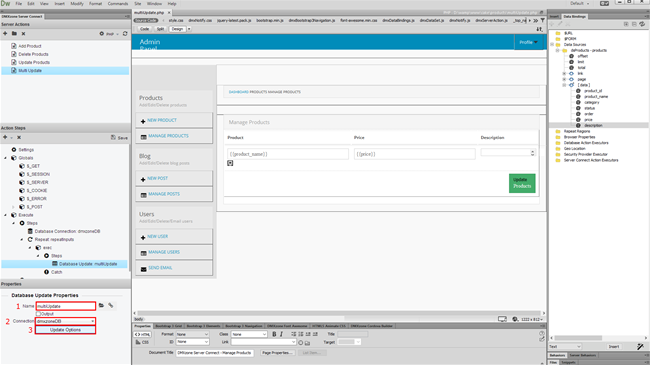
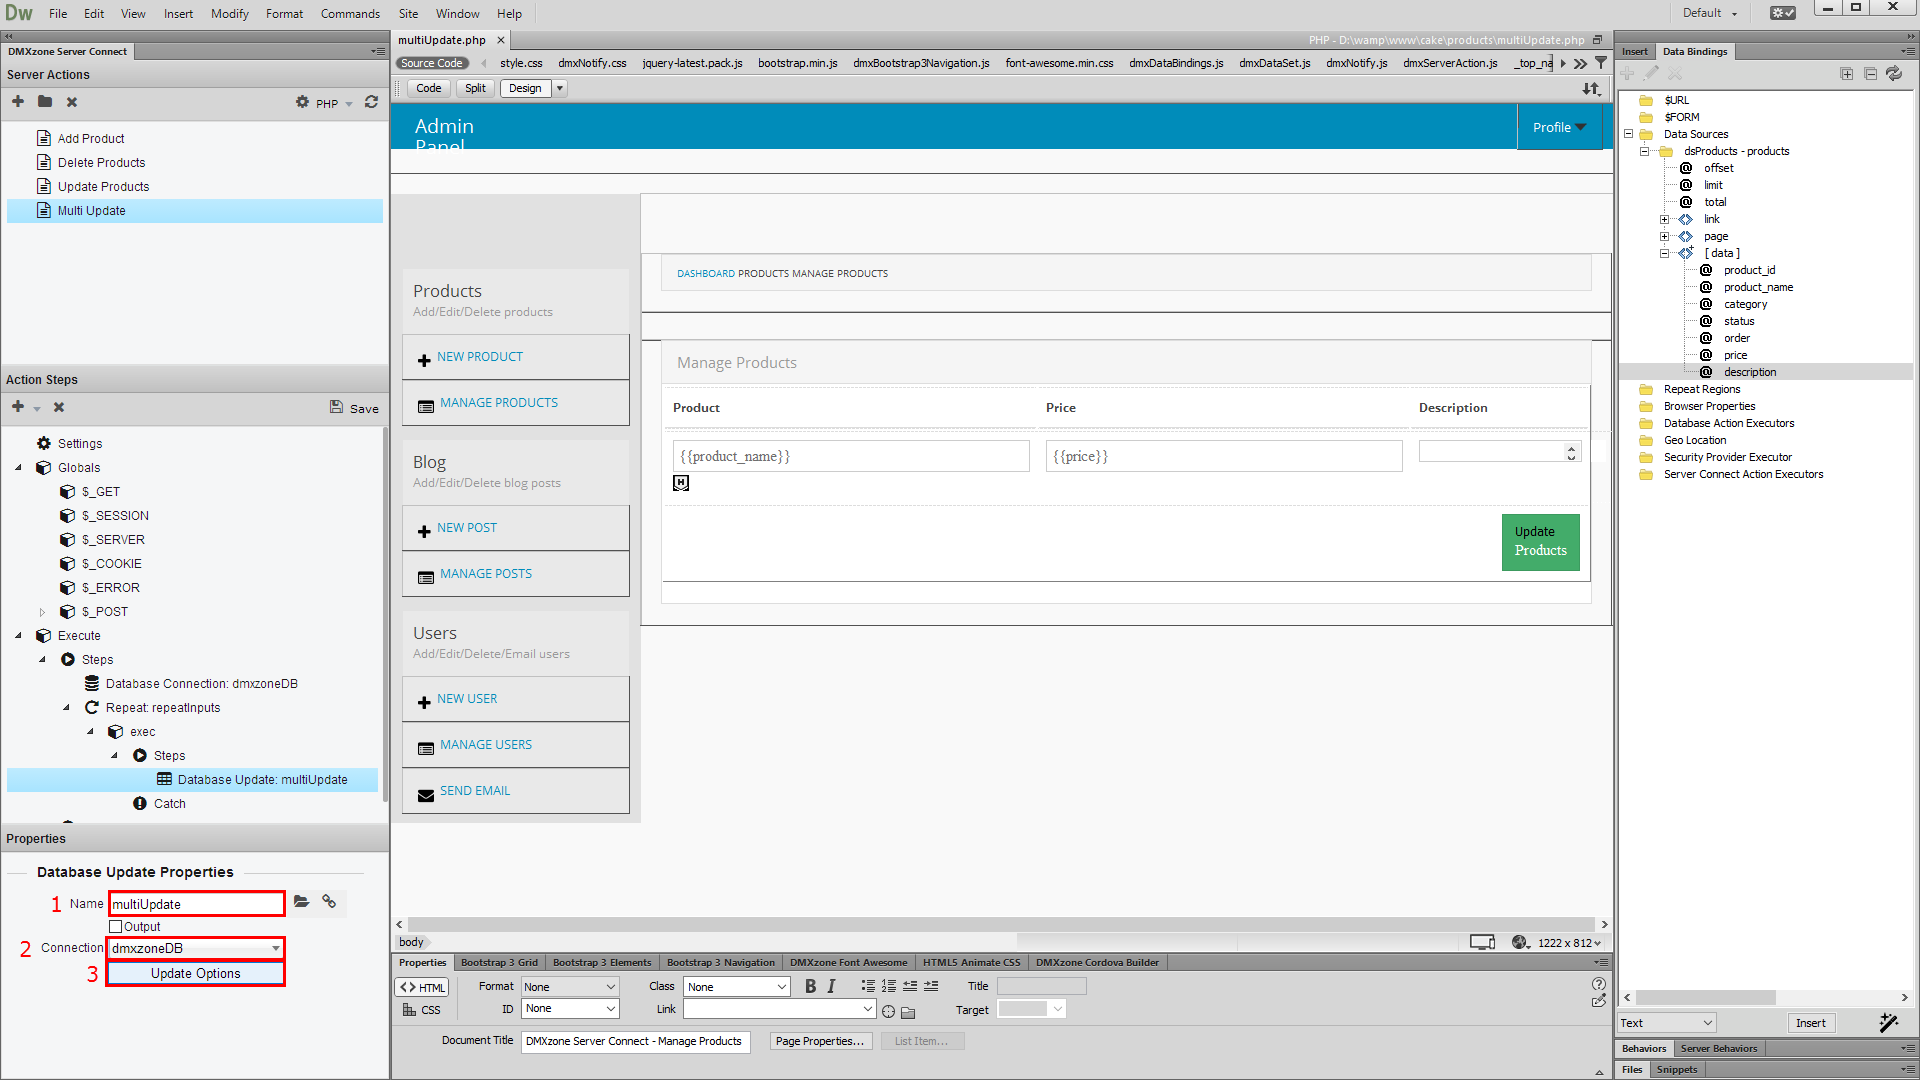
15.Add a name for this update (1) and select your
connection from the dropdown (2). When you're done, click update
options button (3).
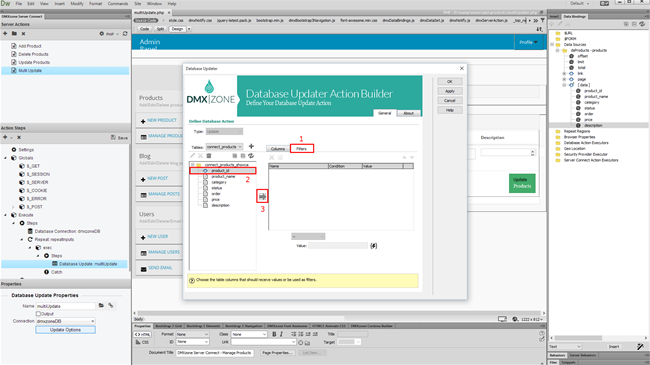
16.Select (1) and add (2) the database table that you
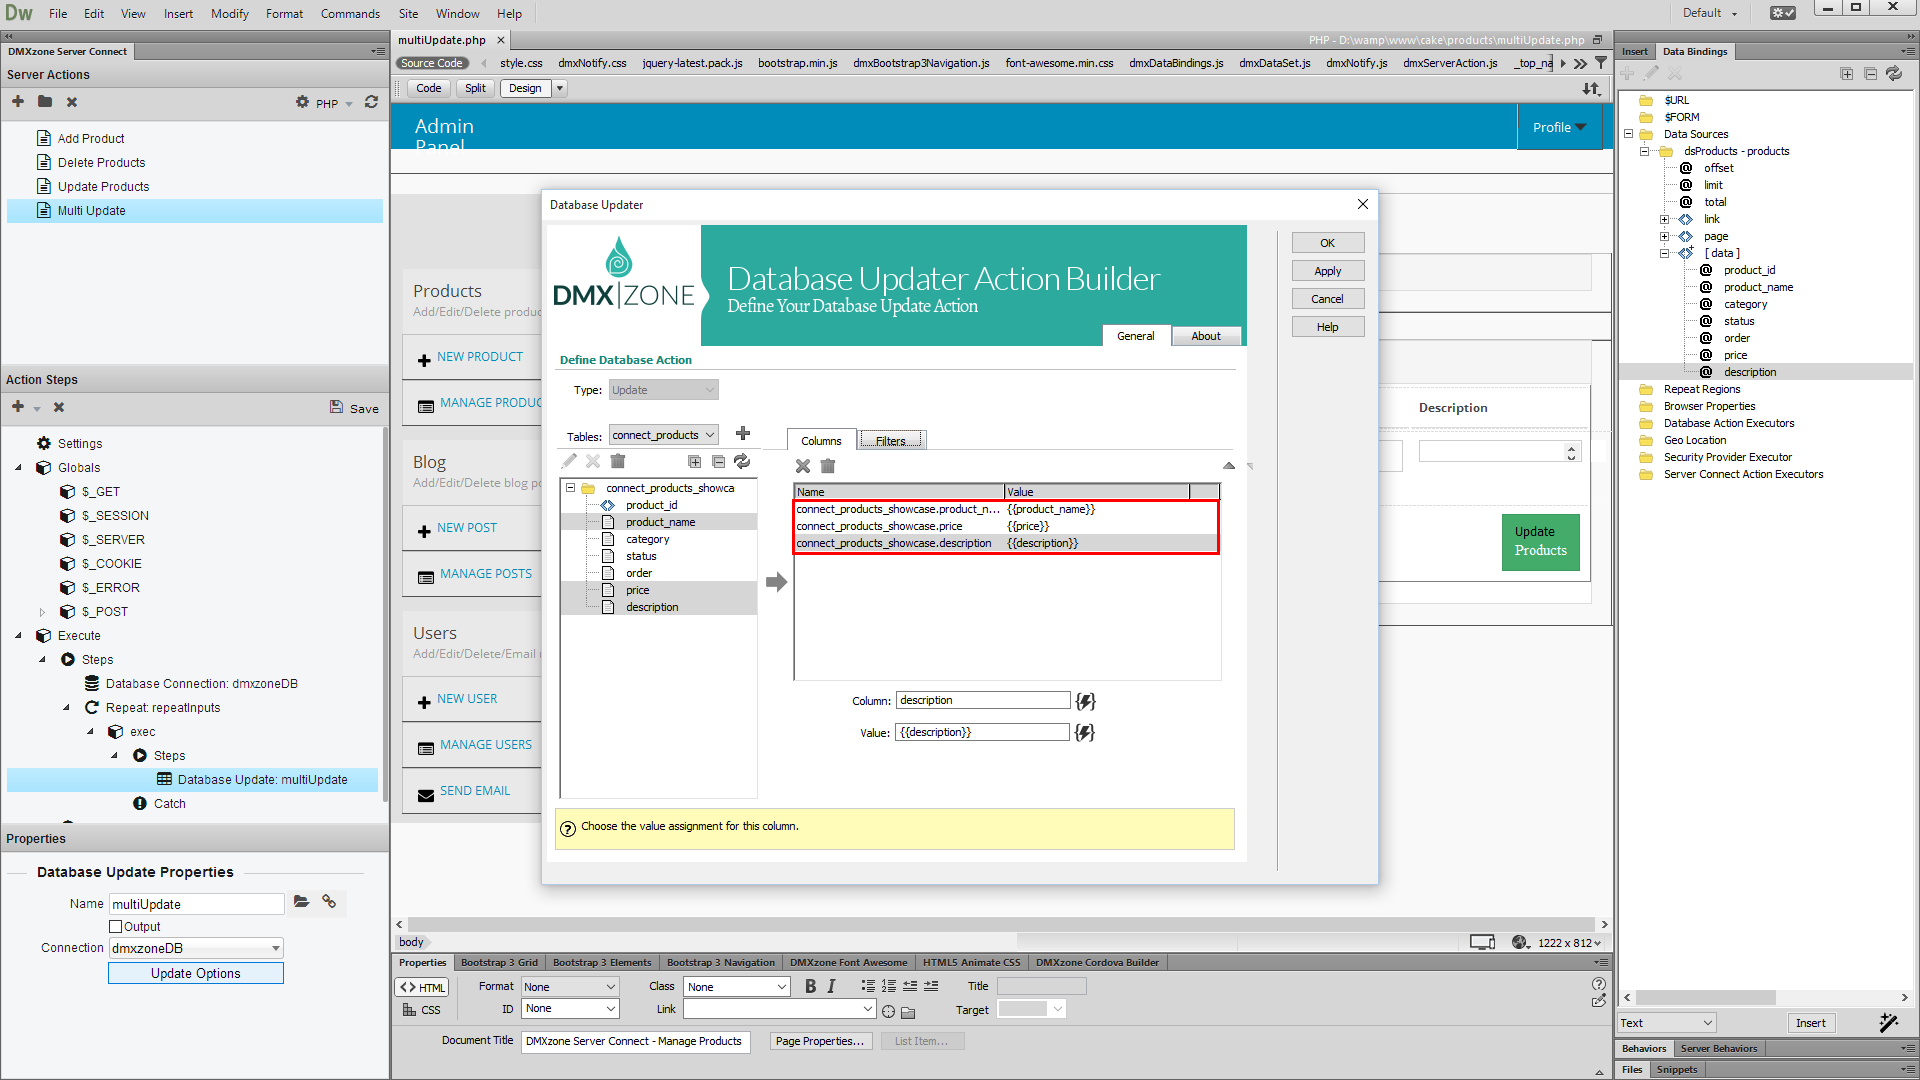
want to update. Add the database columns that need to be updated (3).

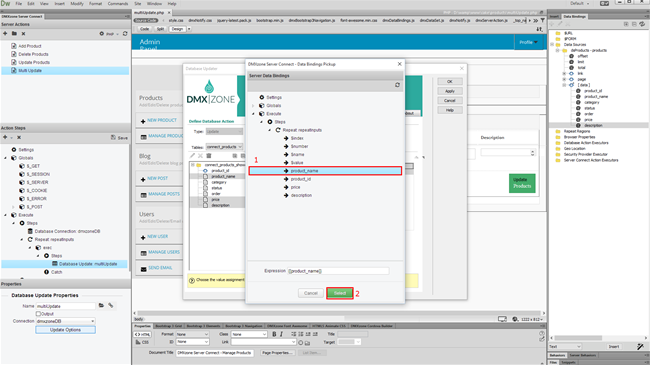
17.Select the first column (1) and click the server data
bindings picker (2), in order to setup its value.

18.Select the input name (1) that needs to be used, from the
repeat results. In our case this is the product name. Then click the select
button (2).
19.Do the same with the rest of the database columns, selecting the
proper values.

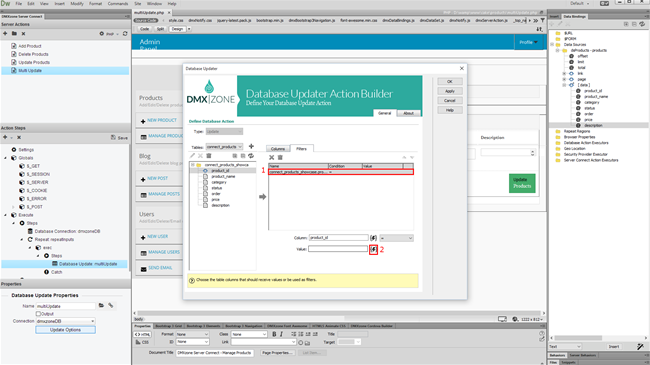
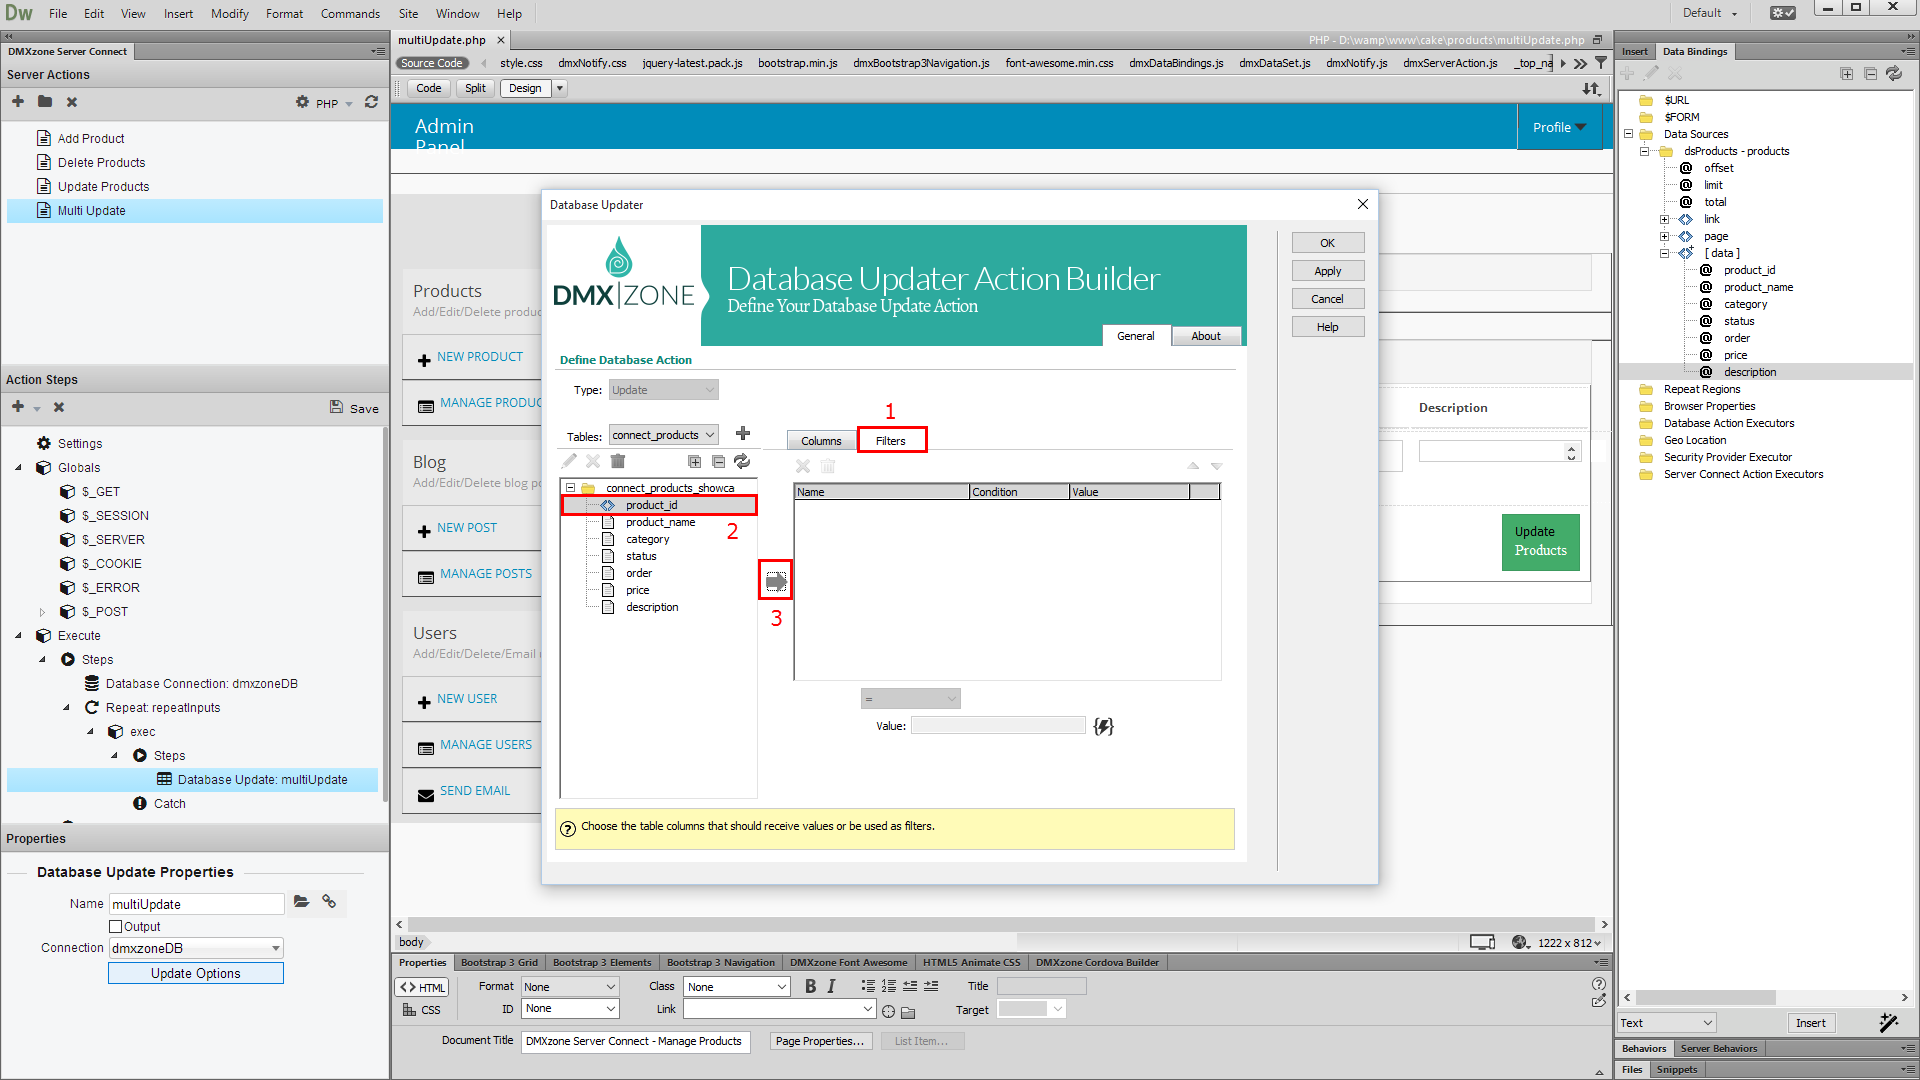
20.In the filter
tab (1), select the column (2) that you want to filter your products
by, and add it (3) to filters list.
21.Select the column (1) and assign a value to it, using the server
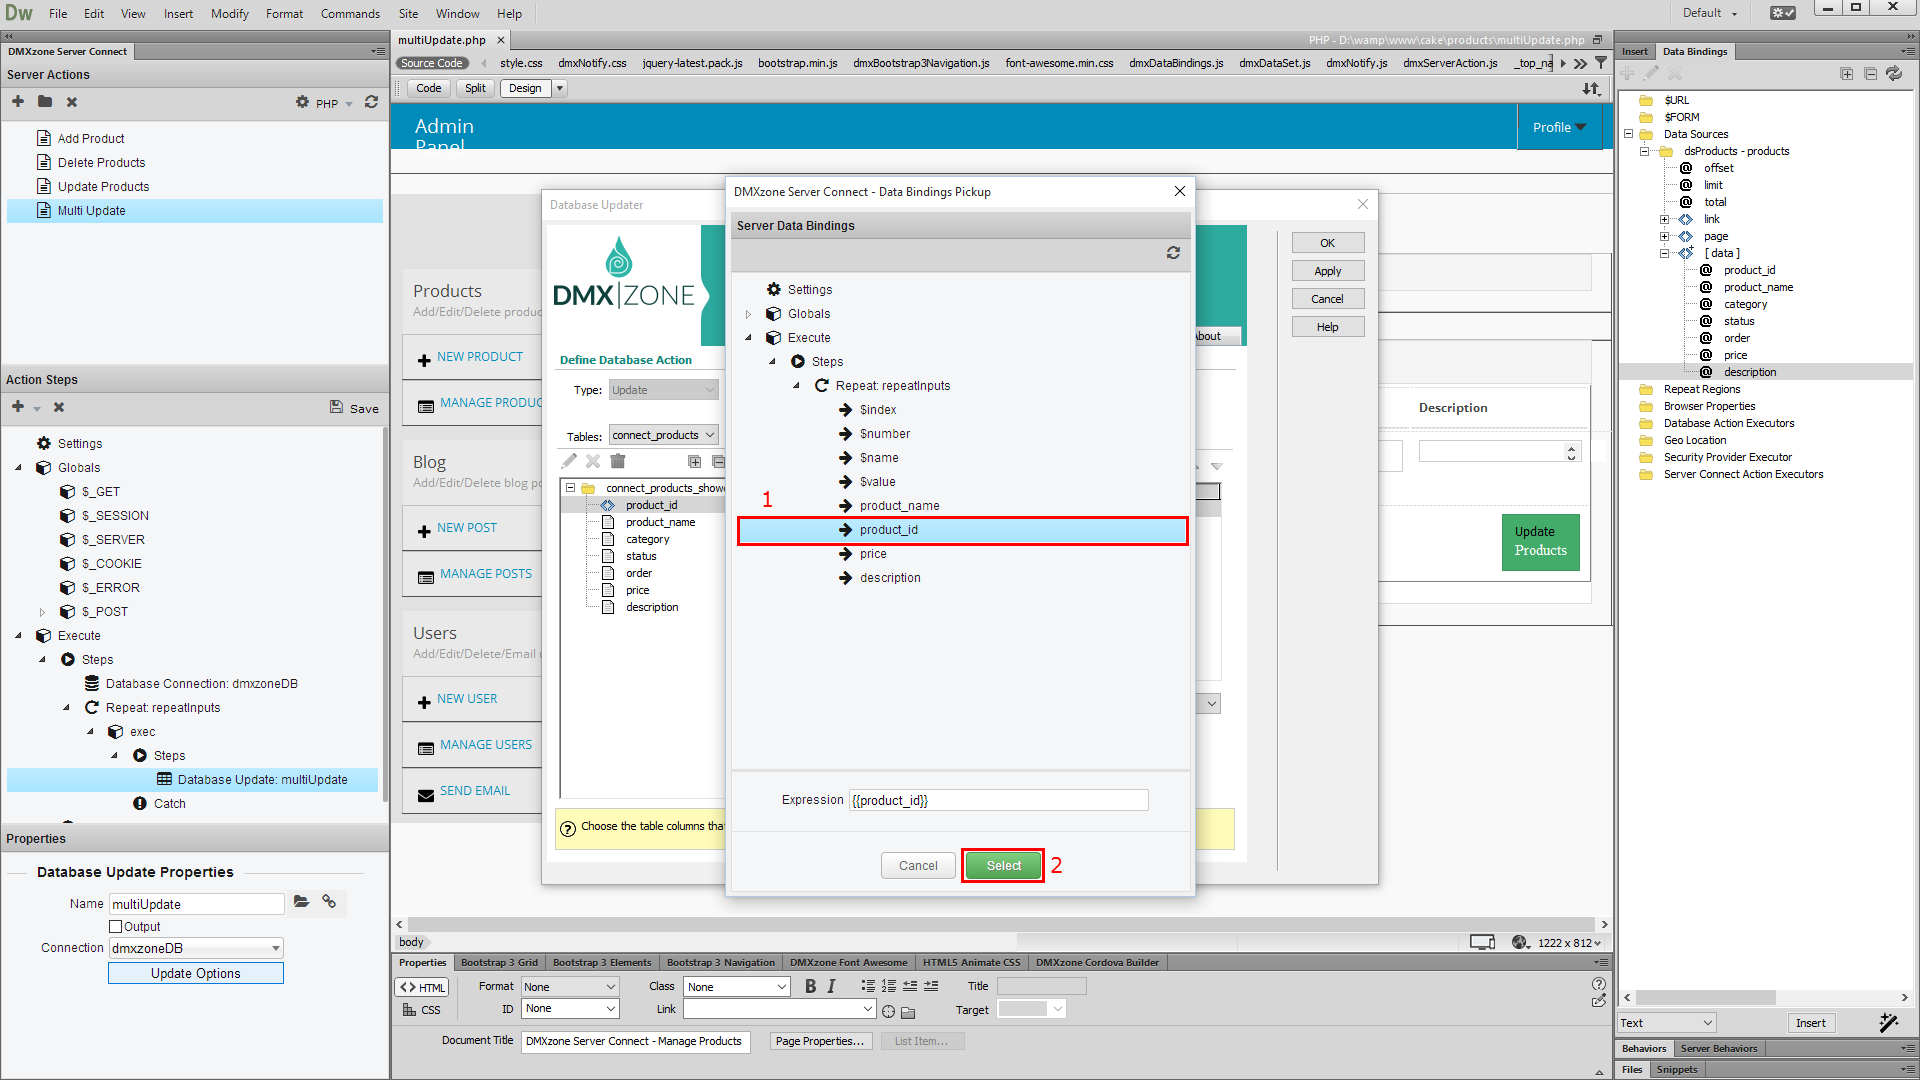
data bindings picker (2).
22.Select the hidden field name from the repeat results (1) and click the select button (2).
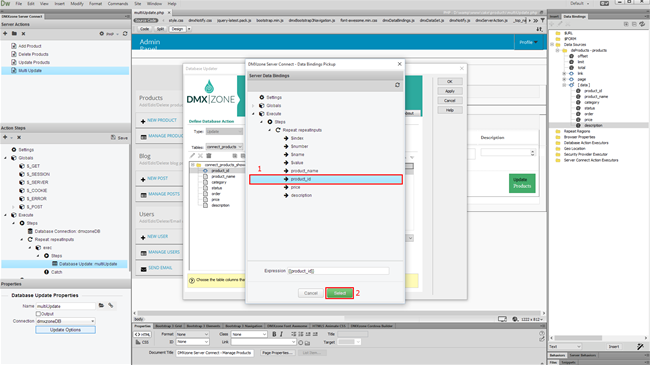
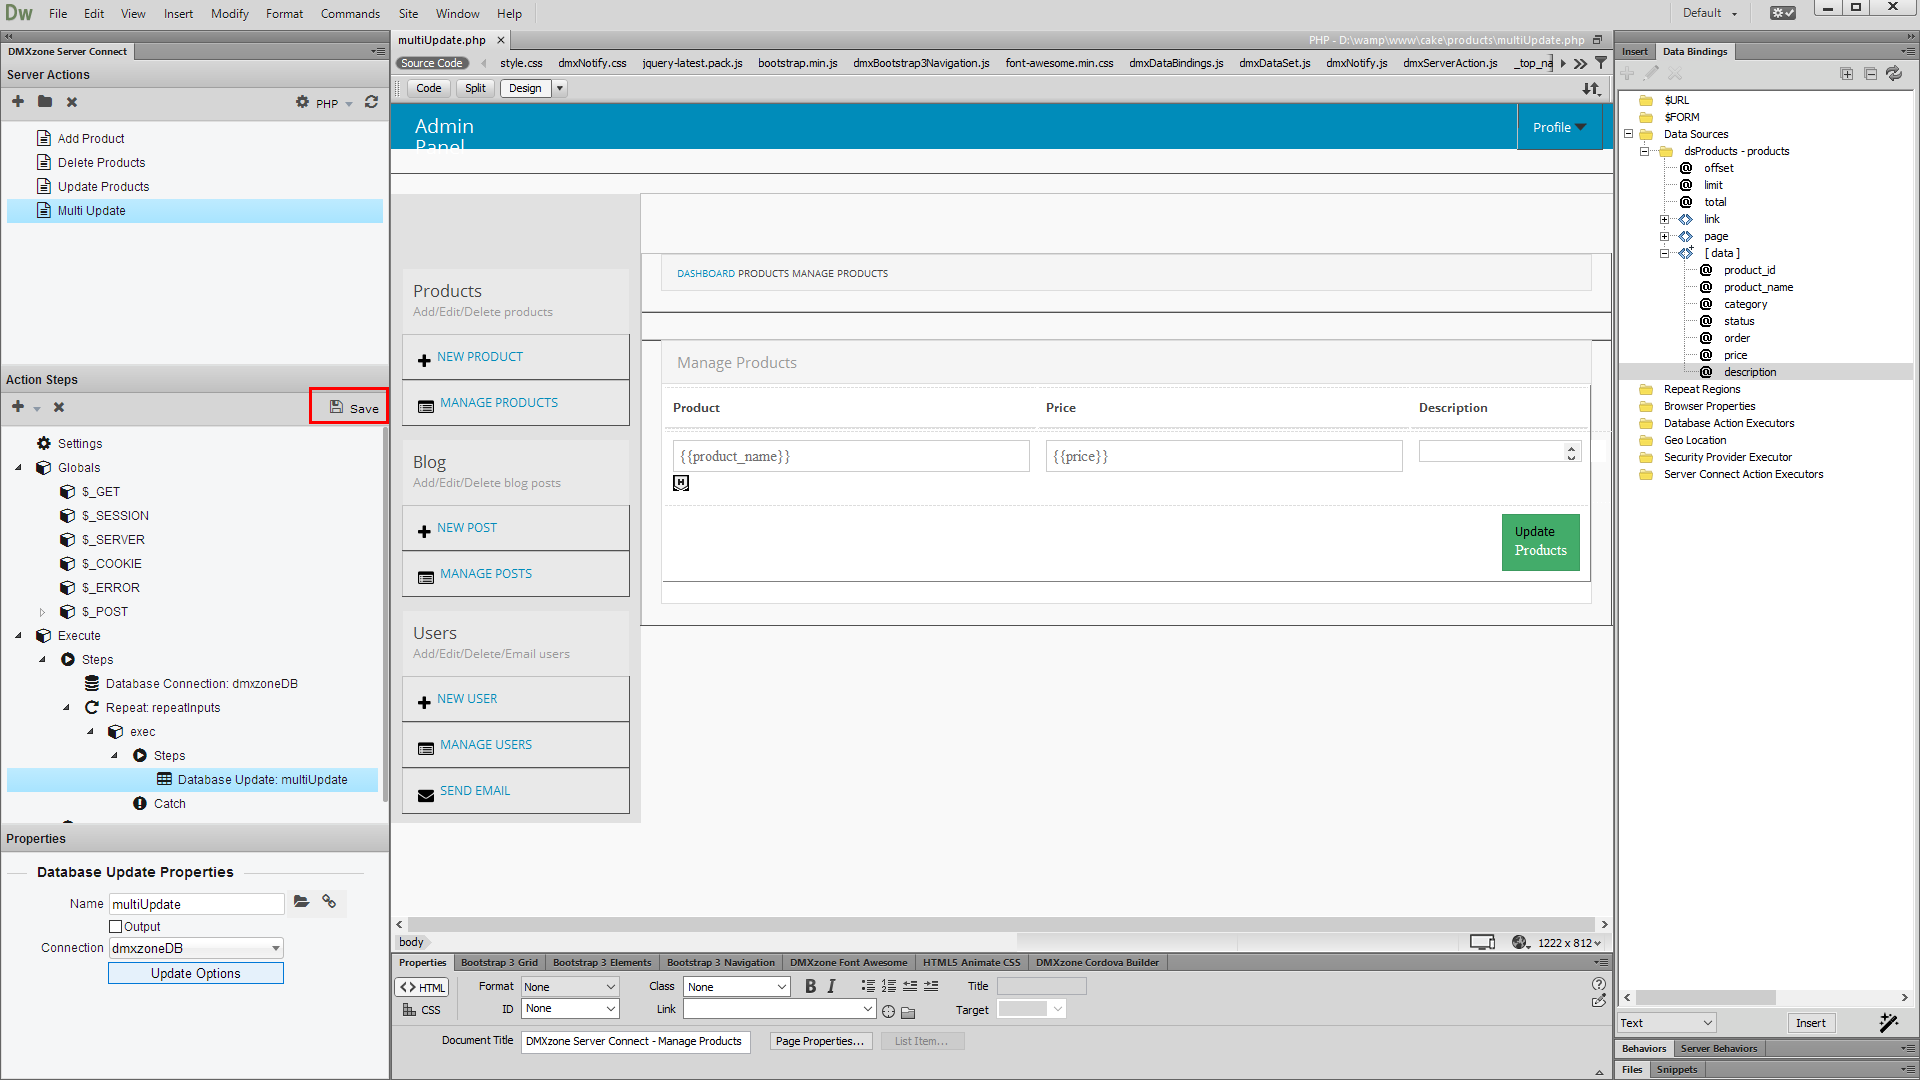
23.Click OK when you're done.

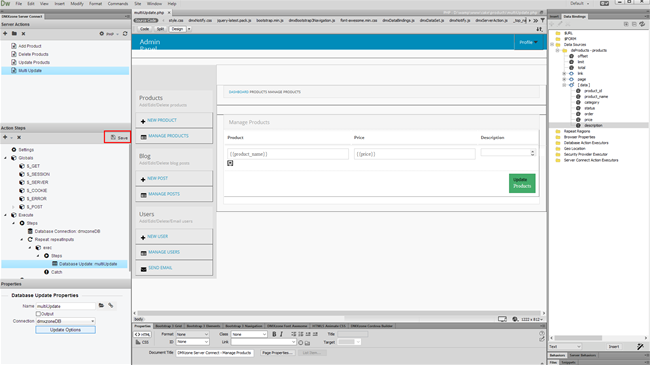
24.Do not forget to save your action steps.
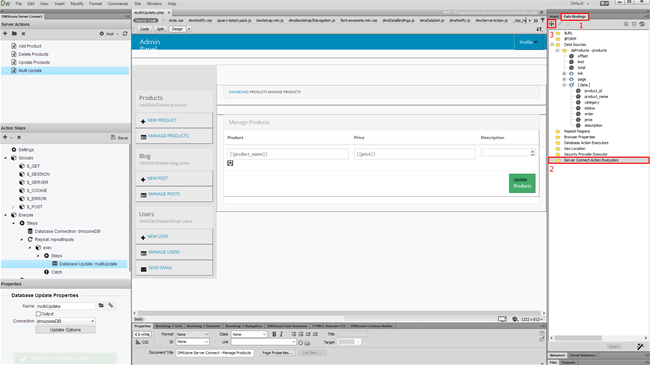
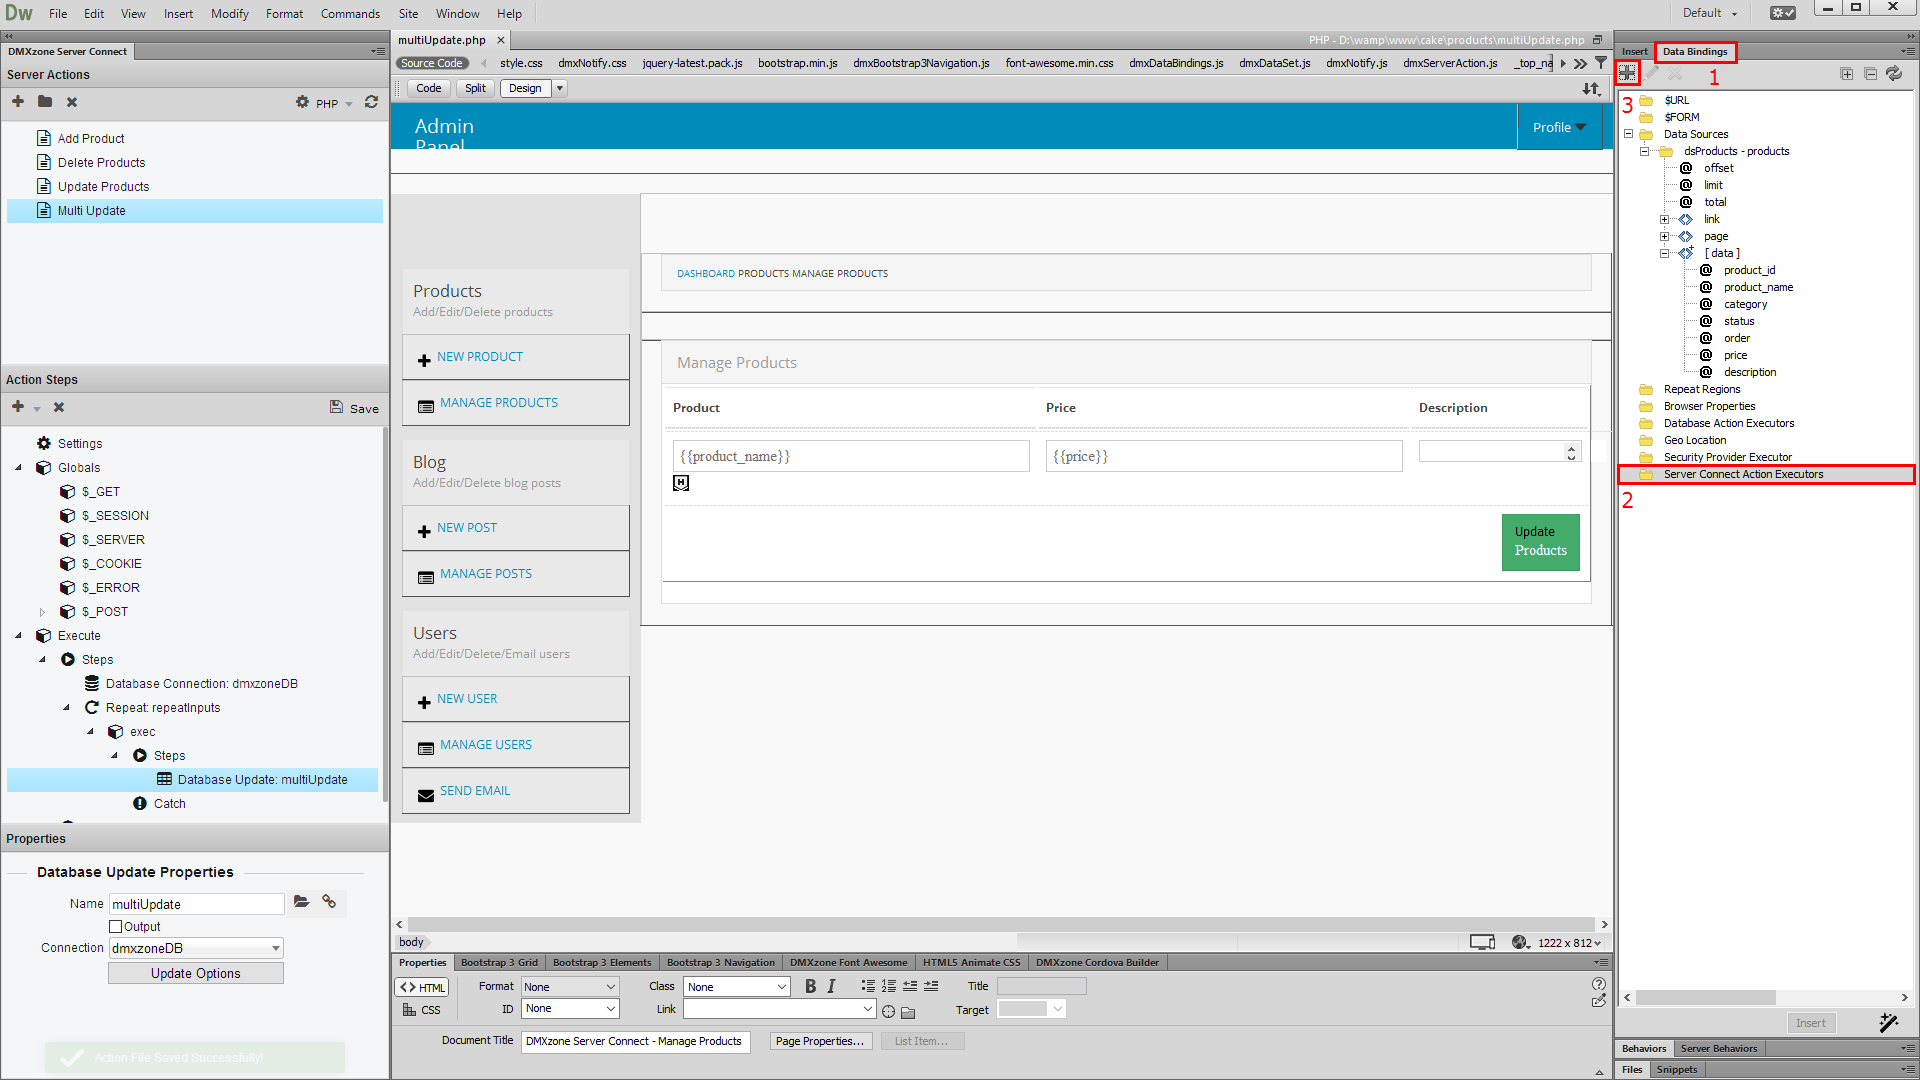
- Then, in the HTML5 Data Bindings panel (1), select
the server connect action executors (2) and click add new button (3).
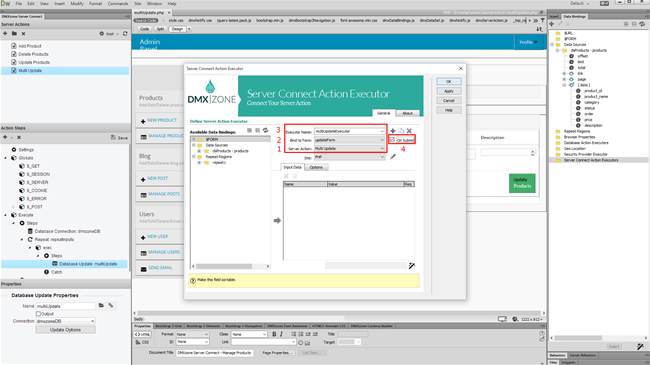
- Select your server action from the dropdown (1) and bind it
to the update form on your page (2). Don't forget
to add a name for the executor (3) and to check the on submit
checkbox (4). When you're done, click OK.
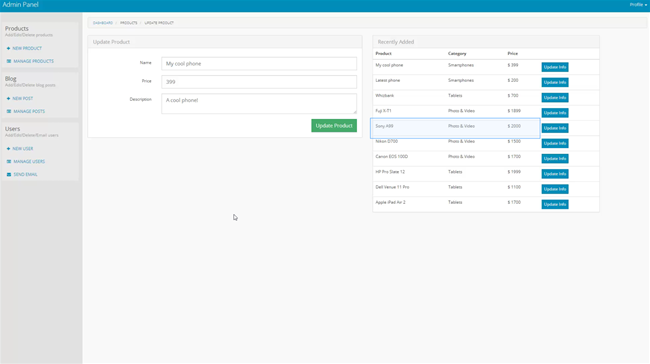
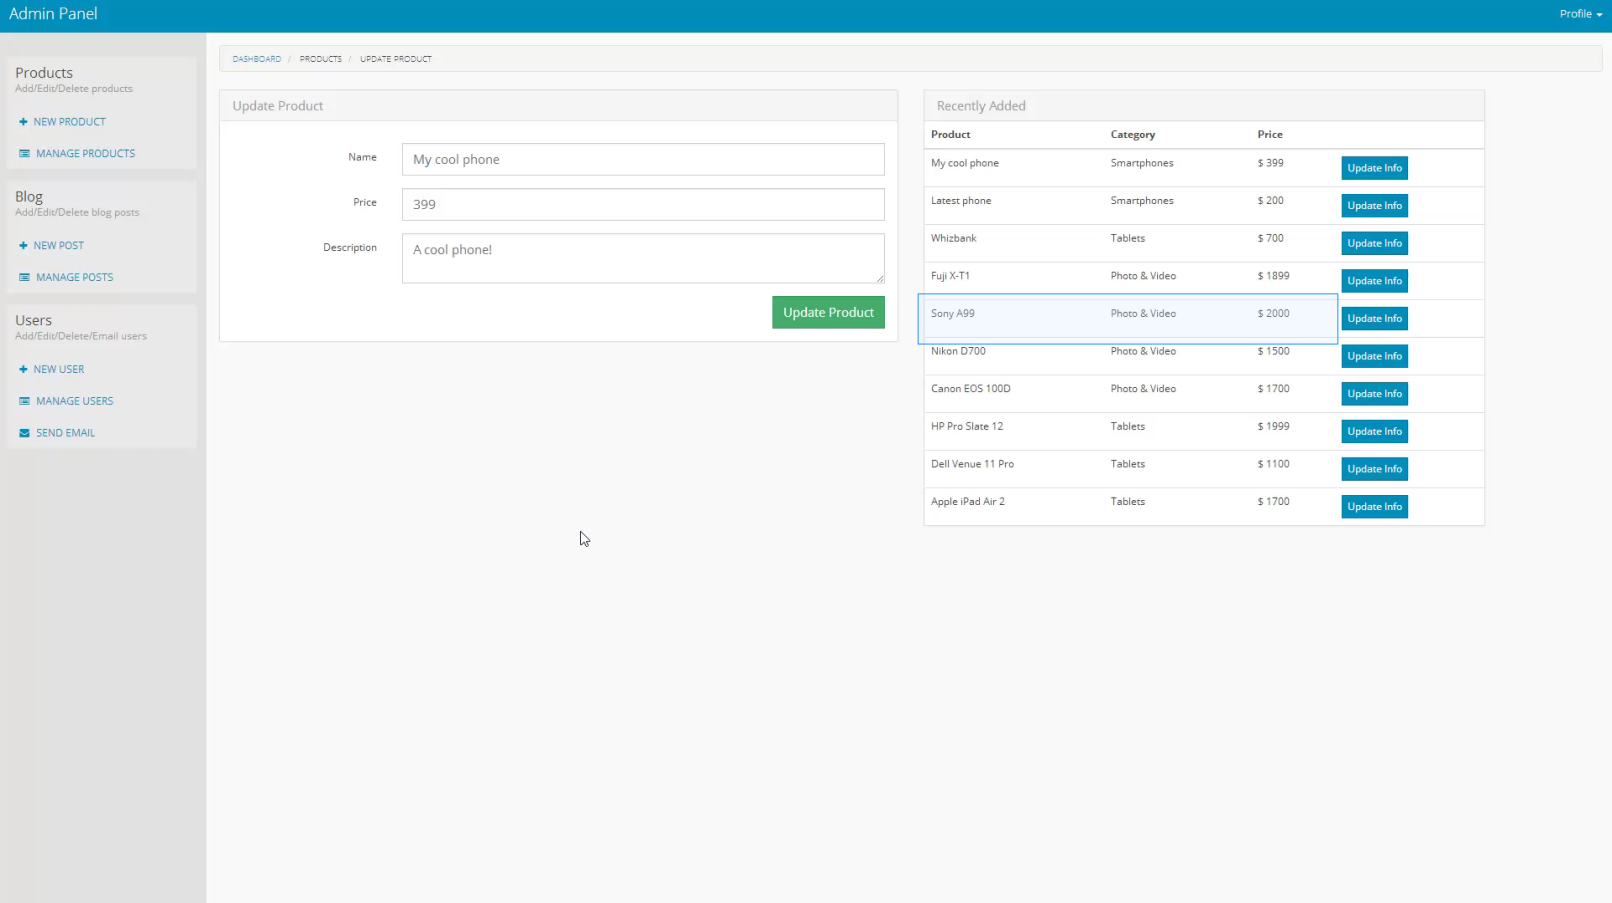
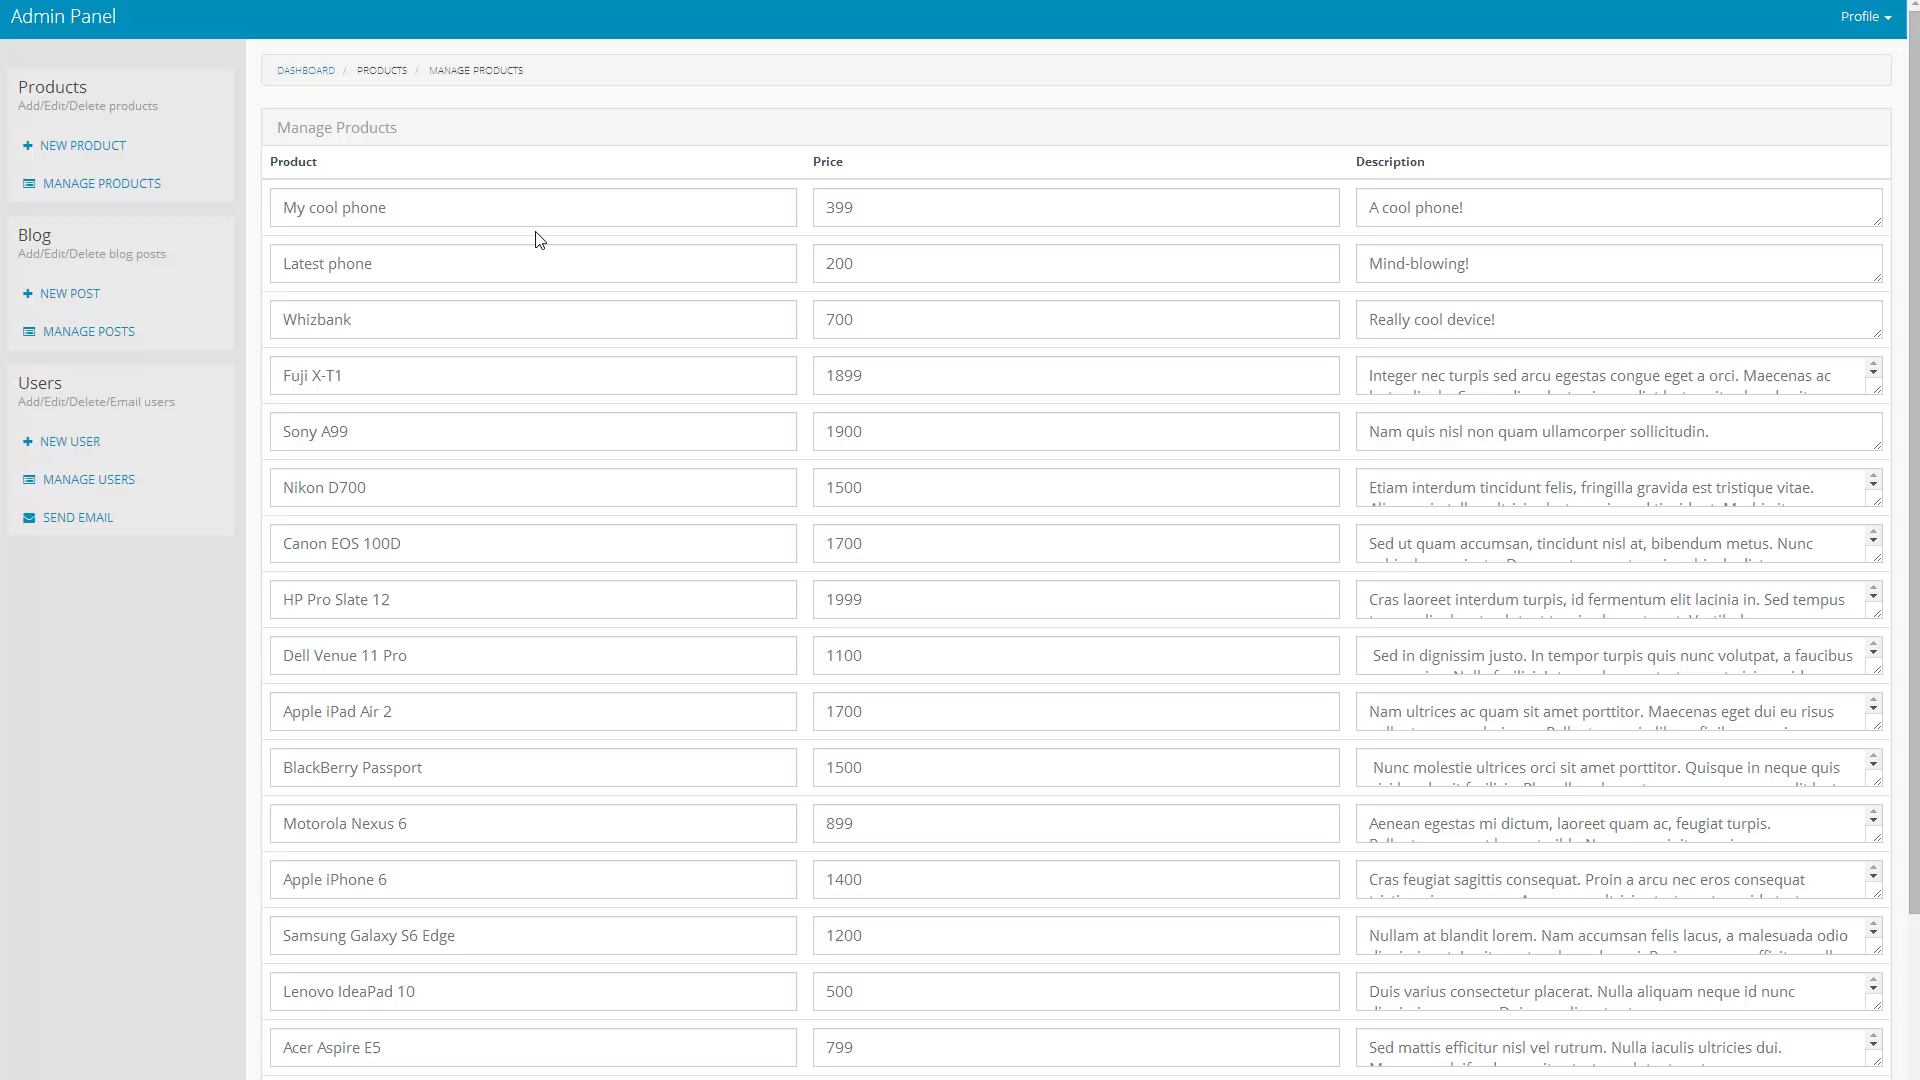
- Let's preview the results.
- You can edit different properties, for different records,
and then when you click the update button the changes are immediately
saved! That's how easy it is to update multiple records, using DMXzone
Server Connect.
Prev Index Next


Comments
Be the first to write a comment
You must me logged in to write a comment.