In this article you will find tutorials, which will teach you how to work with DMXzone Bootstrap 3 Forms Designer extension. They will show you how to build horizontal forms, how to style radio buttons and checkboxes, and even use dynamic input values. All tutorials are also available in video formats. If you experience any troubles with the extension, please contact our Live support or write in the support forums.
DMXzone Bootstrap 3 Forms Designer Manual
Learn how to work with DMXzone Bootstrap 3 Forms Designer
Advanced: Building a Horizontal Form
In this tutorial we will show you how to build a horizontal
form, using DMXzone
Bootstrap 3 Forms Designer.
*You can also check out the video.

How to do it
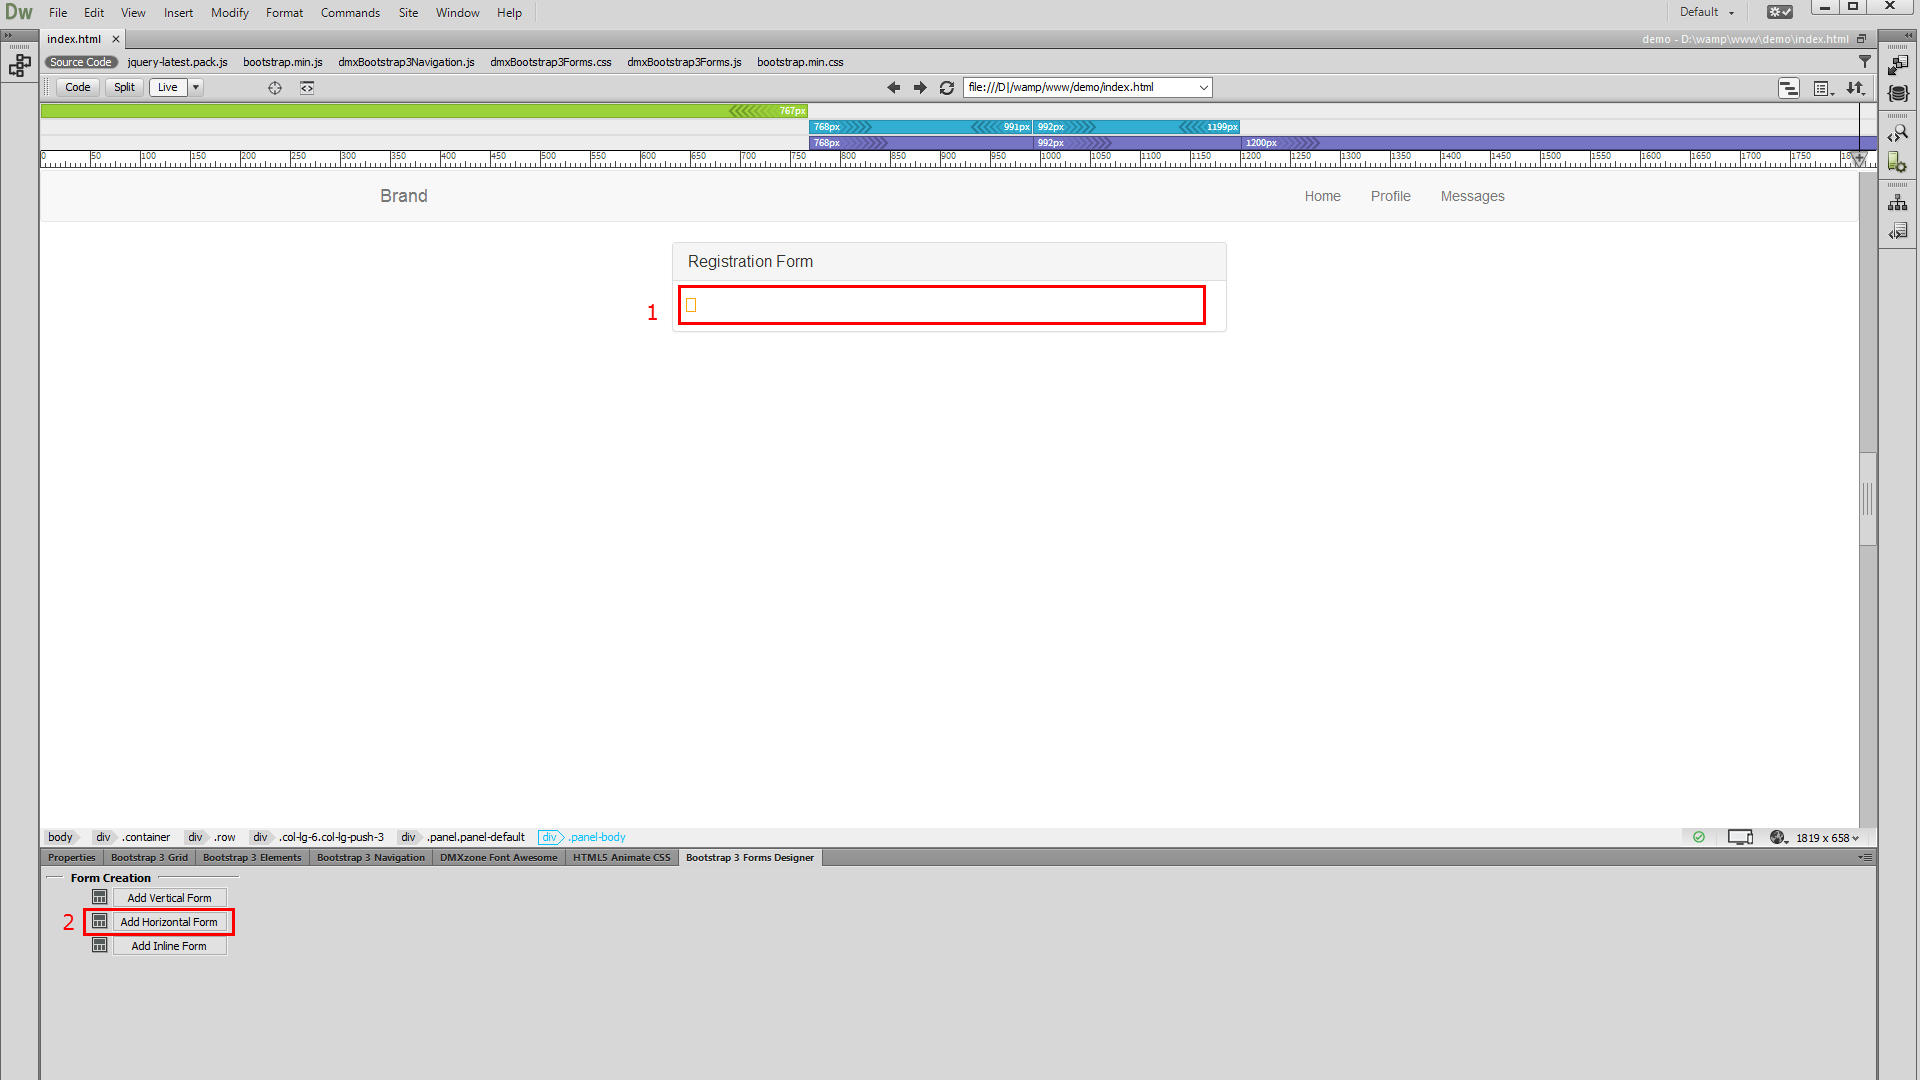
1.We've built a really simple page layout, based on the Bootstrap 3 framework. It contains a div, where we'd like to place our registration form. Click inside the container (1), where you want to insert your form and choose add horizontal form button (2). The labels and form inputs of the horizontal form are aligned in a horizontal layout.
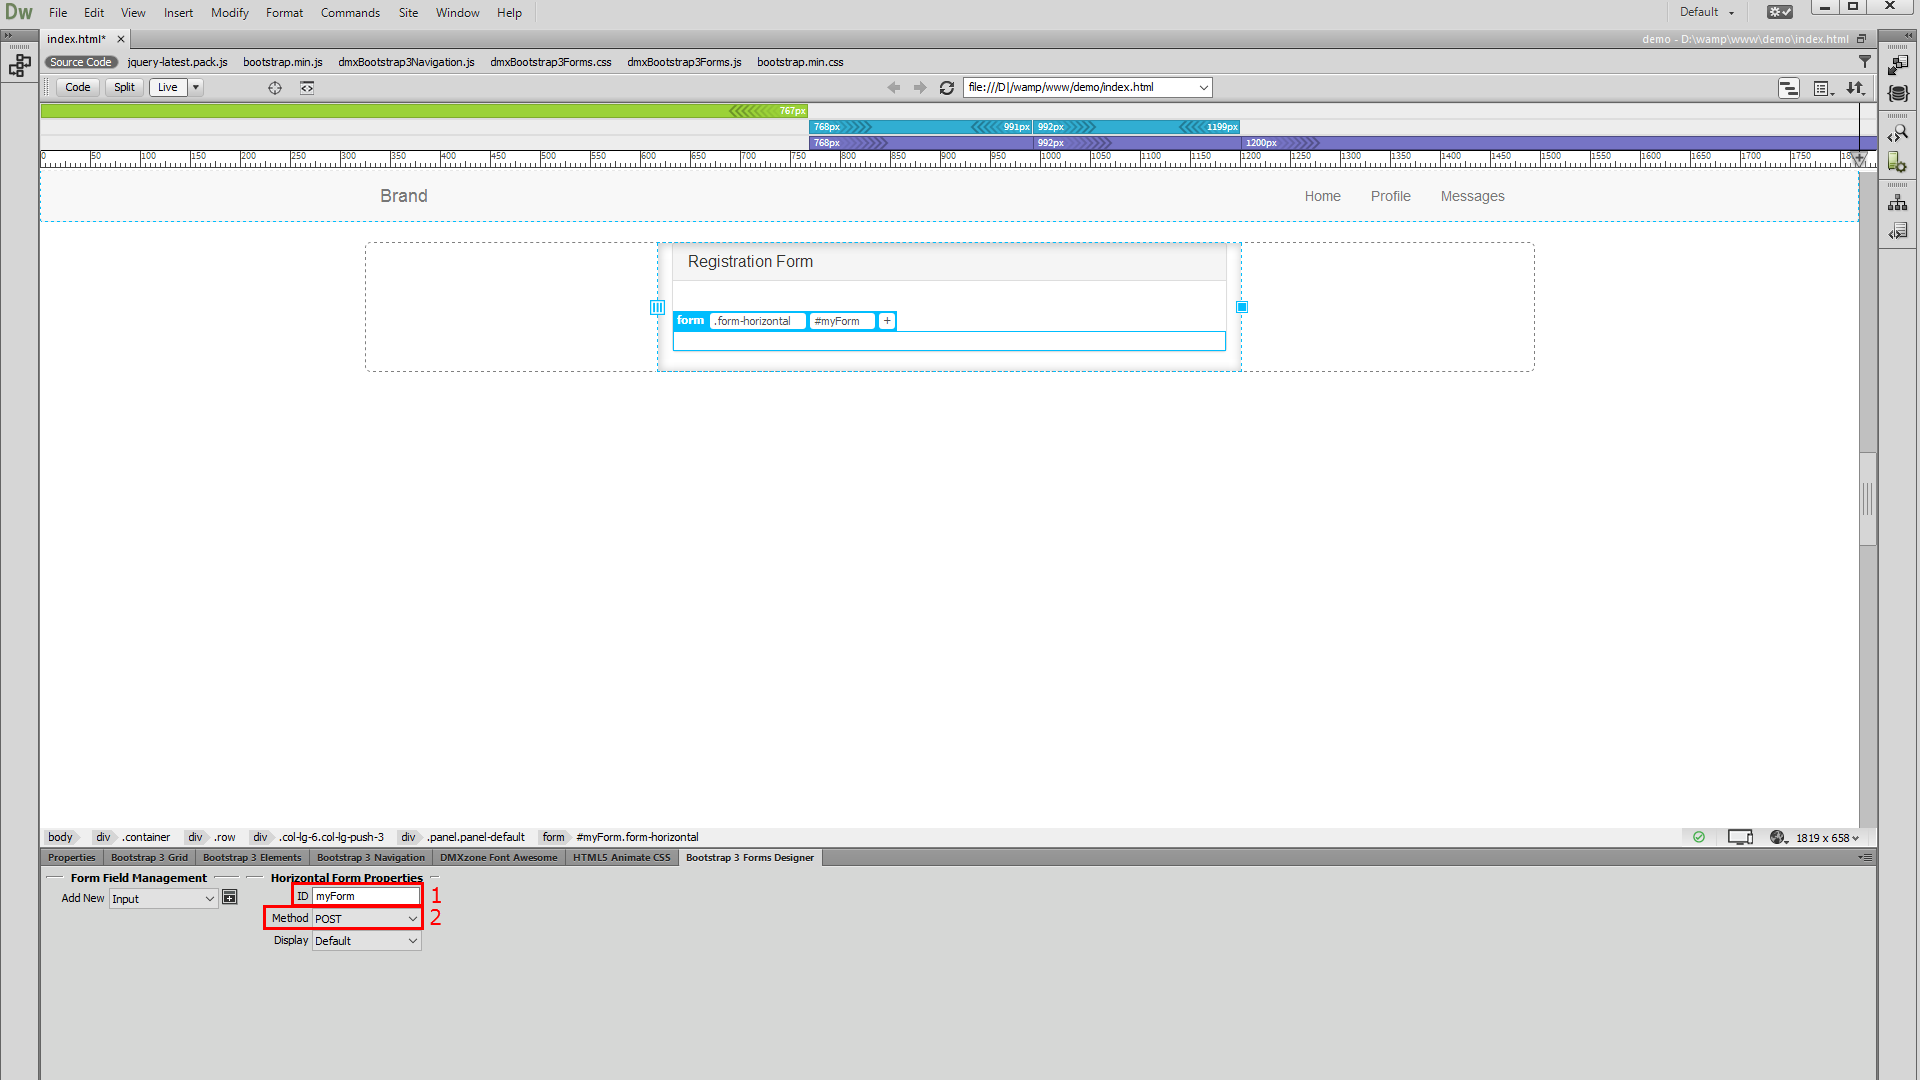
2.First, let's add an ID to our form (1). Choose between GET or POST method, for our tutorial we choose POST (2).
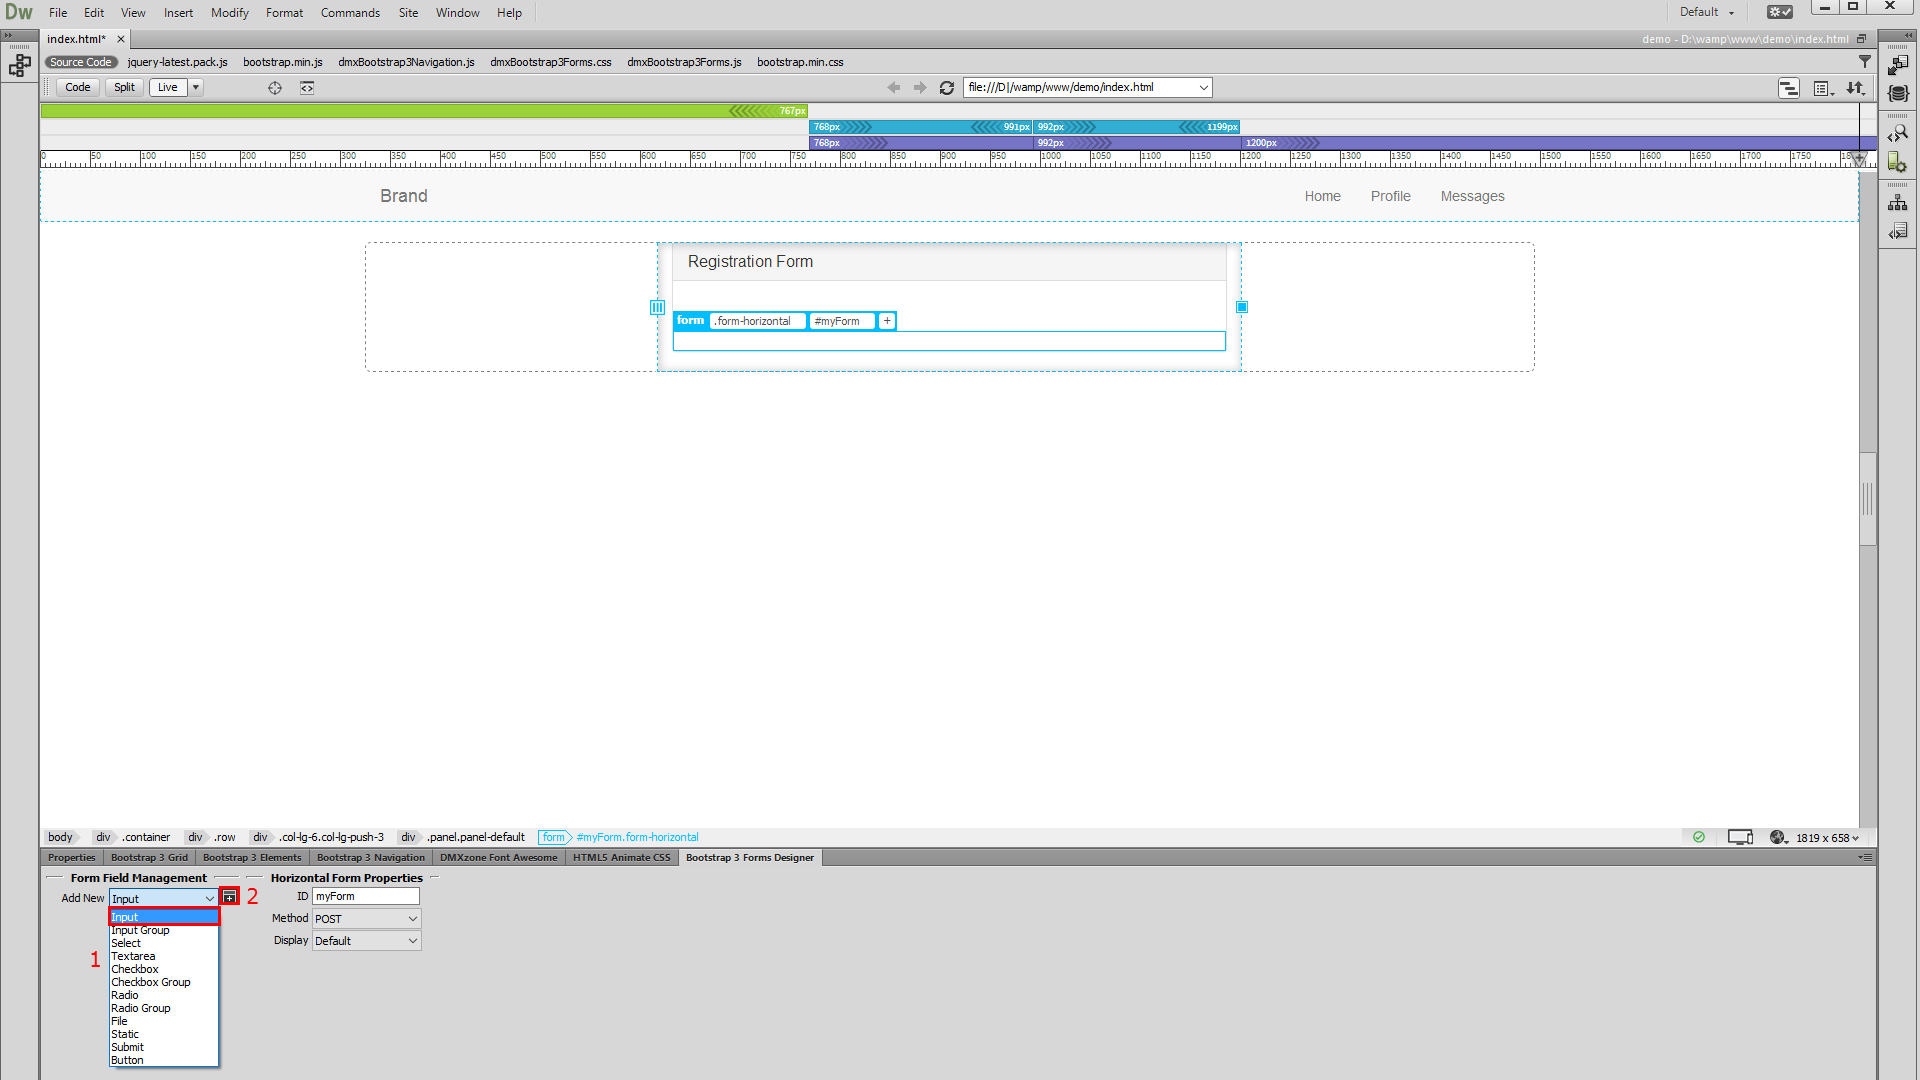
3.Then, let's add some form fields, inside the form. From the dropdown menu, select input (1). The input element is a text-based input. Now, click the add field button (2).
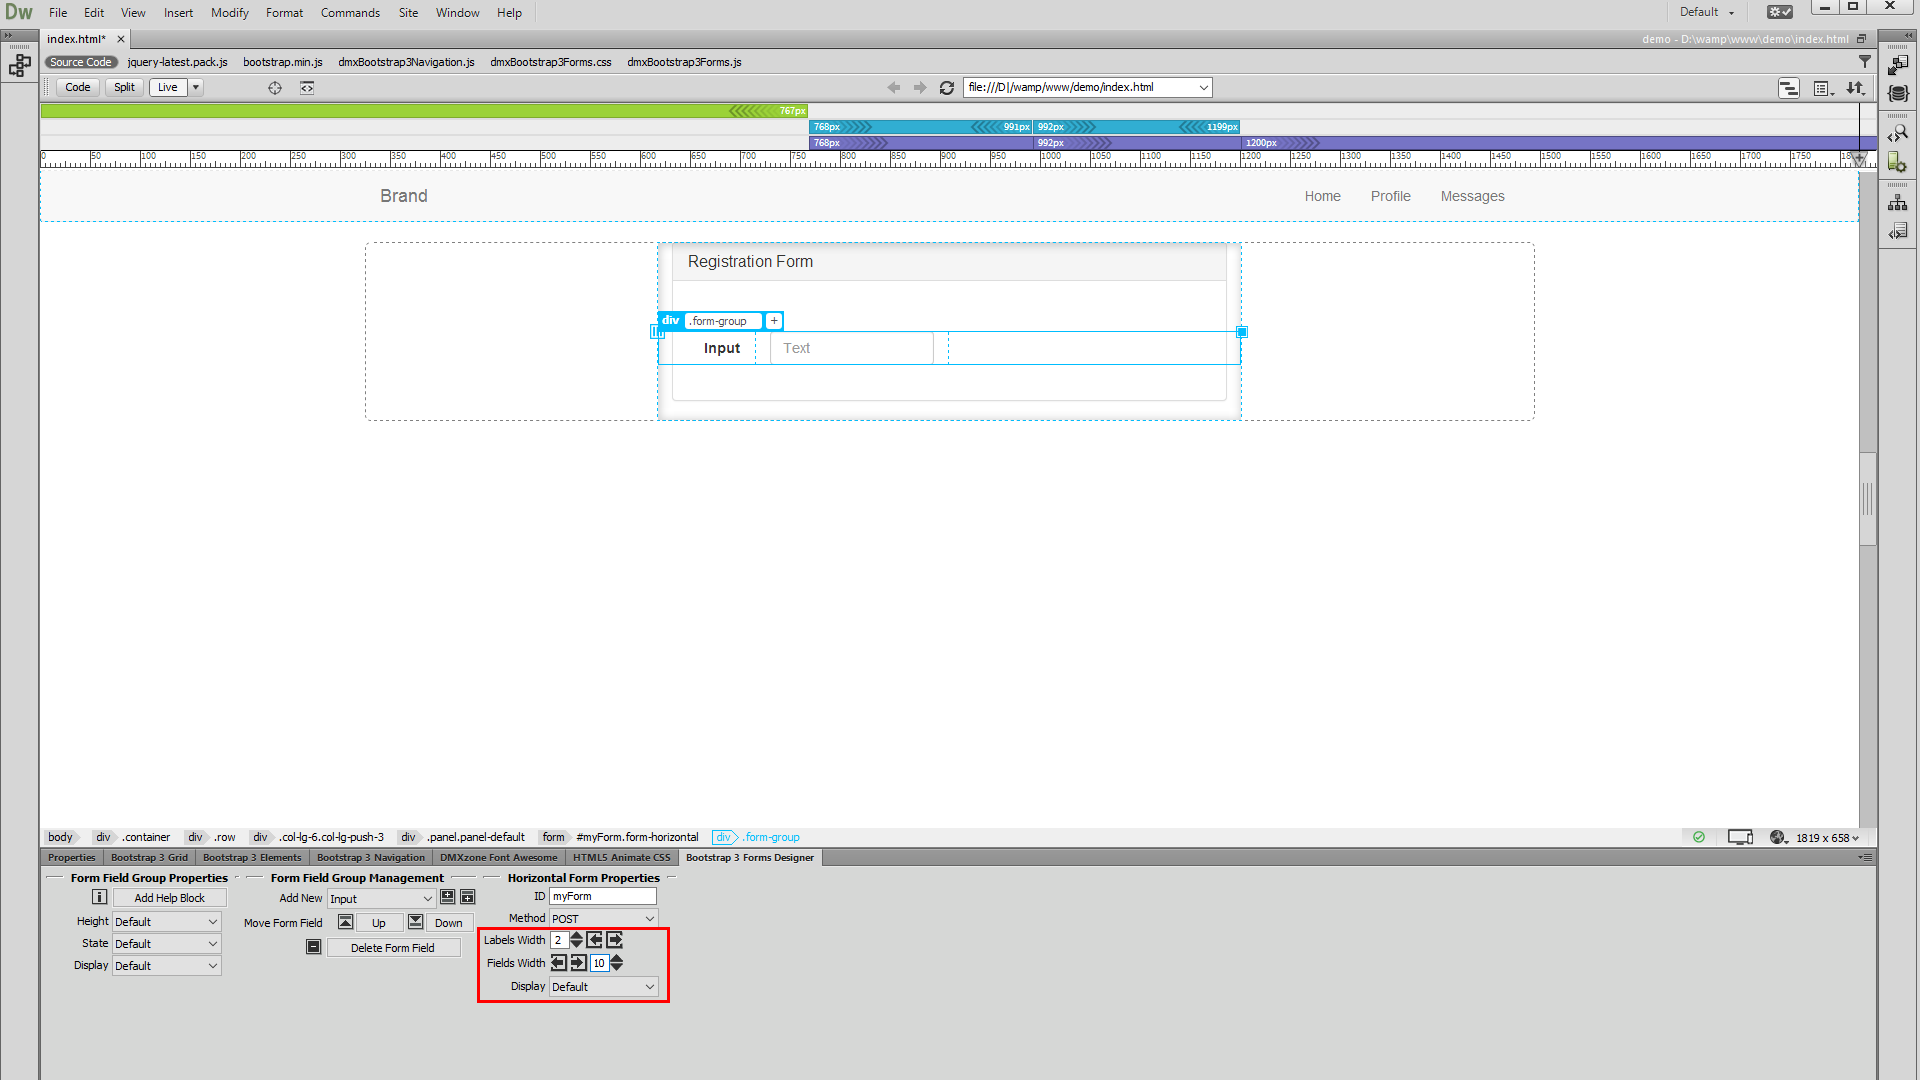
4.For the horizontal form, you can set the width of the labels and the width of the fields. Just like in Bootstrap 3, their width is based on 12-column grid. We leave the width it to its default 10 as we don't need a narrow form.
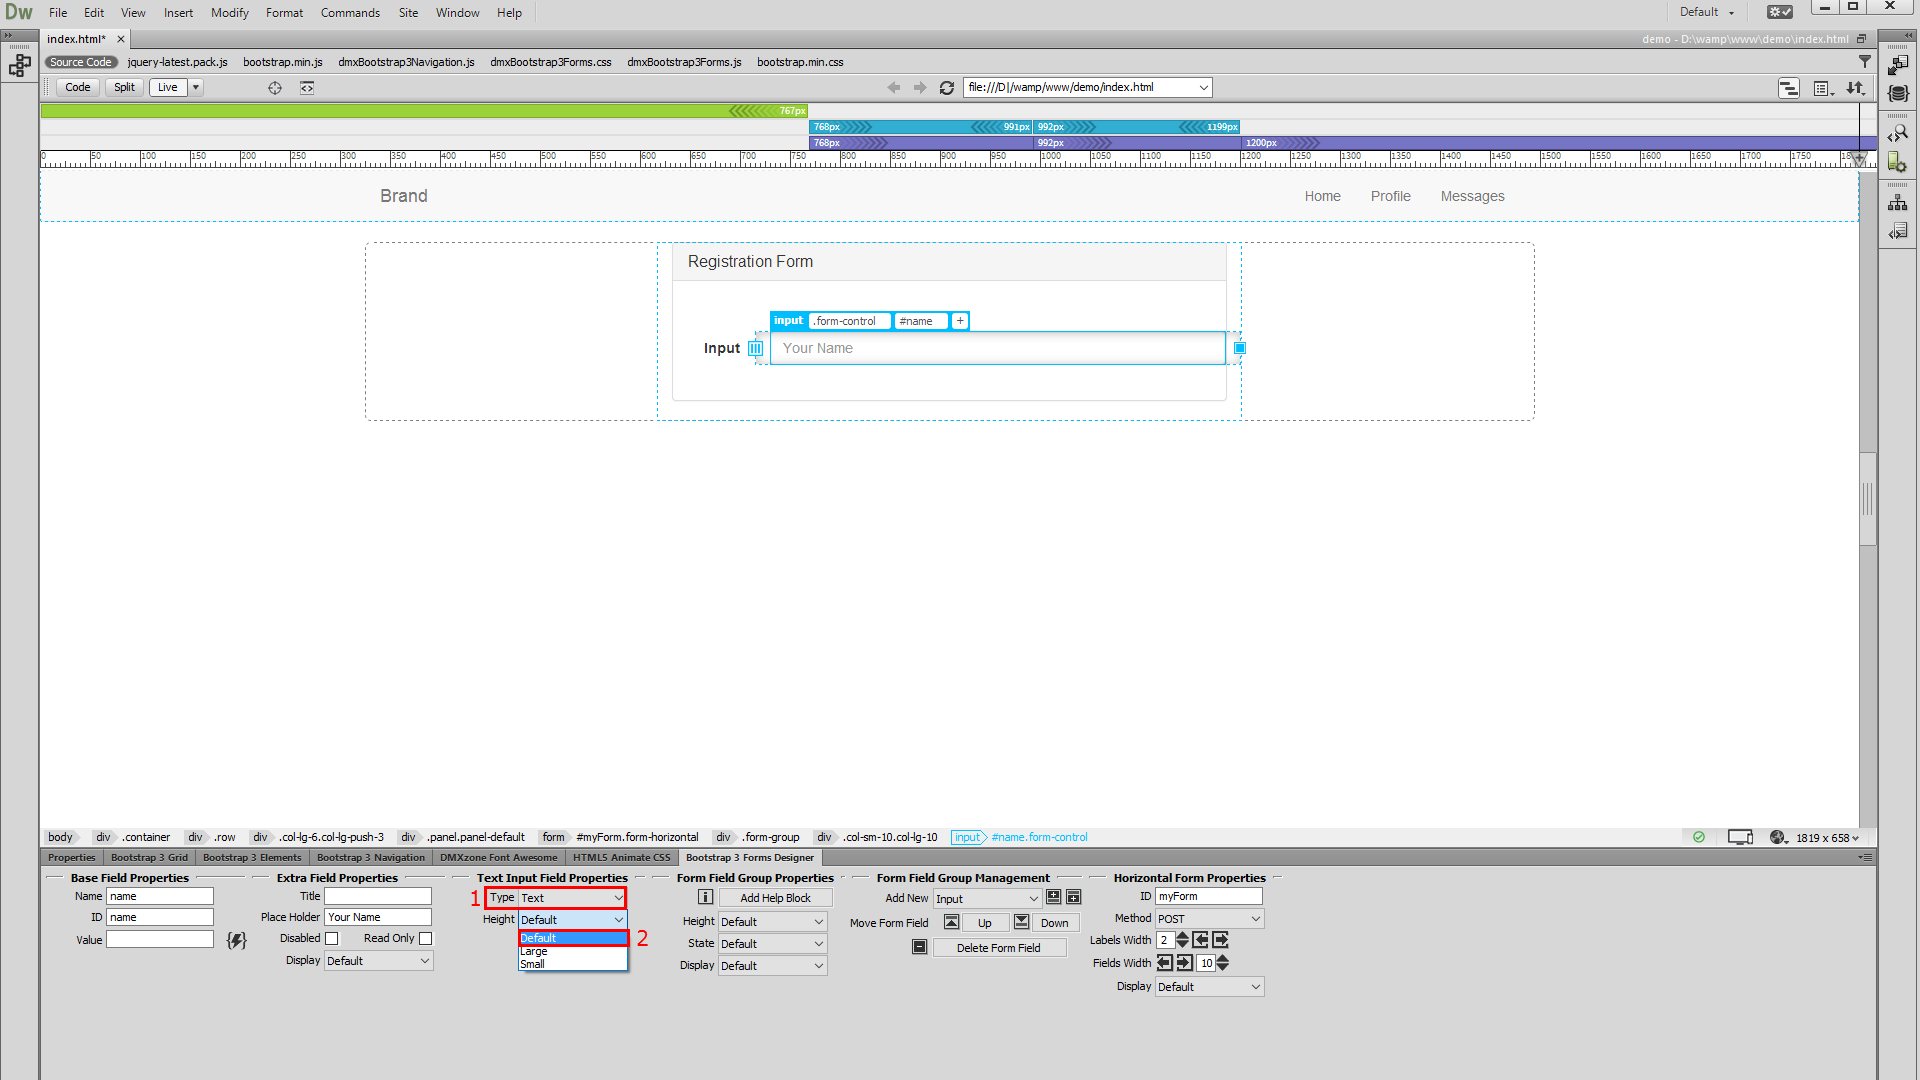
5.Now, select the input (1), that we've just added. You can change its default name and ID attributes, from within the Bootstrap 3 Forms Designer panel. We add name for both (2). Also, you can change the default placeholder text for this input. We enter "your name" (3).

6.Then, select the text input type, from the dropdown. For the name field, we select the text type (1). You can change the height of the input. Choose between the default height, small and big. We just leave the field to its default height (2).
7.You can change the input label text, by double clicking it. We replace it with name.

8.Now let's add a new input. In order to do that, click add field after button from the Form Field Group Management in the floating panel. This adds the form input, after the field, which we've selected on the page.

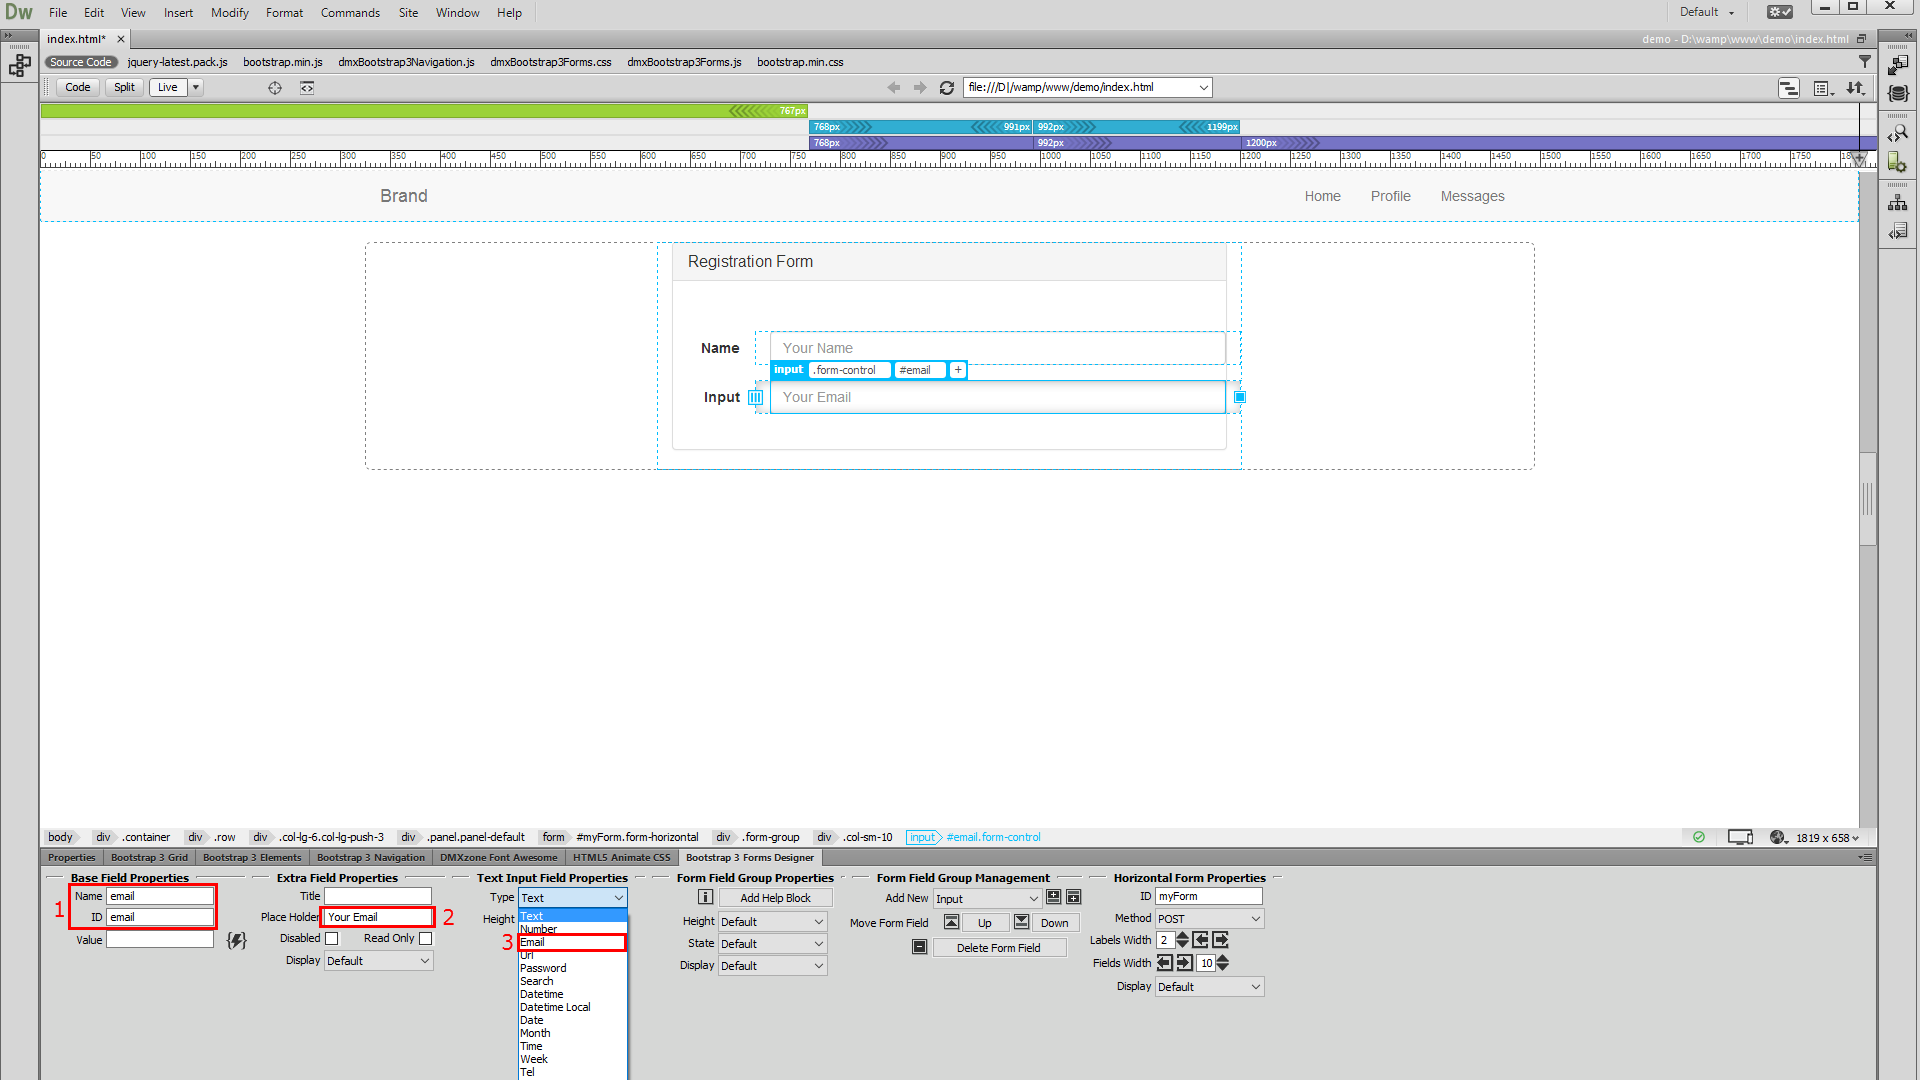
9.We change the default input field name and ID to email (1) and the placeholder text to "your email" (2). From the input field type dropdown we choose email (3) as this input field should contain and e-mail address.
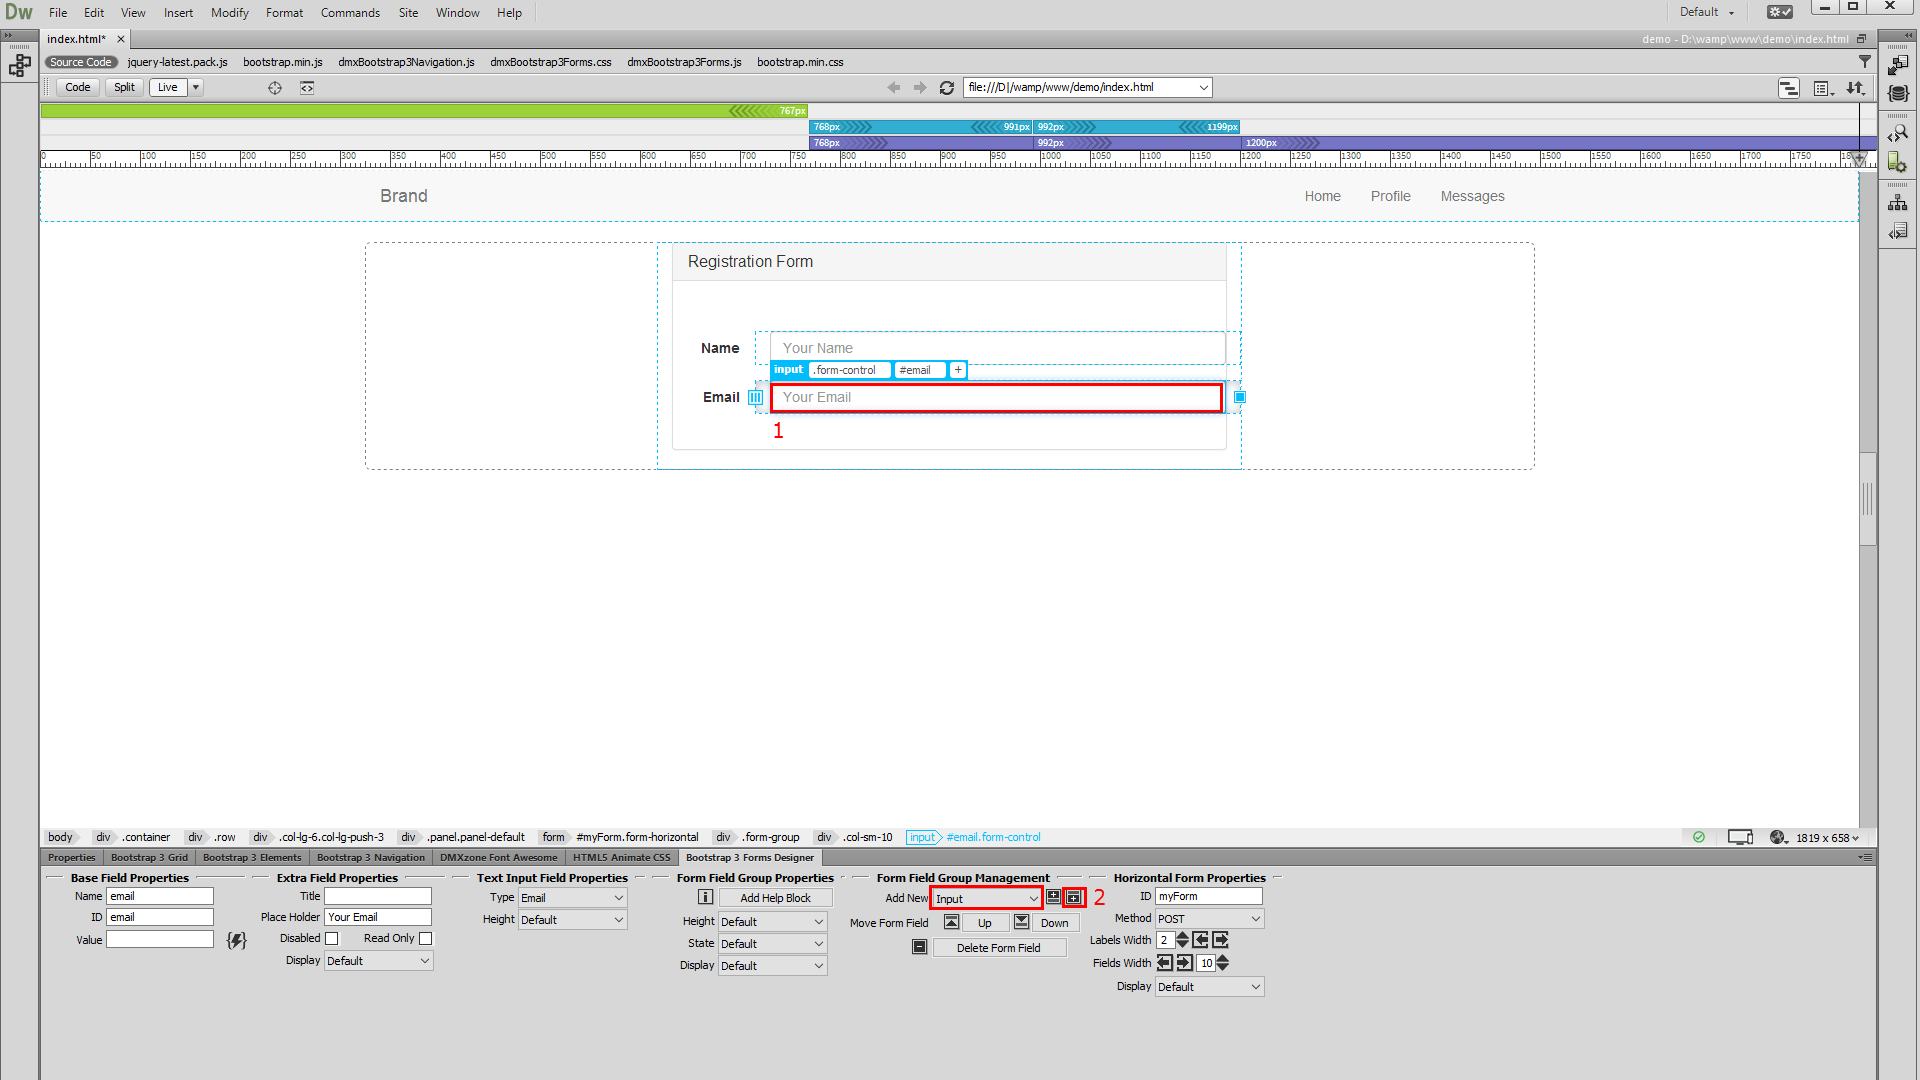
10.Don't forget to change the default label text. We replace it with email.

11.Click the input field (1) that we just added and add another one after it (2).
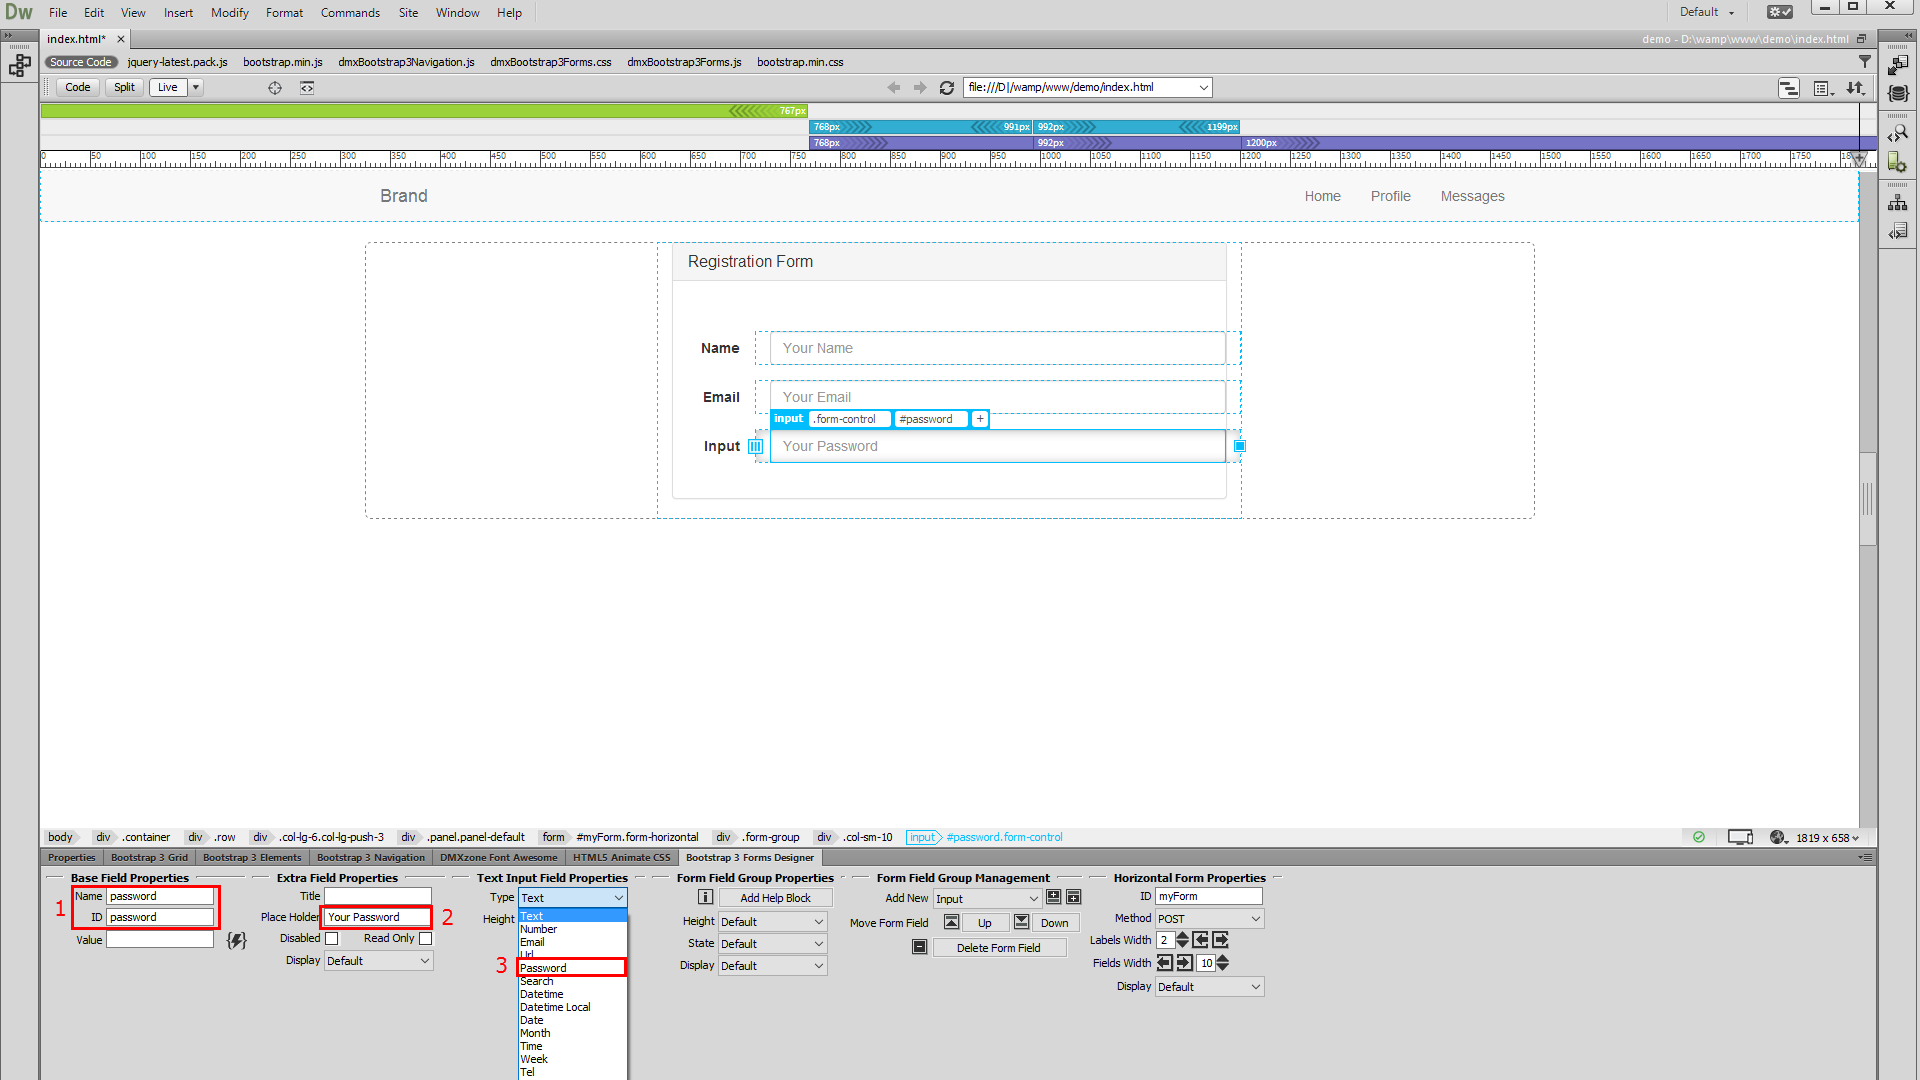
12.Change the name and ID of this input to password (1) and the placeholder text to "your password" (2). The input field type should be password (3) as this will be the password field.
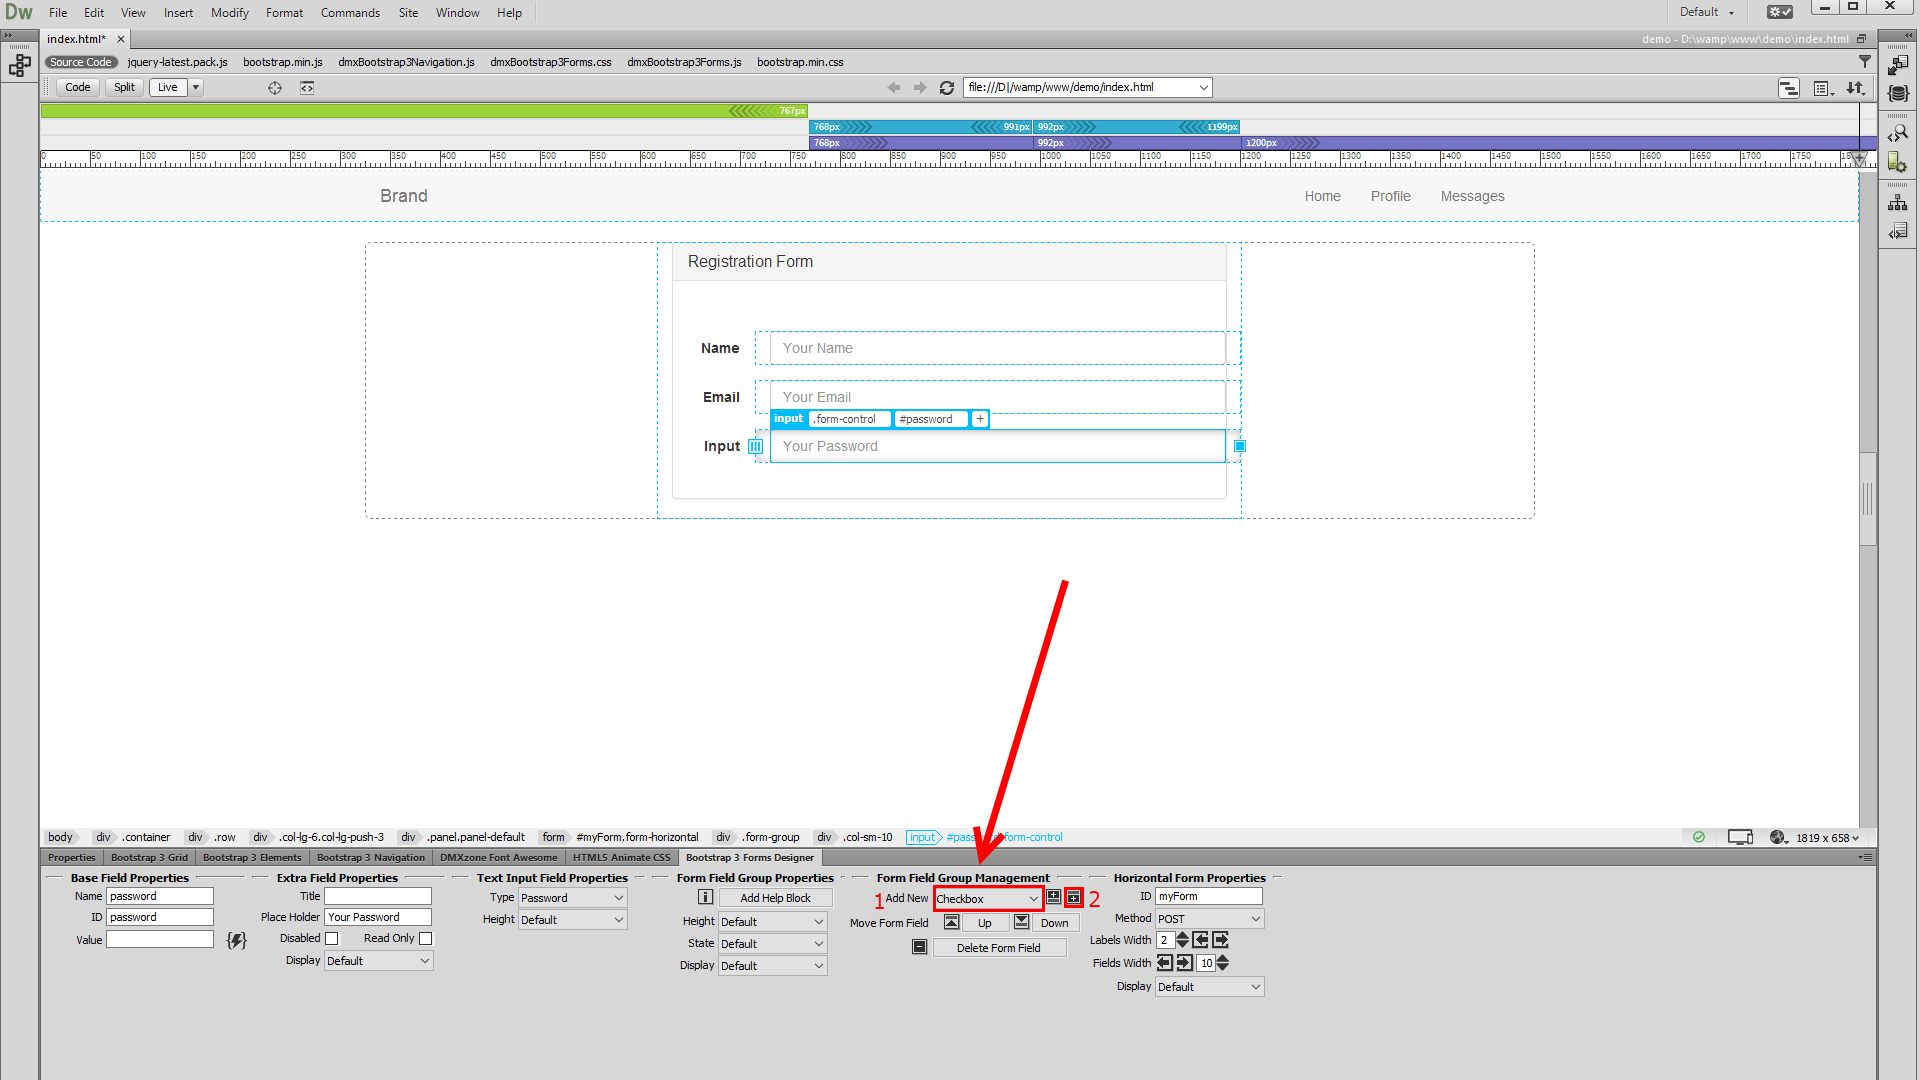
13.Now, let's add a checkbox in our form. Open the input fields dropdown and select checkbox (1) and add it after the password field (2). Make sure to always select the previous input first and then add a new one.
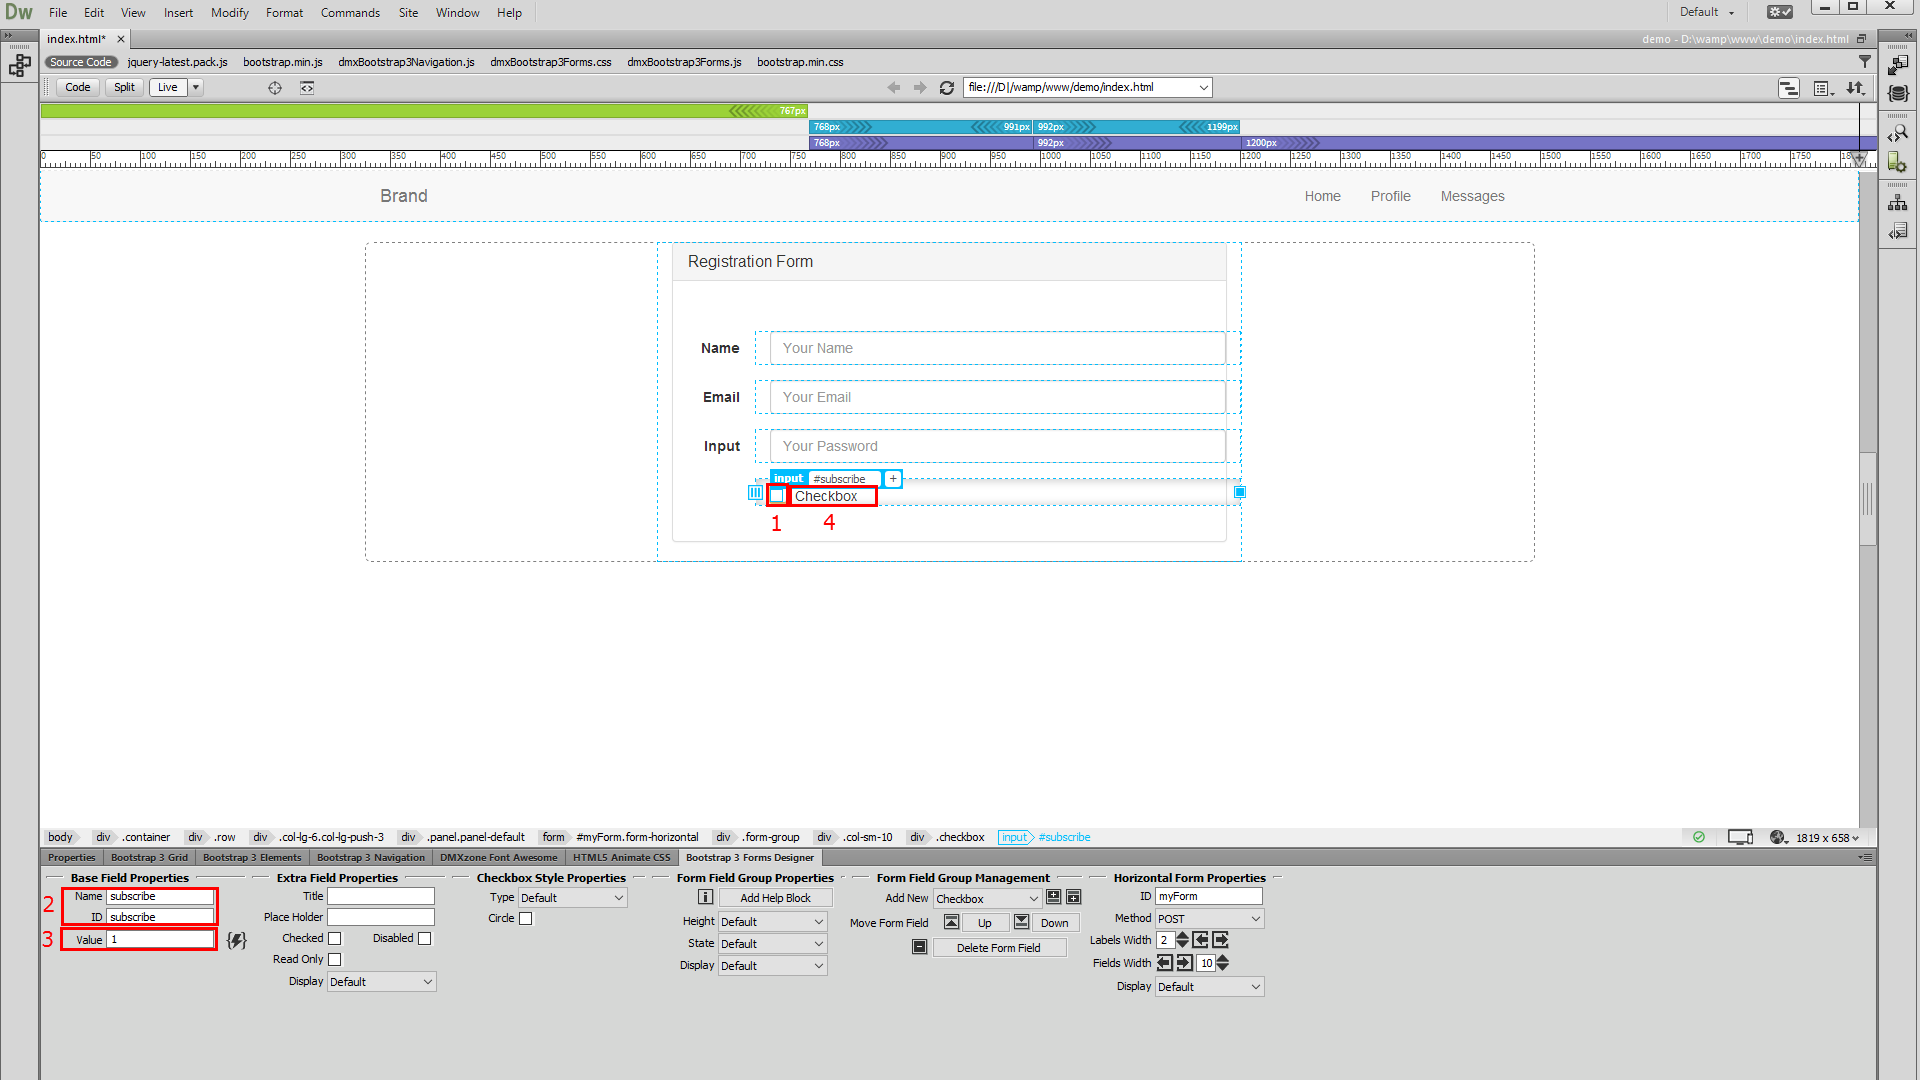
14.Click the checkbox in order to get its properties (1). You can change its default name and ID. We add subscribe (2) and add a value of 1 (3). Don't forget to change the default checkbox text (4).
15.We can move any of the form input fields up or down, fully visually in Dreamweaver (1). Now, let's add a submit button to our form. Select submit from the dropdown (2) and add it after the checkbox (3).
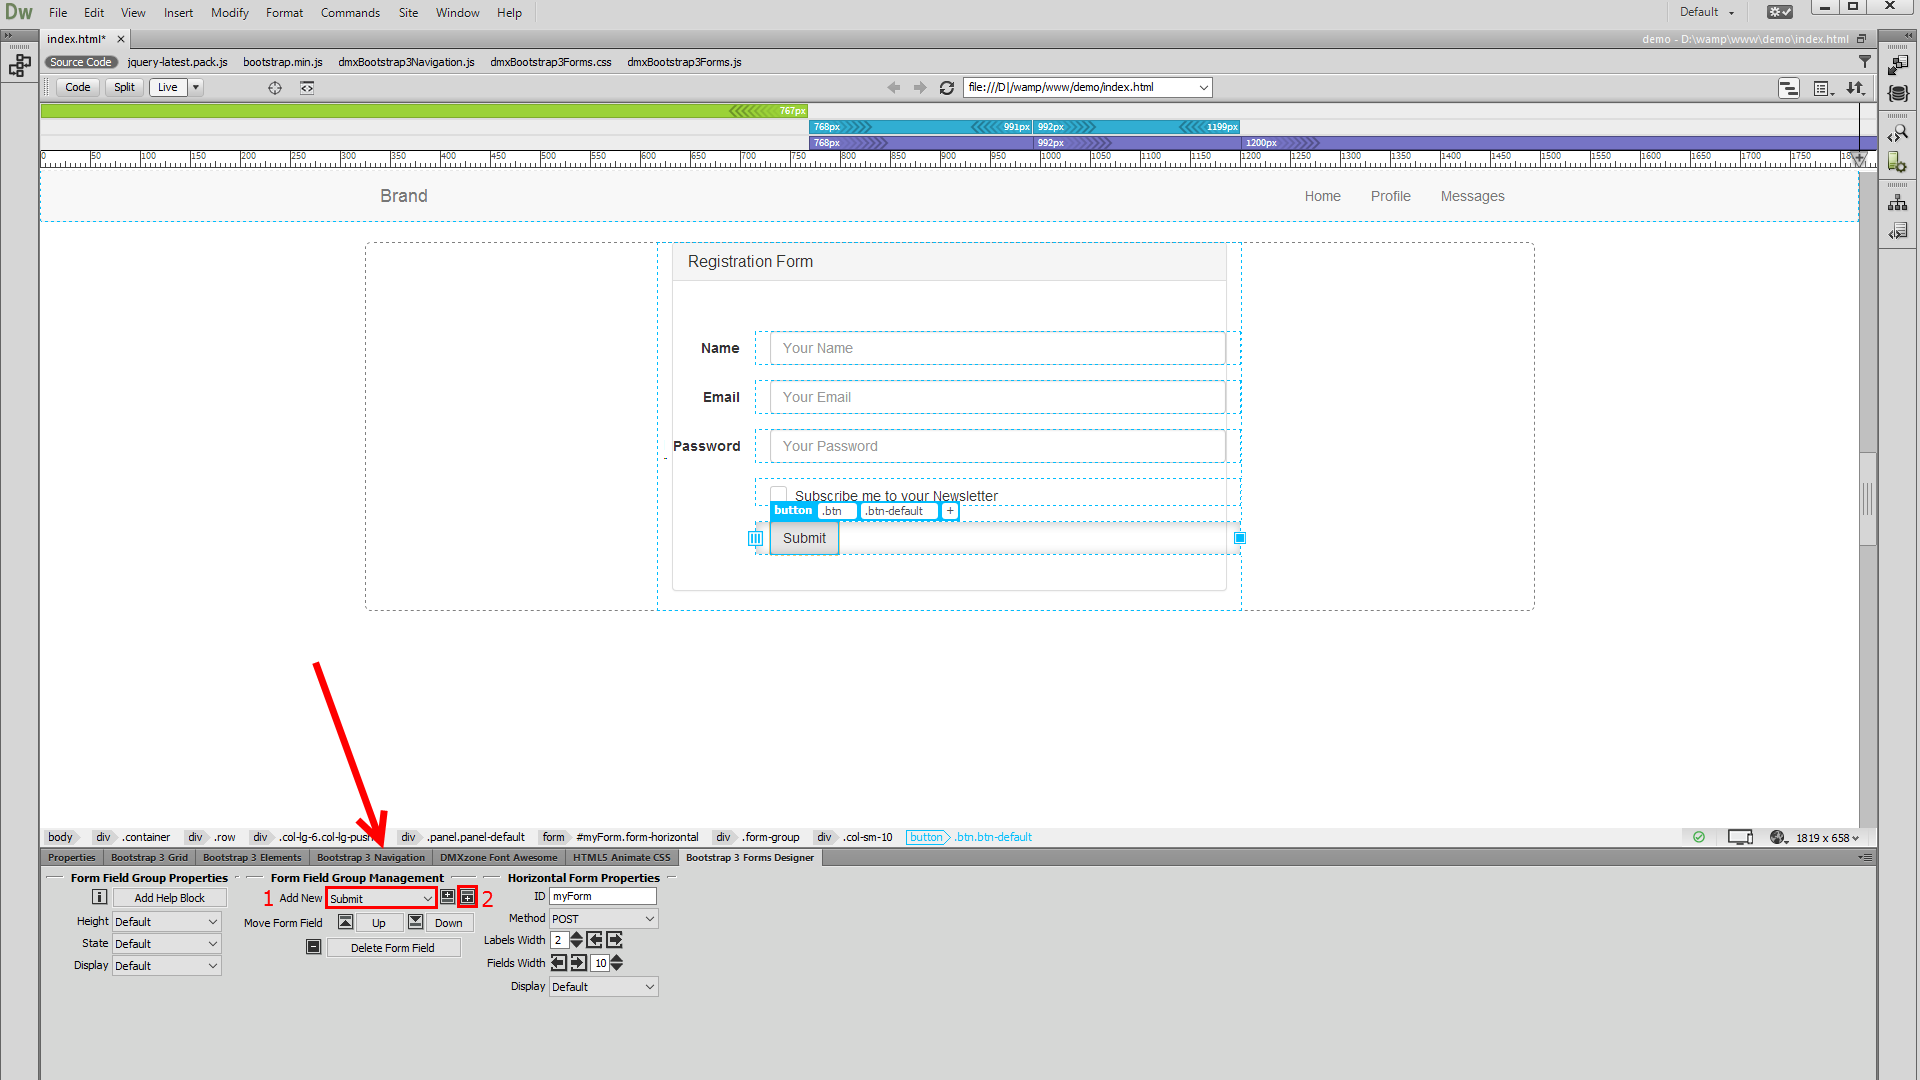
16.And we are done. We've just built a simple registration form for our website. That's how easy it is to build a horizontal form, fully visually in Dreamweaver, using DMXzone Bootstrap 3 Forms Designer.

Comments
Be the first to write a comment
You must me logged in to write a comment.