In this article we have nine extremely useful tutorials to teach you how to work with DMXzone Cordova Builder Dreamweaver extension. We covered everything from setting up your system for the extension to building apps for iOS, Android, Firefox OS, BlackBerry 10, Amazon Fire OS and Windows, both phone and desktop. All tutorials are also available in video format. If you experience any troubles with this tool, please write in the support forums or call our Live support during business hours.
DMXzone Cordova Builder Manual
Learn how to work with DMXzone Cordova Builder extension
The Basics: Setting Up your System for DMXzone Cordova Builder
In this tutorial we will show you how to install all the
components, required to use DMXzone Cordova
Builder
*You can also check out the video.

How to do it
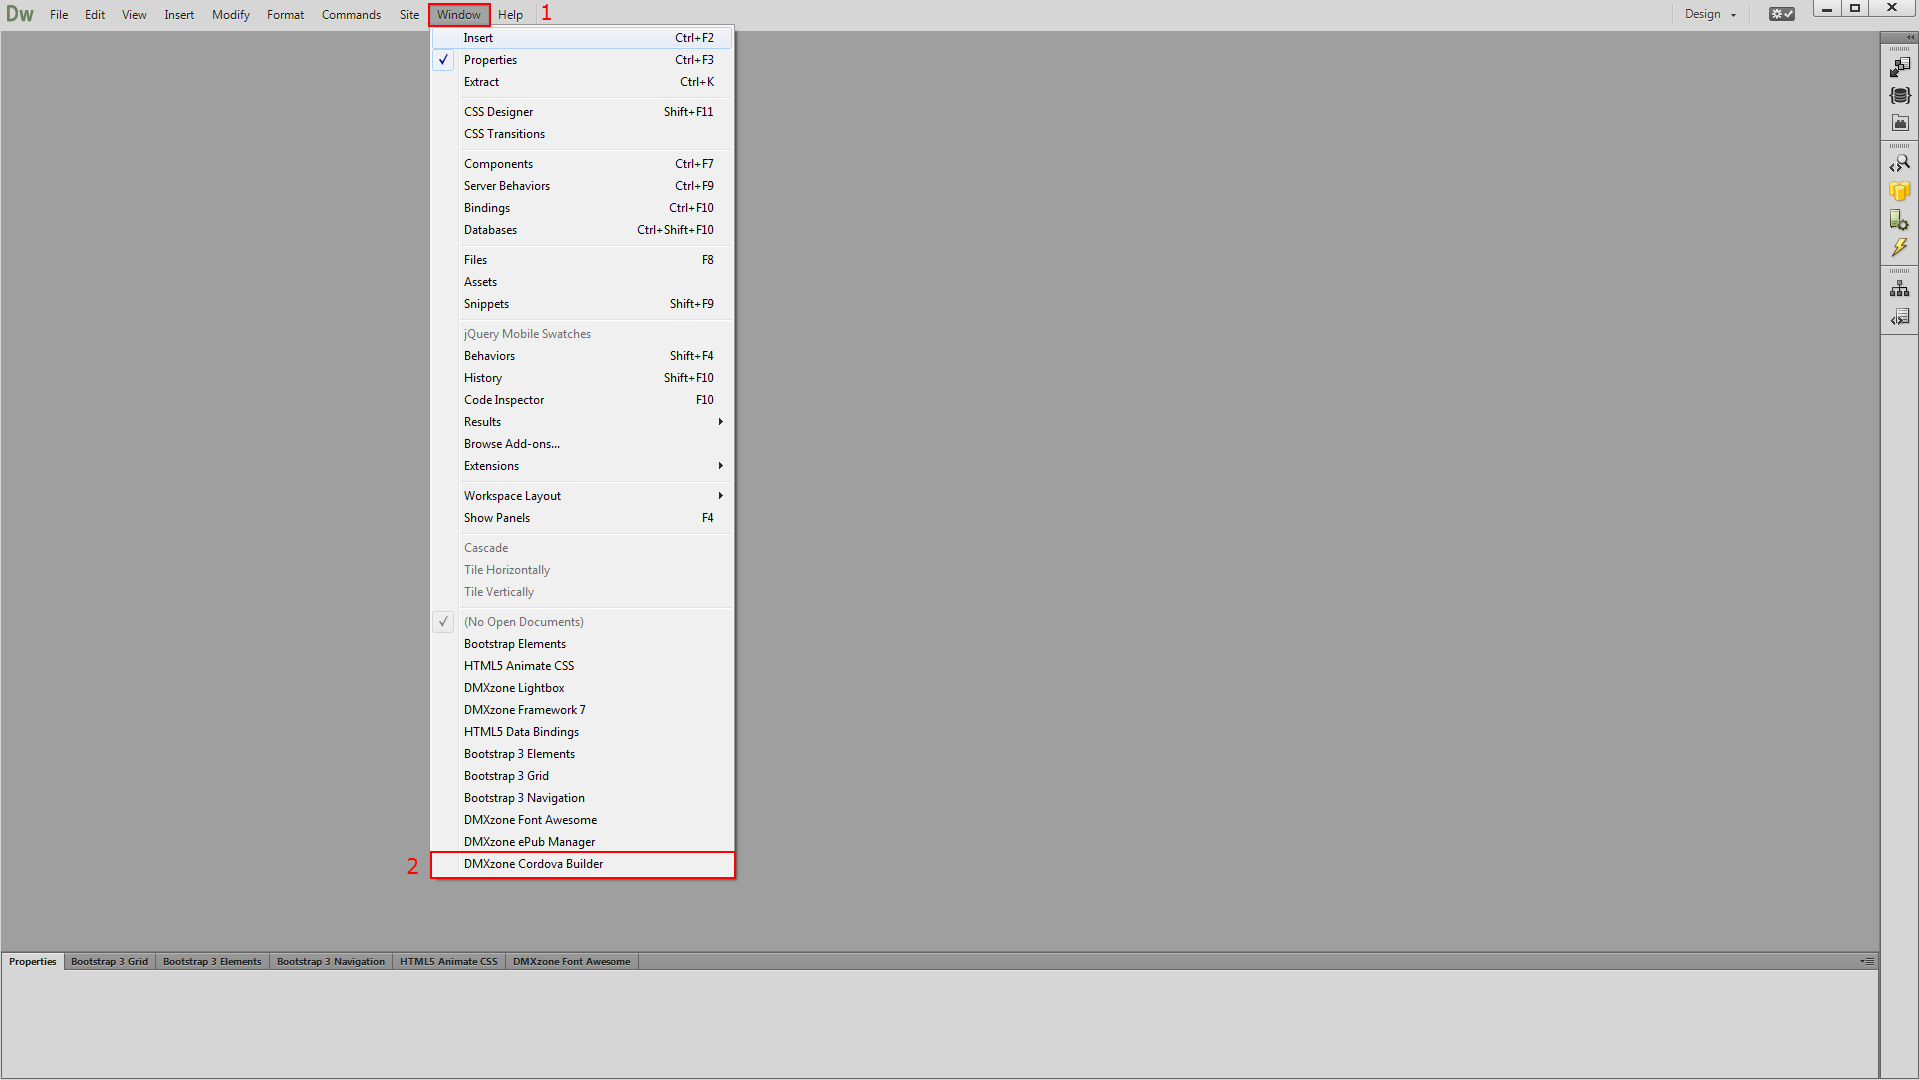
- From the window menu (1) we open the DMXzone Cordova Builder panel (2).
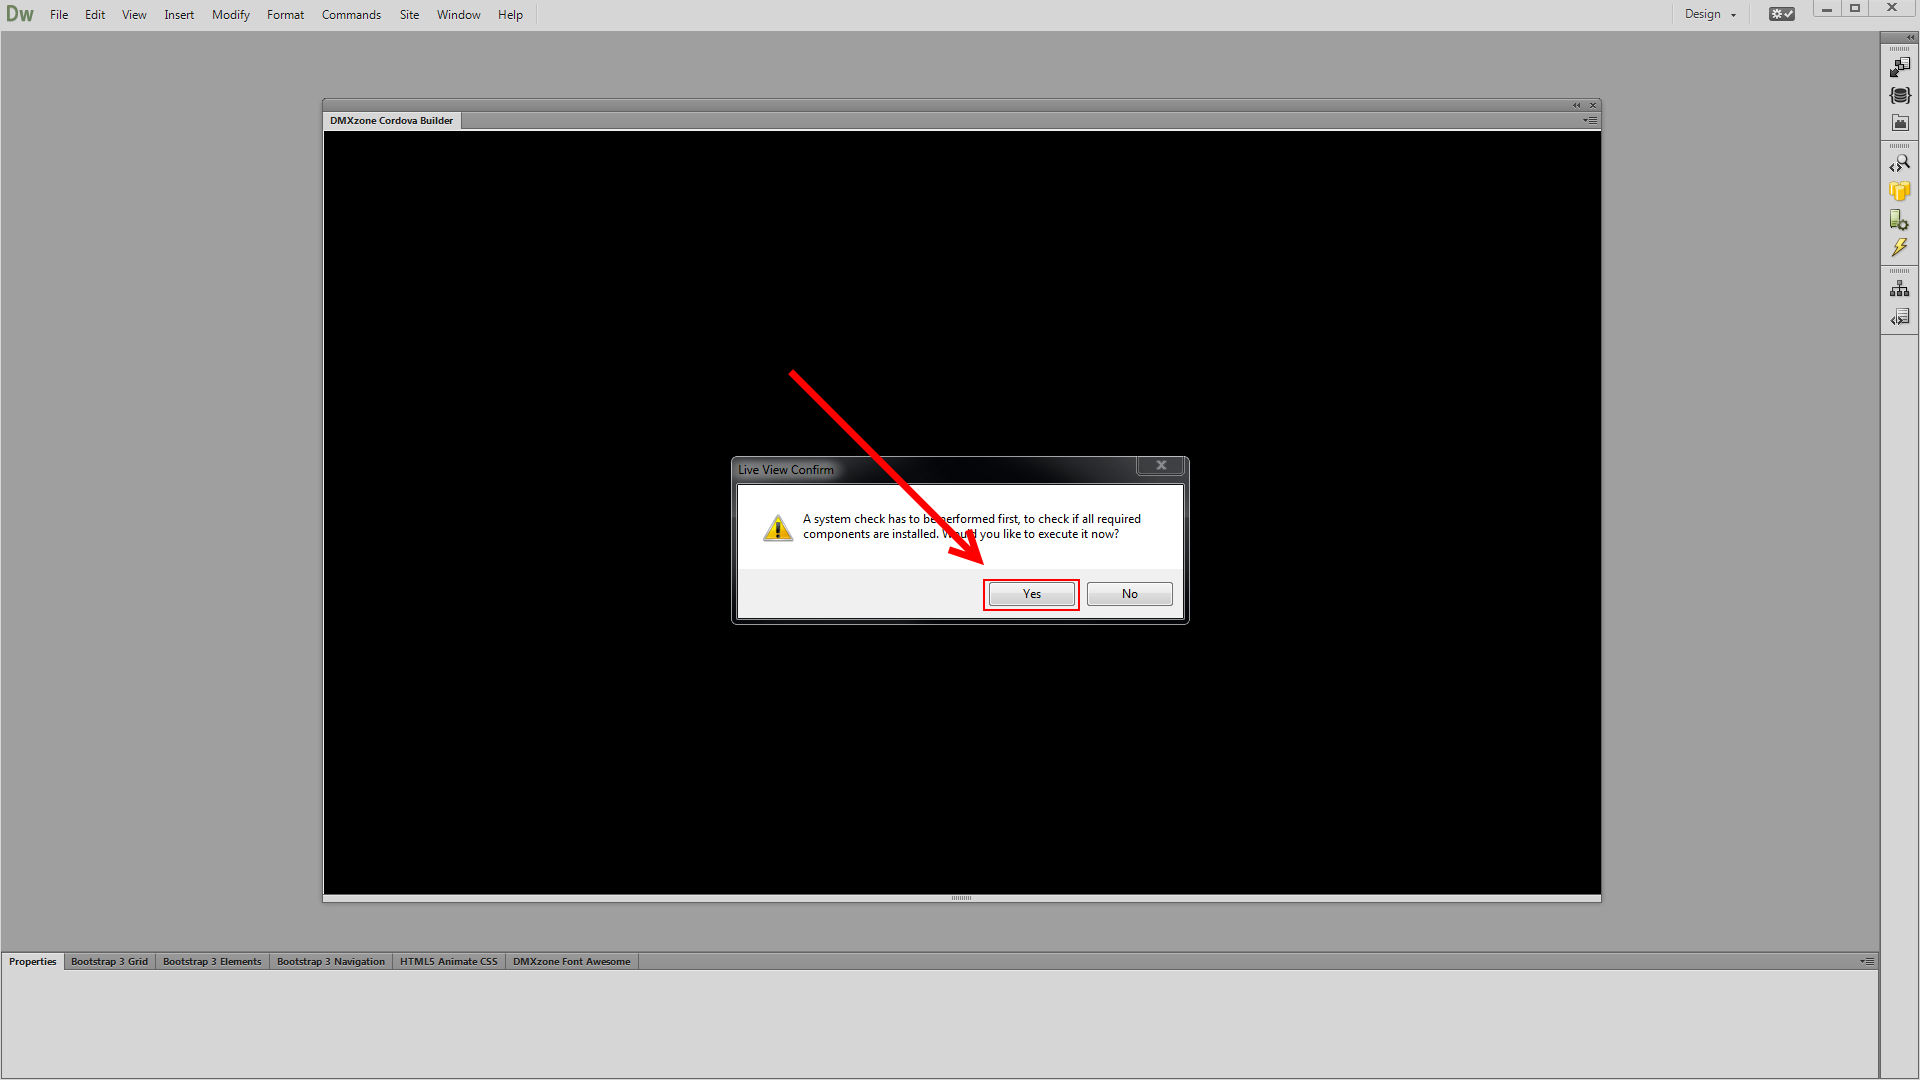
- When you open DMXzone Cordova Builder for the first time a message explaining that a system check is required appears. Click "yes" so the system check can be executed..

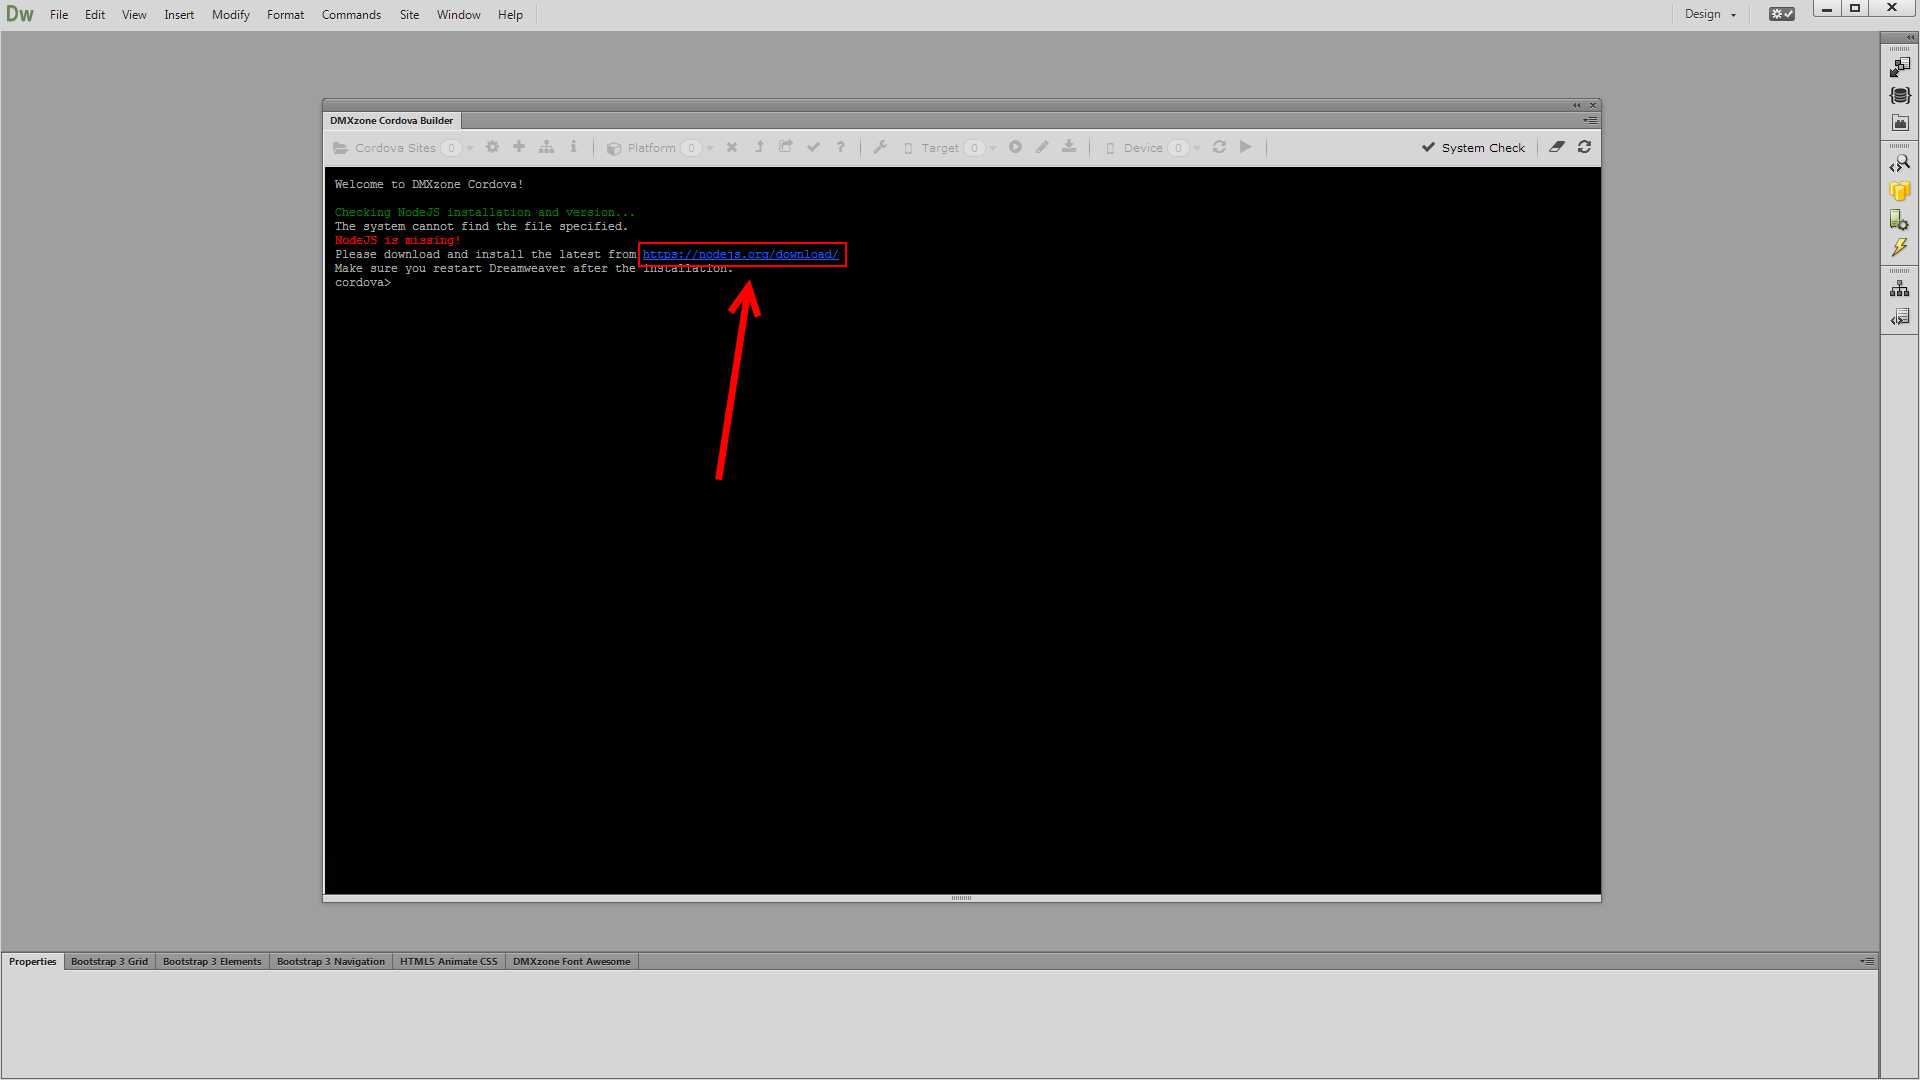
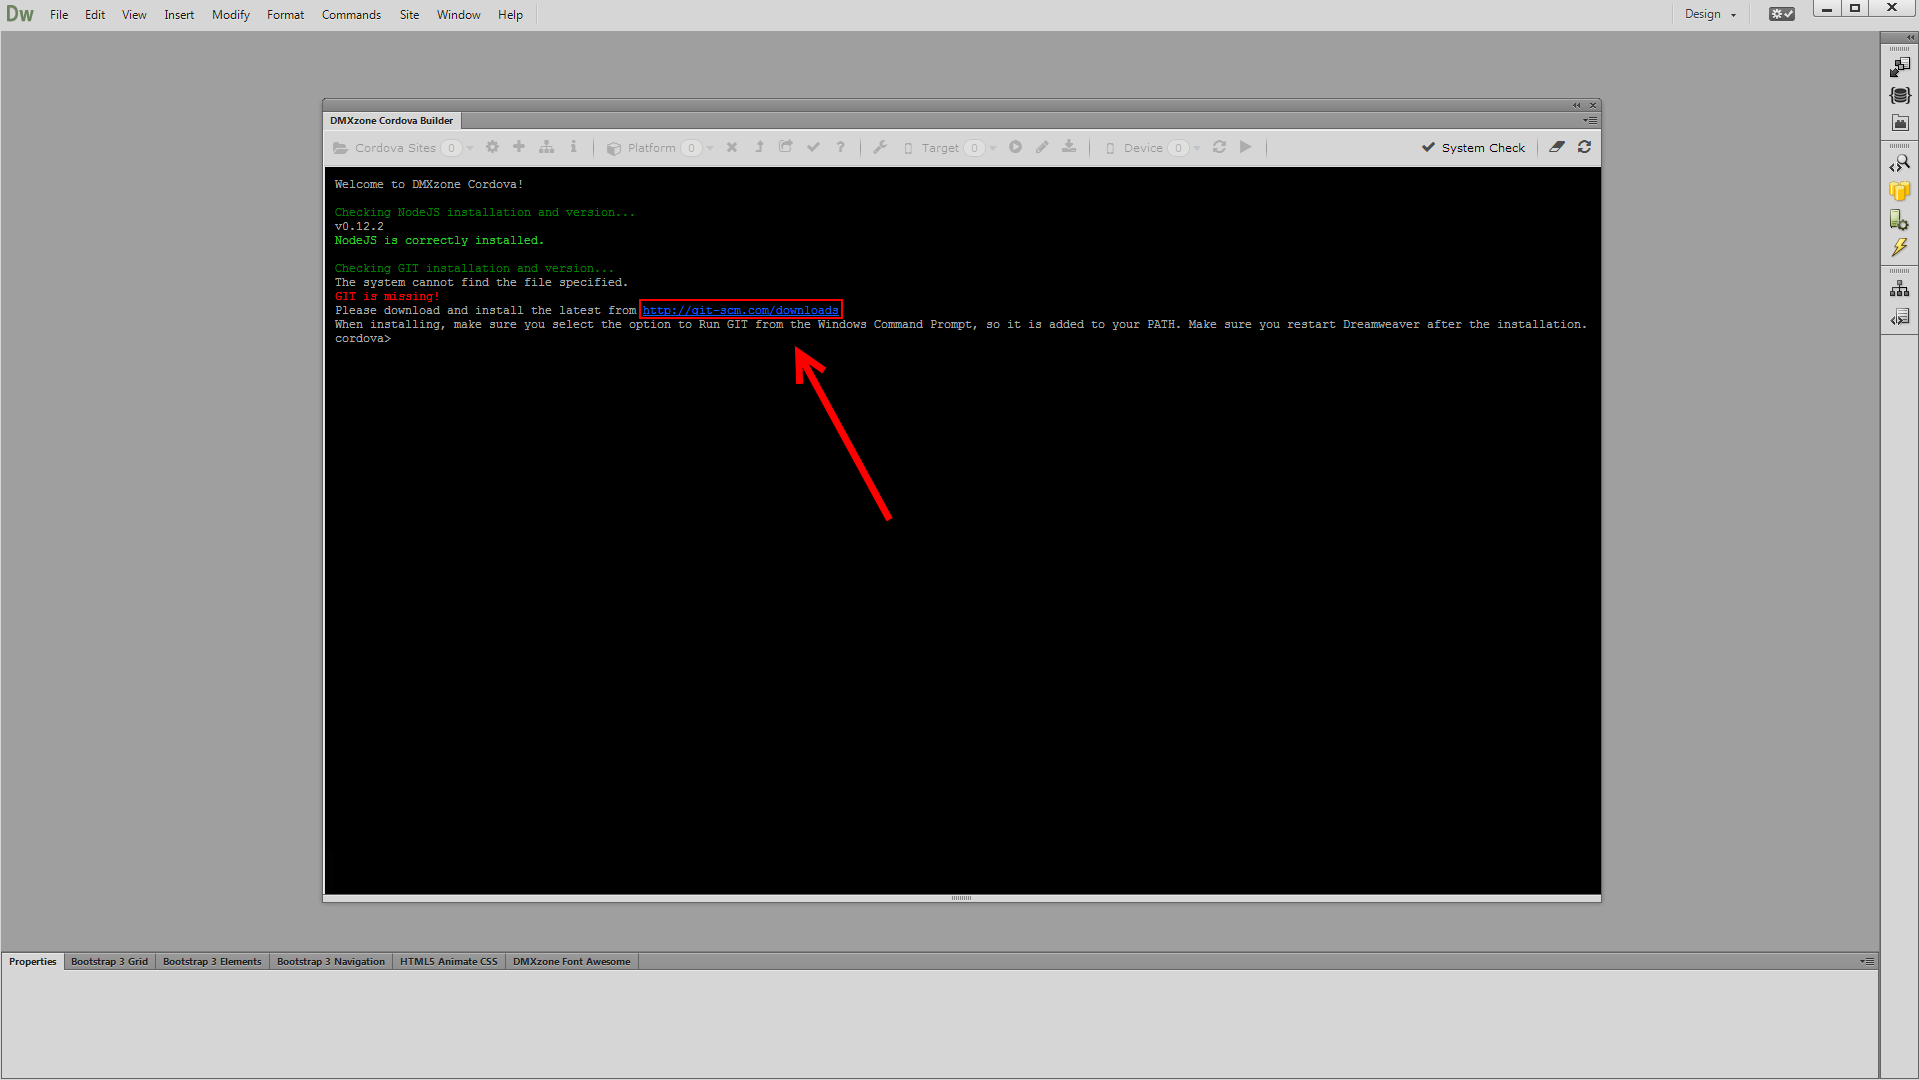
- For this tutorial we didn't install Node JS so you can see what to do when a component is missing. After the system check one of the required components is not installed - Node JS. You can see that a link to the latest version is provided in the DMXzone Cordova Builder console. Click it in order to download Node JS.
- On the Node JS download page select the installer version that matches your operating system. We are using a 64bit version of Windows so we select the Node JS installer to match it.

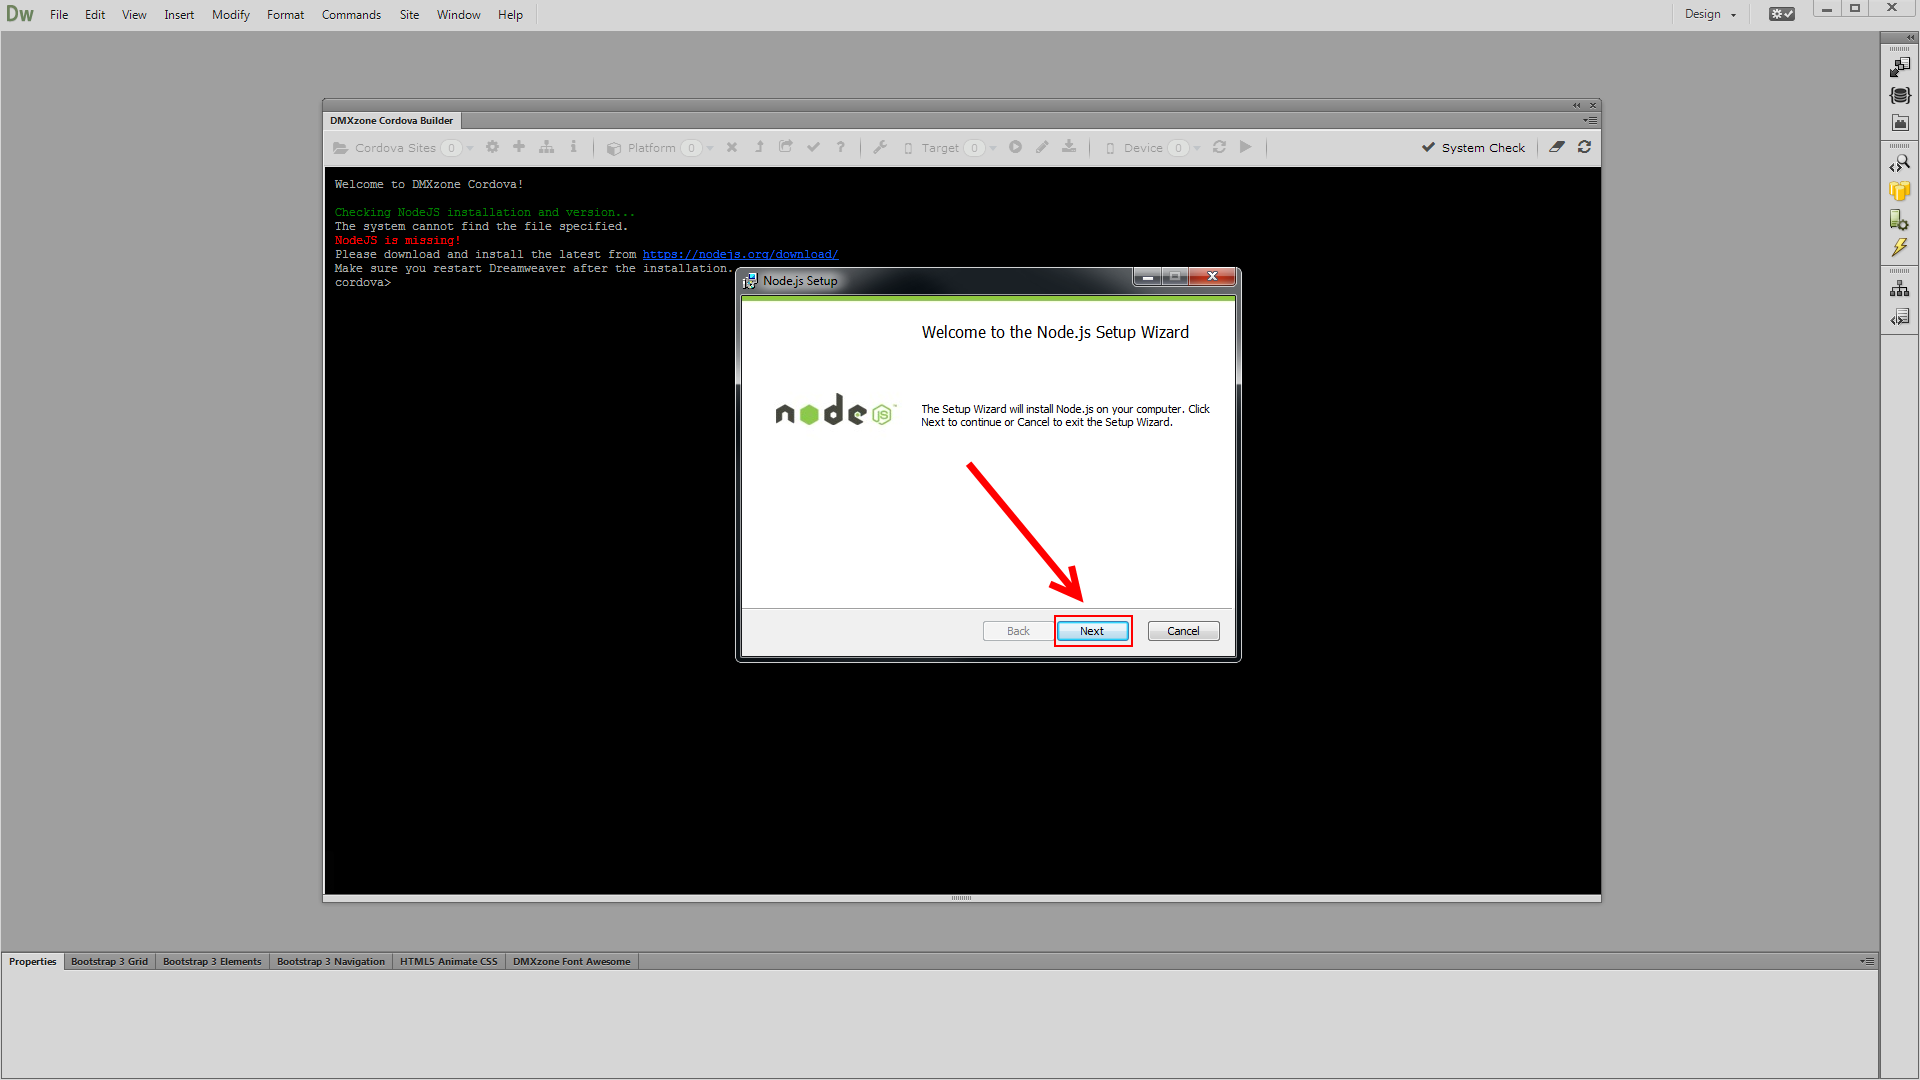
- Run the Node JS installer and the installation Wizard will appear. Click next.
- Go through the installation wizard, using the default settings. No changes in the setup settings are required. Click the finish button when the installation is completed.

- Now, we need to restart Dreamweaver. When you restart your Dreamweaver the same system check dialog will appear. Select yes to run the system check.
- You can see that Node JS is correctly installed but the GIT component is missing. Click on the download link that is provided in the DMXzone Cordova Builder console.
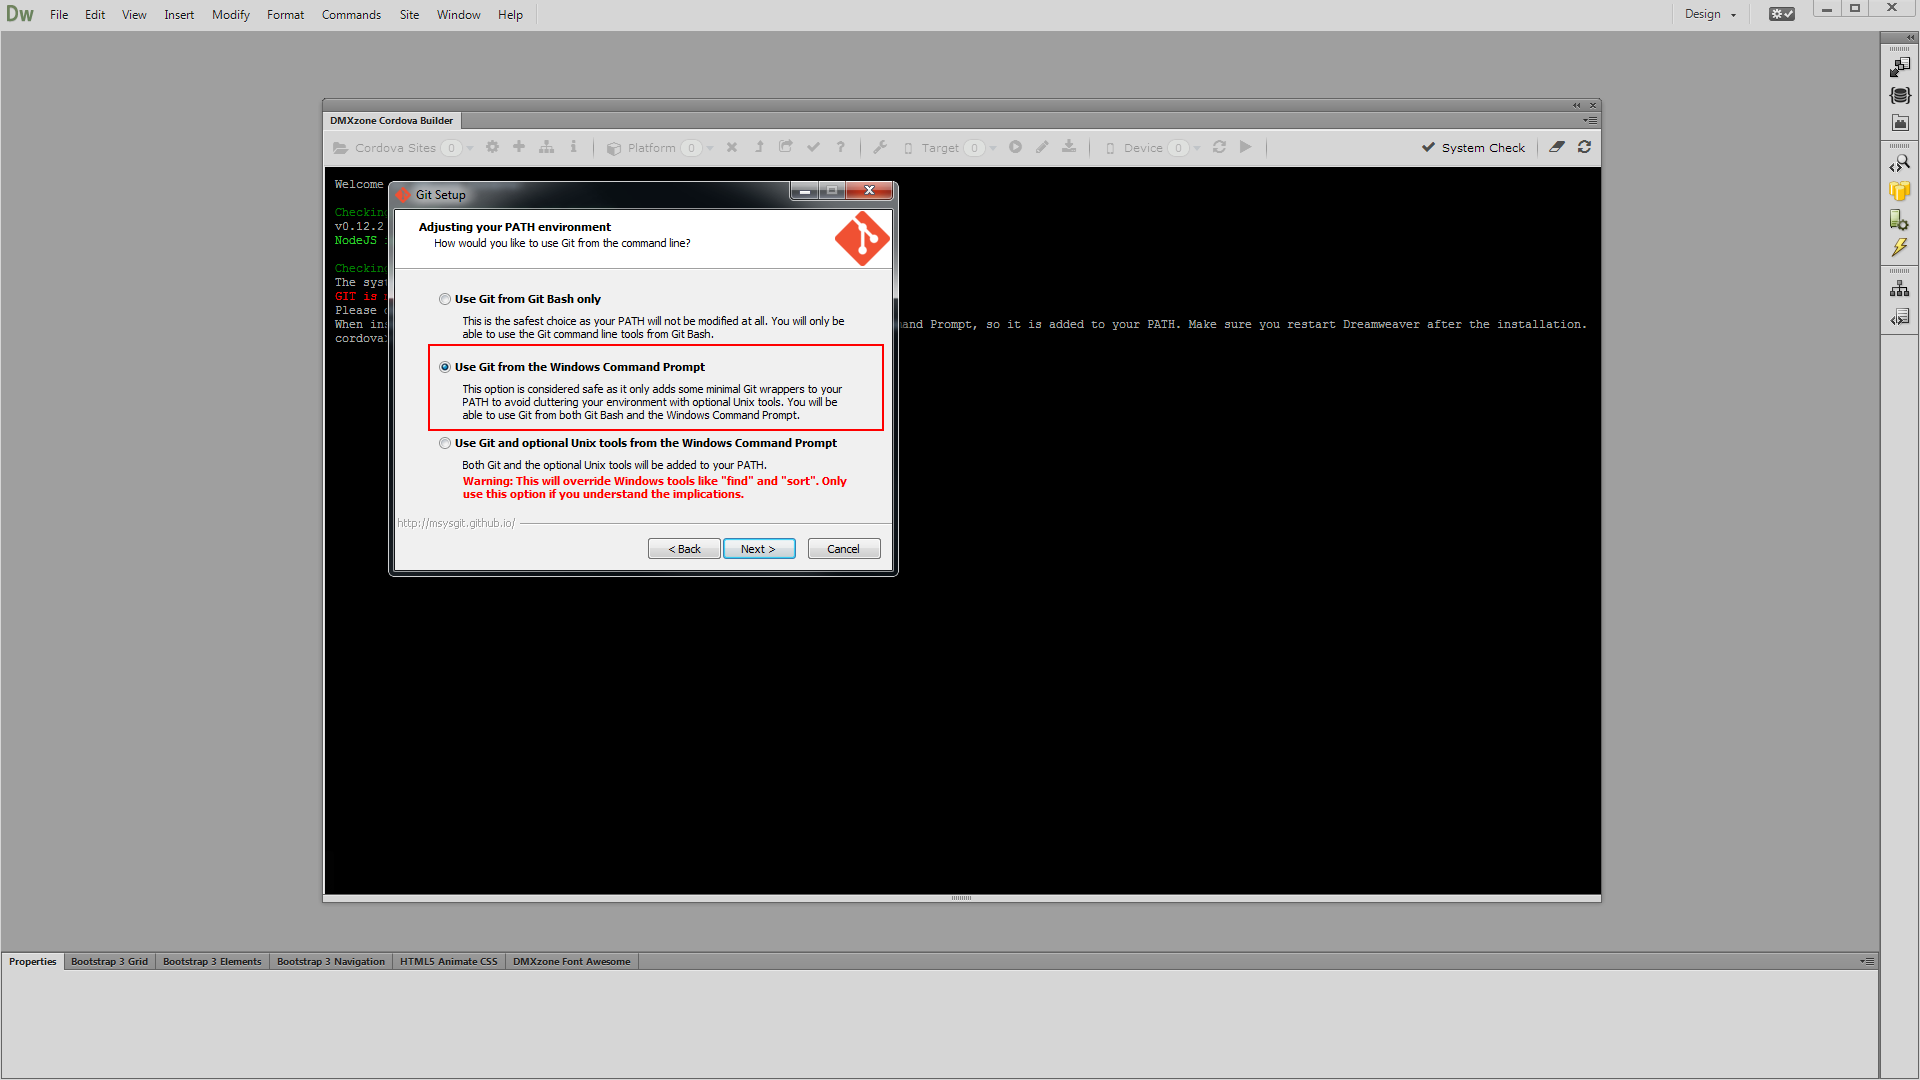
- We use the default settings for the Git components. Make sure to select the following option in the PATH Environment setup: Use GIT from the Windows Command Prompt.
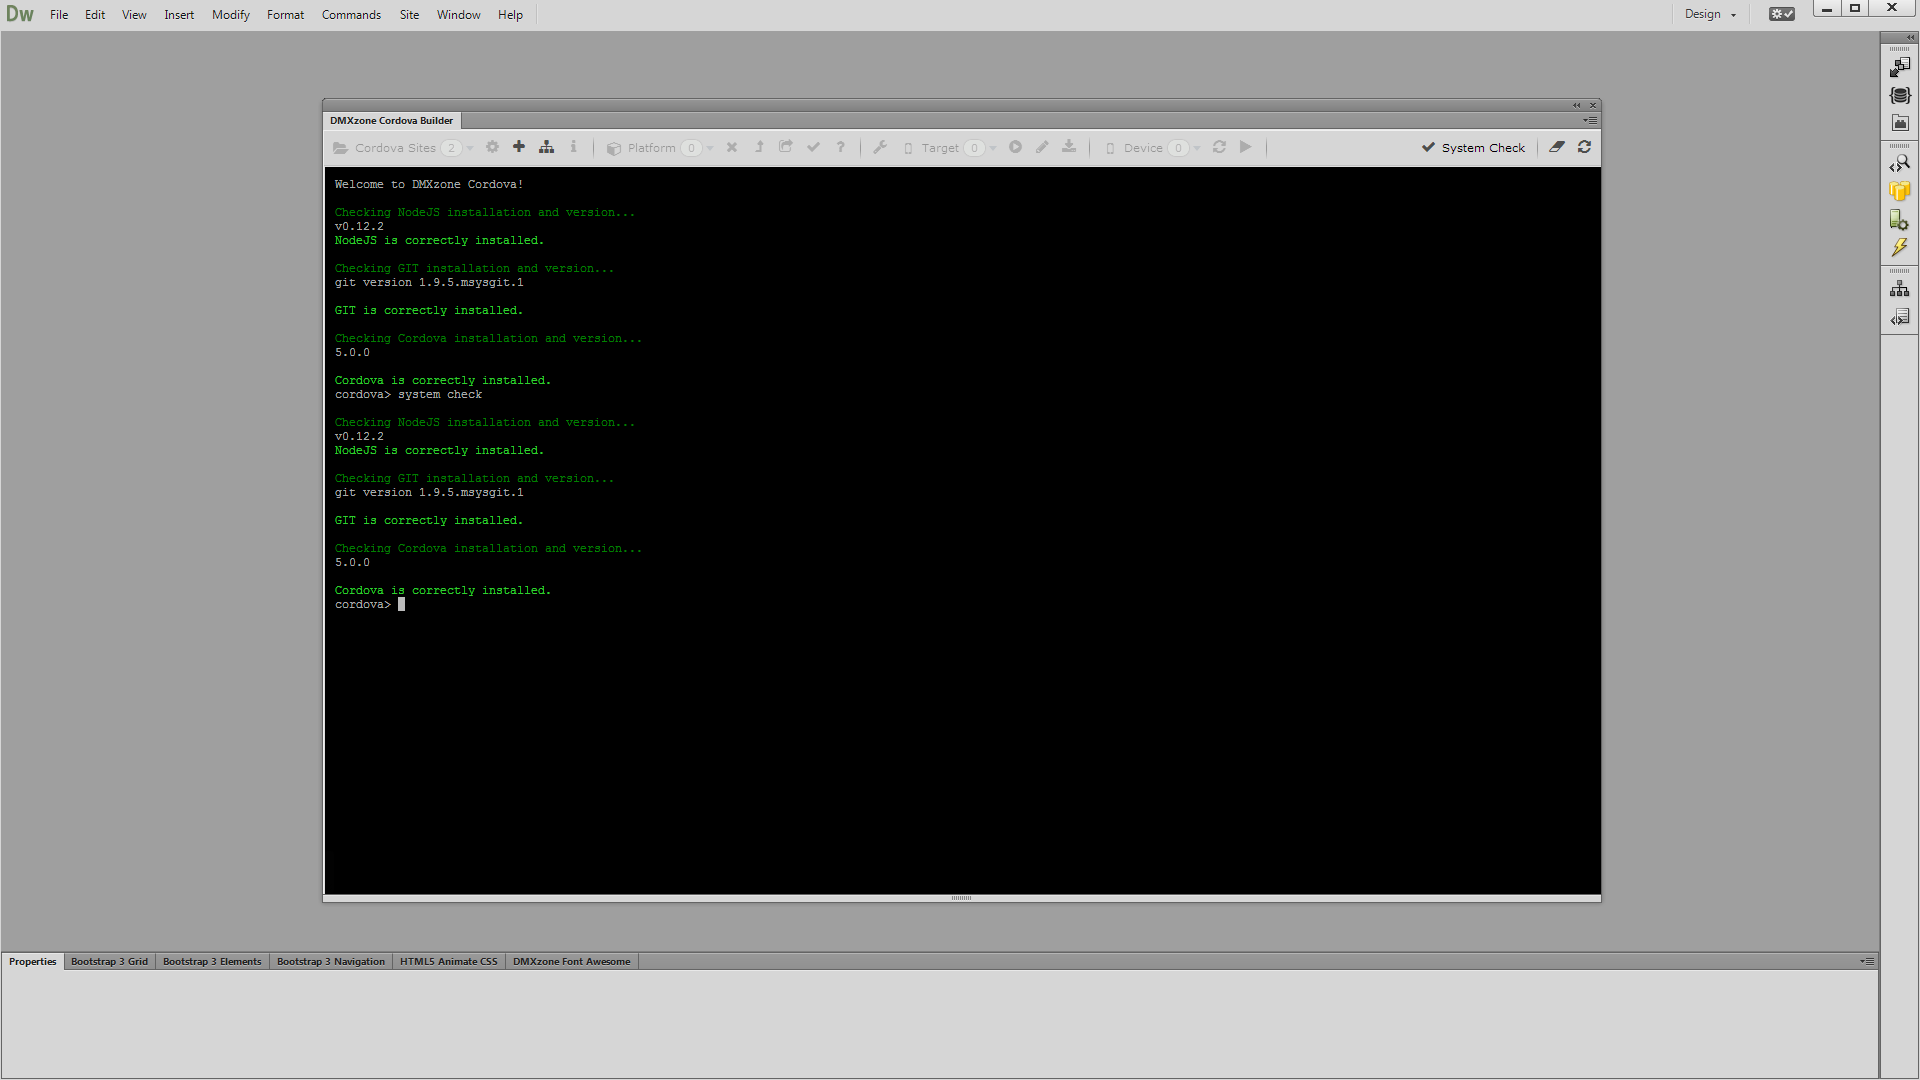
- Once you install Git, restart Dreamweaver again. Again, the system check dialog will appear. Allow it to run. Now you can see that all of the required components are properly installed. That's how easy it is to check your system and install the components, required in order to use DMXzone Cordova Builder.
Comments
Be the first to write a comment
You must me logged in to write a comment.