In this article you will find tutorials, which will teach you how to work with DMXzone Bootstrap 3 Forms Designer extension. They will show you how to build horizontal forms, how to style radio buttons and checkboxes, and even use dynamic input values. All tutorials are also available in video formats. If you experience any troubles with the extension, please contact our Live support or write in the support forums.
DMXzone Bootstrap 3 Forms Designer Manual
Learn how to work with DMXzone Bootstrap 3 Forms Designer
Advanced: Styling Radio Buttons and Checkboxes
In this tutorial we will show you how to style your radio
buttons and checkboxes, using DMXzone
Bootstrap 3 Forms Designer.
*You can also check out the video.
How to do it
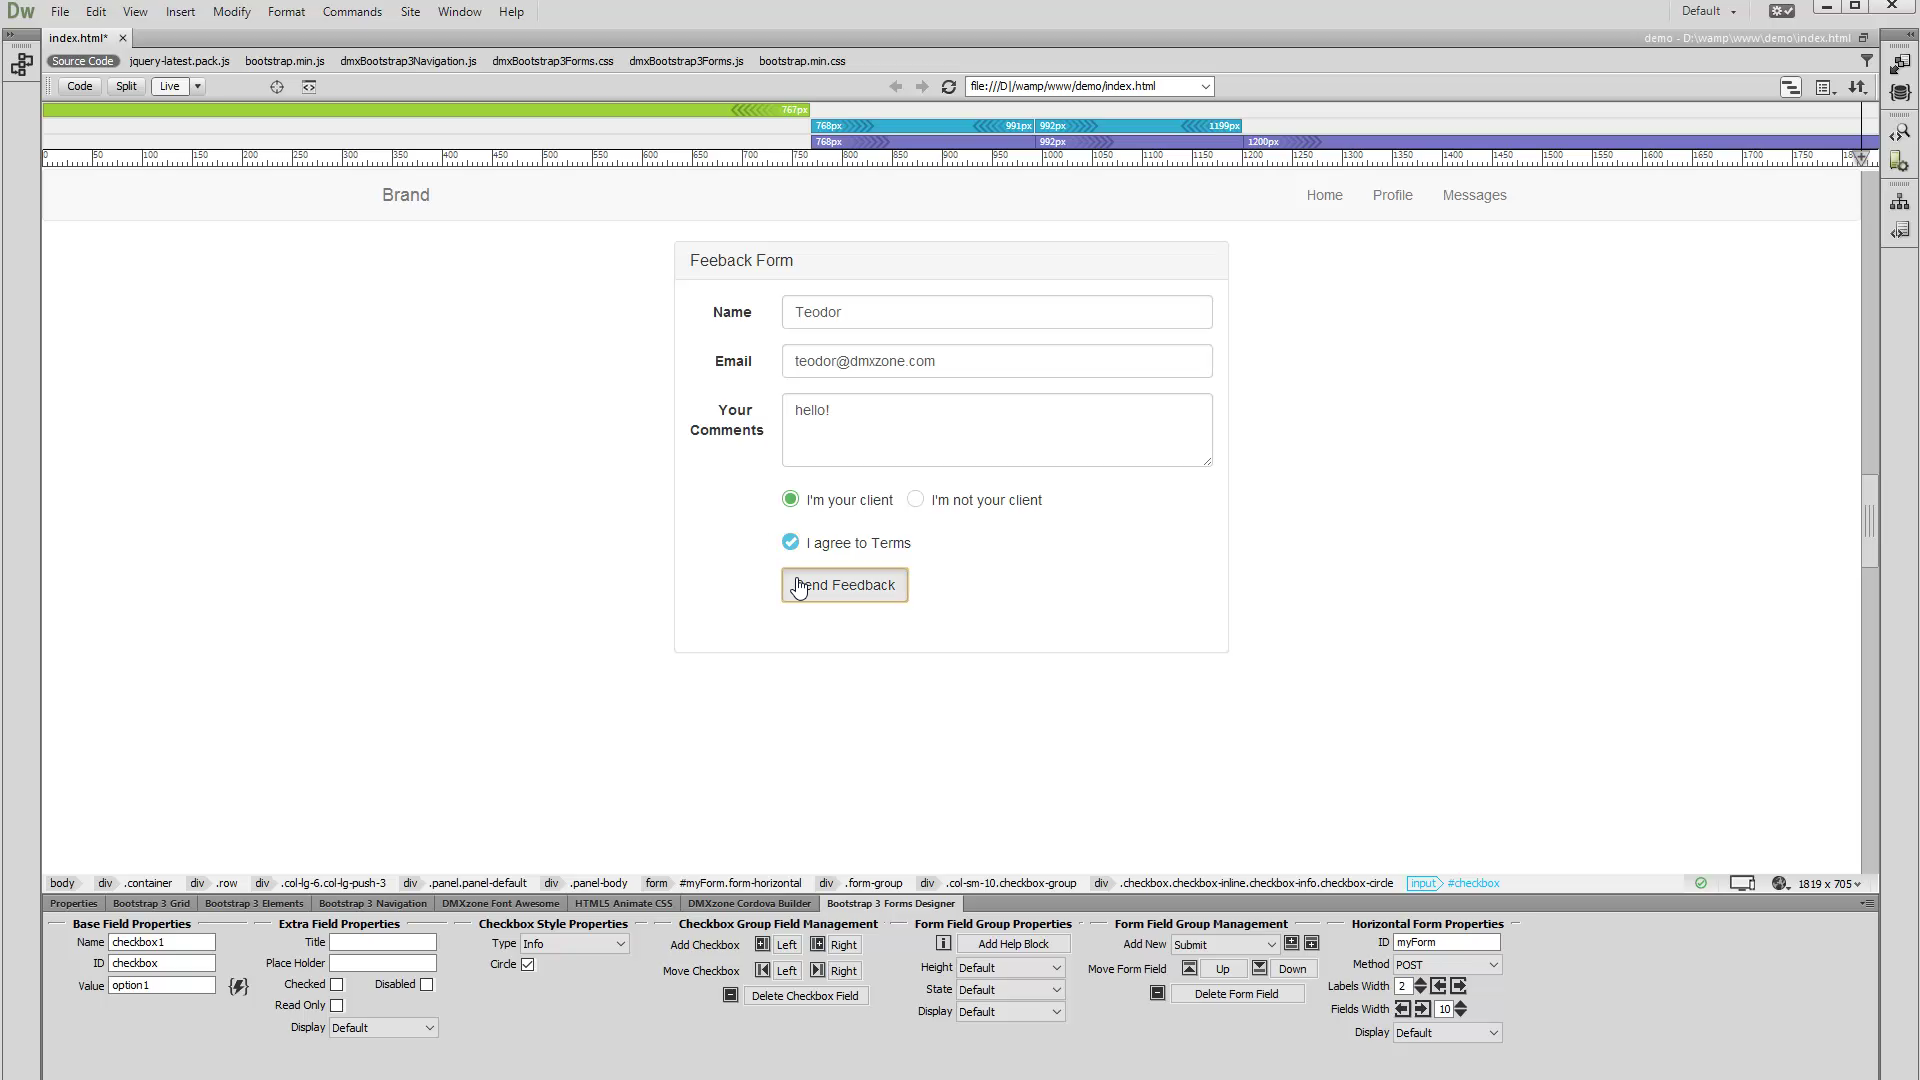
1.We've created a horizontal feedback form, which contains several text fields, radio buttons and a checkbox. We'd like to customize them a little bit. We select the first radio button on our page (1). Then, under radio style properties, open the type dropdown and select one of the bootstrap styles, listed. For this one we select the success style (2).
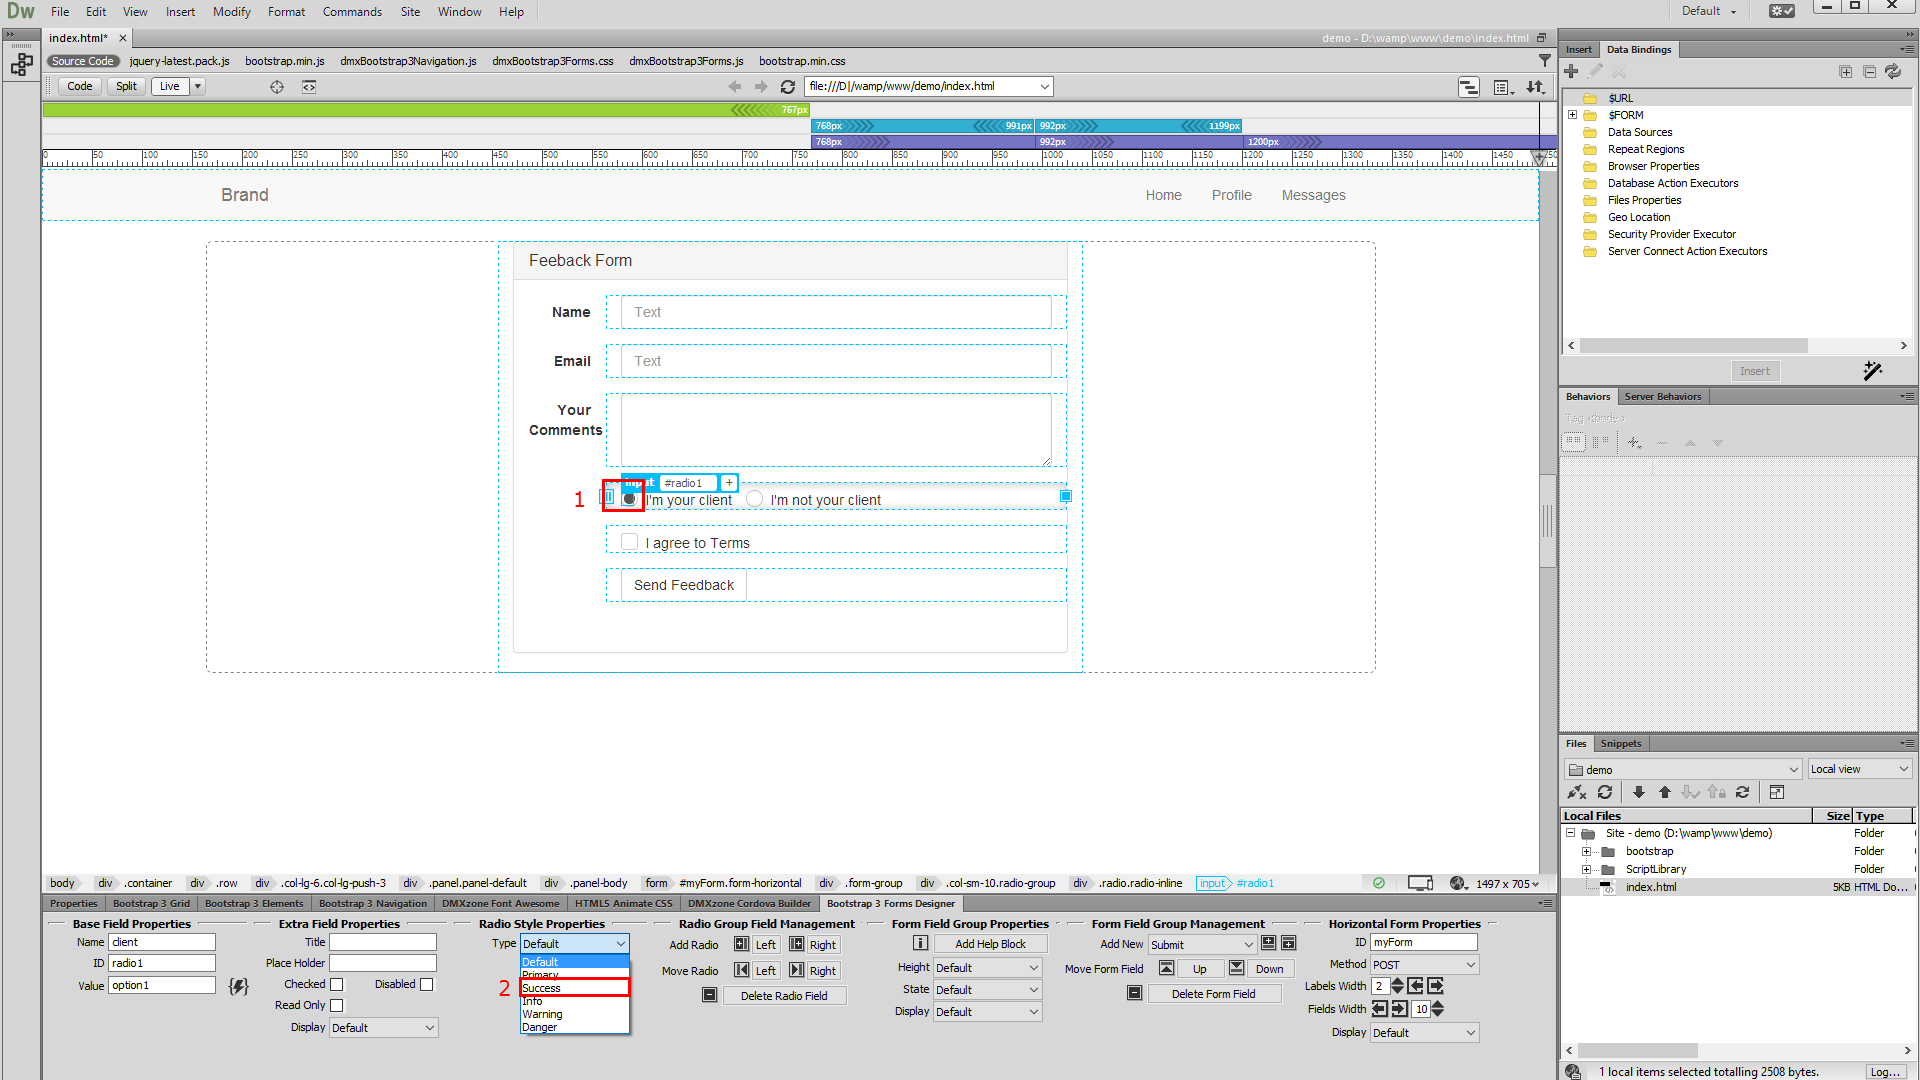
2.You can see the changes immediately in your Dreamweaver. Now, select the second radio button (1) and select the danger style for it (2).
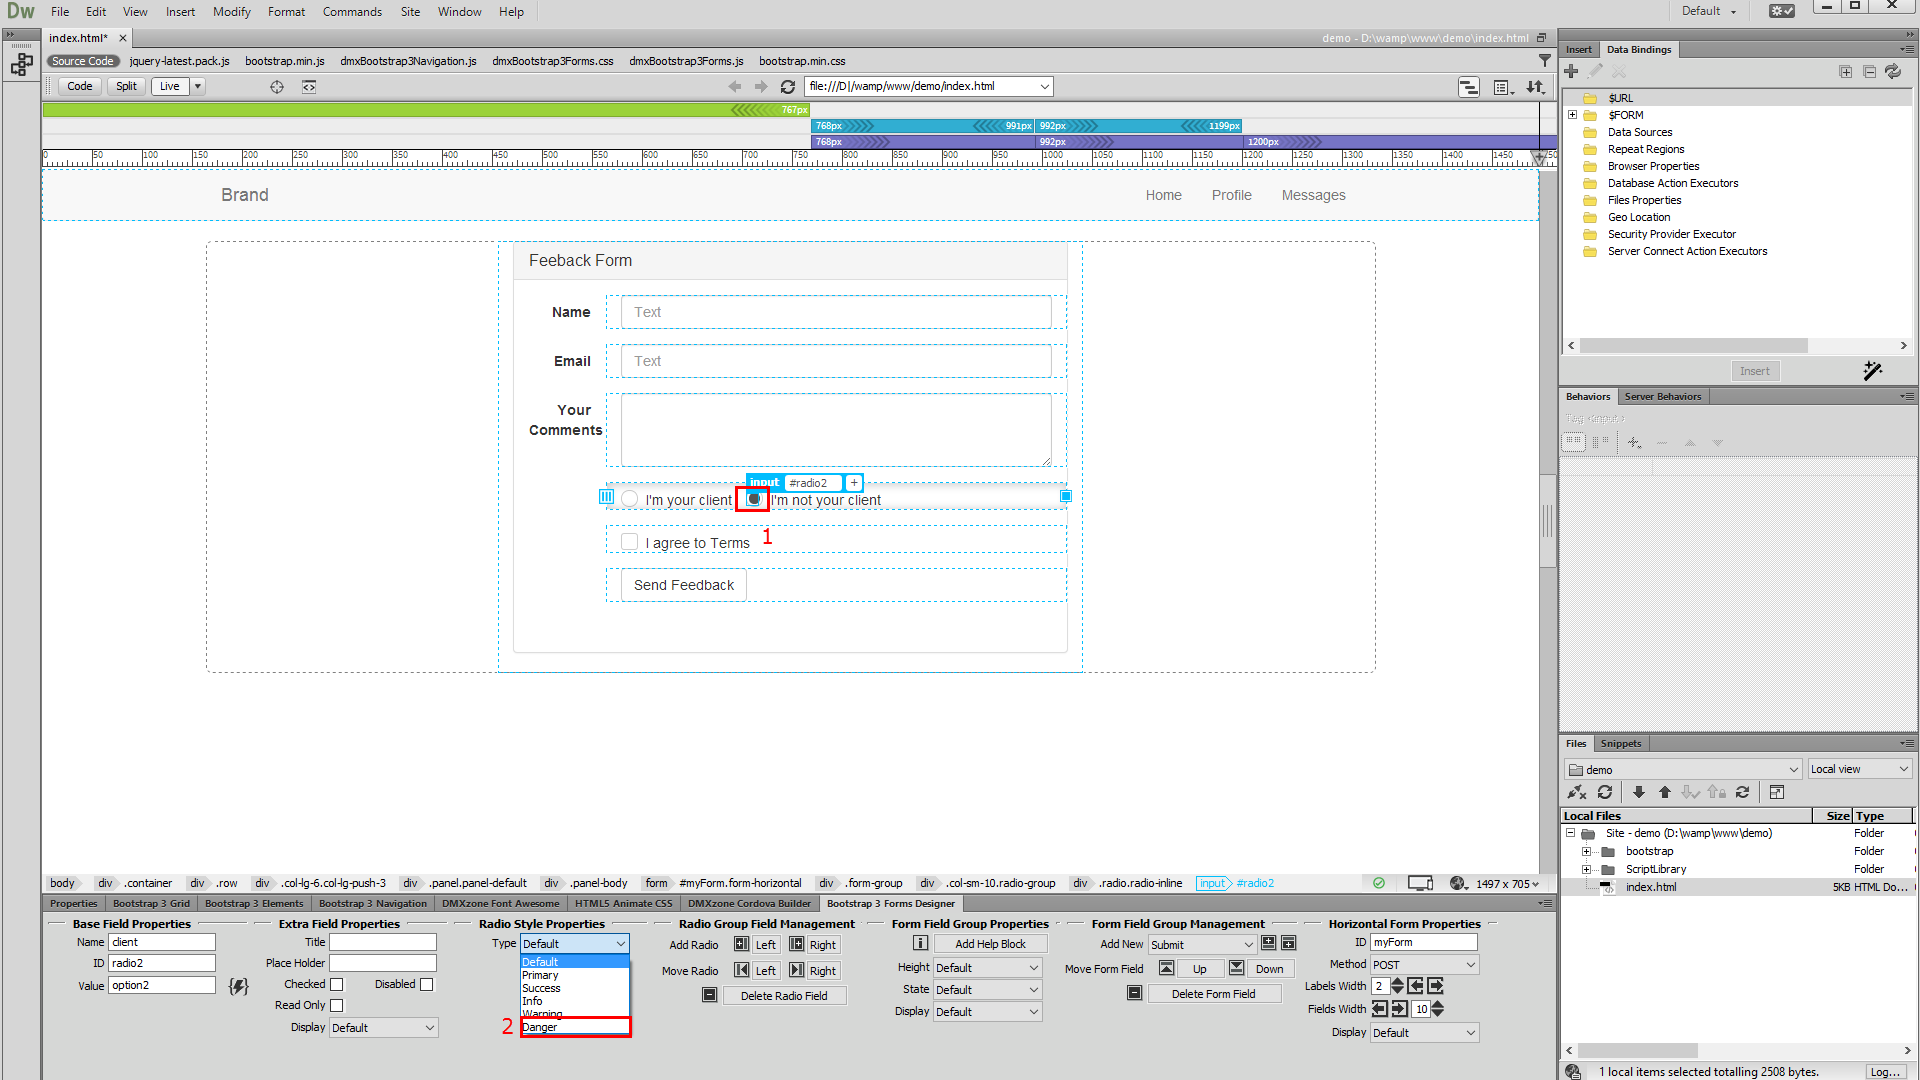
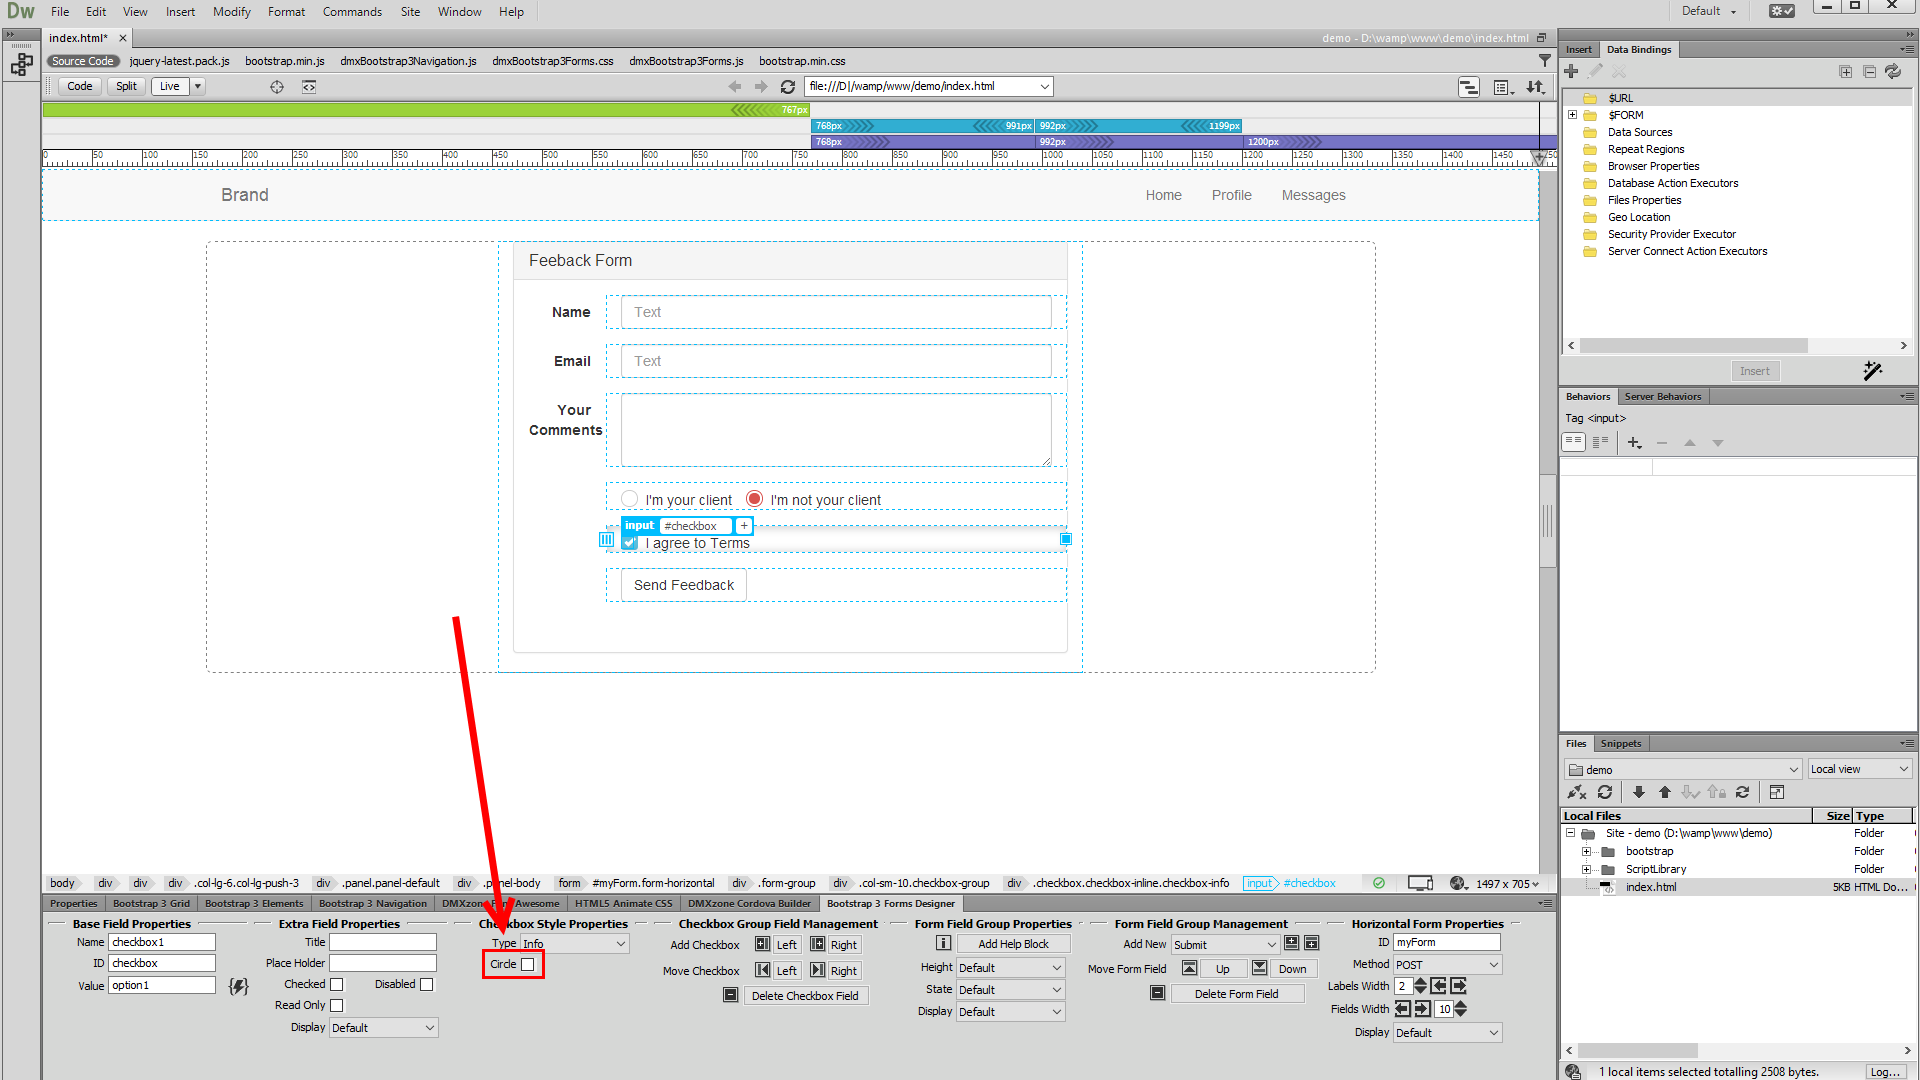
3.We are done styling our radio buttons and select the checkbox (1). Under the checkbox style properties you can see the type dropdown. We select the info style, for our checkbox (2).
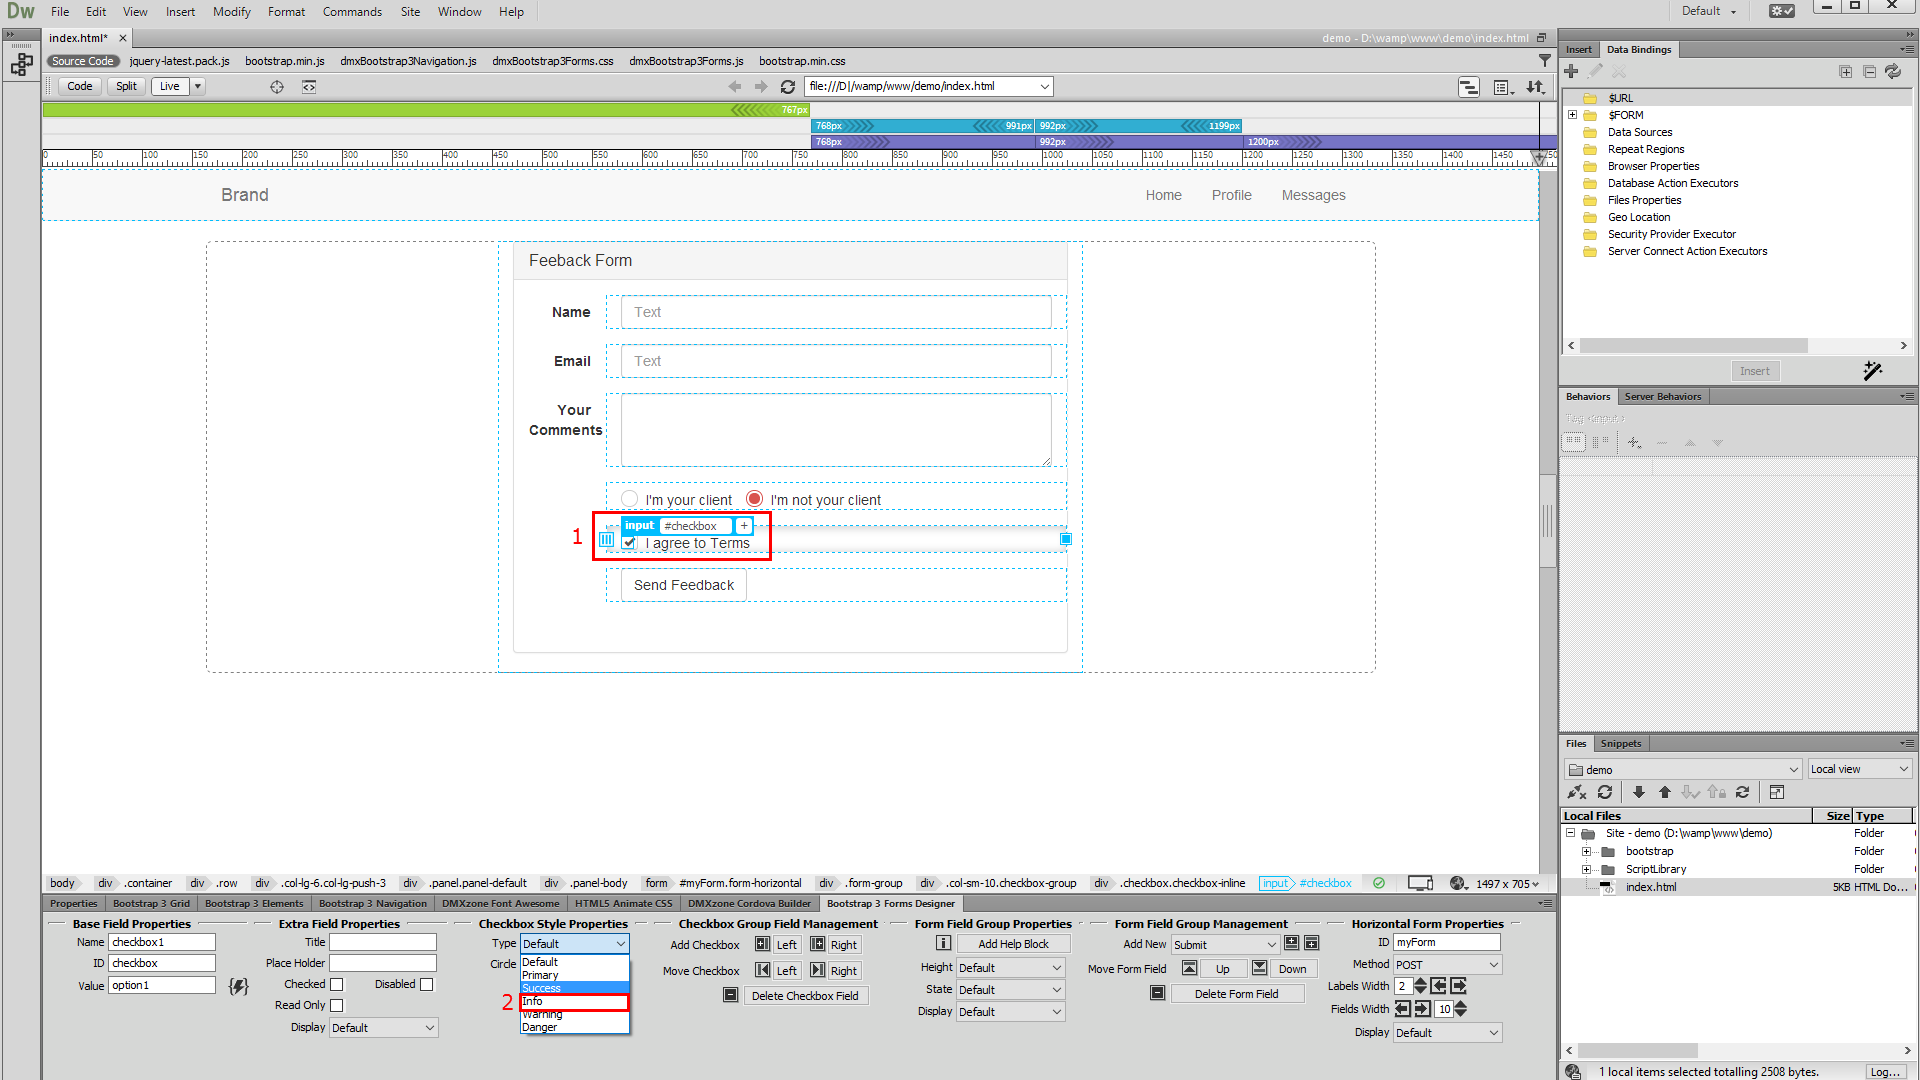
4.Also, here we can add a circle style to our checkbox. Enable the circle option.
5.And let's preview the results!
Comments
Be the first to write a comment
You must me logged in to write a comment.