Fireworks Basics: From Navigation Graphic to Stretchy Table
This article was originally published, as a set of three, on Joyce's personal web site, where Joyce has tutorials, reviews and resources to help the new Web developer develop their skills.
![]()
![]()
![]()
Slice, Optimize and Export
1. If you've taken a break before moving onto this part of the tutorial, open your navigation graphic file.
Note: Be sure your canvas color is set to the same as the one it will be used on for the Web.
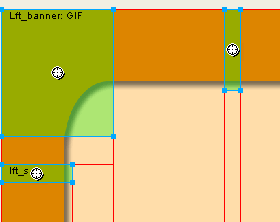
2. Select the Slice tool and draw a slice over the top left corner. Be sure you get the entire curve.
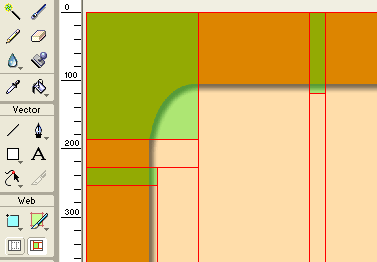
3. Draw another thin slice for the top bar and the side bar. Make sure you get all of the shadow.
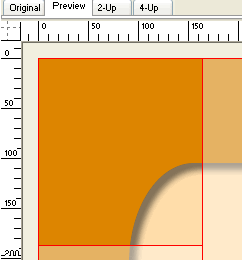
4. Select the large corner slice and click the Preview tab.
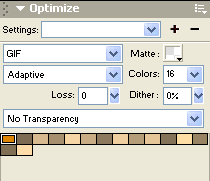
5. Open the Optimize panel and use these settings.
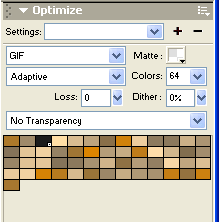
You are using the GIF format because the image has a lot of flat color. JPEG is best for photos, GIF is best for flat colors. You don't need any transparency for this image. If you did need transparency then GIF wouldn't be the best option because of the drop shadow.
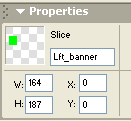
6. In the Property inspector, highlight the default slice name and rename it something useful.
7. Select the top slice and change the optimization to 16 colors and give the slice a name.
8. Repeat for the last slice.
9. Shift+select all three slices.
10. Right-click (Control-click) on the slice and select "Export Selected Slice".
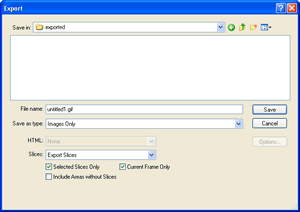
Navigate to the folder you want to export your images into. It should be a folder within your root folder for the site you are building. Don't worry about the name of the file, it won't affect the slice names you gave the slices. Notice that the Selected Slices Only option is checked.
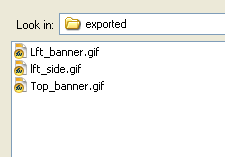
11. Click on Save. I opened the folder again so you could see the exported images. Notice they are all there with the specific names I gave them.
12. Save your file.
You are now ready to use these three image to make a stretchy or fluid table in Dreamweaver.
![]()
![]()
![]()
Joyce Evans
 Joyce J. Evans Joyce is a training veteran with over 14 years of experience in educational teaching, tutorial development, and Web design. She has been asked to speak at conferences such as Macromedia MAX, TODCON, DESIGN FEST and SEYBOLD.
Joyce has received Editors Choice Awards for her book Fireworks 4 F/X and Design and has authored over 10 books on Fireworks, Dreamweaver and Web Design. Her current offering is a CD "Web Page in a Day" which teaches you how to build a site start to finish.
Joyce was a Team Macromedia Volunteer and now an Adobe Community Professional.
She can be reached at mailto:Joyce@JoyceJEvans.com. Her Web site is http://www.JoyceJEvans.com and Idea Design
Joyce lives with her husband, teenage son and daughter, dog, cat and horse, in the Tampa Bay area in Florida. When Joyce isn't working she can be found enjoying the many fruit trees and palms in her yard or at the beach.