Premium Content


Premium Content articles are the very best articles from the world's leading internet technology, subject-matter experts. We have many categories of content below on a wide variety of subjects that have all been commissioned from big name authors.

Explore the Premium Content

Using effects in Flex

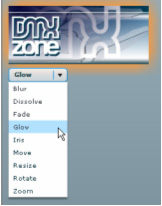
For developers used to working with Flash, Flex provides some new approaches to adding visual effects to SWF files. In this article, I want to look at the effects that are available within Flex and see how you might apply them to components in your application. We'll finish up by building a simple application that allows you to apply some of the effects to an image. The application will allow you to select an effect and apply it to an image and it looks like the following screenshot.

Read More

Implementing Custom Role Security in ASP.NET 1.x – Part 2

Welcome to Implementing Custom Role Security in ASP.NET 1.x Part 2. In this second and final part of this tutorial we will build upon the code and framework developed in Implementing Custom Role Security in ASP.NET 1.x Part 1 and finish off the sample applications requirements.

During Implementing Custom Role Security in ASP.NET 1.x Part 1 we began implementation of a sample application that was designed to create a permissions “aware” custom button control. The purpose of the application is to allow a user to log into an application and have that user’s Role dynamically bound to their user security principal, thus giving a custom button control access to that role and determining if the user is authorized to access its functions.

By creating a separate project of type Web Custom Control Library we added the ability to create a separate assembly to contain the custom button, which can then be used as a reference within our sample web application and also within any other project, allowing for greater code-reuse. It also allows you to create a linkage within the Visual Studio Toolbox for drag/drop operation in the Visual Designer for Webforms.

Read More

Using MooTools to Fix a Cluttered Layout

Simple is in.  Clean is cool.  And amidst the increasing number of home brew web designers, the issue of a simple, clean layout isn’t just in and cool it is important.  Whether these designers admit it or not, clean websites make money and increase usability for the user.  The examples are limitless:  Google, Blogger, CSSBeauty, 456 Berea St, YouTube, Joomla, Flickr, and my personal favourites: BaseCamp, MezzoBlue, TextLinkAds, RubyOnRails, and MooTools.

Read More

Creative Portfolio: Evaluating Your Design Goals

Many of you have read the articles posted to date in this portfolio series. Some projects might take more time than others, so this article is a “breather,” or an evaluation point in the portfolio process. Here, you’ll learn exactly what you need in your Art or Creative Director’s portfolios. You’ll learn how to define your projects by eight different categories so that you can begin to create a flowchart for your online and CD portfolios.

The Portfolio Project: Evaluation

PORTFOLIO PROJECT: Most college courses that focus on visual communications degrees contain a class or a time frame – usually in the senior year – when the student must evaluate his or her strengths and weaknesses and likes and dislikes within his or her design experience. The result is a goal. This goal is focused on a “senior project” which mainly consists of portfolio presentations online, on a CD, and in print. While the projects published to date in this series all include items that would fit into your portfolios, this article will help you to define where you want to go from here.

TOOLS: Imagination, ability to grasp reality, energy to finish the projects that you’ve begun to date and to tackle further projects that are more detailed and complicated.

WHAT YOU’LL ACCOMPLISH: This task will help you decide your goals. Upcoming projects might not appeal to you, but if you want to grasp a well-rounded design experience, you will at least read the material and decide after you read the articles whether you want to tackle the project or create more projects contained in previous articles.

Read More

Creating a metric conversion calculator with Flex

In this article, I want to show you how to create a metric conversion calculator in Flex Builder 2. We’ll be able to use this calculator to convert from miles to kilometres, feet to metres, pounds to kilograms and back again. You’ll see how to create a simple application in Flex and I’ll show you how to use different types of layout controls. We’ll even add a validator and a small ActionScript 3.0 function to the file.

We’ll work through the following steps:

  • Creating the project
  • Creating the interface
  • Populating the ComboBox
  • Adding a validator
  • Calculating the result
Read More

Yahoo! Ajax Toolkit: Autocomplete

Some time ago good folks at Yahoo! have put together a whole toolkit of UI components called “UI Library” and made it available to the developer’s community for free.
In this article we will take a look at one of the tools from this great collection – the AutoComplete component.

Since you are reading this it would be safe for me to assume that you know what AutoComplete is. That’s right, it’s the handy dropdown populated with automatic suggestions that appears when you start typing in a text field.

If you are a savvy developer (and even if you aren’t) you can go right ahead and download the toolkit, install it, read the documentation, look at the examples and finally set it up to work with your application.

Check also DMXzone's own Ajax AutoComplete Dreamweaver extension to get field auto completion right out of the box! 

Read More

Implementing Custom Role Security in ASP.NET 1.x – Part 1

Security is of course an integral part of any application. It is usually designed as part of the abstract application framework during the design phase. There are many different aspects of security in a web application, and most developers, especially network administrators focus on the unknown public portion of security when it comes to design.

You can have firewalls, IP filtering, load balancing, DMZ’s and more when it comes to physical infrastructure with security. Keeping hackers and the general public out of private information and sensitive servers is of course one of the biggest security concerns.

The type of security this tutorial refers to however, is regarding internal user access security. Aside from the obvious security concerns already mentioned, there is often a definite hierarchy of privilege in any company. The different types of users that make up an application can be many. From administrators, so supervisors, to department managers, to regular field workers, all of whom require different levels of security access in your application.

Read More

Video Streaming with an AJAX Video Gallery Part Three

Welcome to part three of the video streaming tutorial.  In part two we got the JavaScript file including the main AJAX function written and working, and added some CSS to position our player selection buttons and logo's.  This part of the tutorial is going to finish the tutorial with some more CSS to style the AJAX-generated buttons, write the server-side ASP code that returns the list of available files in the chosen format and add a function that plays another video when its button is clicked.  We'll begin with the ASP code.

A Little ASP

As wonderful as our AJAX is, it won’t do anything without the data returned from the server and in order to generate that data, we need some script to run on the server.  ASP provides exactly the functionality we require and can happily run on the server and pass the required data back to the AJAX function.  One simple function in our ASP file will do everything we need.  In a text editor, begin by opening the ASP file and setting the variables the function will need:

<%

  dim fs,fo,x

Read More

Creating a basic application with Flex Builder 2

Welcome back to Flex Builder 2. If you read the first article in the series, I hope I’ve excited you about what Flex can do and that you can’t wait to create your first Flex application. So here it is!

In this article, I’ll create a very simple “Hello World” style of application. The application will display a message and a button. When the user clicks the button, the message will change. We’ll also add an image to the interface with a fade in effect. It’s a very simple application but it will introduce you to some important concepts for working with Flex Builder 2. Hopefully, it will also show you how powerful Flex is as an approach for building applications.

I’ll work through the following steps in the article.

  • Creating the project
  • Creating the user interface
  • Compiling the SWF file
  • Adding an image
  • Adding a fade in effect

You don’t need to have any experience with Flex Builder at all to complete the tutorial. However, you will need to download and install the software from the Adobe site. If you haven’t done this already, you may want to refer to the article, Introduction to Flex Builder 2 for instructions about how to do this.

You can download the source files for the tutorial from the blue Properties box that contains the article PDF. There's a heading titled Code Download and you can click the Details link next to it to get the zip file. The download includes the completed files for the article as well as the image that we’ll add to the interface.

Note: If you have difficulties downloading the source files or PDF, you might have a problem with your cookies. Delete the cookies from your machine and try again. In Internet Explorer, you can do this by choosing Tools > Internet Options… and clicking the Delete Cookies… button on the General tab.

Read More

Creative Portfolio: Packaging

When you were young, did you enjoy going to the toy store so that you could look at all those toys in boxes? At the time, you probably didn’t realize that the package was part of what held your fascination. Packaging is both inviting and prohibitive – it invites the consumer to desire its contents, yet it prohibits the consumer from touching the actual product. In this article, Linda defines packaging, and teaches you – the aspiring Creative or Art Director – what packaging entails.

The Portfolio Project: Product Label

PORTFOLIO PROJECT: Packaging for Wine Label Project. Now that you’ve created a wine label and have that product ready for your portfolio, the next step is to create a promotional box, or package, for that wine product. But, you aren’t limited here – the ideas and methods that I’ll cover in this tutorial apply to all packaging projects that you might encounter.

TOOLS: Graphical software – if you own a copy of a 3D graphic program, all the better to render boxes and containers in three dimensions. If you don’t own this type of software, don’t despair. Perhaps the best way to learn about packaging is the down-and-dirty hands-on method, where you actually build the package and photograph the result for your portfolio.

WHAT YOU’LL ACCOMPLISH: This task will invite you to think about how products are packaged for the consumer. Hopefully it will make you more aware of the possibilities, trends, and limitations provided by shelf presence, consumer ability to comprehend provided information, and the importance of colour, shape, and other elements and principles of design that are entailed in packaging projects.

Read More
Display ToolTips on ASP.NET 1.x DataGrids

Presenting data to your users is always an important topic of discussion when it comes to user interface design. Usually a big concern for the GUI developer is how to maximize the available screen space and still maintain a usable interface.

If you try to cram too much information onto one page you will often be left with an interface that requires scrolling, which is a big nuisance for users. With headers and footers, navigation bars, alerts and personalized information taking up valuable screen space the actual amount of usable space on each page is sometimes quite small.

Taking advantage of the space you do have requires some thoughtful design and creativity. A common approach is to display only the most critical information, and if users require more they need to dig deeper. The problem with this approach is that constantly firing post backs to dig down into data can be time consuming for the user.

The purpose of this tutorial is to allow users to view additional information about an item without having to send multiple requests to the server. The term “ToolTip” is probably one you’re familiar with, and is more commonly used in desktop applications, but can also be implemented in web applications with some creativity.

Read More

Video Streaming with an AJAX Video Gallery Part Two

In part one of this series, we created an initial HTML page and some associated CSS that allowed visitors to our site to select a video clip to watch.  We also created three additional pages (one for each clip) that provided a method of selecting which format the visitor  wanted to watch the video in, giving a choice of either; Windows Media Player, Apple Quicktime or Real Player.  In this part we're first going to look at the CSS needed to layout each of the individual video clip pages, and the JavaScript required to show the embedded player of the visitors choice, before moving on to look at a way of using AJAX to generate a list of other video clips in the same format and display a method for viewing these additional videos.

Some Additional CSS

Open up the videocontent.css file in your favourite plain text editor and add the following selectors to layout the section of the page in which the visitor selects the video format they want to watch the video in.  If you remember, when we coded the HTML, the class and id attributes were already defined.  The buttons used to select the desired player, and the logo's linking to download sites for each of the players are held in a containing div element, and then in a columnar layout.  The container div should be styled as follows using a pretty standard ID selector:

#container {

  position:relative;

  height:150px;

  width:620px;

  text-align:center;

  left:50%;

  margin-left:-320px;

  margin-right:auto;

}

Read More
Newer articles Older articles