In this article you'll find all the needed information in order to be able to work with the HTML5 Data Bindings Browser Properties extension. It features tutorials on how to access the browser properties on your page, serve retina optimized images to retina devices, changing the content depending on the device orientation and also how to show/hide specific elements on your page. The tutorials are also available in video format.
HTML5 Data Bindings Browser Properties Manual
Learn how to work with HTML5 Data Bindings Browser Properties


Advanced: Serve Retina Optimized Images to Retina Devices
In this tutorial we will show you how to serve retina optimized images to retina devices, using HTML5 Data Bindings Browser Properties.
*You can also check out the video.

How to do it
1. We have created a simple page layout. We want to show a donut image to the visitors of our web site. We want to be sure that when users with retina displays visit our web site, they see a sharp and crisp image. First we are going to add a normal resolution image that will be served to non-retina displays. Open the insert menu (1) and select image menu item (2).

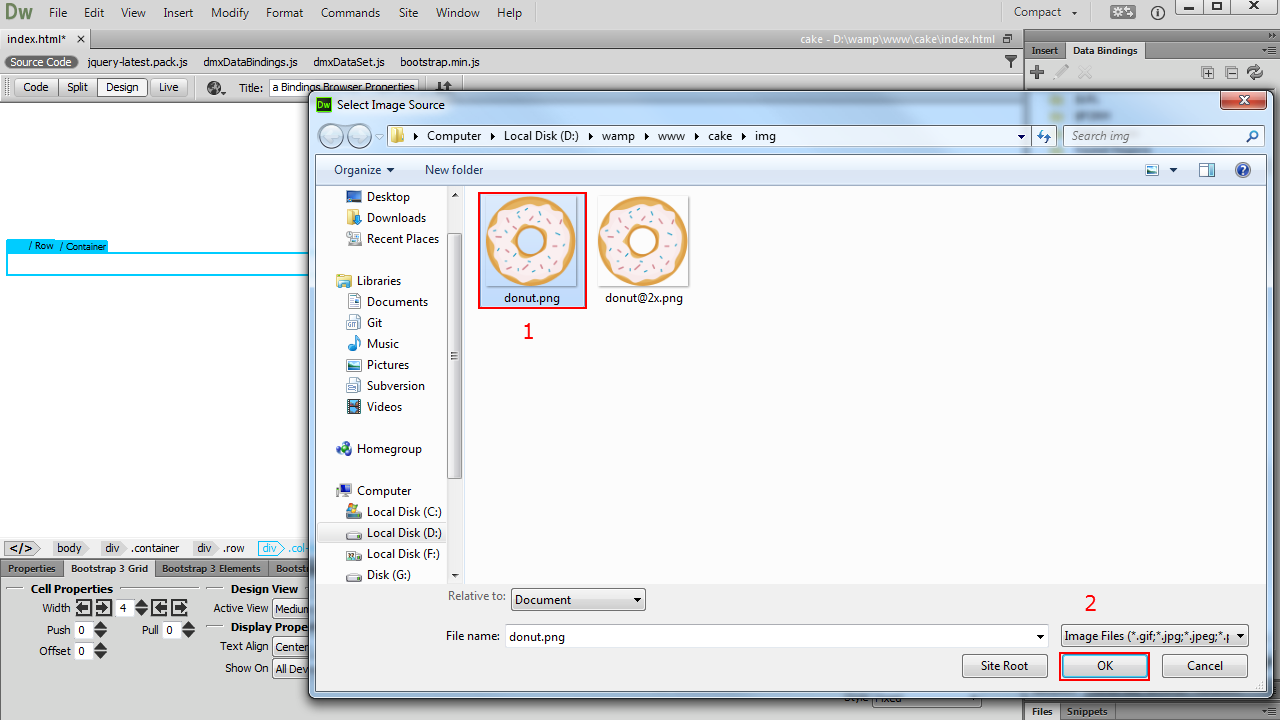
2. Browse to your images folder and select your normal resolution image (1) and click the OK button (2).
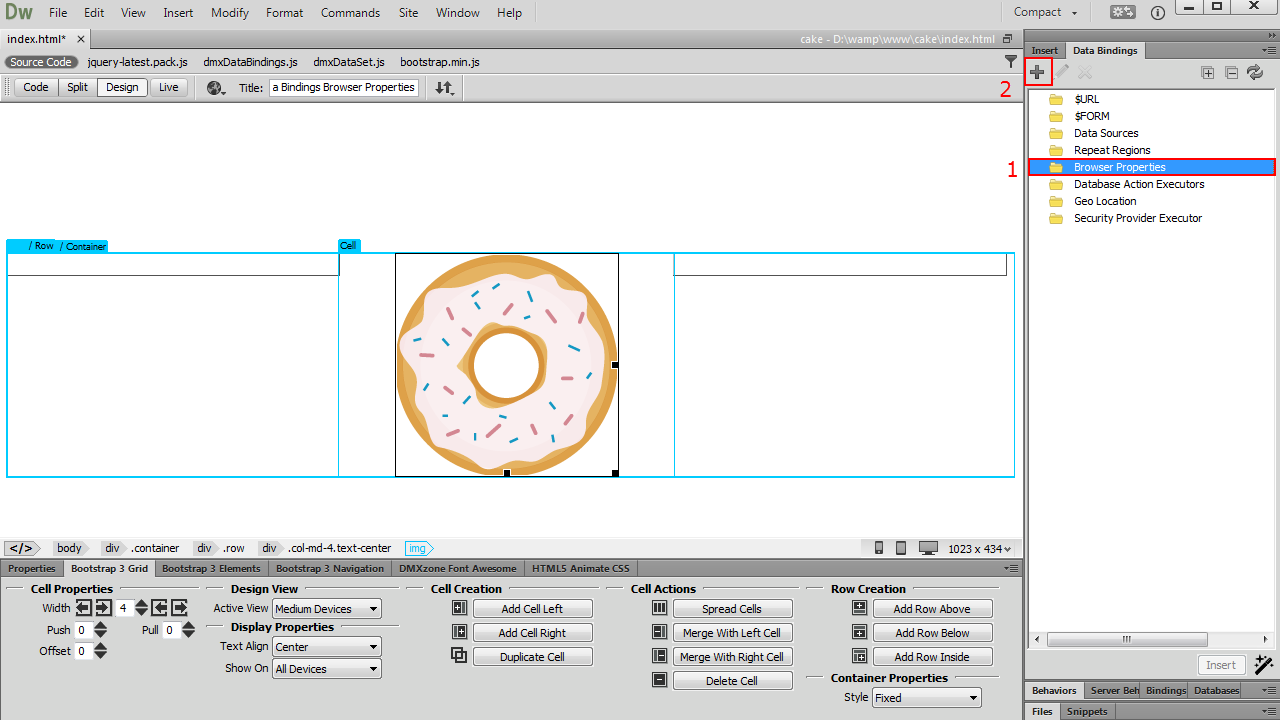
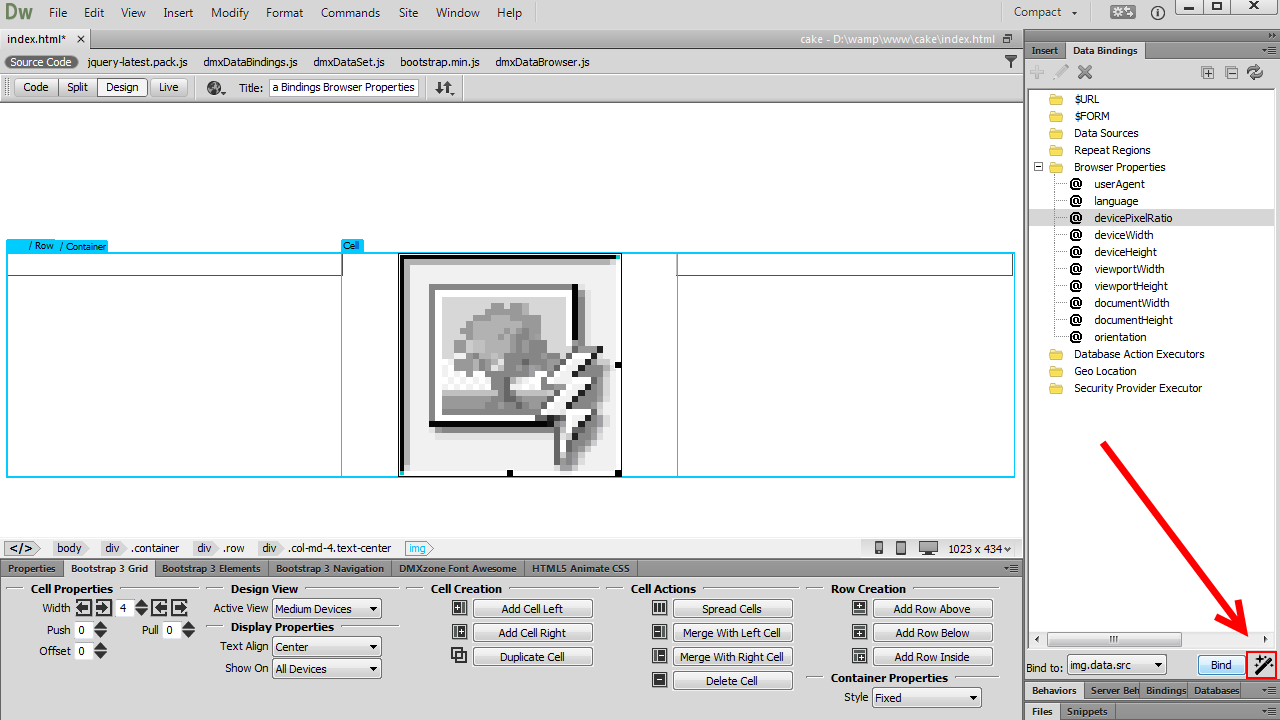
3. Now we are going to add a device pixel ratio check on the page. This way will detect if the device screen is retina or non-retina. Select browser properties inside the HTML5 Data Bindings floating panel (1) and click the add button (2).
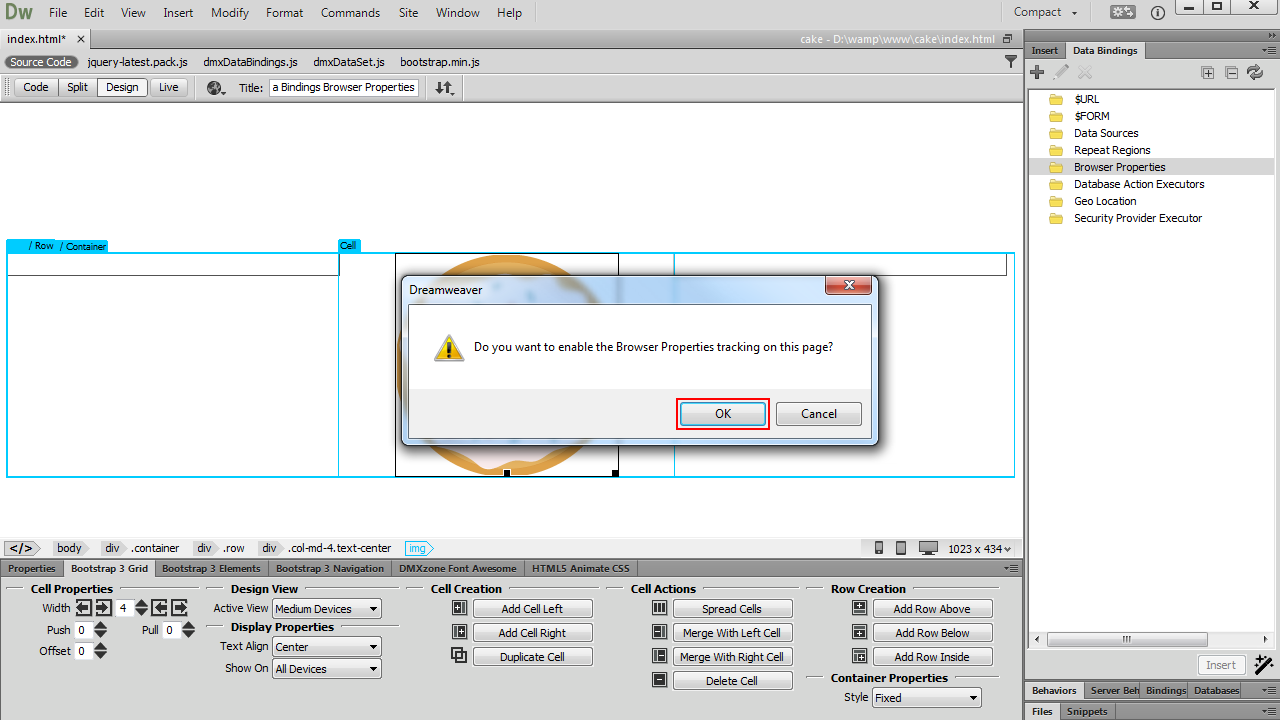
4. Enable the browser properties by clicking the OK button.
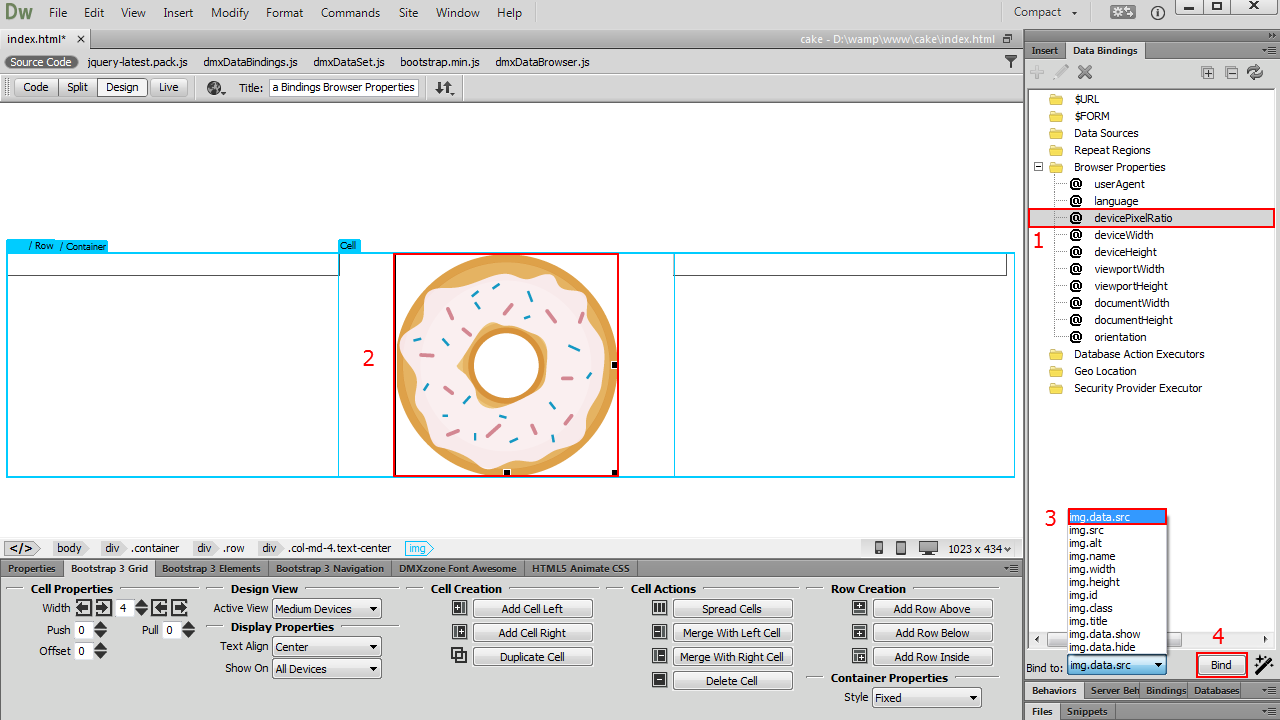
5. Select the device pixel ratio binding, located under browser properties (1), select the image that you added on the page (2) and from the bind to menu, choose the image data source (3) and bind it (4).
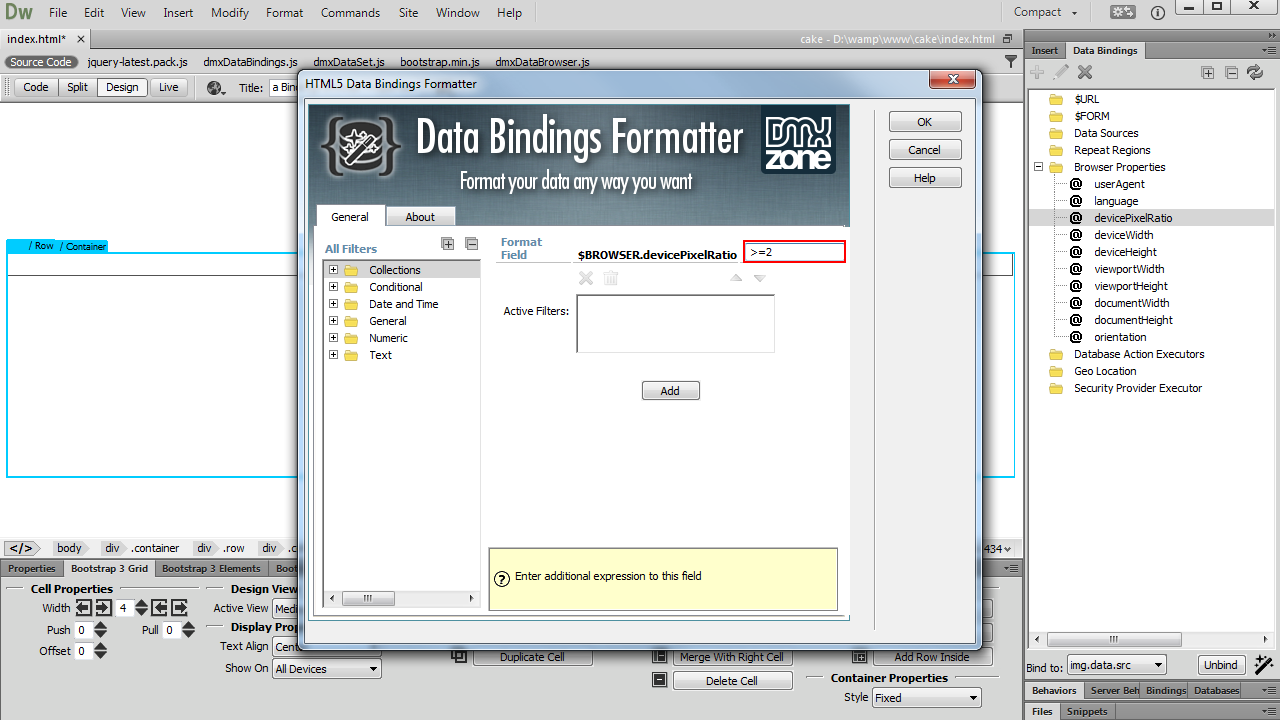
6. While the image is still selected, click the Format Data Binding button. Note that you need to have the HTML5 Data Bindings Formatter installed, in order to see this button.
7. Devices, with retina displays, have a pixel ratio that is equal or greater than 2. We enter >=2 condition into the format field.
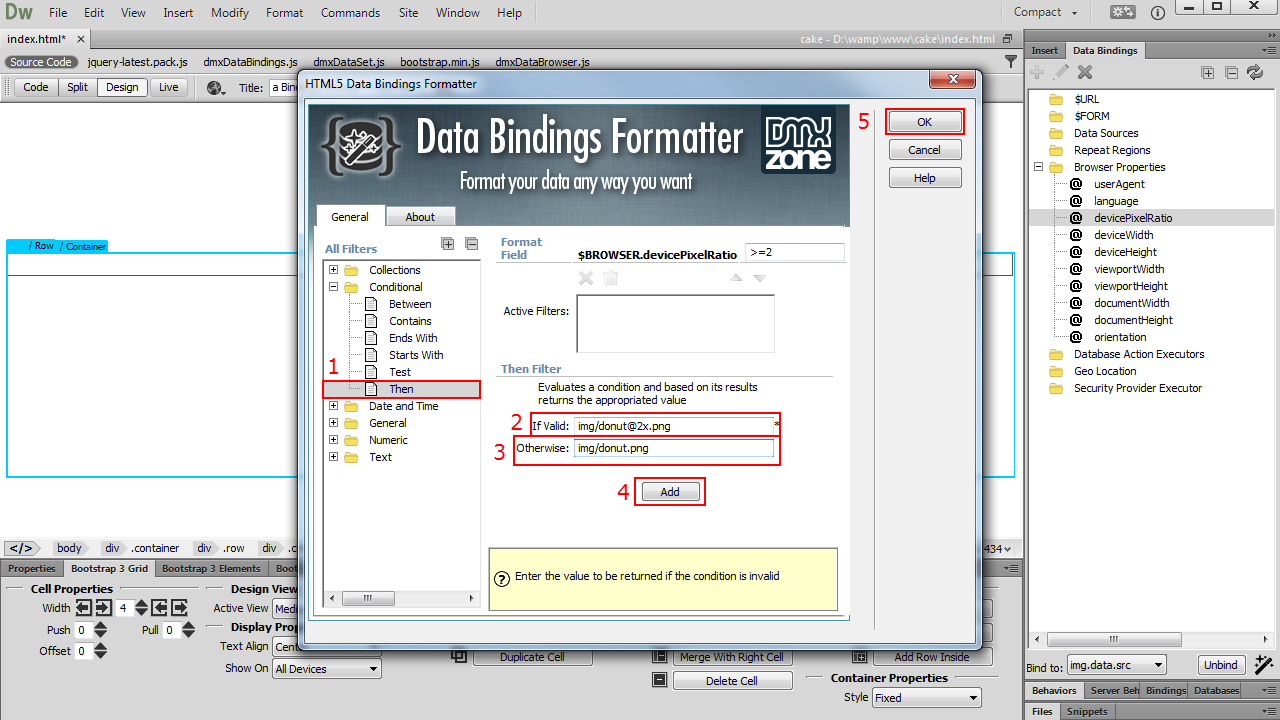
8. Now, expand the conditional filters and select then (1). If the device pixel ratio is greater or equal to 2, we want the retina image to be served so we enter the path to our retina image (2). Otherwise, if the device pixel ratio is < 2, we want to display the normal-resolution image so we enter the path to the normal-resolution image (3). Then we apply the filter (4) and click the OK button (5).
9. Now you can save your work and test the page on a retina and non-retina devices. That's how easy it is to serve retina optimized images to retina devices, using HTML5 Data Bindings Browser Properties.

Lubov Cholakova
 Lubov has been with DMXzone for 8 years now, contributing to the Content and Sales departments. She is bringing high quality content in the form of daily blog updates, reviews, tutorials, news, newsletters,update emails and extensions' manuals. If you have a product that needs publicity or any other questions about the entire DMXzone community, she is the one you can contact.
Comments
Be the first to write a comment
You must me logged in to write a comment.