With this movie we will show you how to use the Dynamic Attributes, available in DMXzone App Connect.
DMXzone App Connect Manual
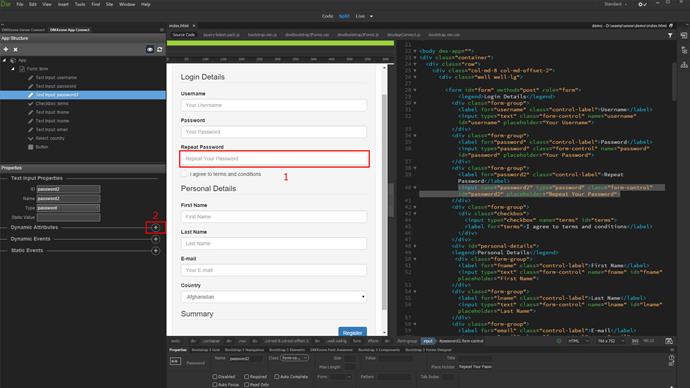
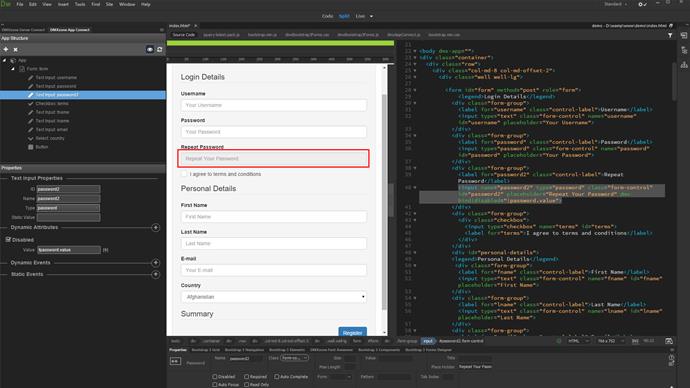
For this tutorial we have a form, where users enter their details. We'd like to apply dynamic attributes to some of the inputs here. Let's start with the repeat password field. We'd like it to be disabled, when there is nothing entered in the password field. Click the repeat password field on your page (1) or select it in the app connect panel and click the add dynamic attribute button (2).
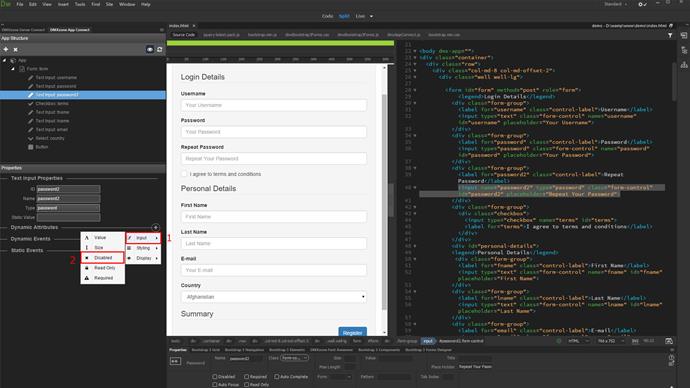
Select input (1) as we'd like to change the attributes of the input. The smart app connect panel only shows the attributes, available for the selected element. Then, select disabled (2).
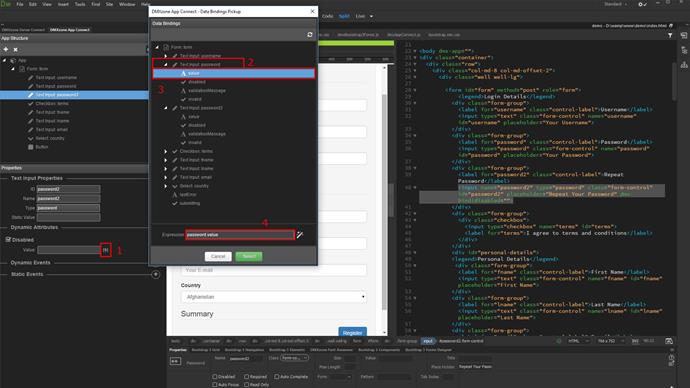
The disabled attribute has been added to the password repeat field. Now, we need to select the condition, when it should be applied. Click the dynamic data button, in order to select the condition (1). We need this field to be disabled when the password field has no data entered. Open the password field properties in the dynamic data picker dialog (2). Select the password field value (3). The expression (4) now means that the disabled attribute will be applied when the password field has a value.
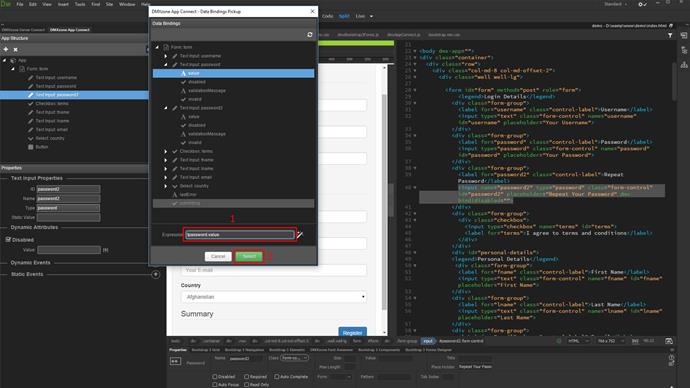
We just need to add, an exclamation mark (1) in front of it in order to reverse it to when the password field has no value. Click select when you are done selecting the expression (2).
You can see the changes immediately in live view. The password repeat field is now disabled because there is nothing entered in the password field.
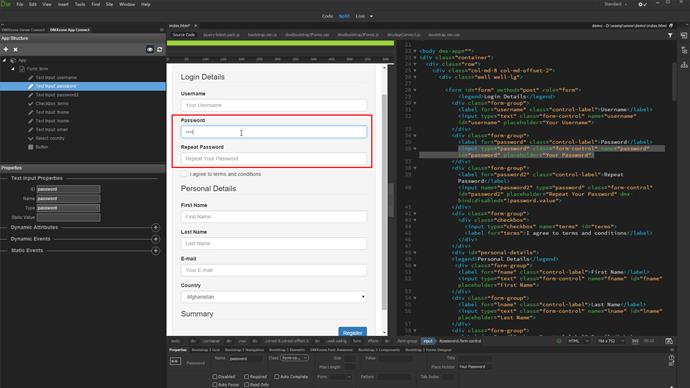
As soon as we enter something in the password field the disabled attribute will be removed. And now you can re-enter your password.
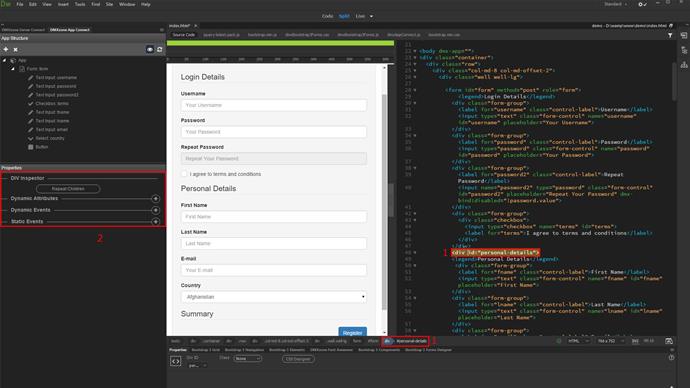
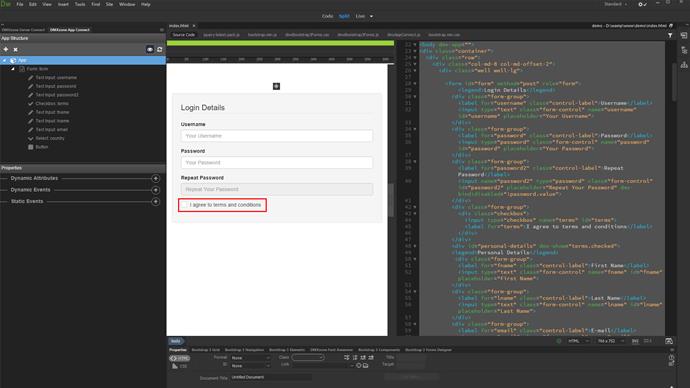
Let me show you another example of dynamic attributes usage. We'd like to hide the personal details container when the users has not clicked the i agree with terms checkbox. We can select the personal details div in code view or in the properties inspector (1). You can see the div inspector appears inside the app connect panel (2).
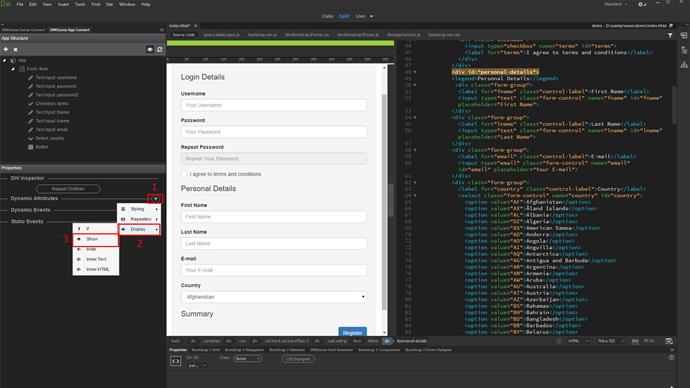
Click the add dynamic attribute button (1) and select display (2) and then show (3).
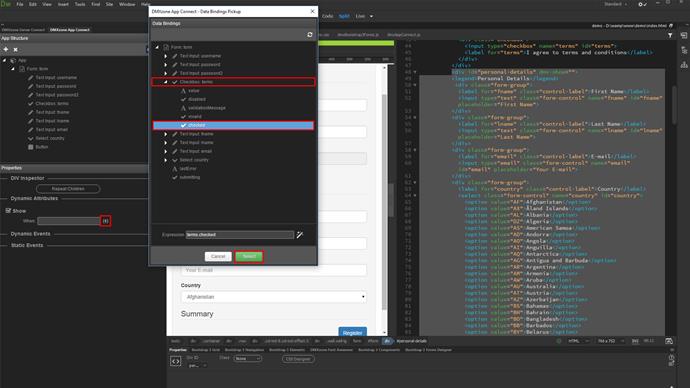
Show attribute has been applied to the div. Now let's select when the div should be shown. Click the dynamic data button (1) and open the checkbox properties (2) in the dynamic data pickup dialog. Choose checked (3) and click the select button (4).
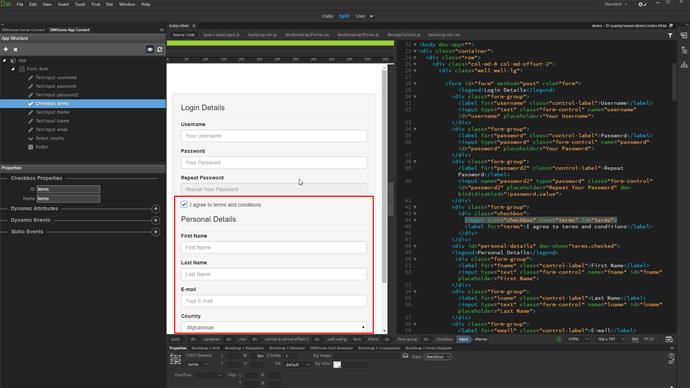
Now, our personal details div will only be displayed when the terms and conditions checkbox is checked.
You can see this immediately in live view.
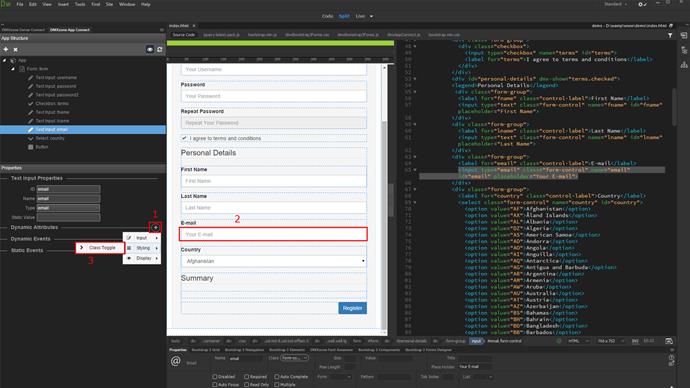
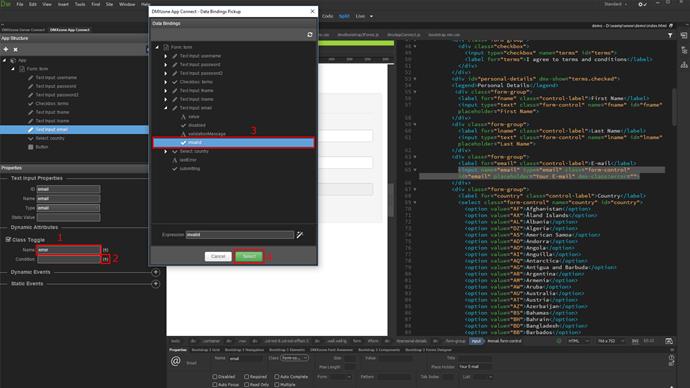
Last but not least, we will toggle a class when a field value is not valid. We select the email field (1). This field type is set to email. This way the browsers HTML5 validation can be used to check if the entered value is in proper email format. Now, click the add dynamic attribute button (2) and from styling choose class toggle (3).
The class that we've setup is error (1). Note, that this is a custom class, which you define in your own CSS and it is not something integrated in app connect. Then, select a condition when this class should be applied (2). We need it to be applied when the value entered in the email field is not valid. So select invalid, under the email field properties (3) and click select (4).
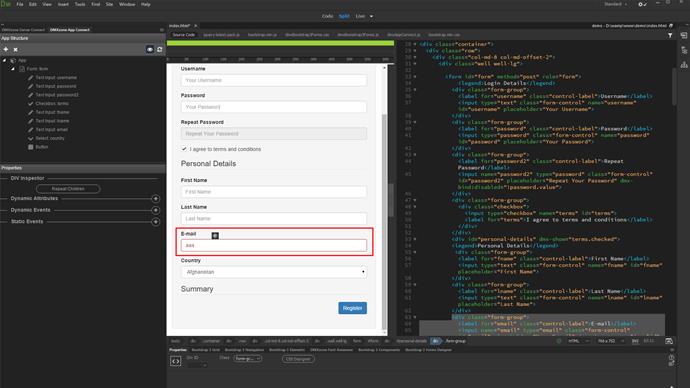
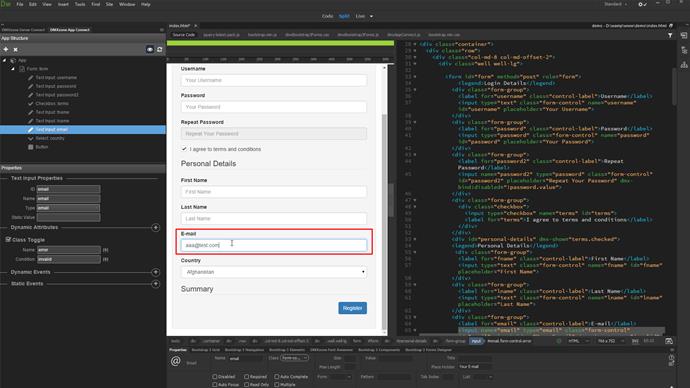
We enter some random text in the email field. You can see that the error class is applied as the value is not a valid email format.
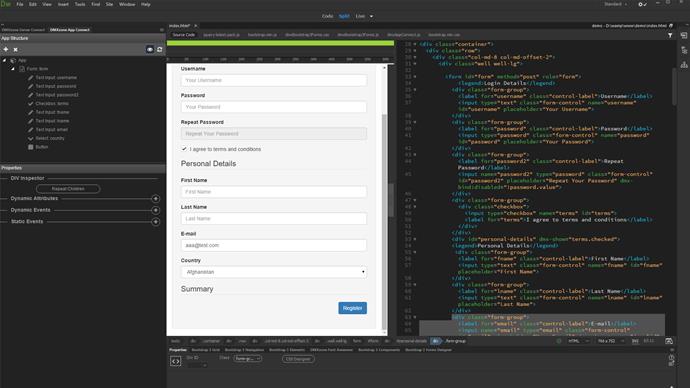
As soon as we enter a value, which is in a valid format the error class is removed.
These are just a few examples of what you can achieve, using the dynamic attributes, integrated in DMXzone App Connect and how easy it is to use them!
