With this movie we will show you how to setup login system for your website. The login system includes logging users in and out, restricting access to pages, protecting data sources and filtering data, using the logged user ID.
DMXzone App Connect Manual
We will start with the login process first. We created a simple log in form containing a text field, a password field and a checkbox as well as a submit button.
Open the server connect panel and create a new server action (2). We put it inside a folder, as it is easier to maintain the server actions when they are organized like that (1).
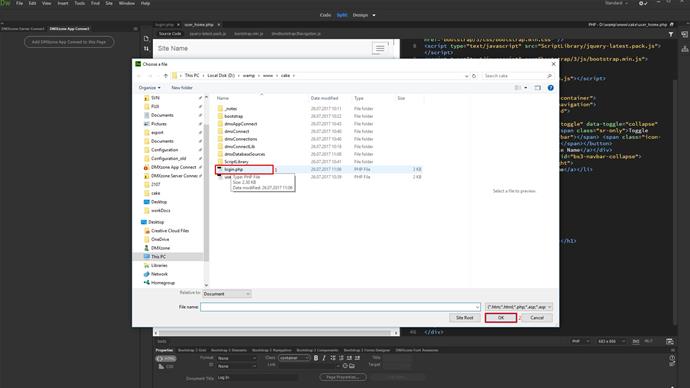
Click globals (1). In the link page field browse to your log in page (2). Select it and click OK (3-4).
In the form field, select your form(2-3) and click the import button below (3).
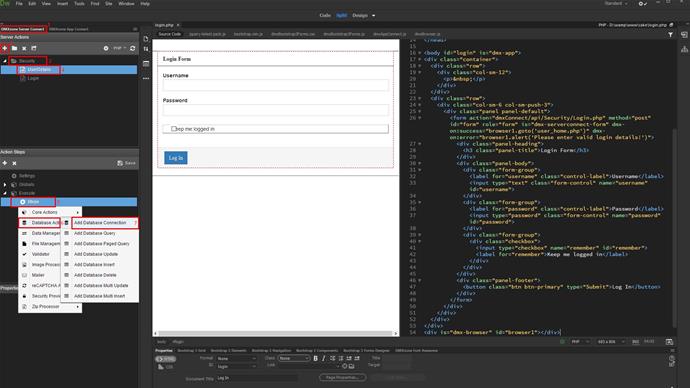
The form fields have been imported, under global post variables (1). Right click steps(2) and add a database connection (3-4).
Setup your database connection or select one from the dropdown if you've already defined it (1-2).
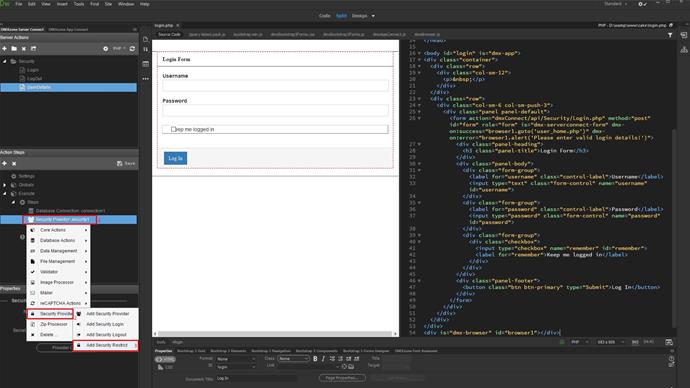
Right click the database connection(1) and add security provider (2-3).
Select database from the type dropdown (1-2).
Select your database connection from the connection menu and click the provider options button (1-2). Select your database table storing the users and select the ID, login and password columns (3-4). Click OK when you're done (5-6).
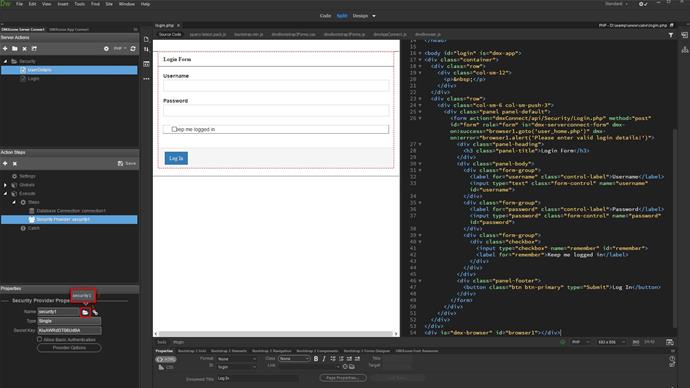
Don't forget to click the link to file button (1-2). This way you will make the security provider available sitewide.
Right click the security provider step(1) and add security login (2-3).
Setup the login properties. Link your form fields for login, password and remember, available under the global post variables. Expand post and select the corresponding form field. Do this for all of the fields (1-4).
Select your security provider from the menu (1-2). We're done setting up the login server action. Click the save button in order to save it (3).
Open the app connect panel (1). Add app connect to your login page (2).
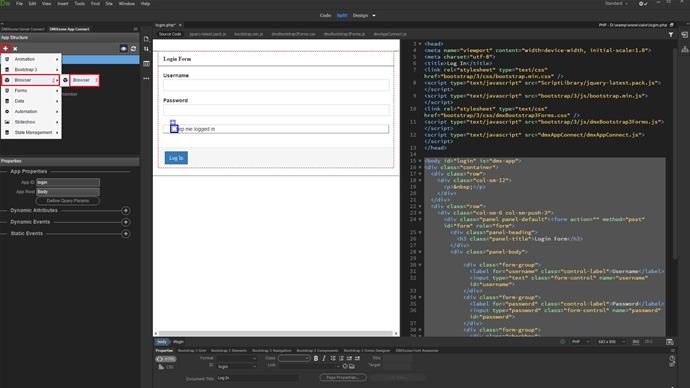
In order to be able to redirect users after login, we need the App Connect Browser component added on the page.
Click add new component and add app connect browser (1-3).
Select the log in form in the app connect tree. In the handler menu (2), select server connect (3).
Select the login server action in the action menu (1-4). Now we're done setting up the login process. Let's setup the redirect on successful login and also an alert message, when the user enters wrong login details.
Open the dynamic events menu (1). Select server connect (2). And then, on success (3).
Click the dynamic events picker (1). Under the browser component, select go to (2). Enter the URL where the user should be redirected after a successful login. If this is a static URL, it should be wrapped in single quotes (3). Click select when you're done (4).
Now, let's add an alert on error event.
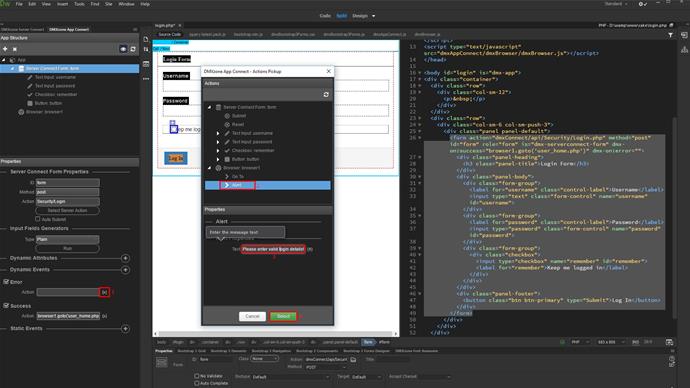
Add a new dynamic event (1), then under server connect (2), select "Error" (3).
Click the dynamic event picker (1). And under browser, select "alert" (2). Enter the alert text wrapped in single quotes (3). And click select (4). We're done with the log in part. Now, we are going to setup the page and query restrictions as well as filtering the data, using the logged user ID.
Open the server connect panel (1). Create a server action. We call it "user details" (2-4). Right click steps(5) and add a database connection (6-7).
Load your database connection (1-2).
Right click the database connection (1). Then, add security provider (2-3).
Load the security provider which we created in the login server action (1-2).
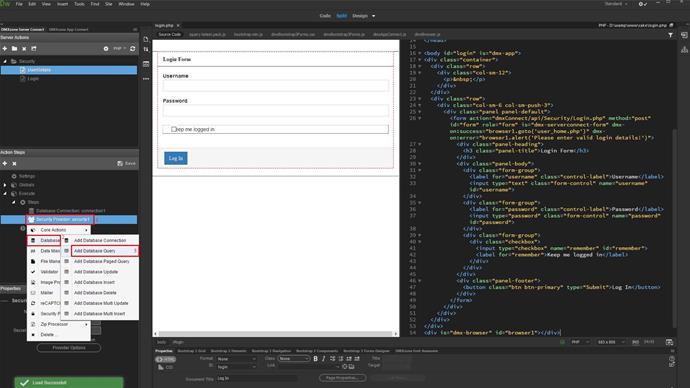
Right click it(1) and create a database query (2-3). This is the query which we will be using to display the data filtered by the logged user ID.
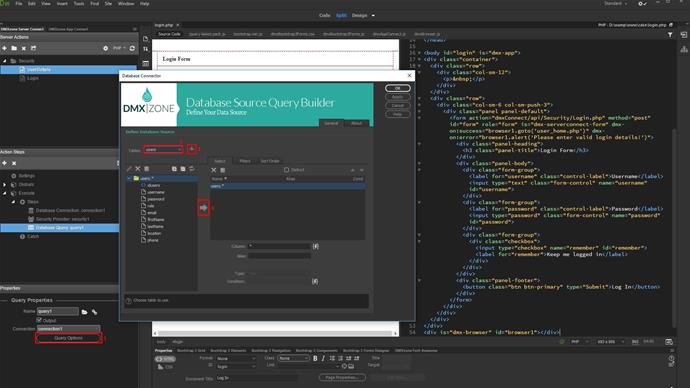
Click the query options button (1). Select, and add the table which you want to use in this query. We'd like to show the logged user details, so we add the users table to the query (2-3). Add the table columns which you need (4).
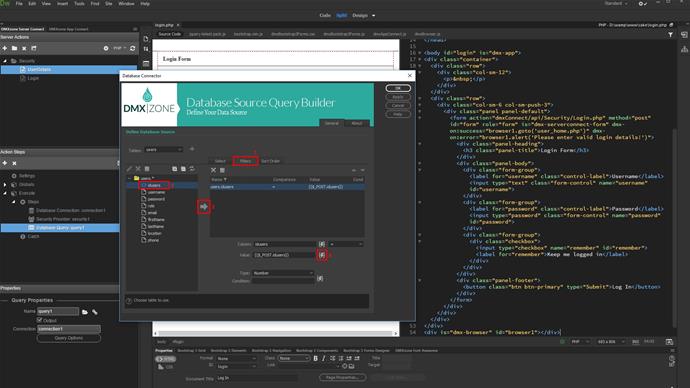
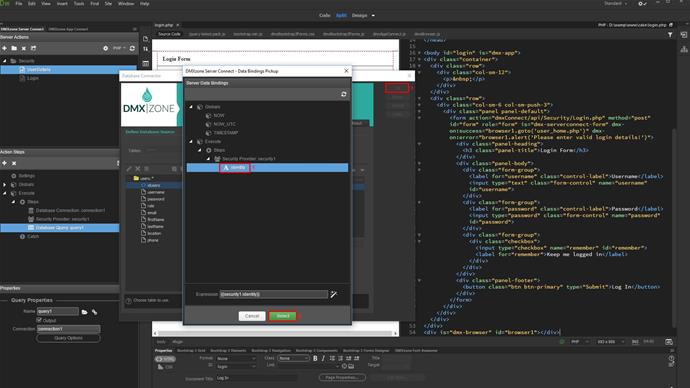
Open the filters tab (1). Select and add the column which you want to filter your query by. In our case, this is the user ID column (2-3). Click the dynamic data picker in order to select the filter value (4). Under security provider step, select identity. This is the identity, of the logged in user (5). Click select (6). And click the ok button, when you are done (7).
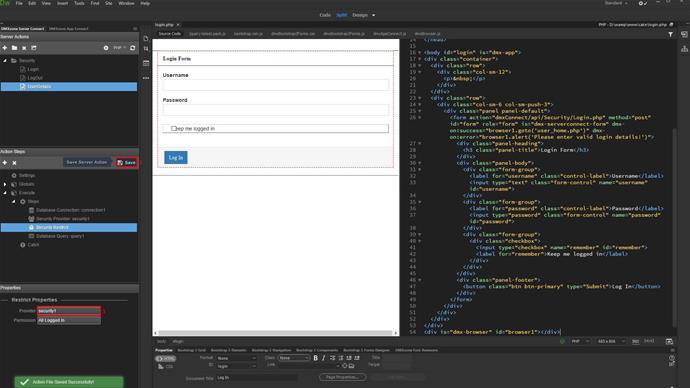
In order to protect the query from being loaded by someone who is not logged, you just need to add a security restrict step before the query itself. Right click the step before the query(1) and add security restrict (2-3).
Select your security provider from the dropdown (1-2). Save your server action (3). Now, your query is secured in the action file. Let's setup the page security now and then we will bind the data on it.
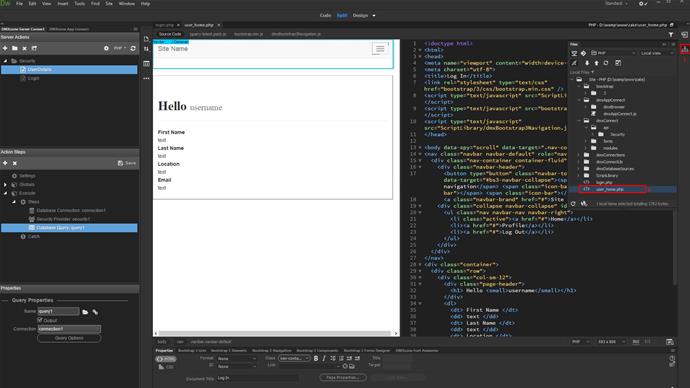
Open the page where you redirect your users after login. Note that everything that we are going to apply now, should be done on every page which you'd like to restrict access to on your site (1-2).
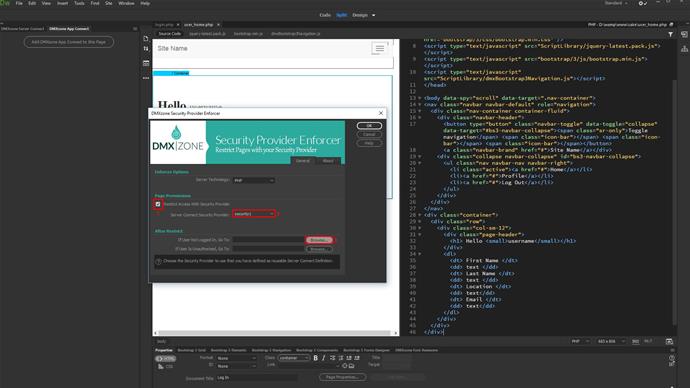
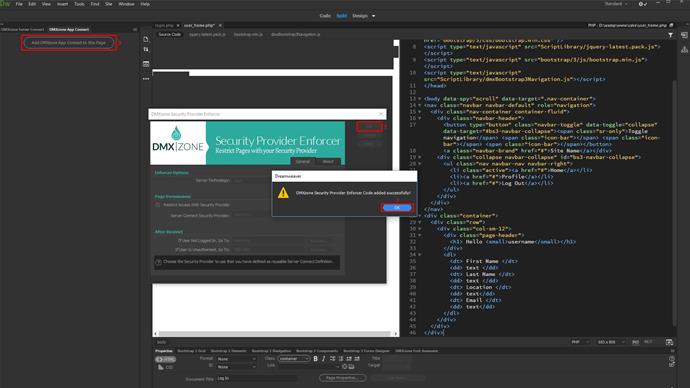
Open the app connect panel (1). Add security restrictions to the page. We will restrict access to the page, so only users who are logged in, can access it. Open the site menu (2). Open "DMXzone security provider" (3). Select "manage page security enforcer" (4).
Check the restrict access checkbox(1) and select your security provider from the dropdown (2). Select a redirect URL for the users who are not logged in (3).
We want to redirect them to the login page (1-2). We do the same for the users who are unauthorized to access this page. Note that we will explain more about the access levels in the next video tutorials.
Click ok when you're done (1-2). As our security restrictions are now setup, we can bind some data on the page. Add app connect to your page (3).
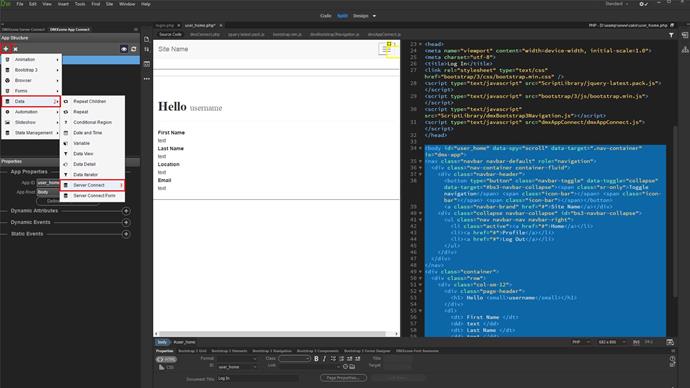
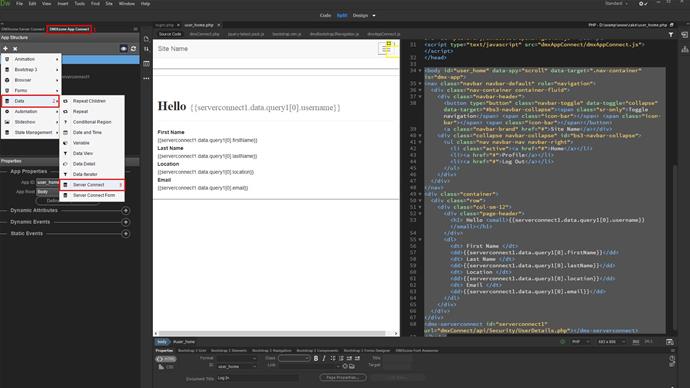
Add a new component (1). Under Data (2), select server connect (3).
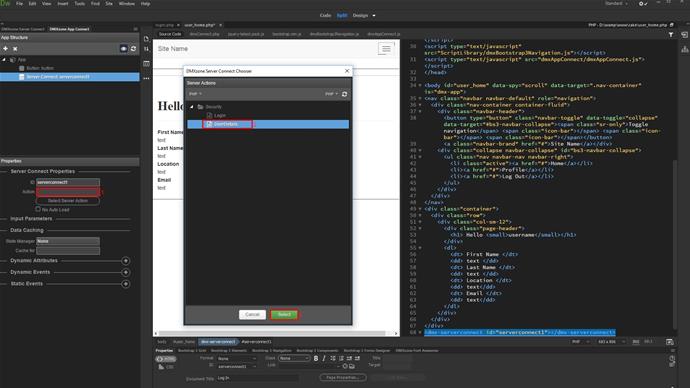
Select the server action with your filtered query (1-2). Click select (3).
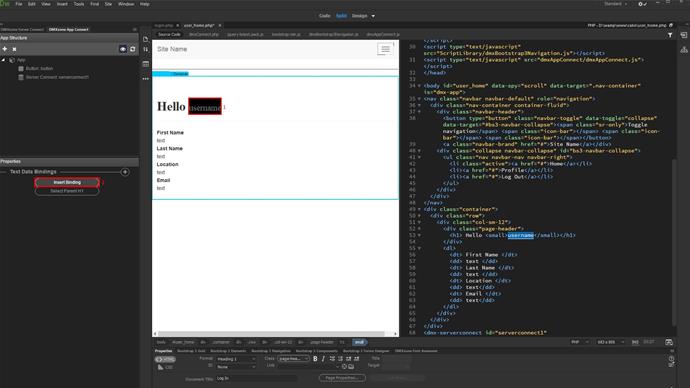
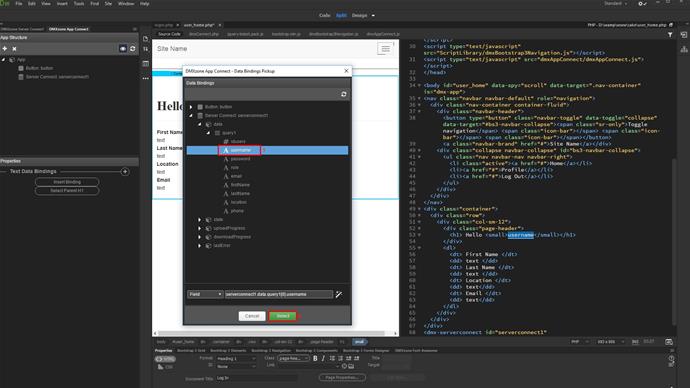
Click on your page(1) and then click the insert binding button (2). Under the server connect component, data, query, select the dynamic binding (3), you want to insert and click the select button (4).
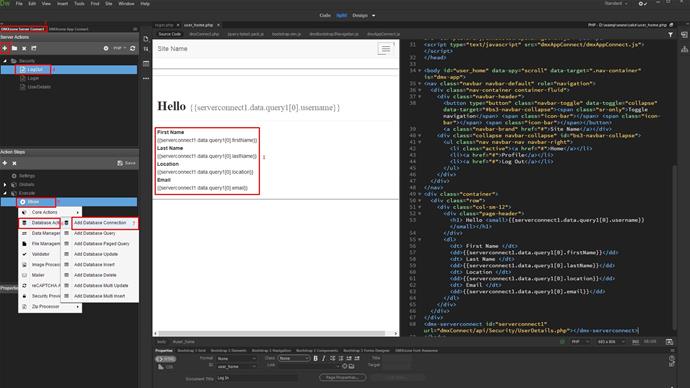
Do the same for all of the data you'd like to show from the filtered query (1). Open the server connect panel(2) and create a new server action (3). We'll call it "log out" (4). Right click steps(5) and add a database connection (6-7).
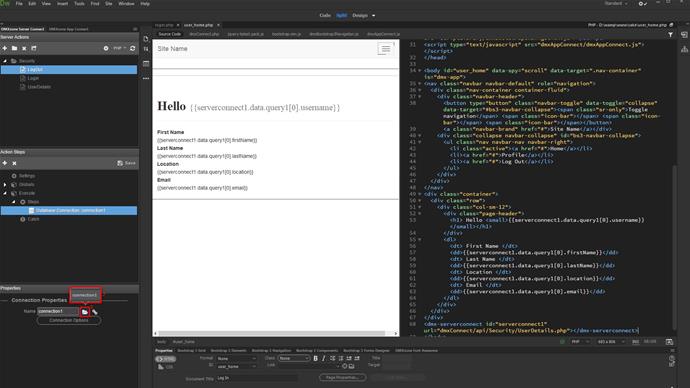
Load your database connection from the menu (1-2).
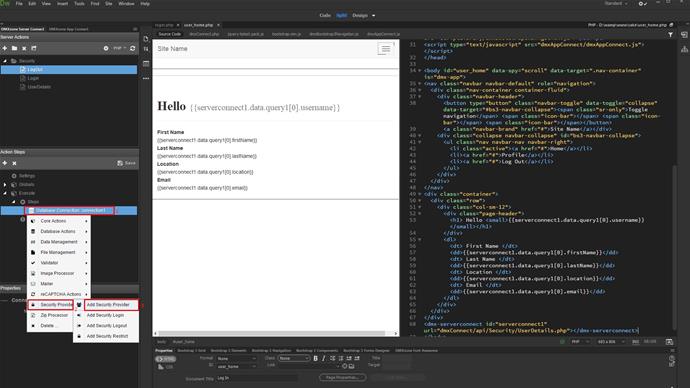
Add a security provider step (1-3).
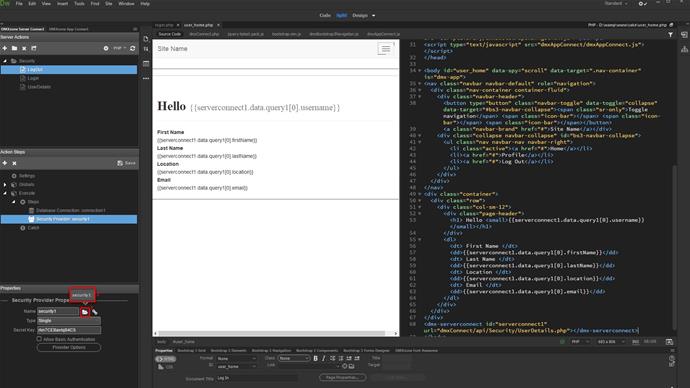
Load your security provider (1-2).
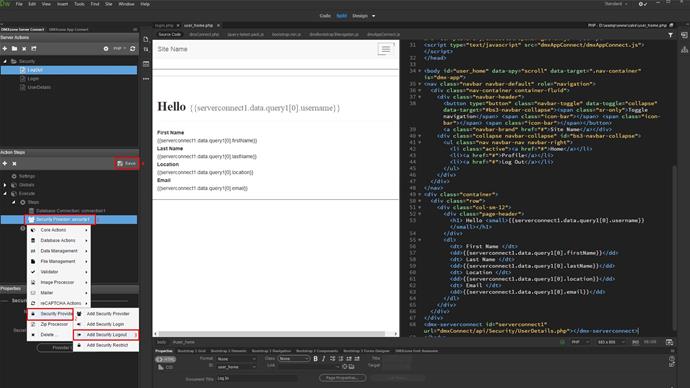
Right click the security provider step(1) and add security log out (2-3). Save your server action (4).
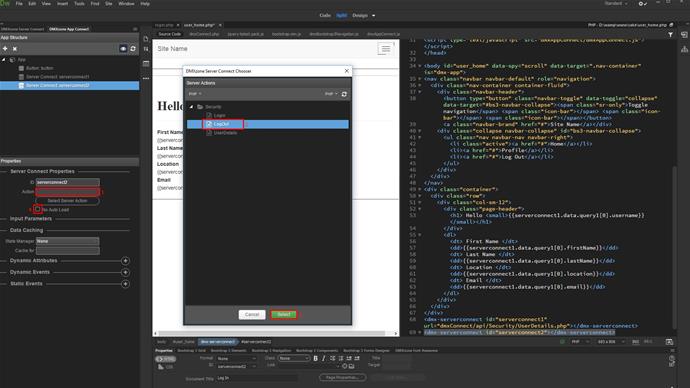
Open the app connect panel (1). Click the add new component button and select "server connect" (2-3).
Select your log out server action here (1-3). We call the server connect component "log out". Don't forget to check the No Auto Load checkbox. This is important as otherwise this log out action will run on page load. We only want it to run when we click the log out button, so - check the no auto load option (4)!
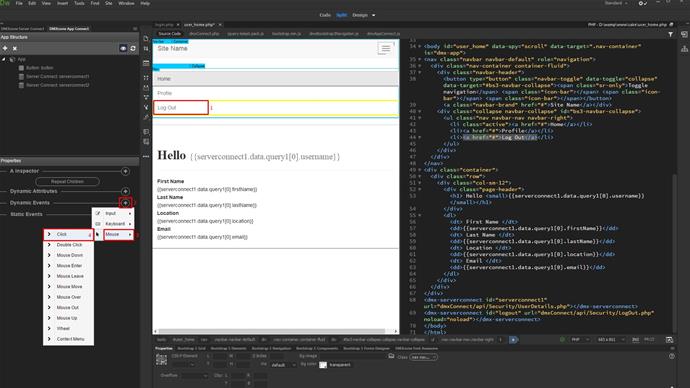
Select your log out button or link (1). Add a new dynamic event (2). Open the mouse menu(3) and select click (4).
Click the dynamic event picker (1). Under the log out server action (2), select "load" (3). Now the log out action will run only when we click the log out button. Let's setup the redirect after logging out.
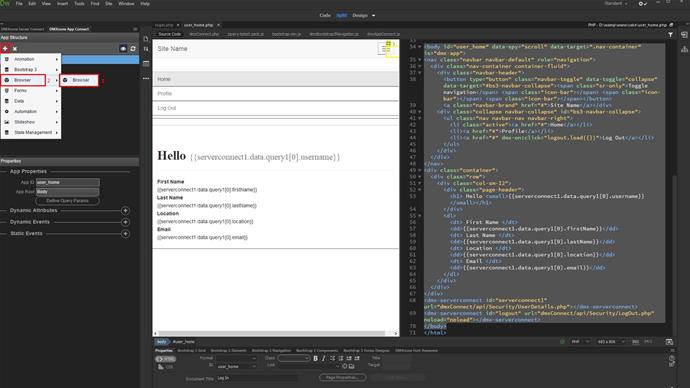
Add a new component (1). Under browser (2), select "browser" (3).
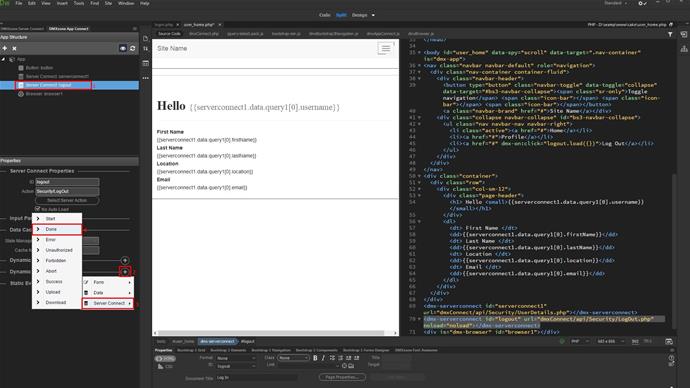
Select your log out action (1). Add a new dynamic event (2). Under server connect (3), select either done or success. We select done (4).
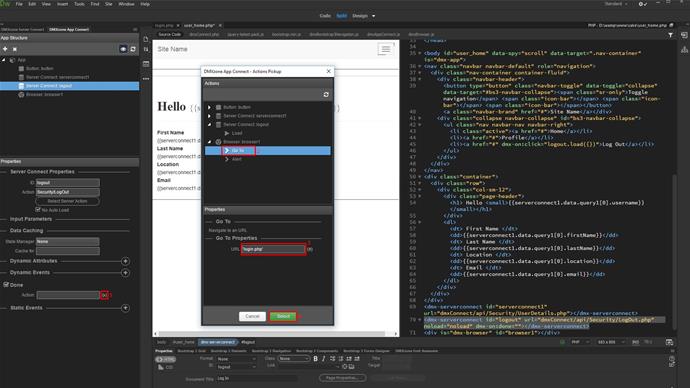
Click the dynamic action picker (1). Under browser, select go to (2). Enter the URL where users should be redirected to after logging out. For static a link, wrap it inside single quotes (3). Click select (4).
And we are done!
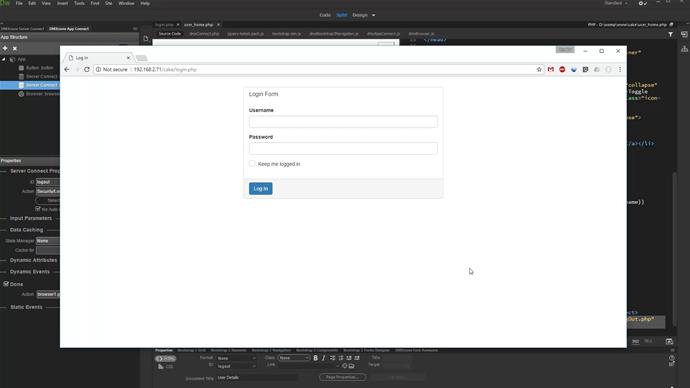
Everything is setup and our log in system is fully functional. Let's preview the results. Trying to enter wrong login details an alert appears. As soon as we enter the proper log in data we get redirected to the details page, where we can see our details. After we click the log out button, we are redirected back to the log in page. That's how easy it is to setup a complete login system using DMXzone Security Provider.


